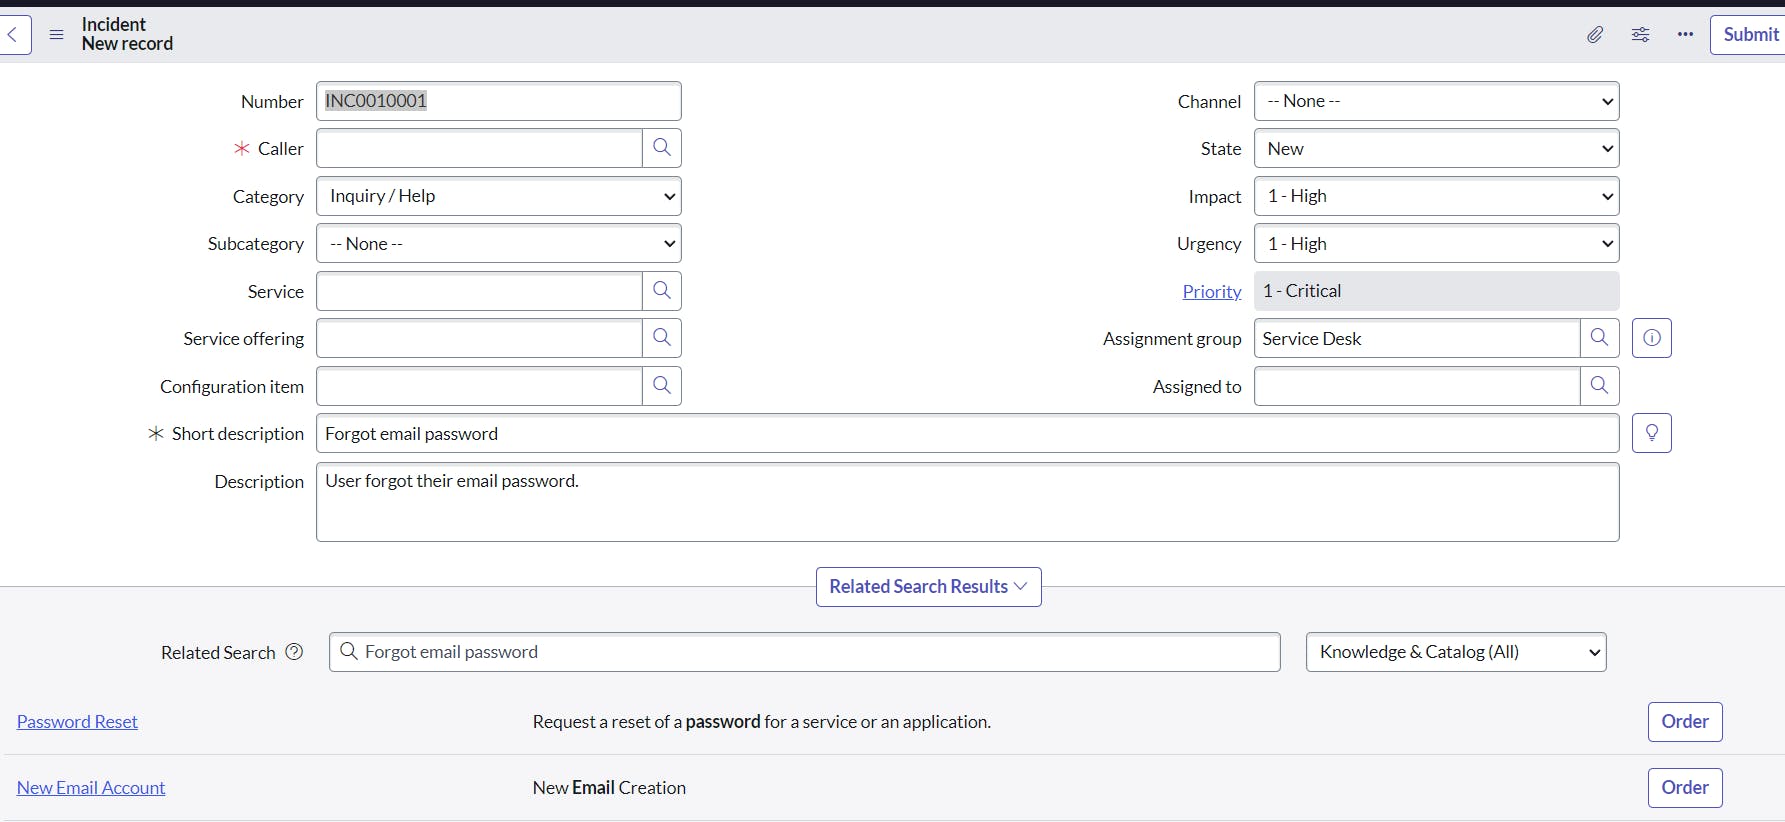
service now


Table of contents
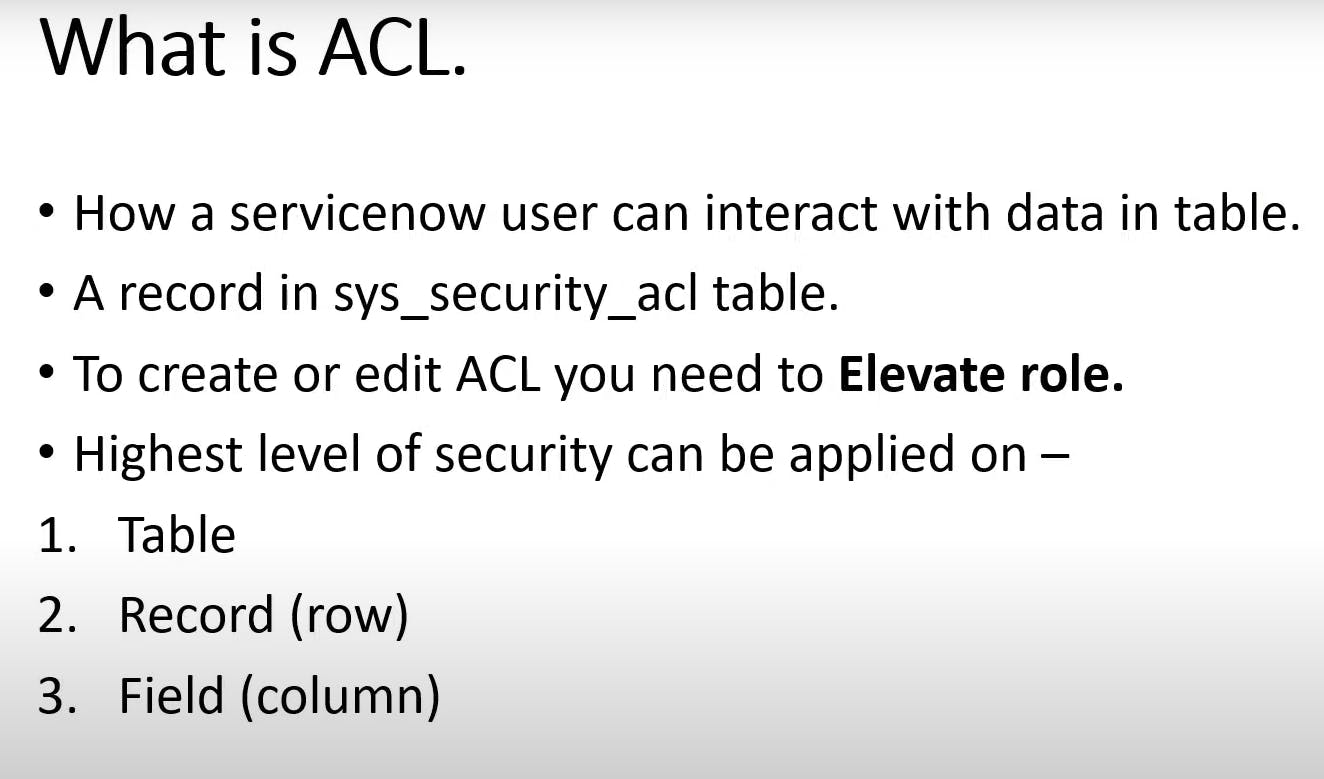
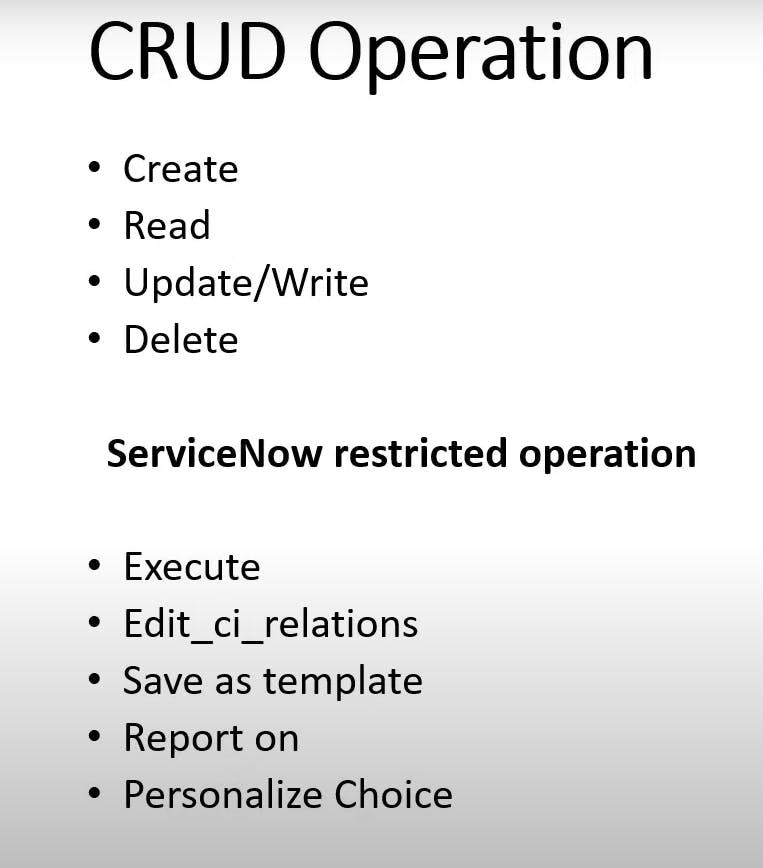
- record
- List
- Form view
- filter and search
- Condition builder and Breadcrumbs
- Field option
- Form Control menu
- form field menu
- ServiceNow - Modifying List and Forms
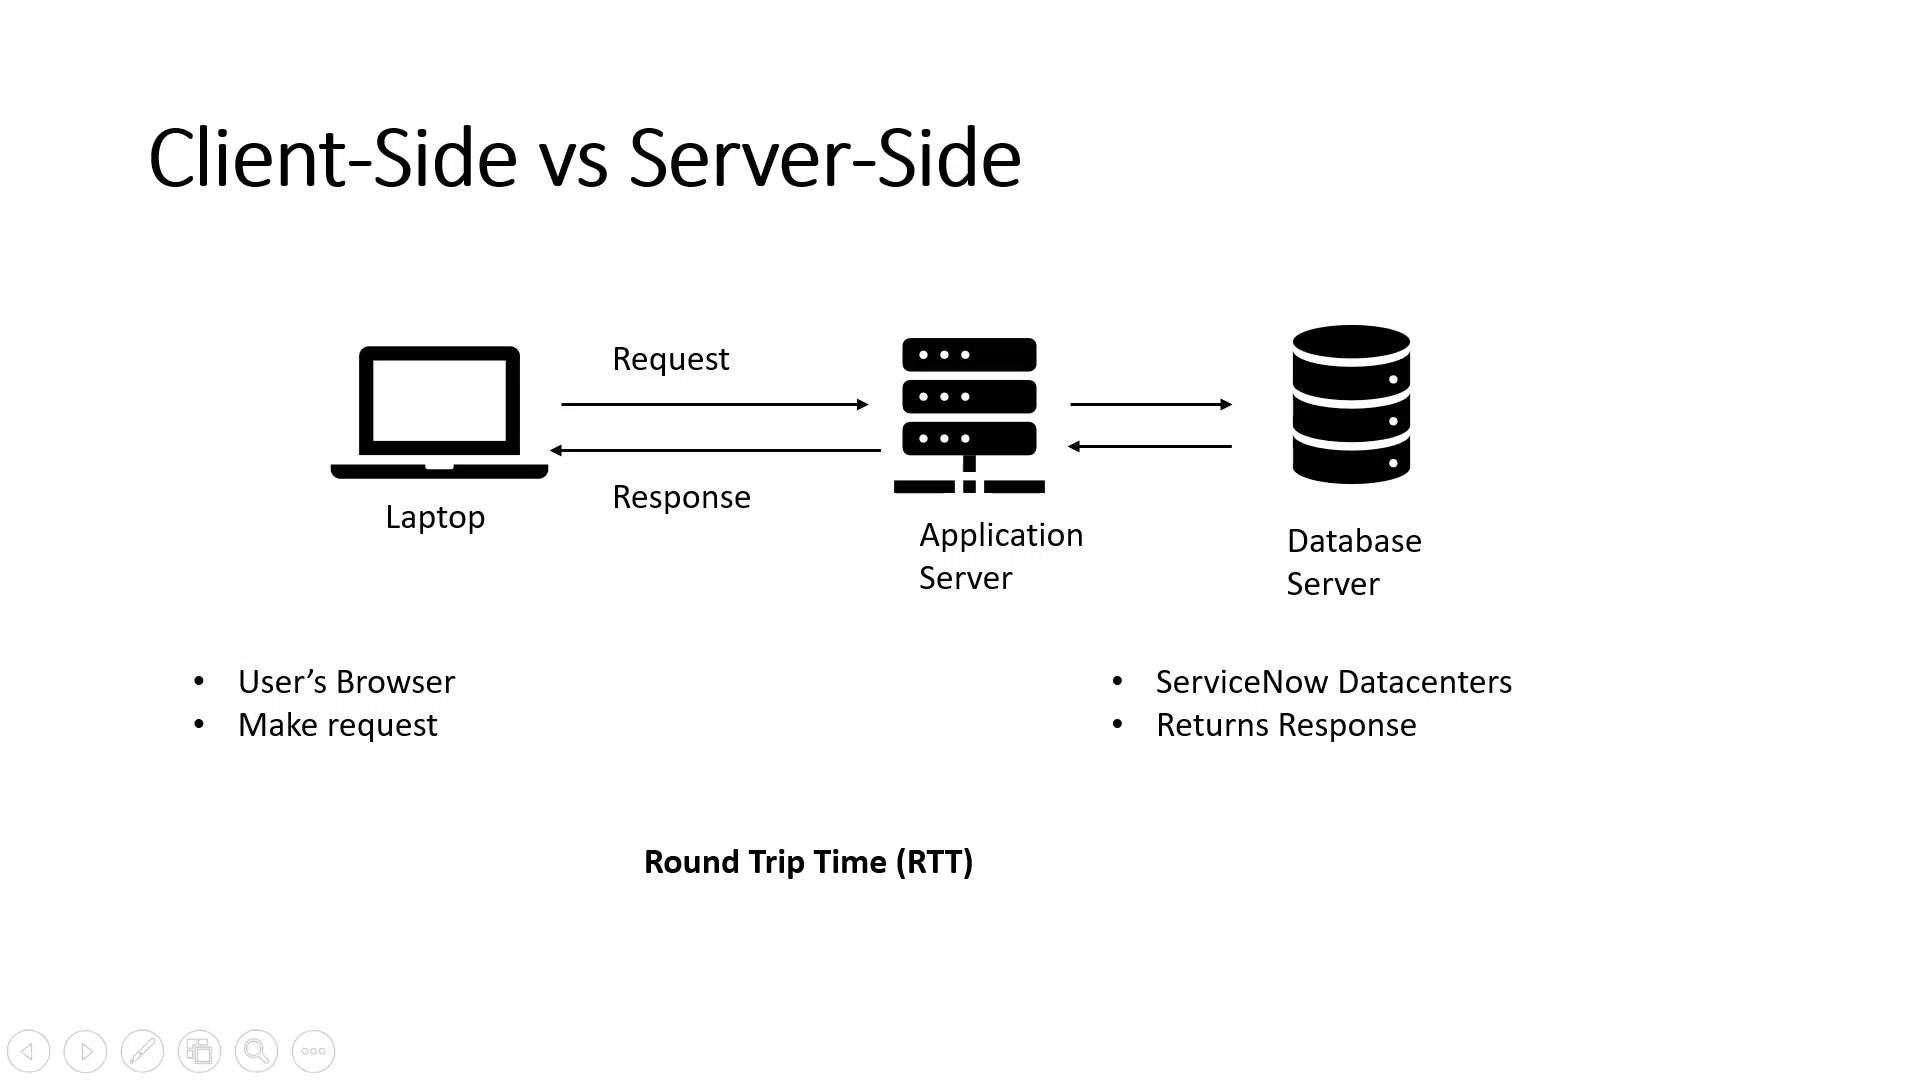
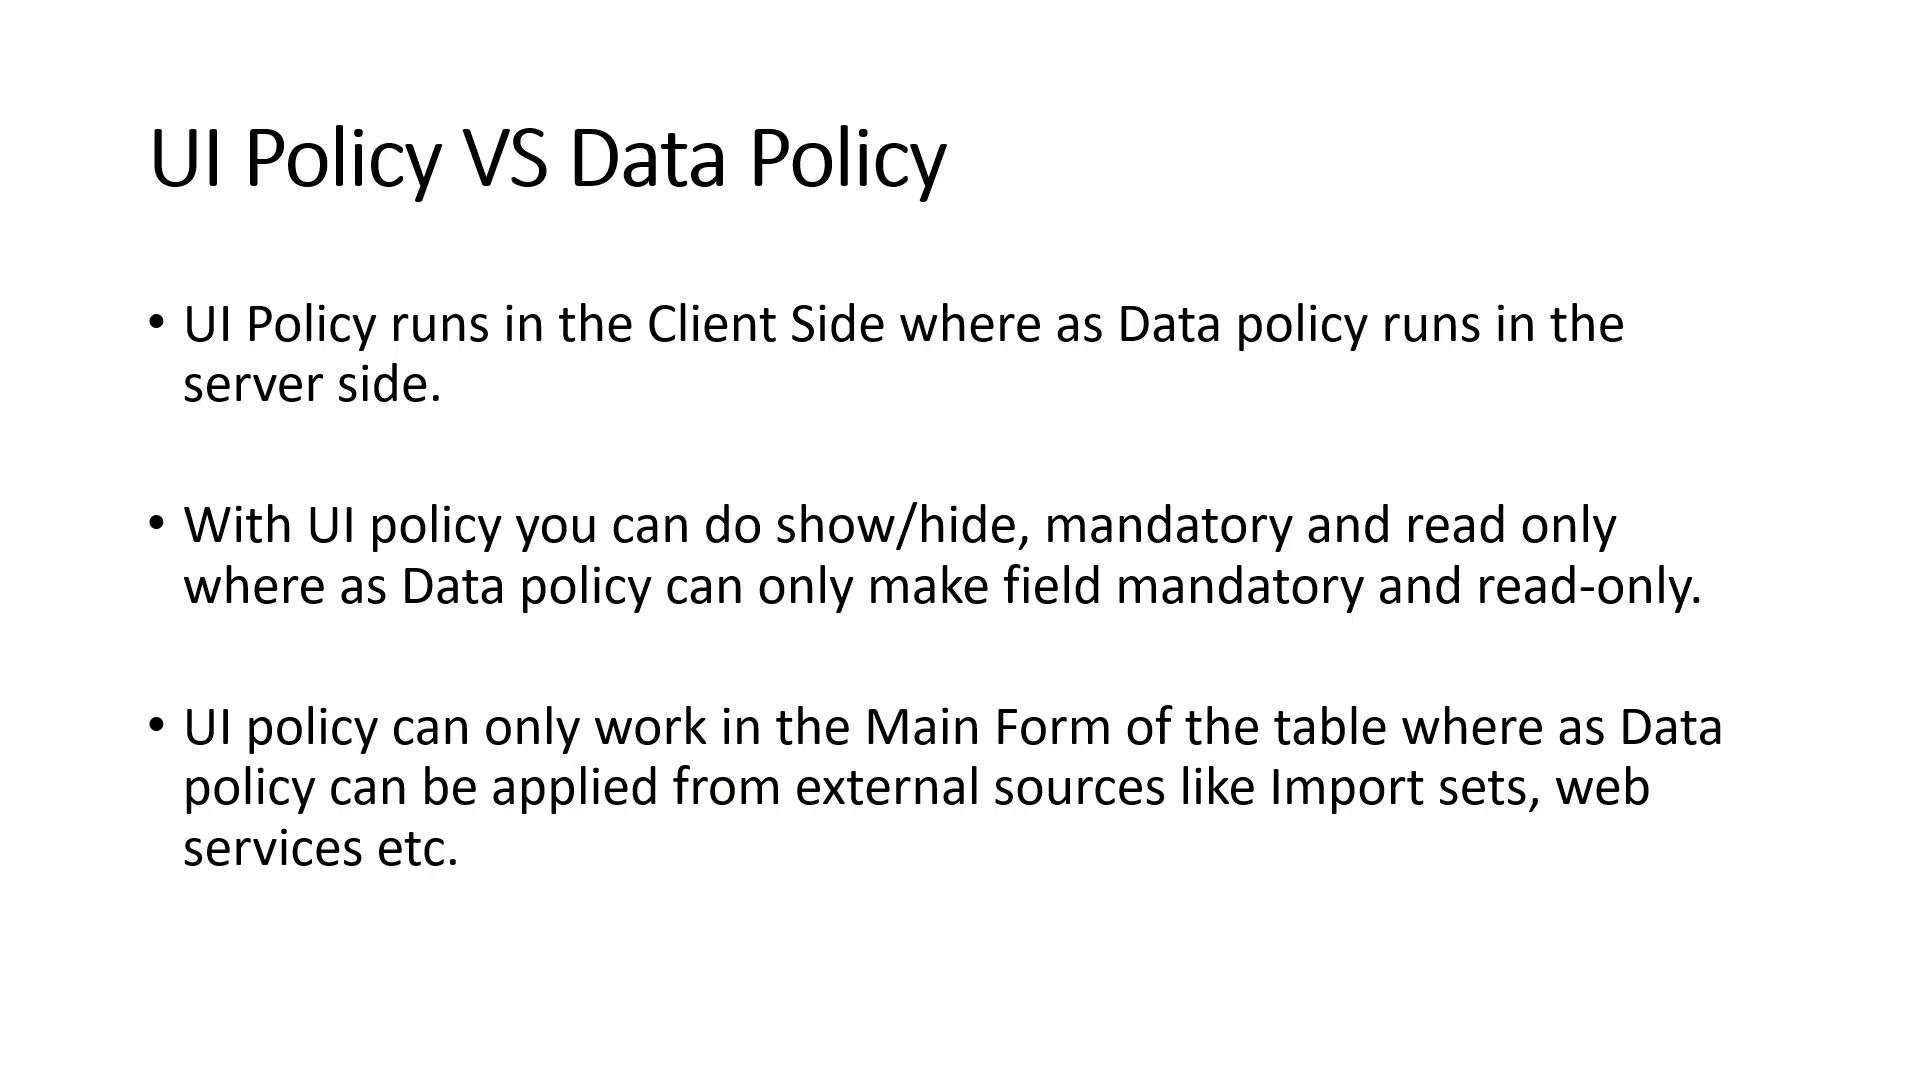
- Client-Side vs Server-Side
- Business Rules
- Client Scripts
- Data Policies
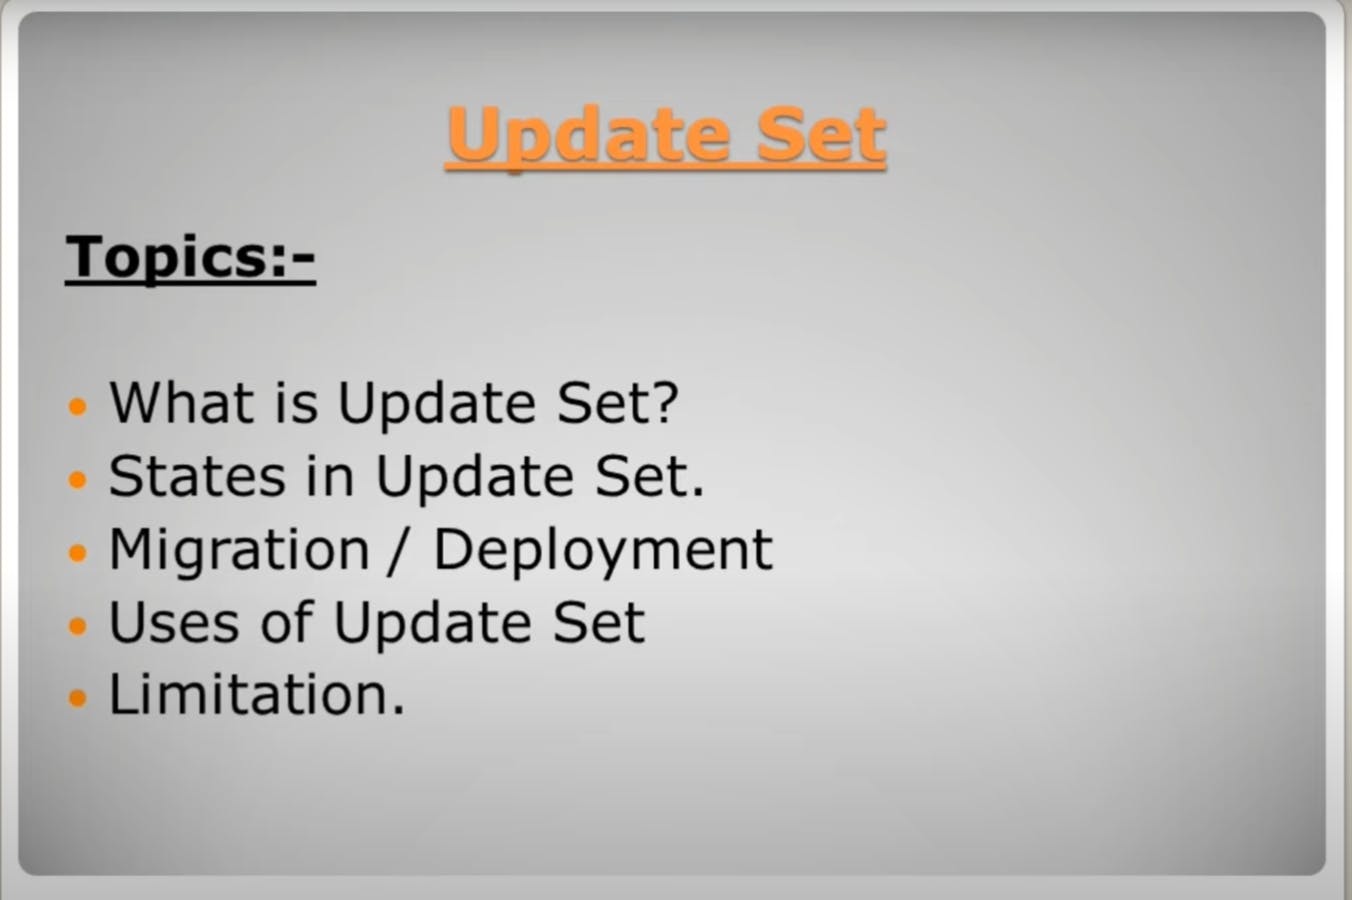
- Update Set
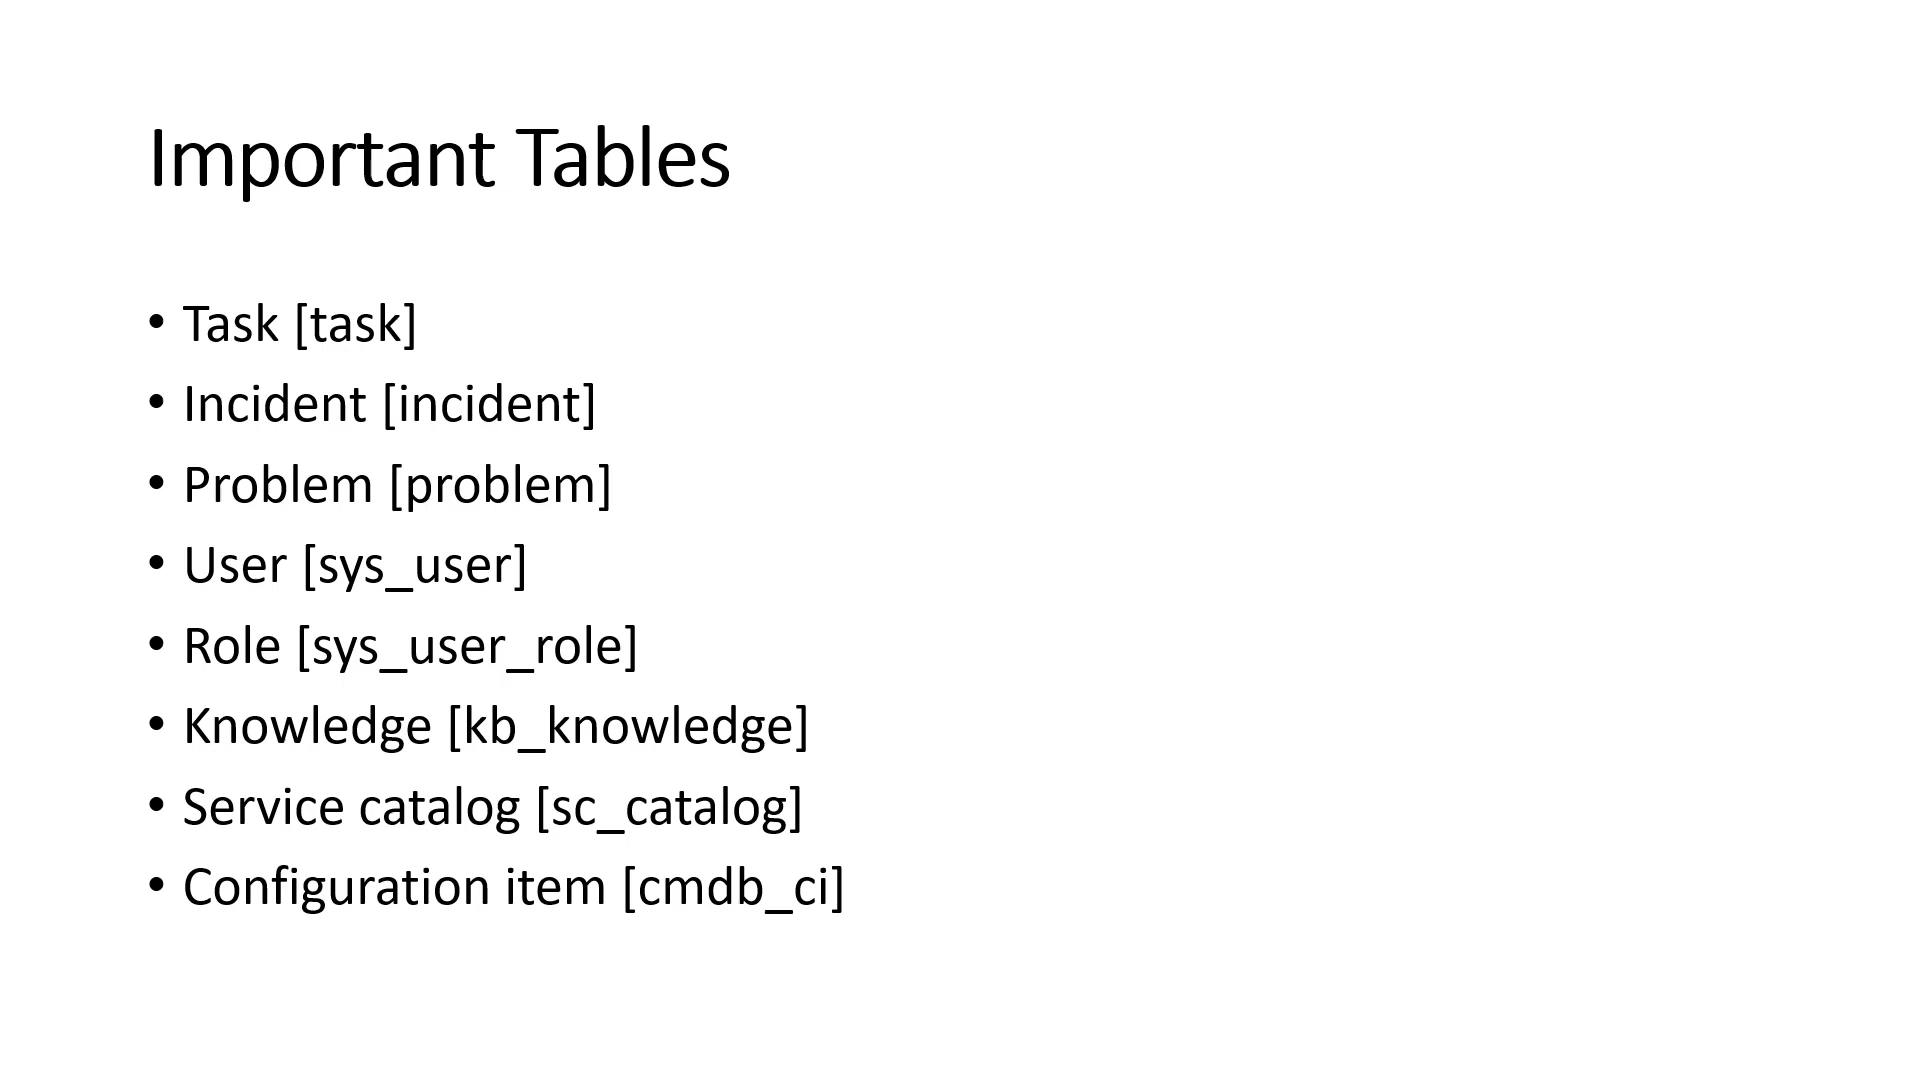
- ServiceNow Tables
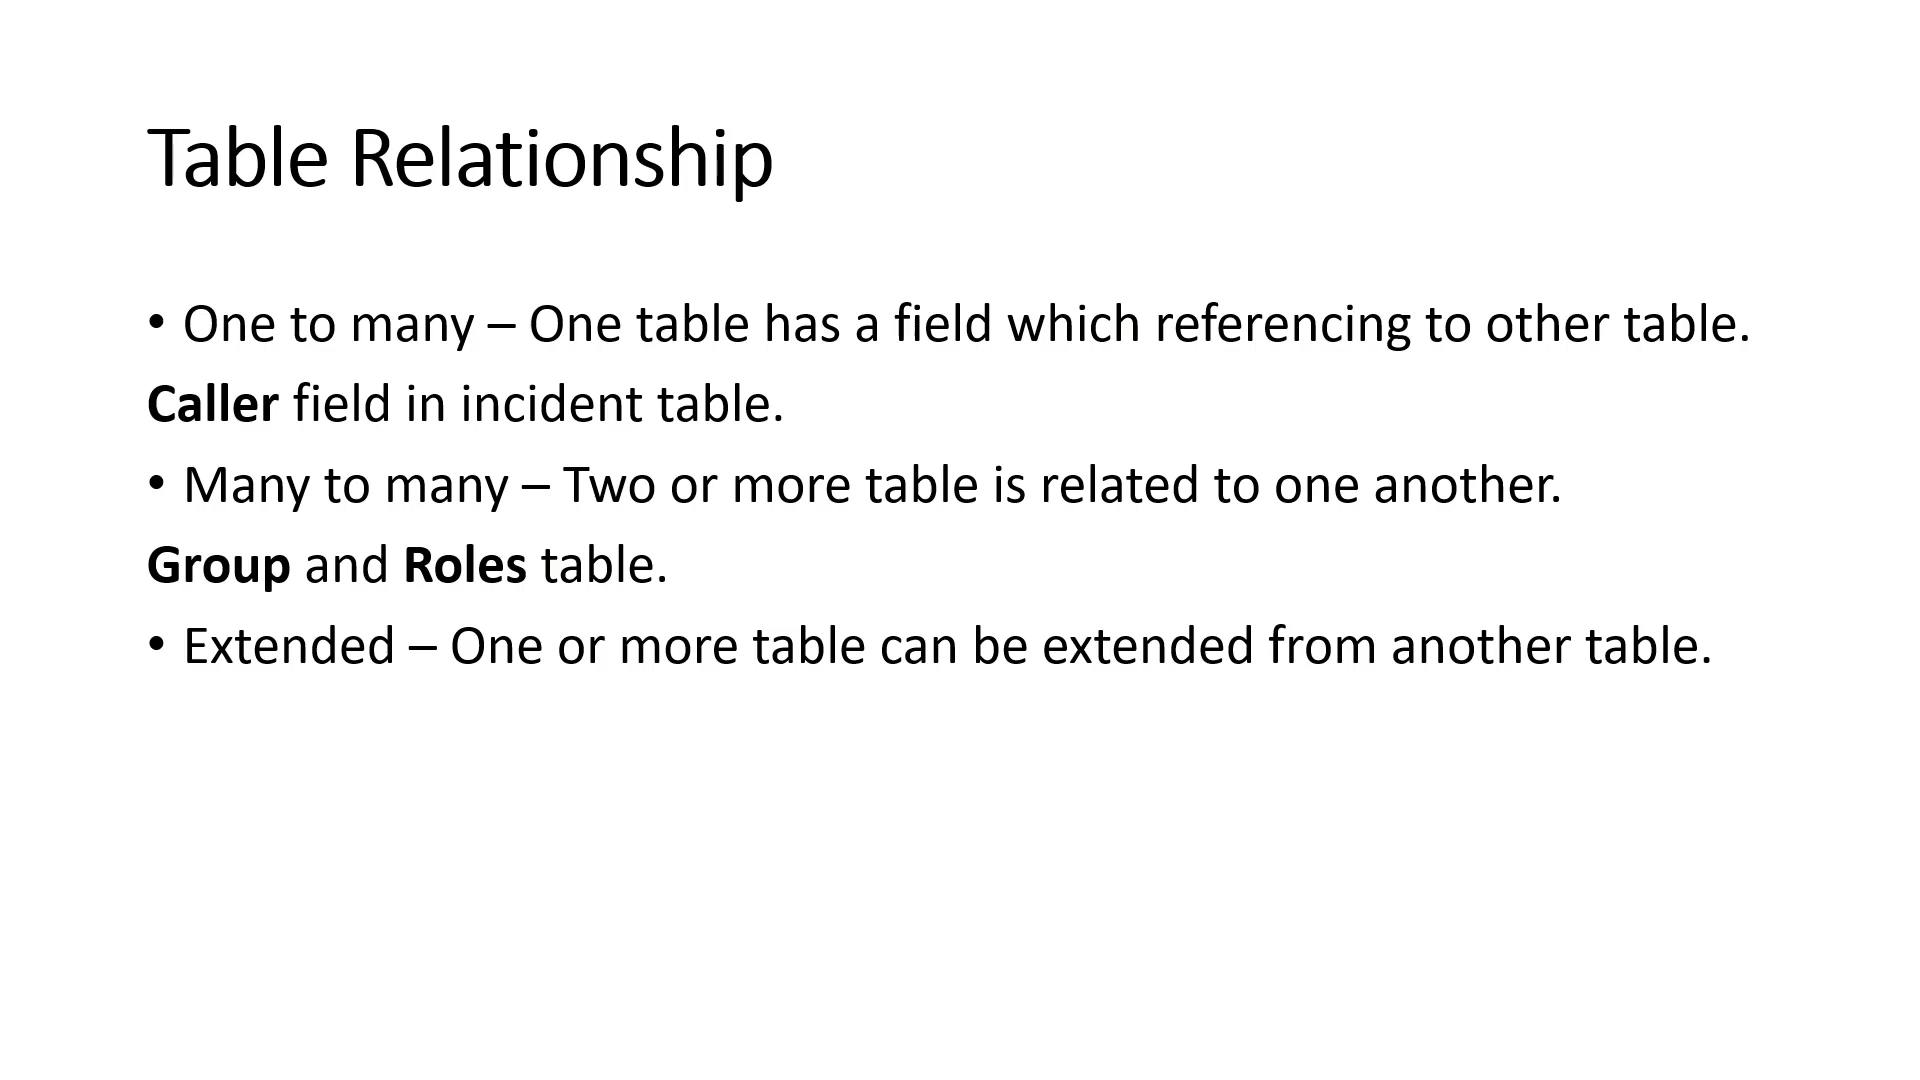
- ServiceNow Table Relationships and Schema Map
- Creating custom table
- Extends Table
- Dictionary override
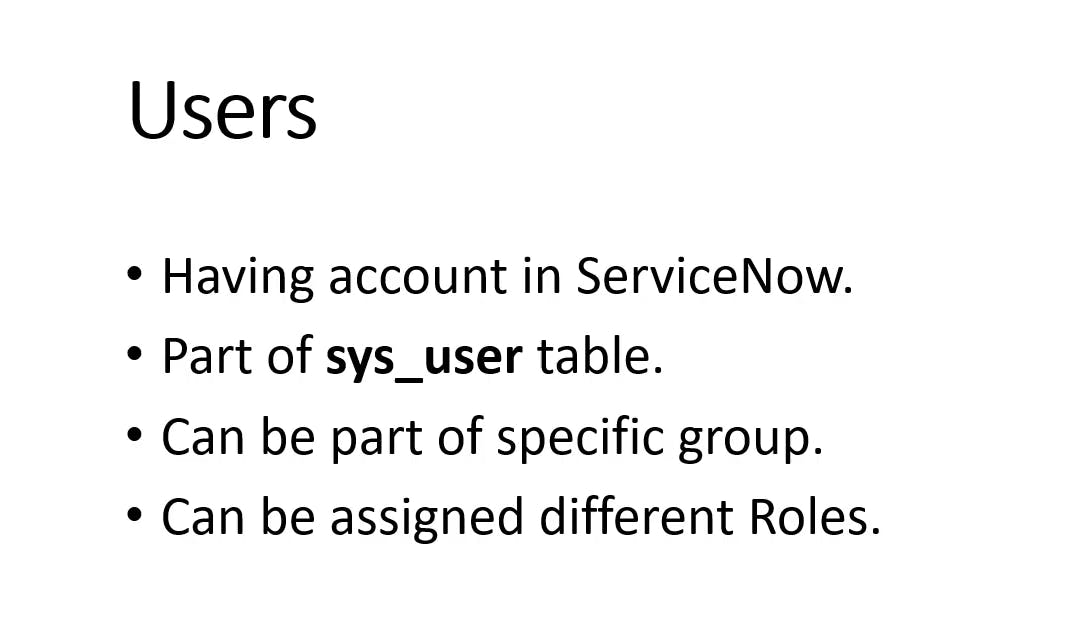
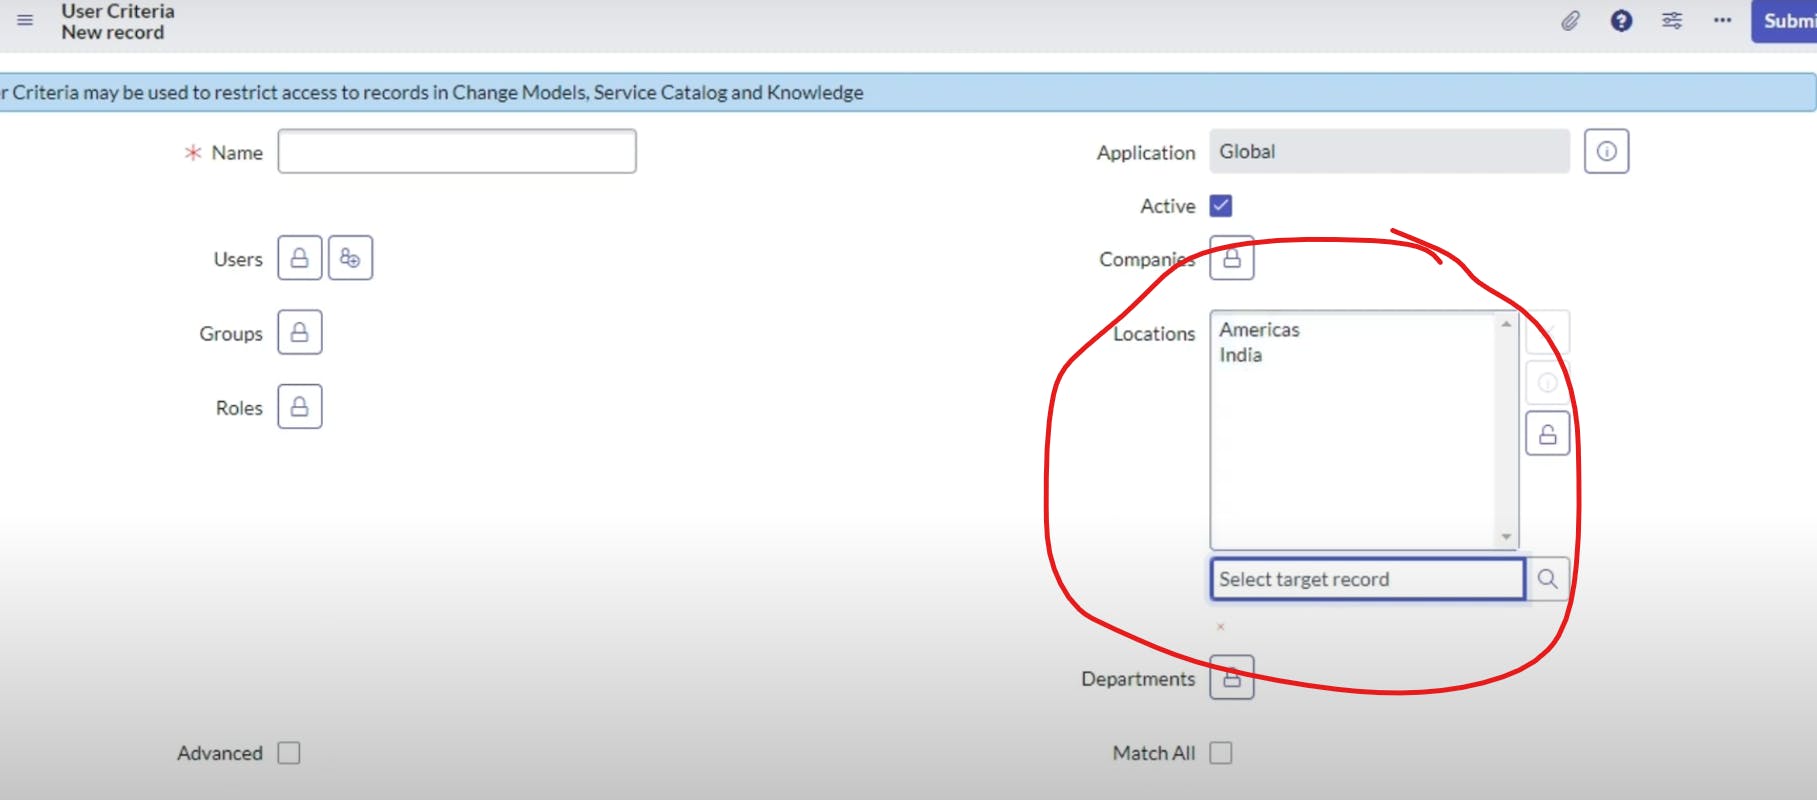
- Users and Groups
- Roles
- Import Sets
- Service Level Agreement
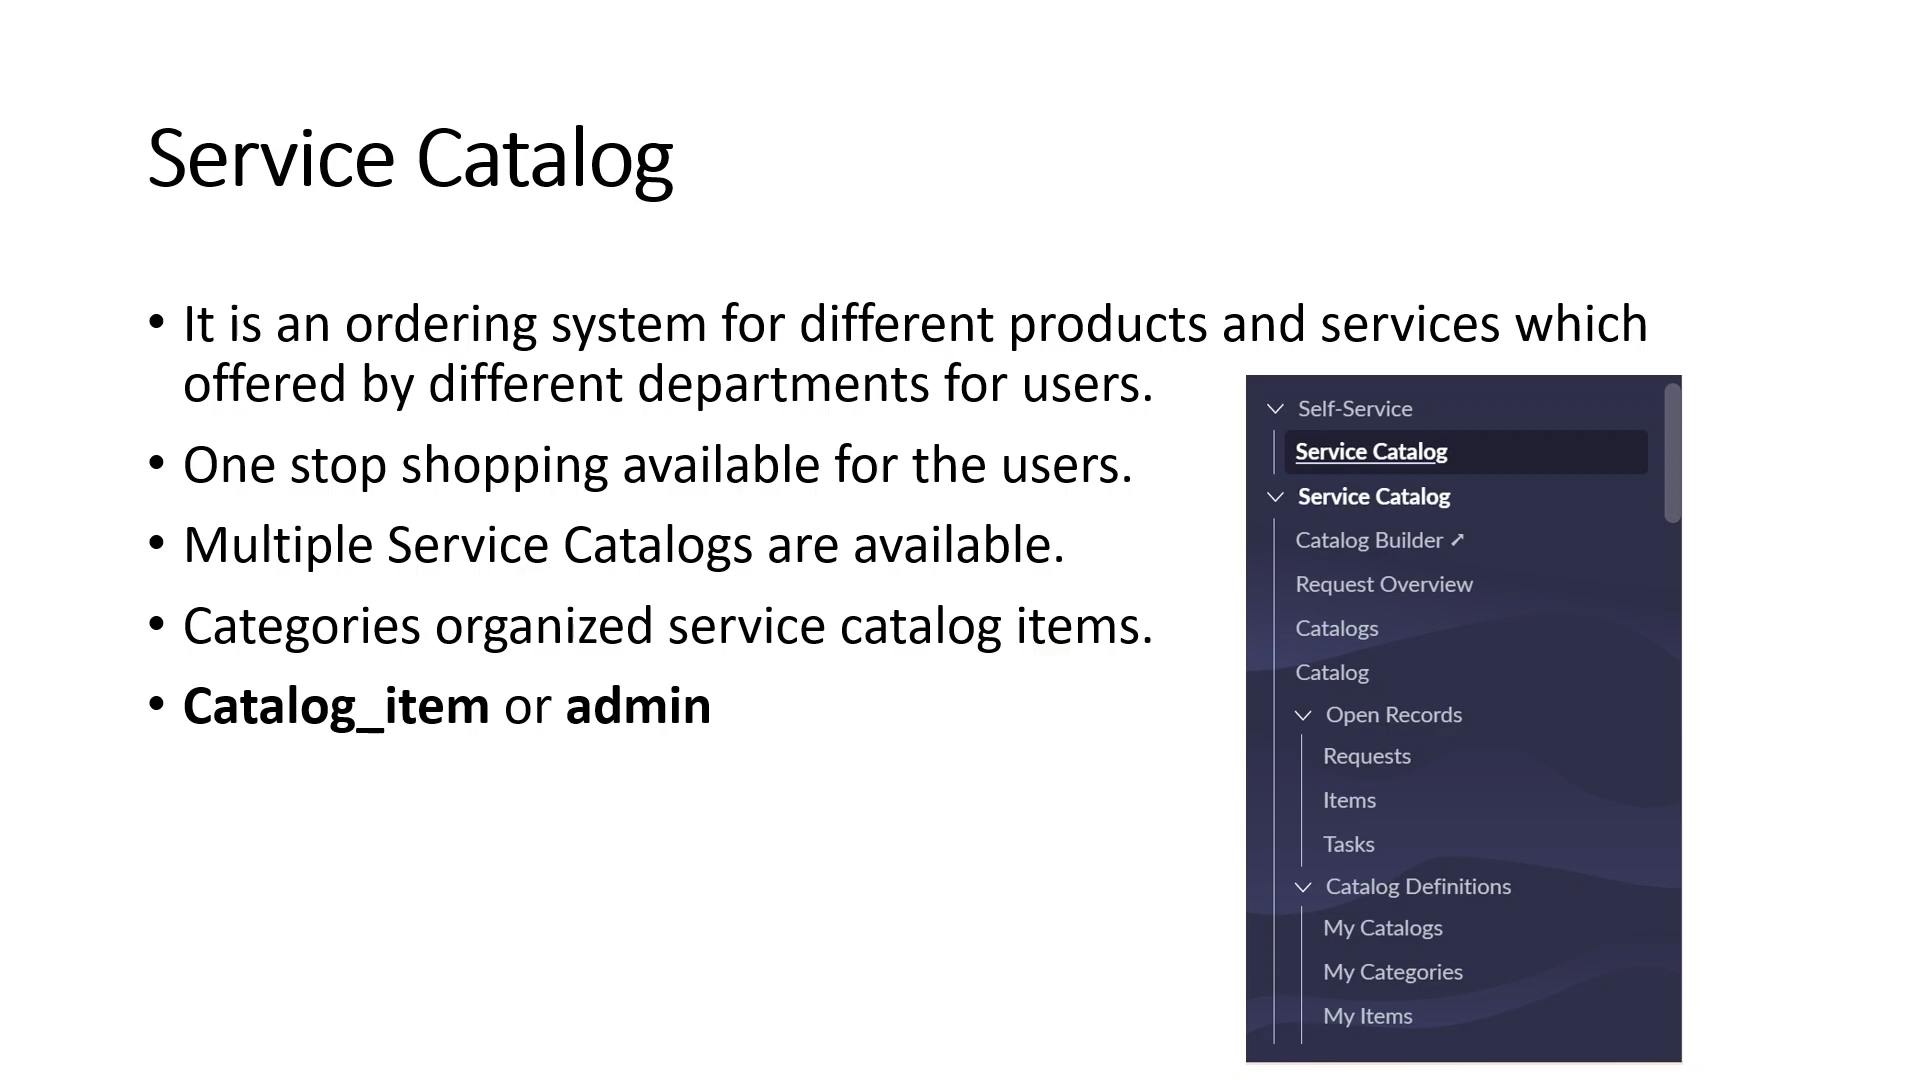
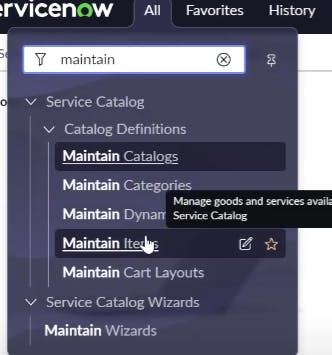
- Different components of Service Catalog
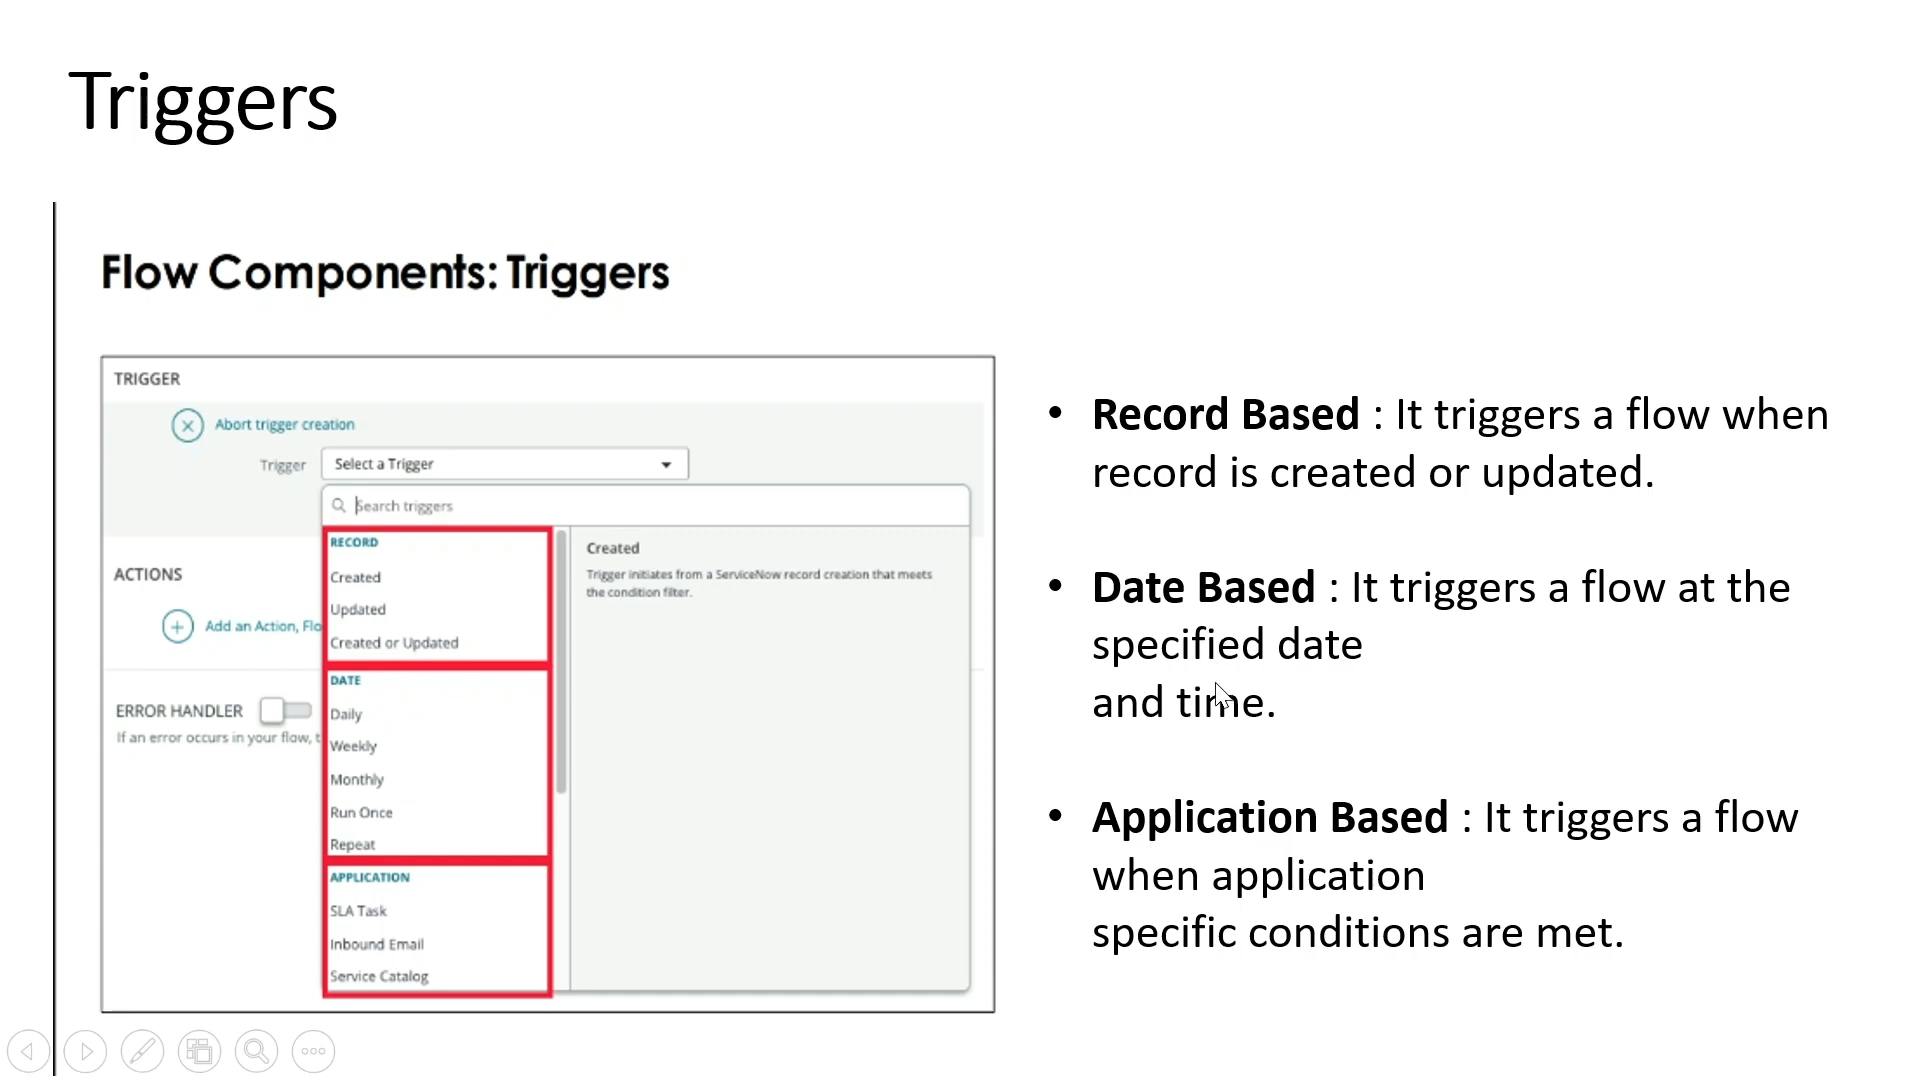
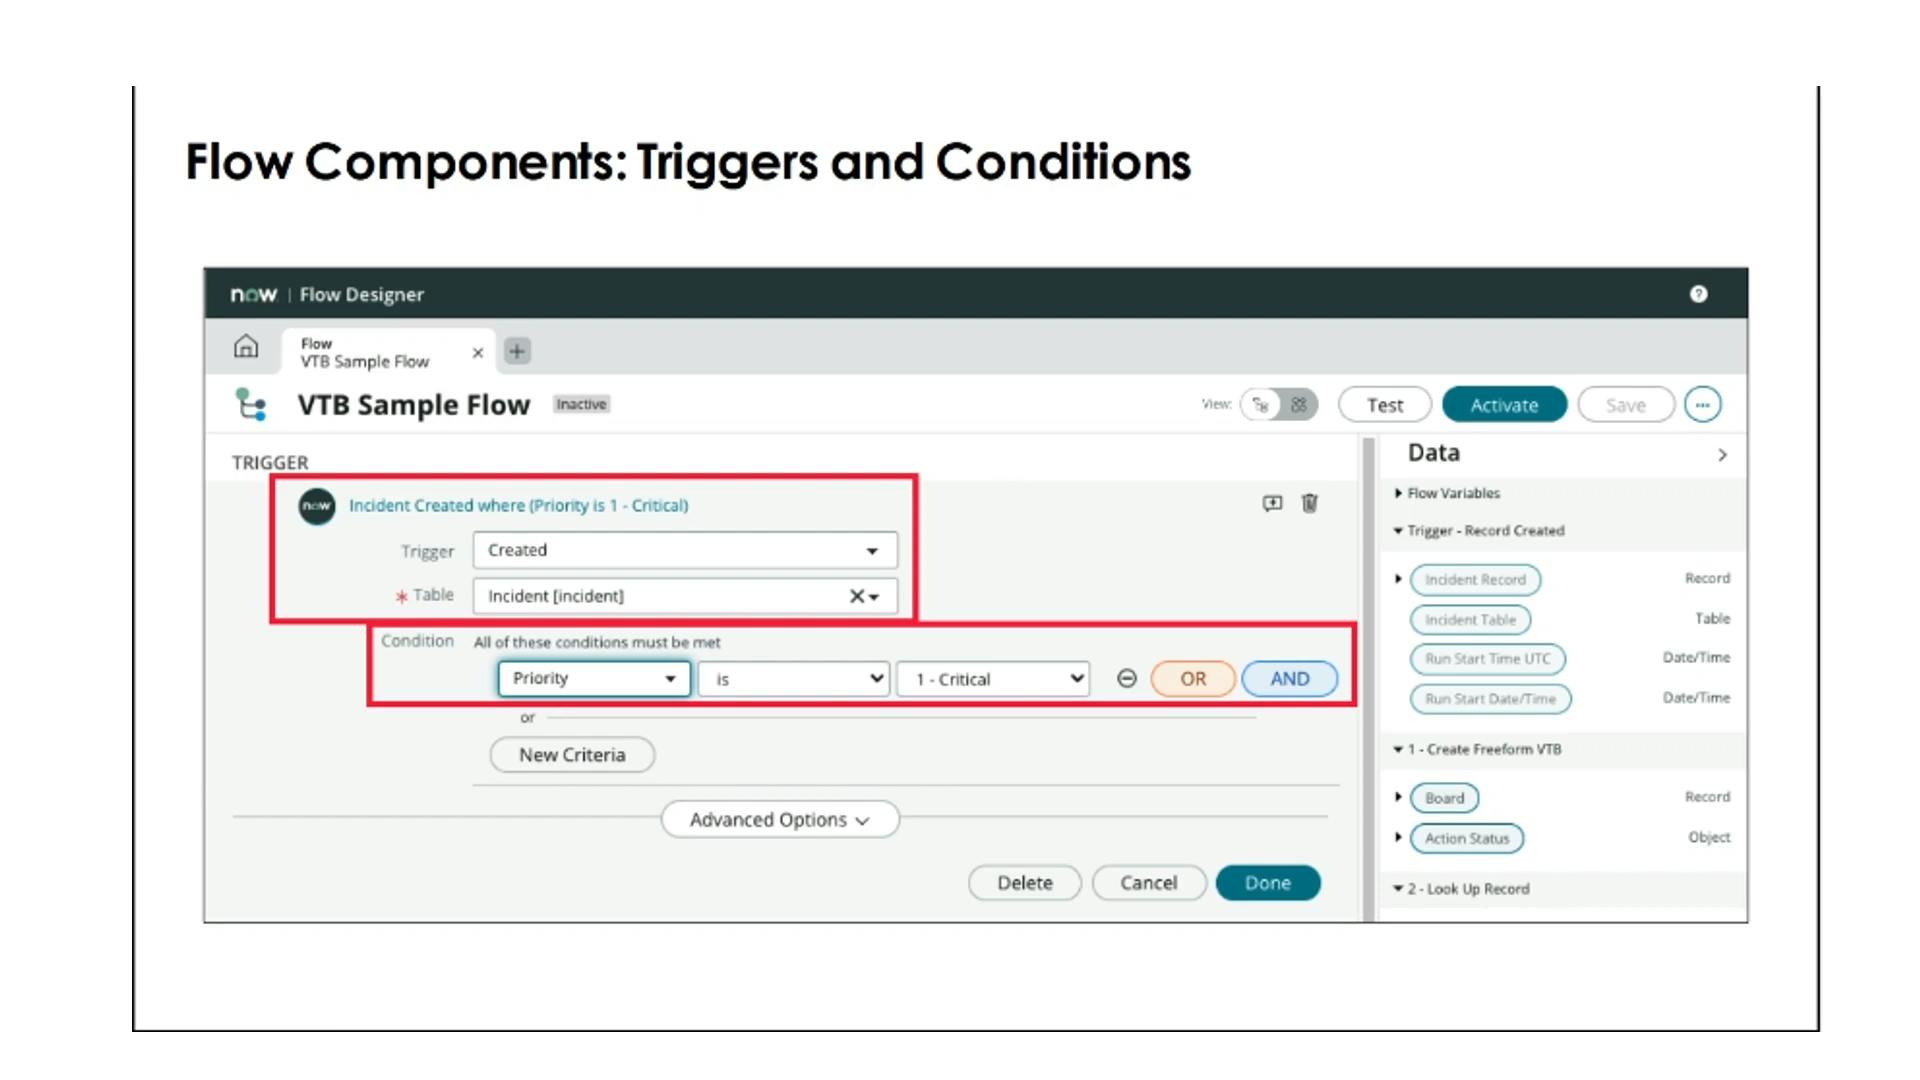
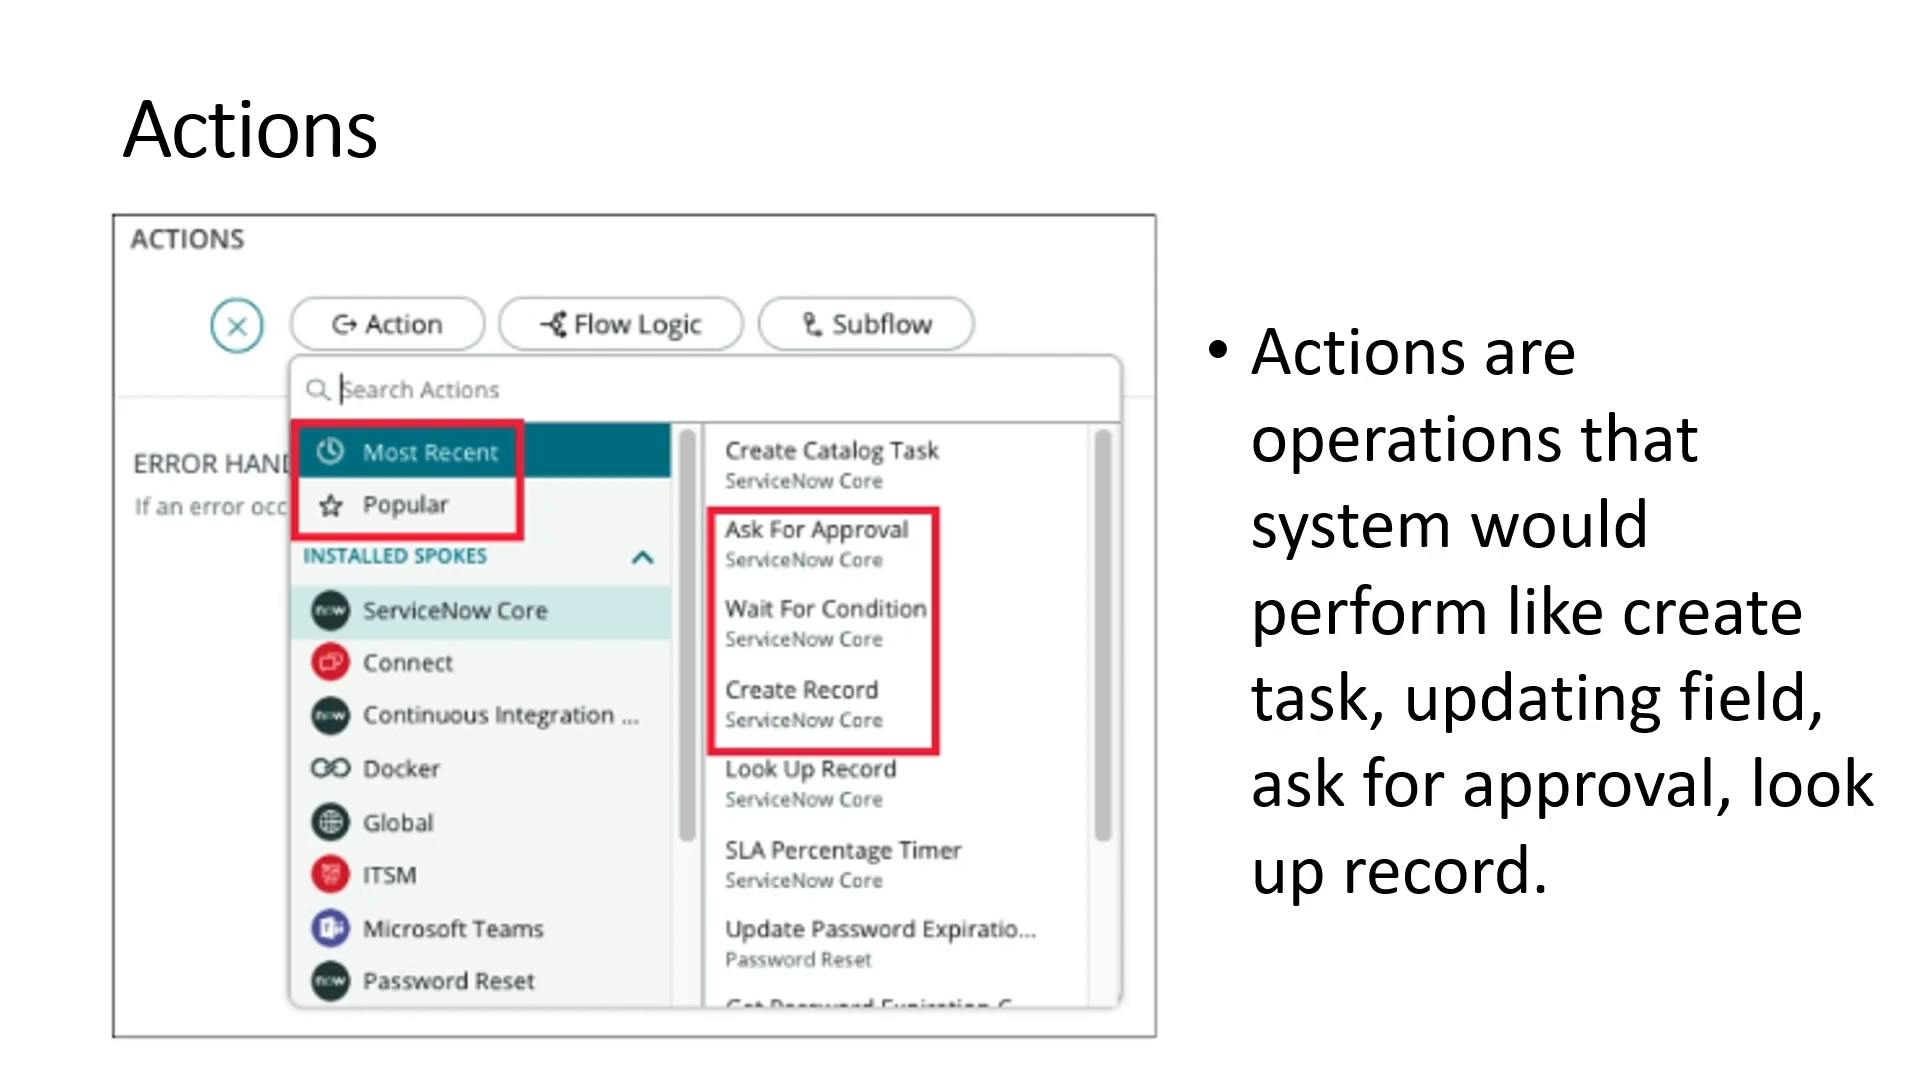
- Flow Designer
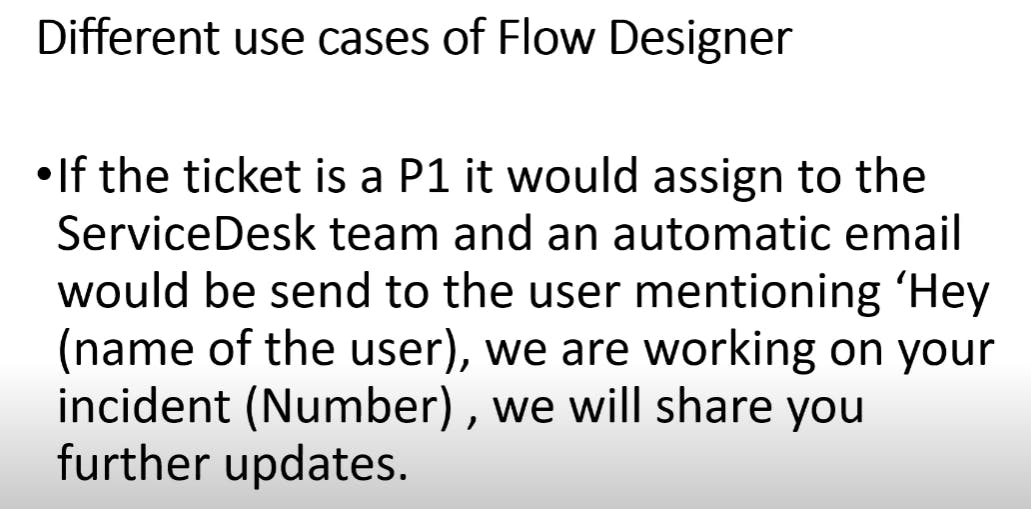
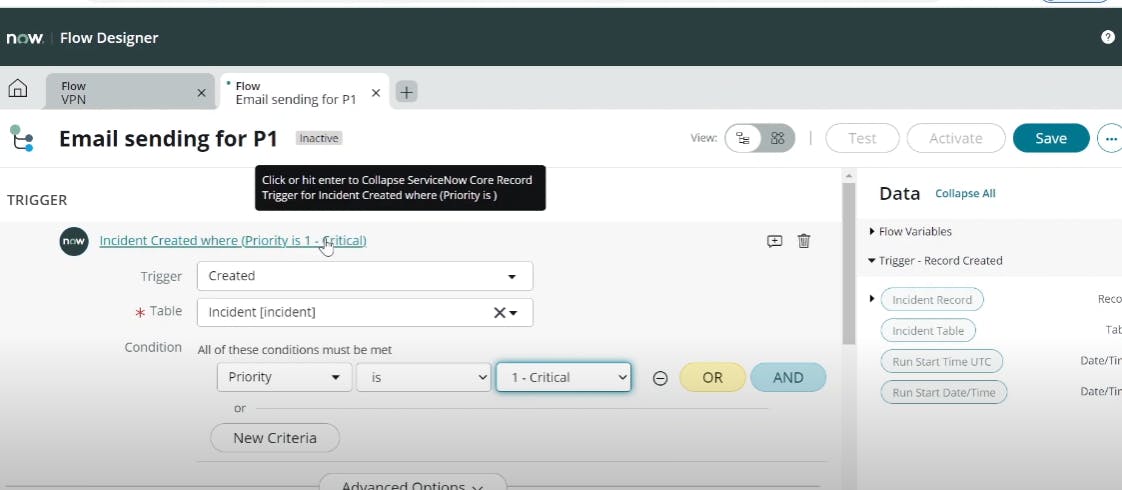
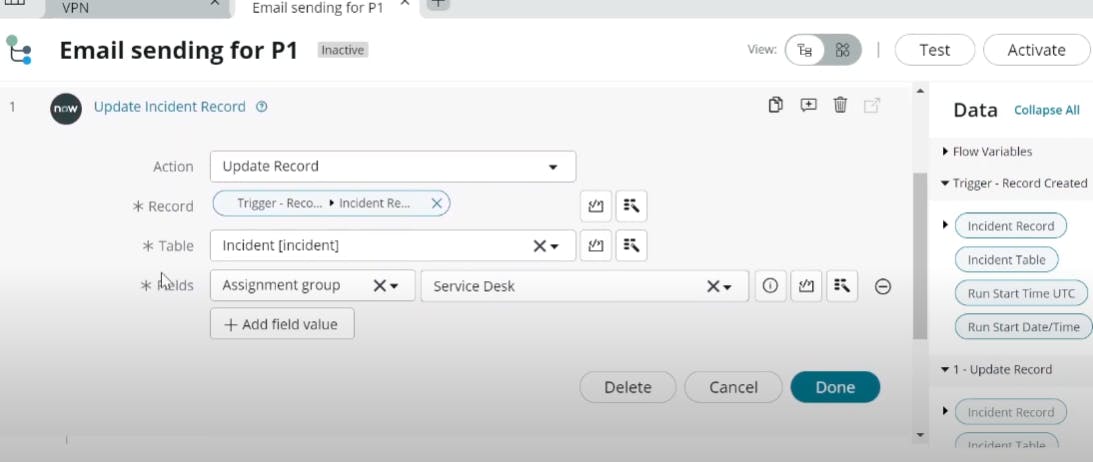
- Different use cases of Flow Designer
- Create new Flow for Iphone 14 Catalog Item
- servicenow reports and dashboards
Permalinkrecord

PermalinkList
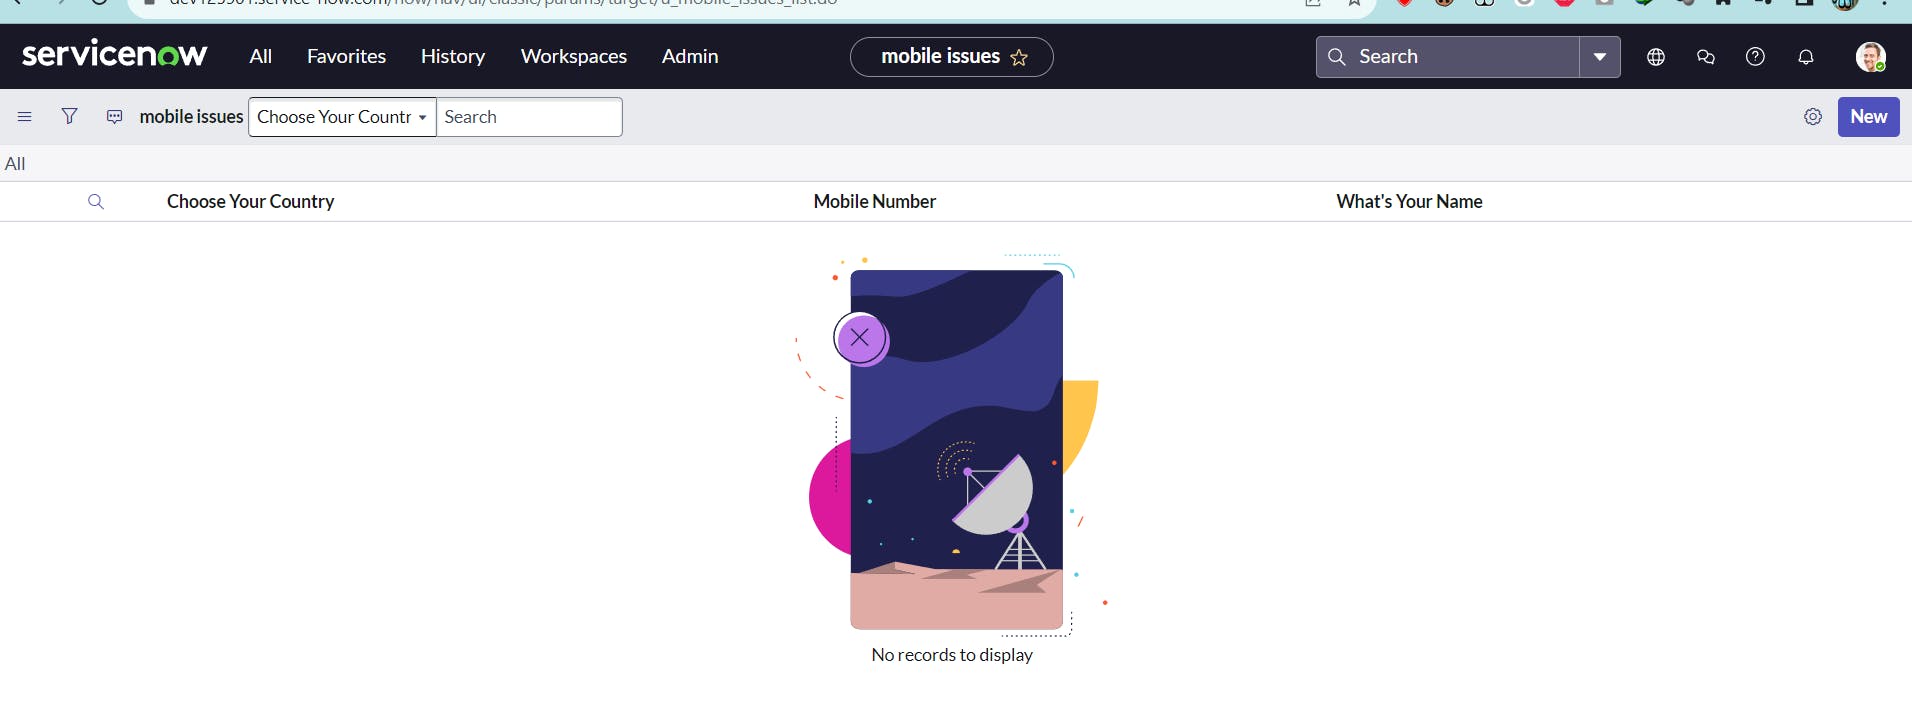
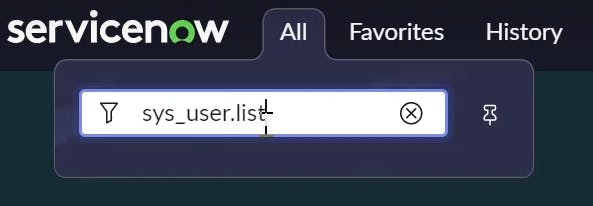
You can even get it by searching .list - (incident.list)

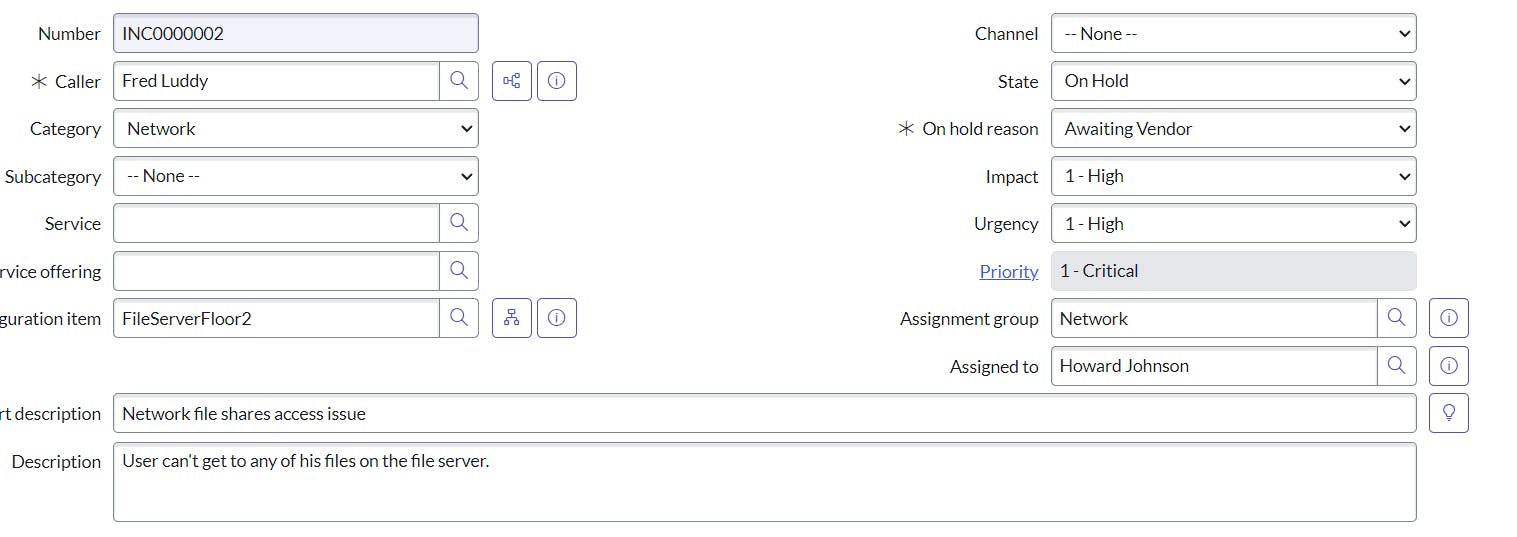
PermalinkForm view
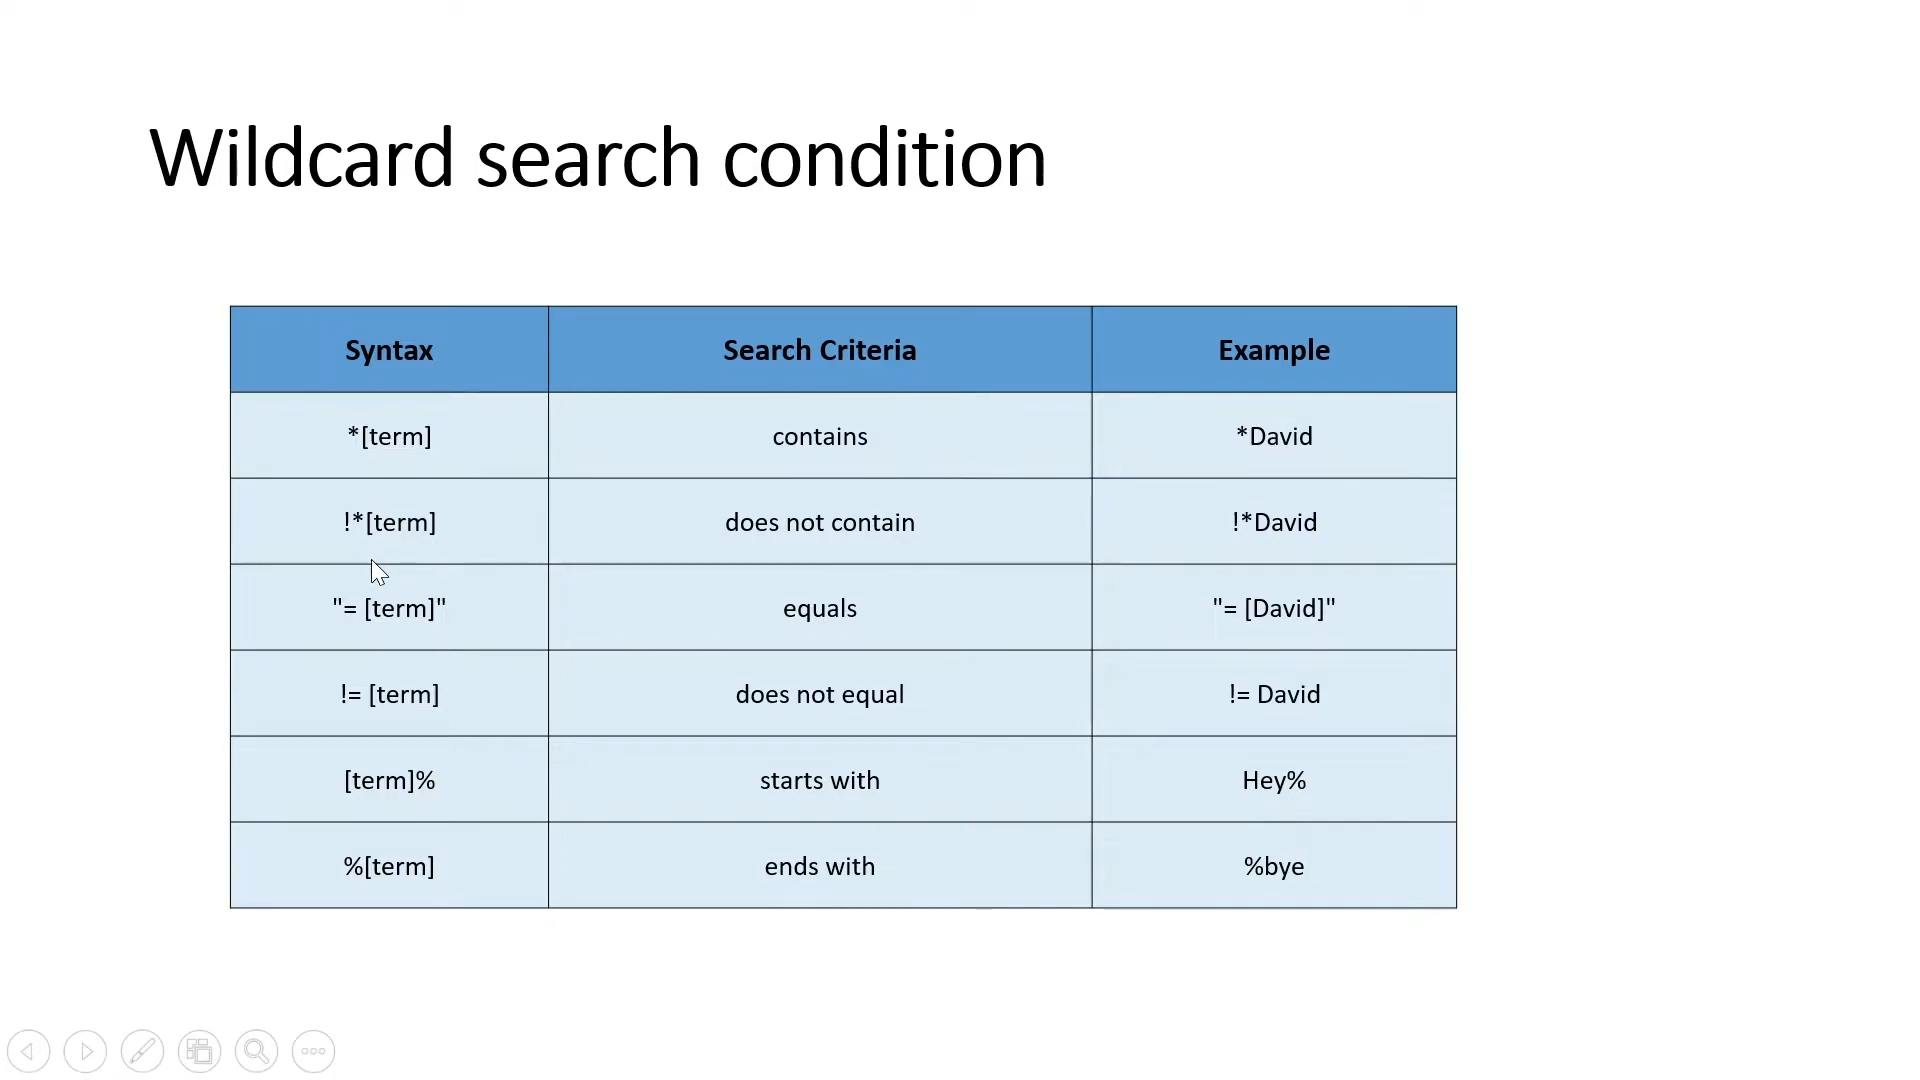
Permalinkfilter and search
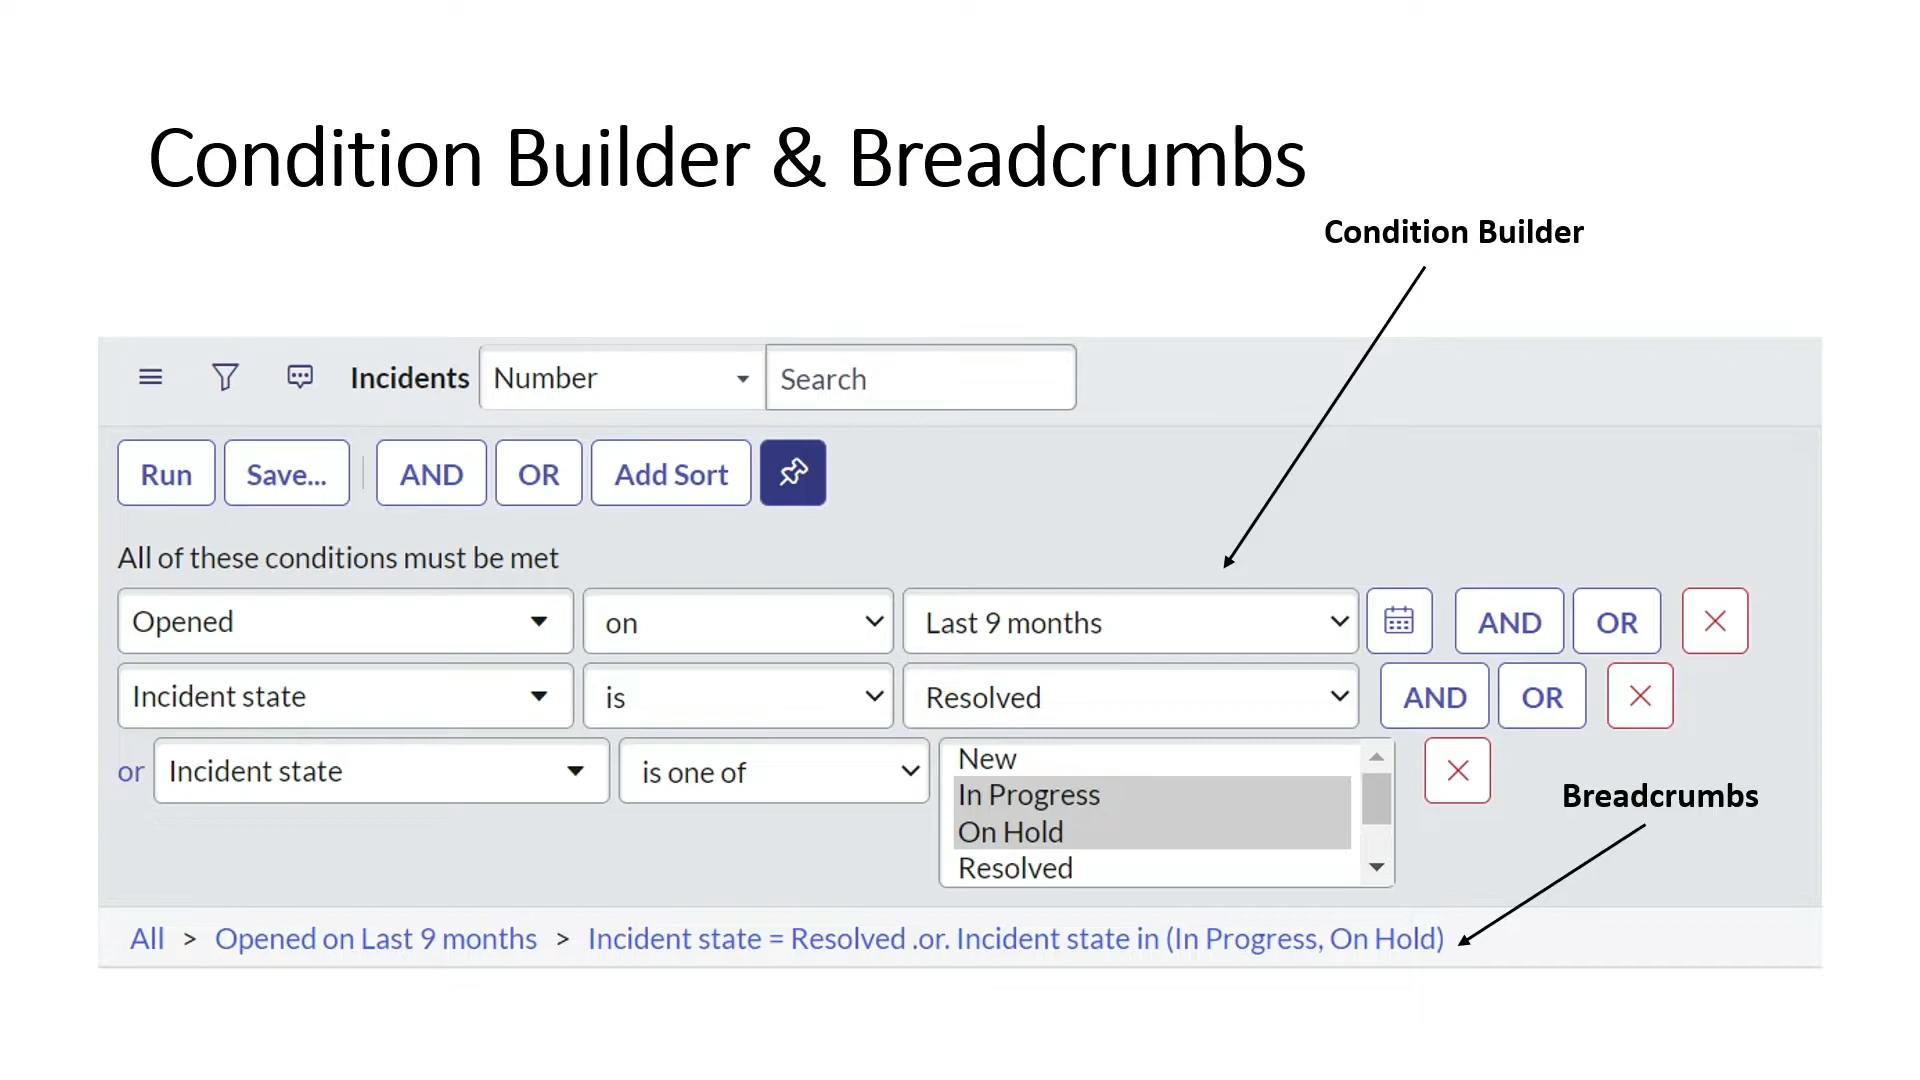
PermalinkCondition builder and Breadcrumbs
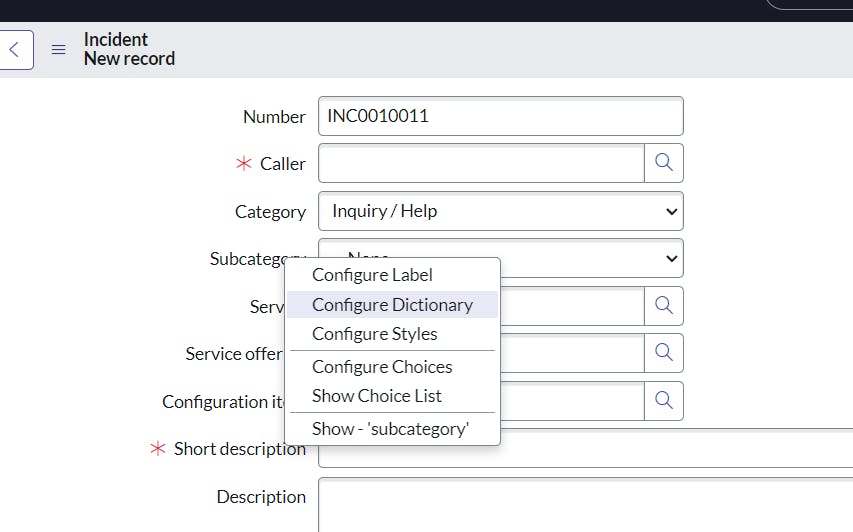
PermalinkField option
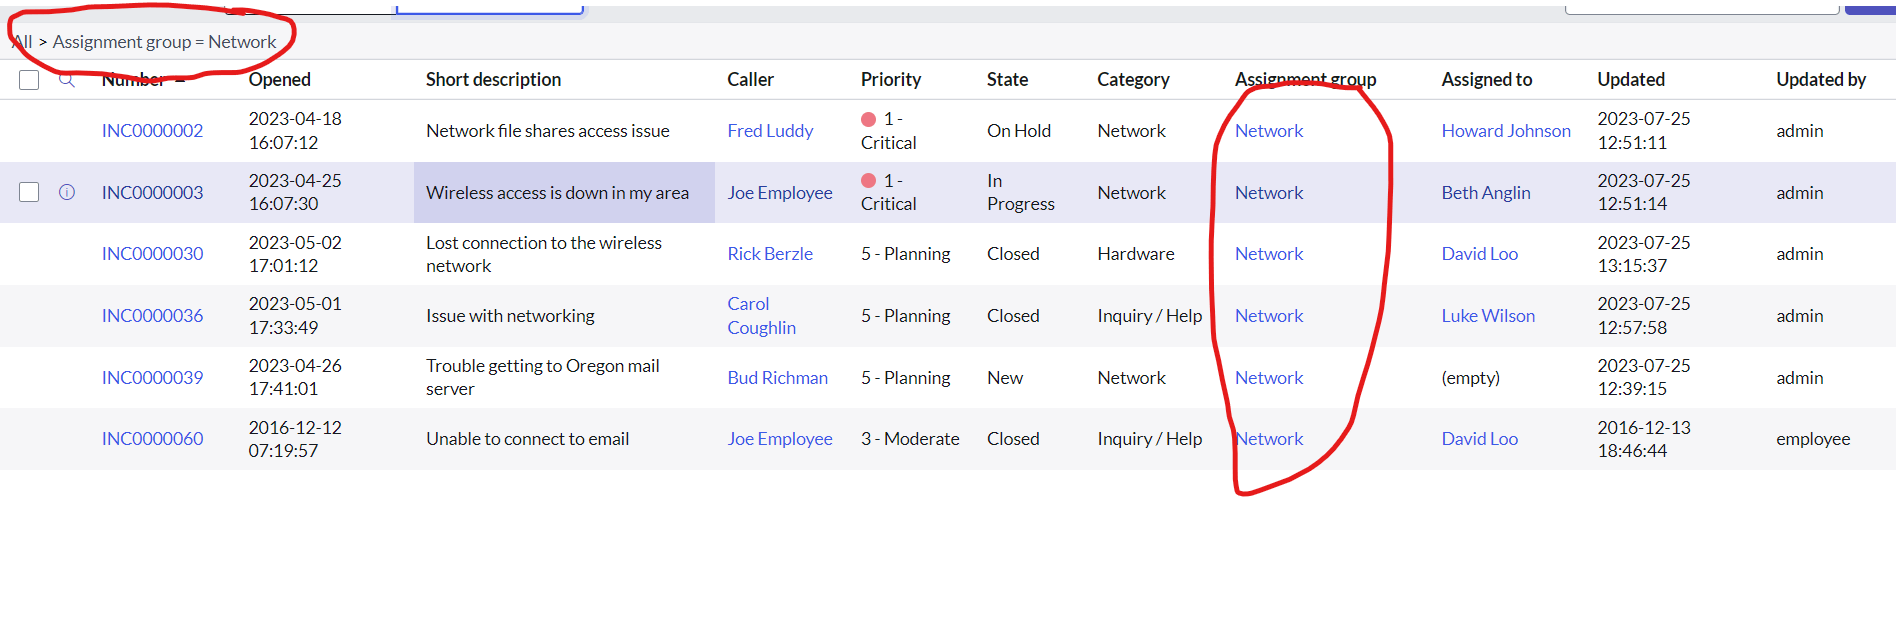
when i click show matching on network it will show all the matching network ones
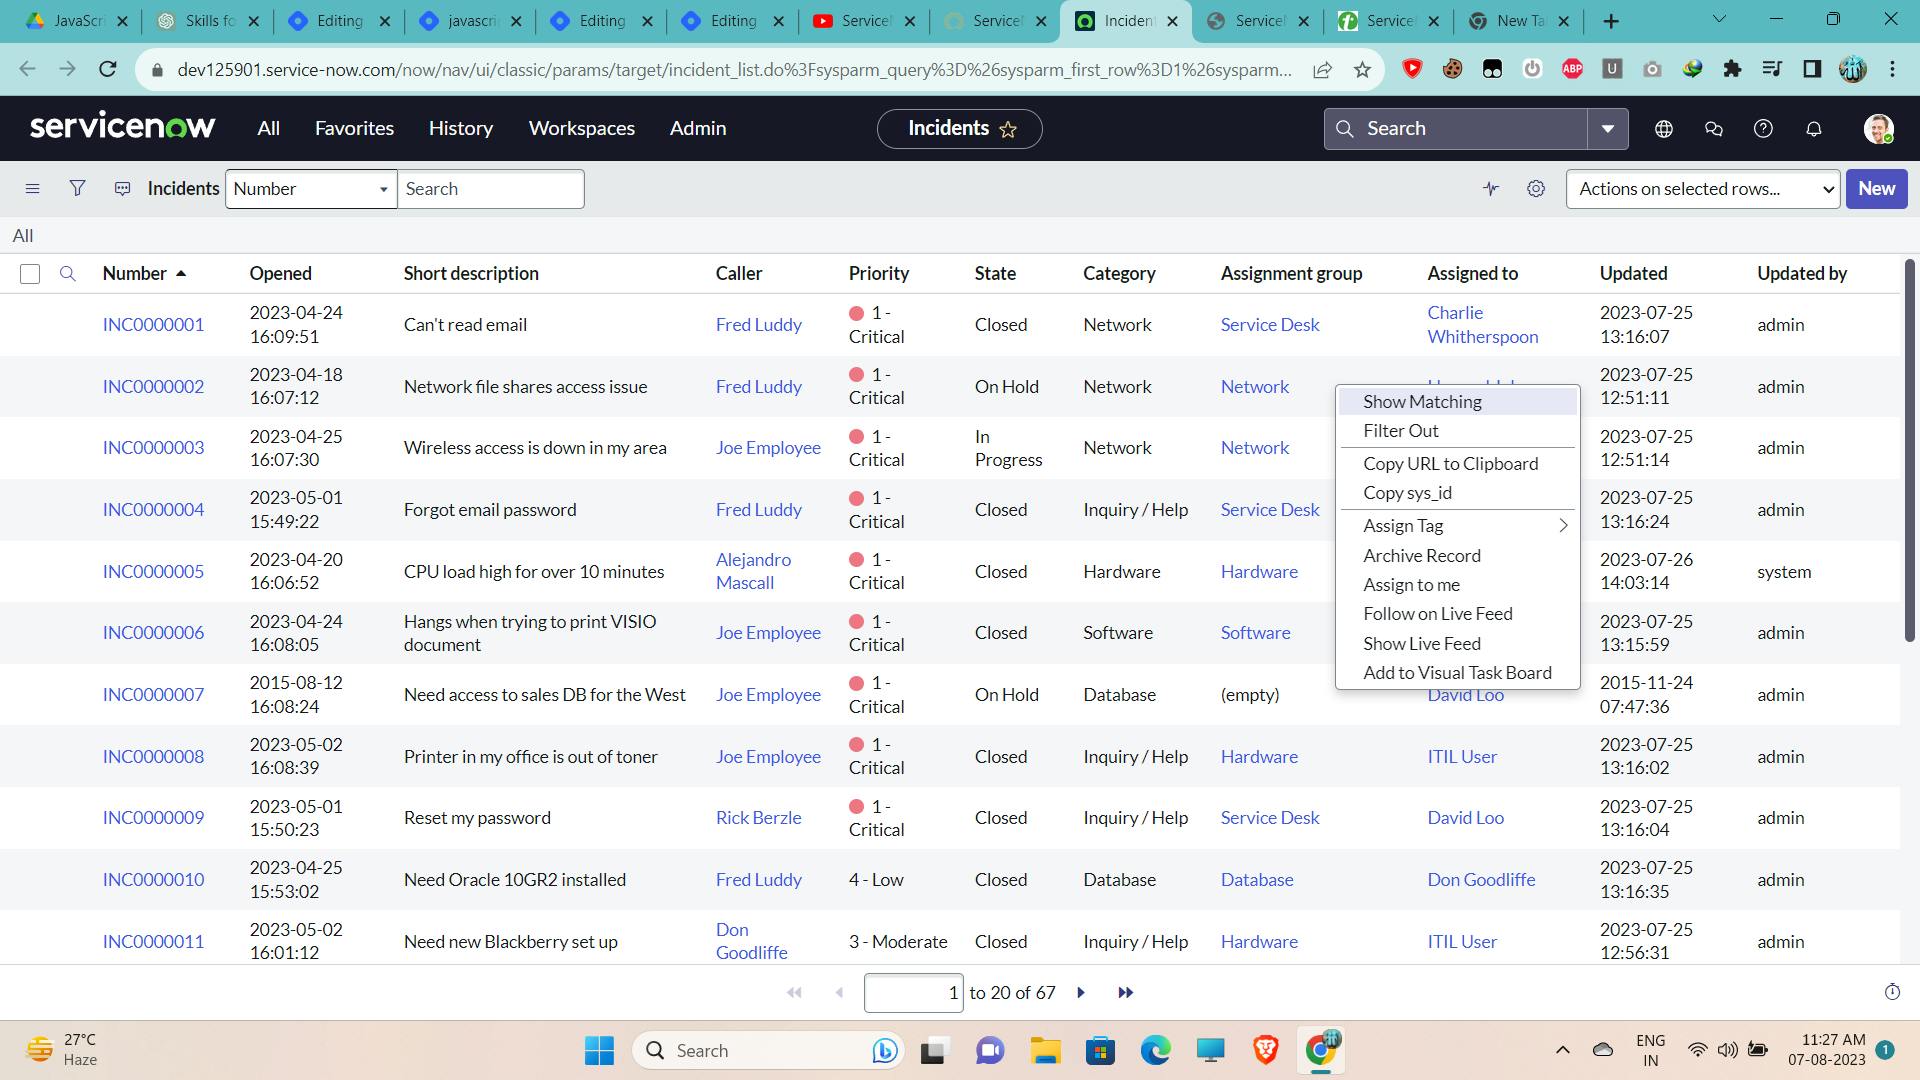
o/p
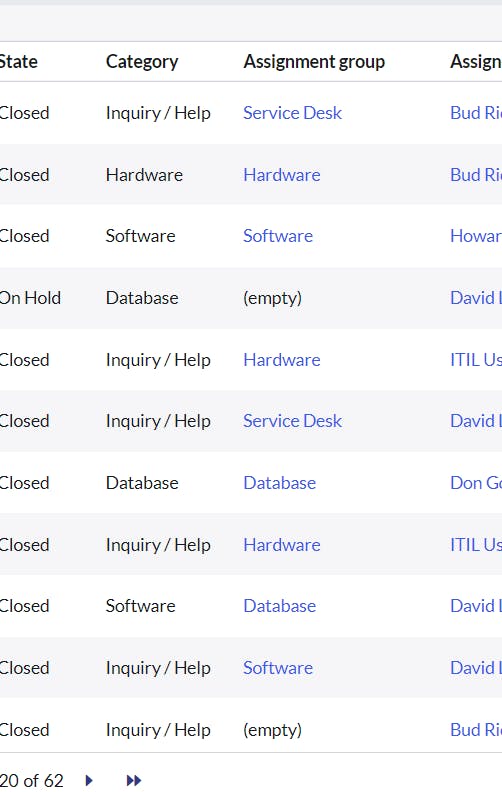
if i select filter out it will select all the values except the selected ones (network)
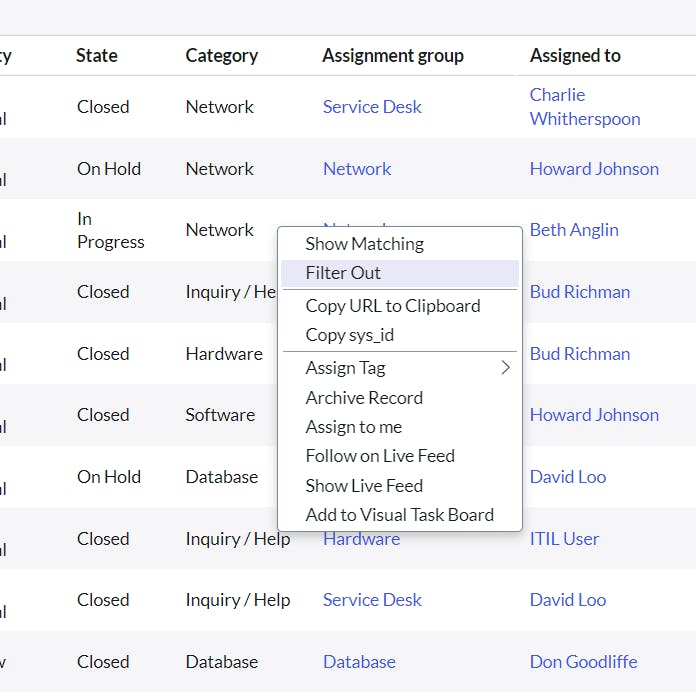
except network all the remaining are filtered out
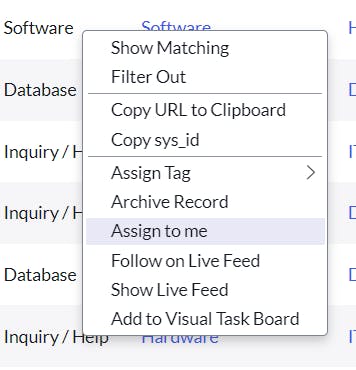
when you click assign to me here it will assign it to system admin
PermalinkForm Control menu
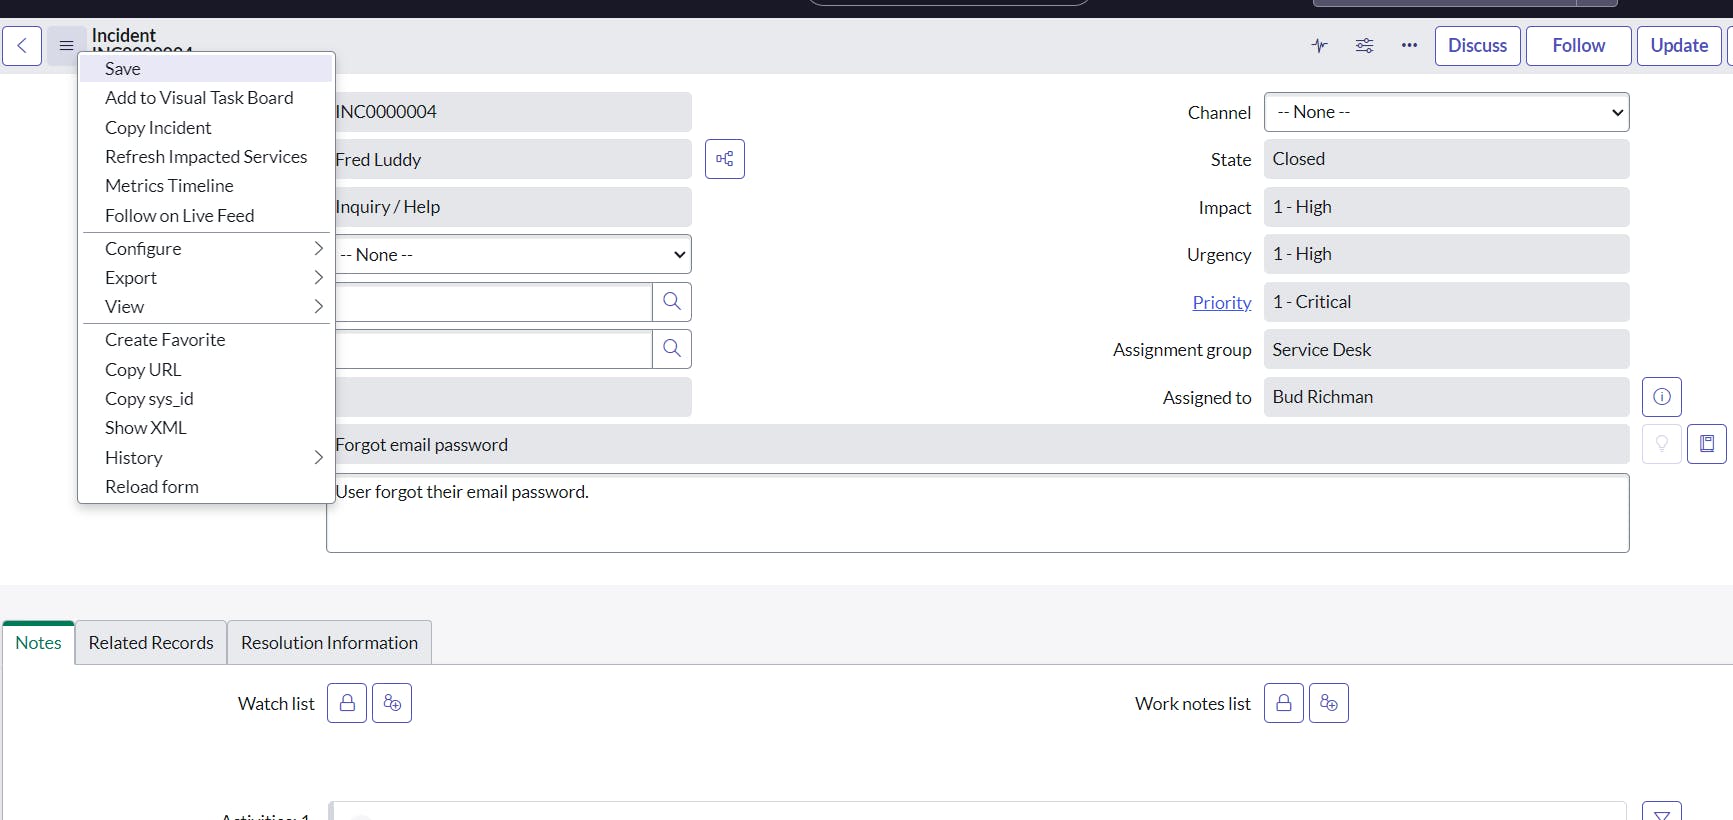
if you click copy incident it will copy the same incident with same data again like this
you can try different types of form controls in menu
Permalinkform field menu
all of these are form fields
you can select any one of them and change data( clicking state)

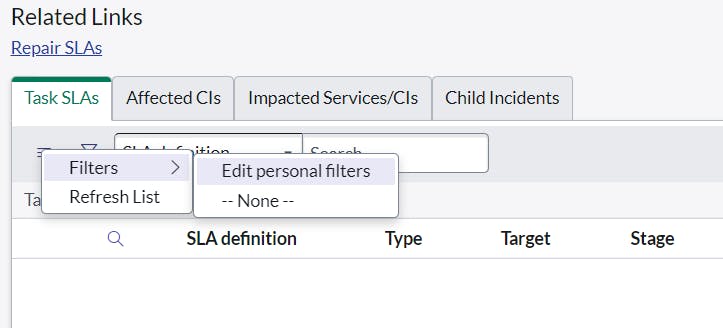
Permalinkrelated list menu
PermalinkServiceNow - Modifying List and Forms
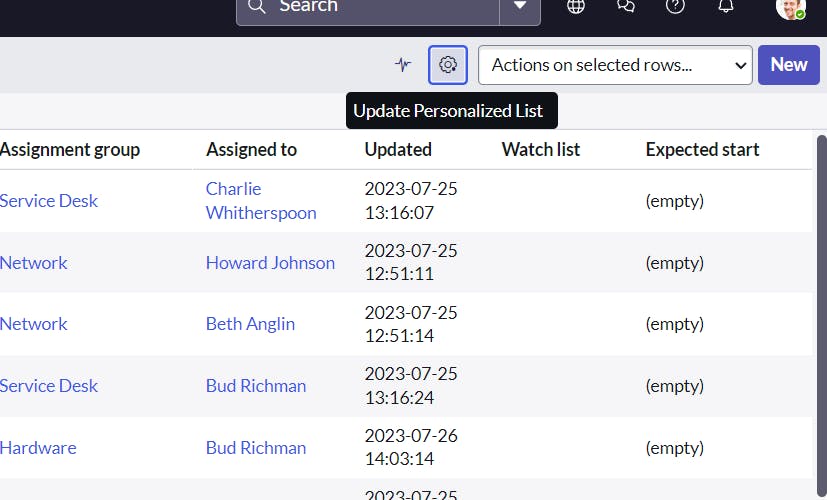
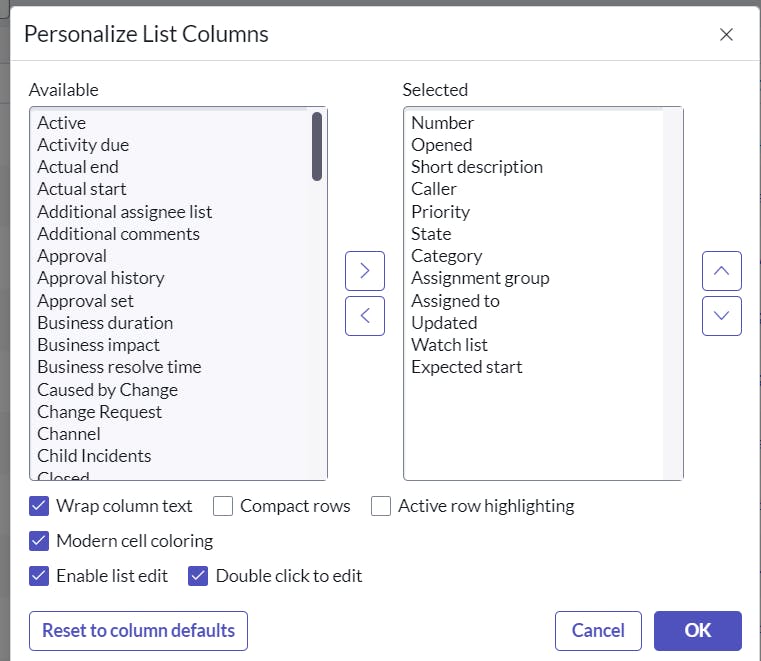
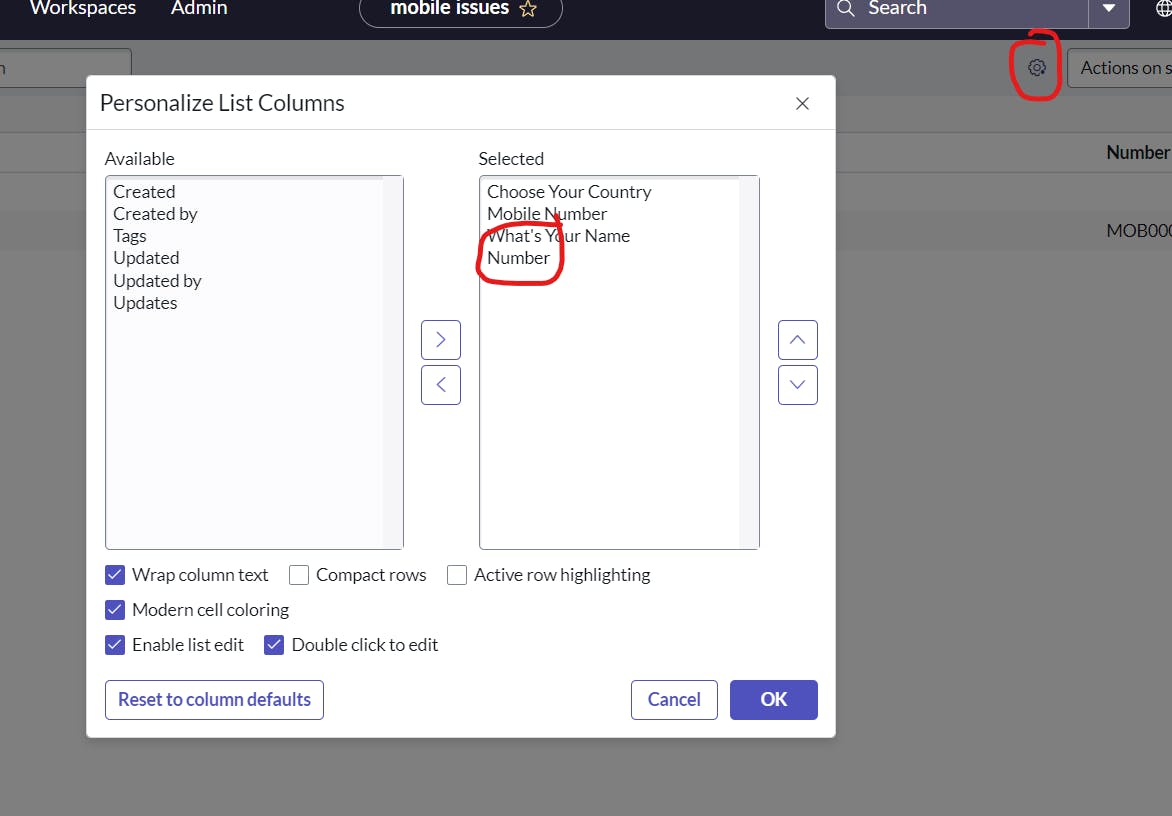
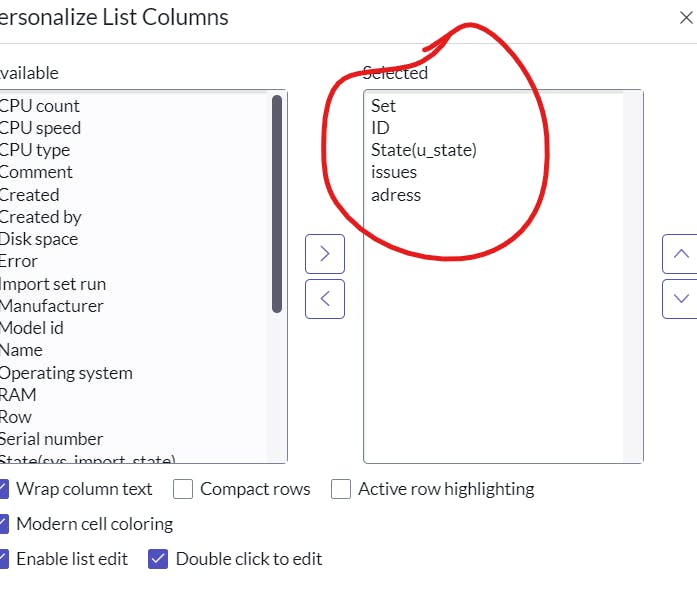
PermalinkPersonalize list
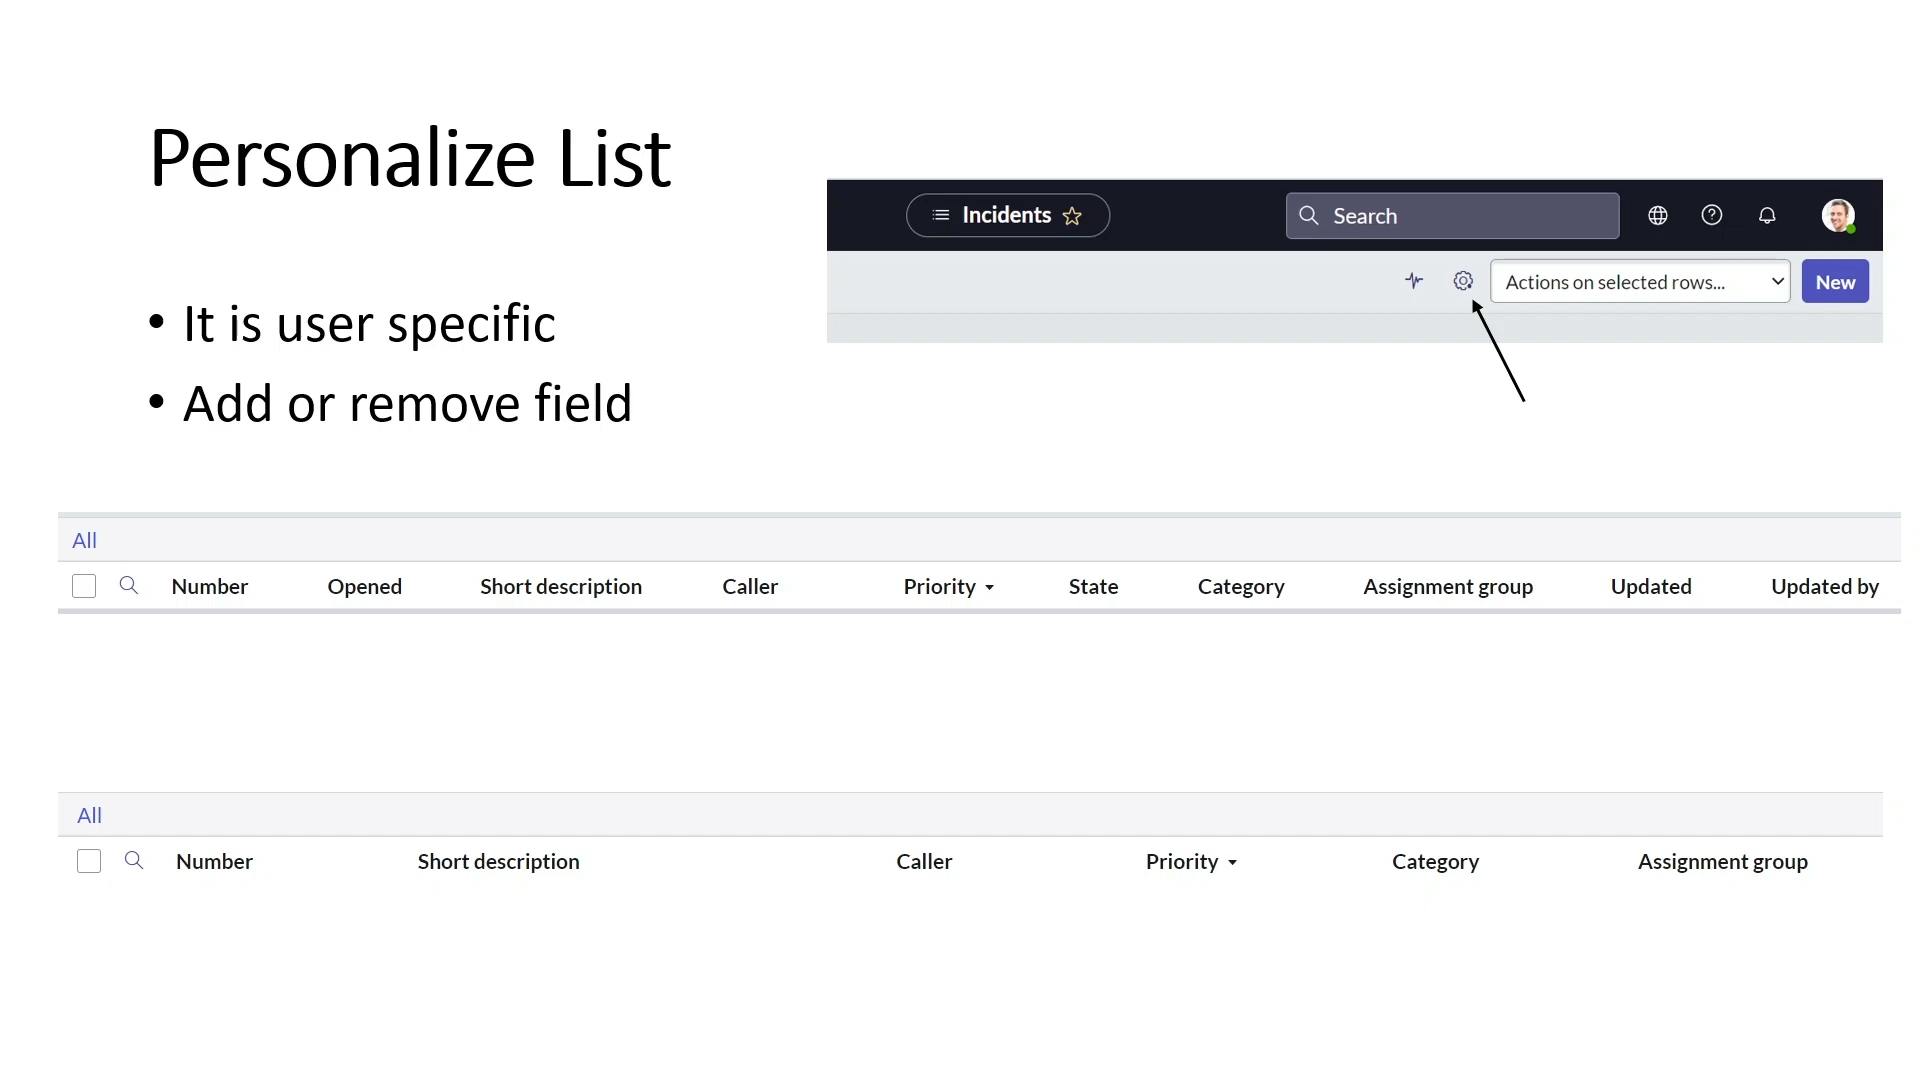
to update or add we select this
we can add the necessary things if we want to selected or move to available tag
if you move them to selected then they will appear in list
PermalinkConfigure List Layout
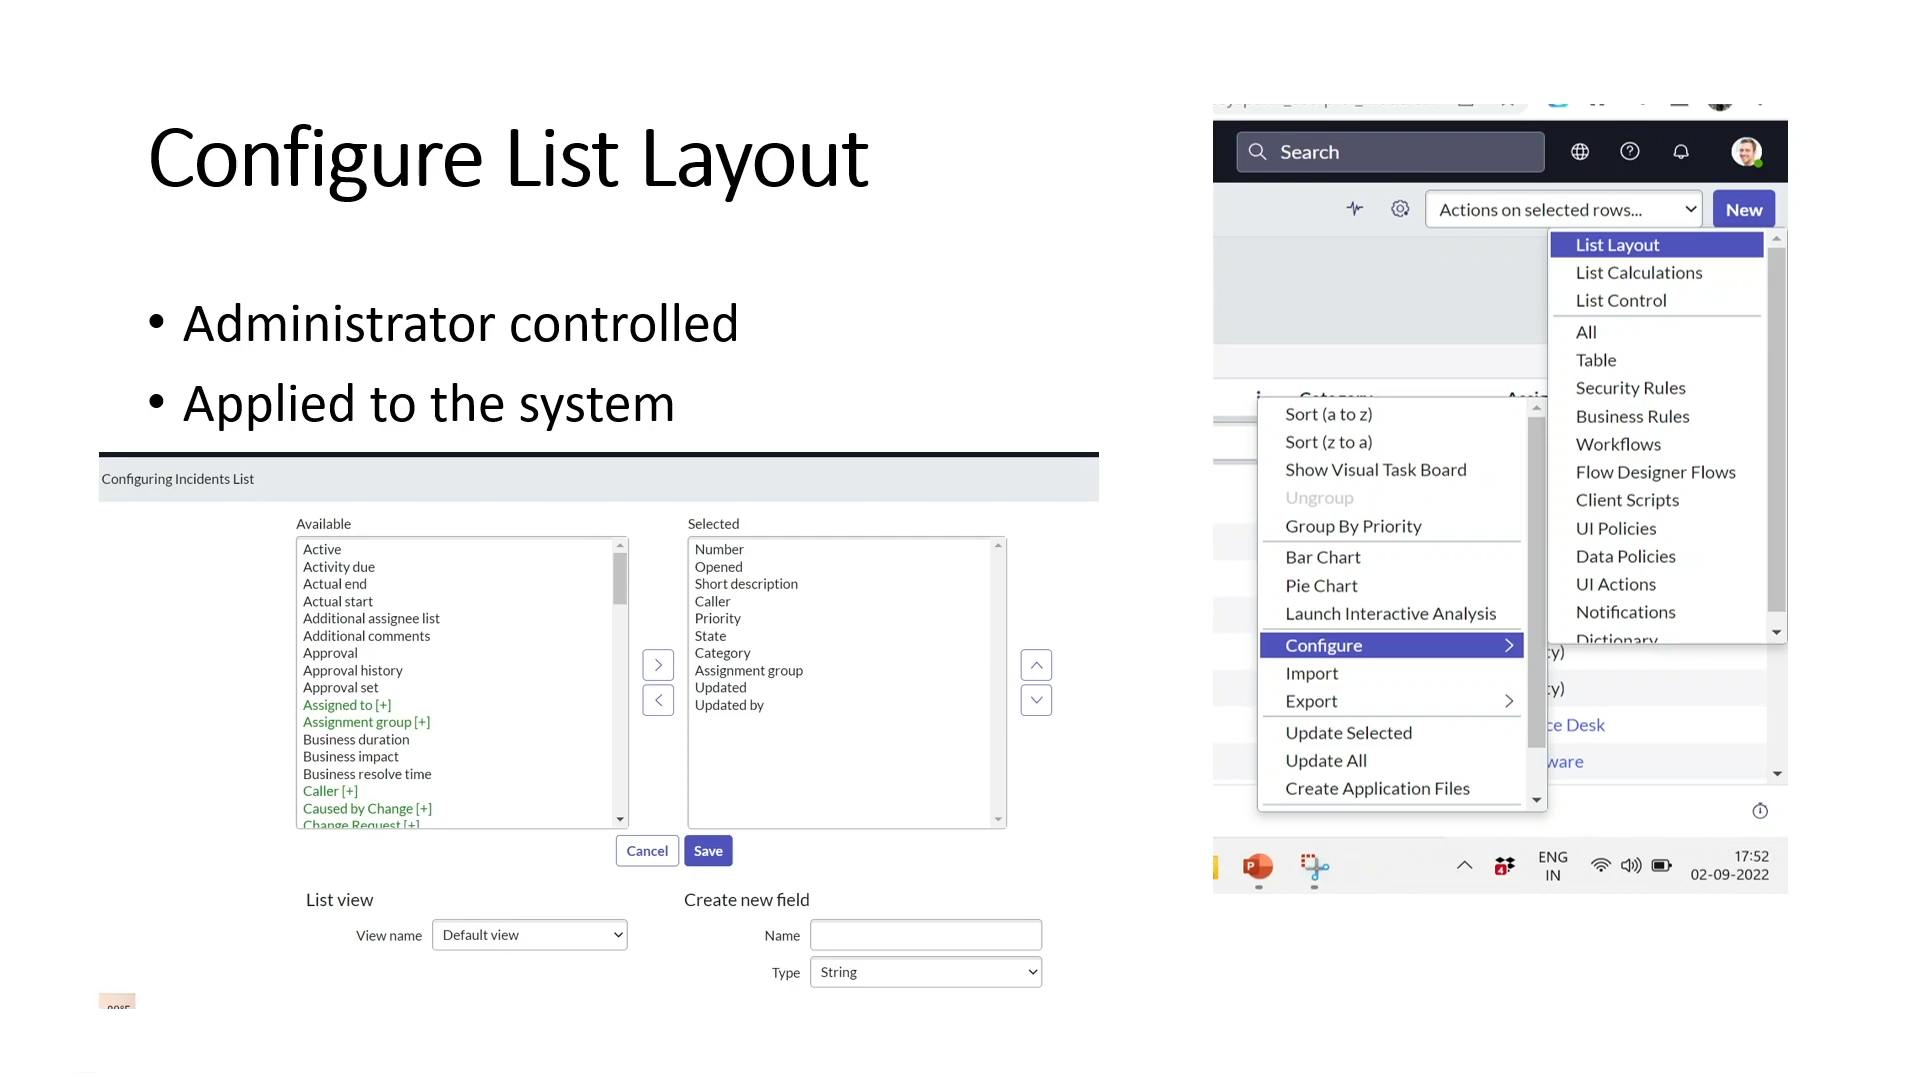
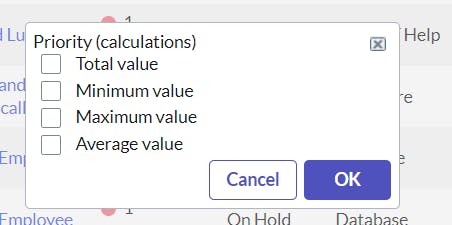
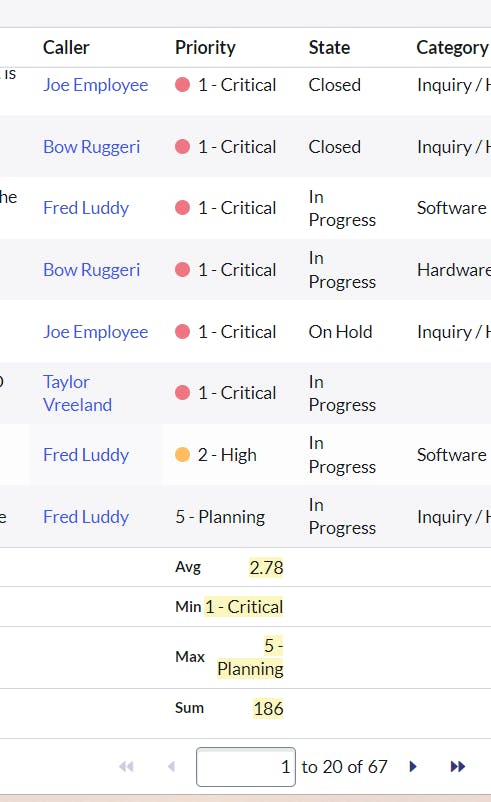
Permalinkconfigure list calculation
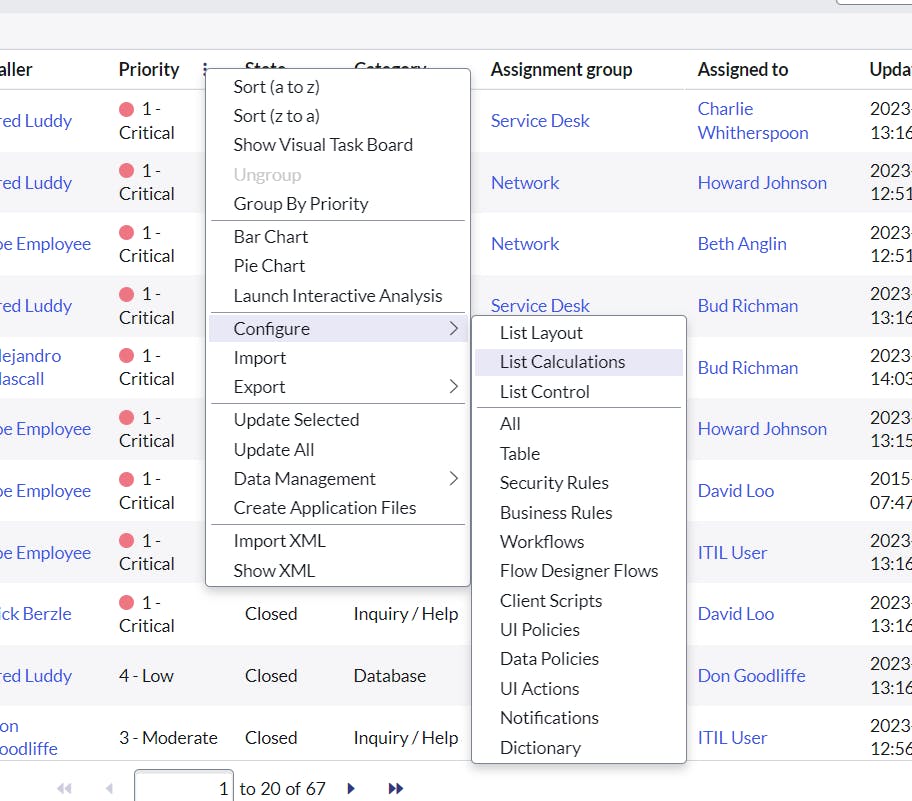
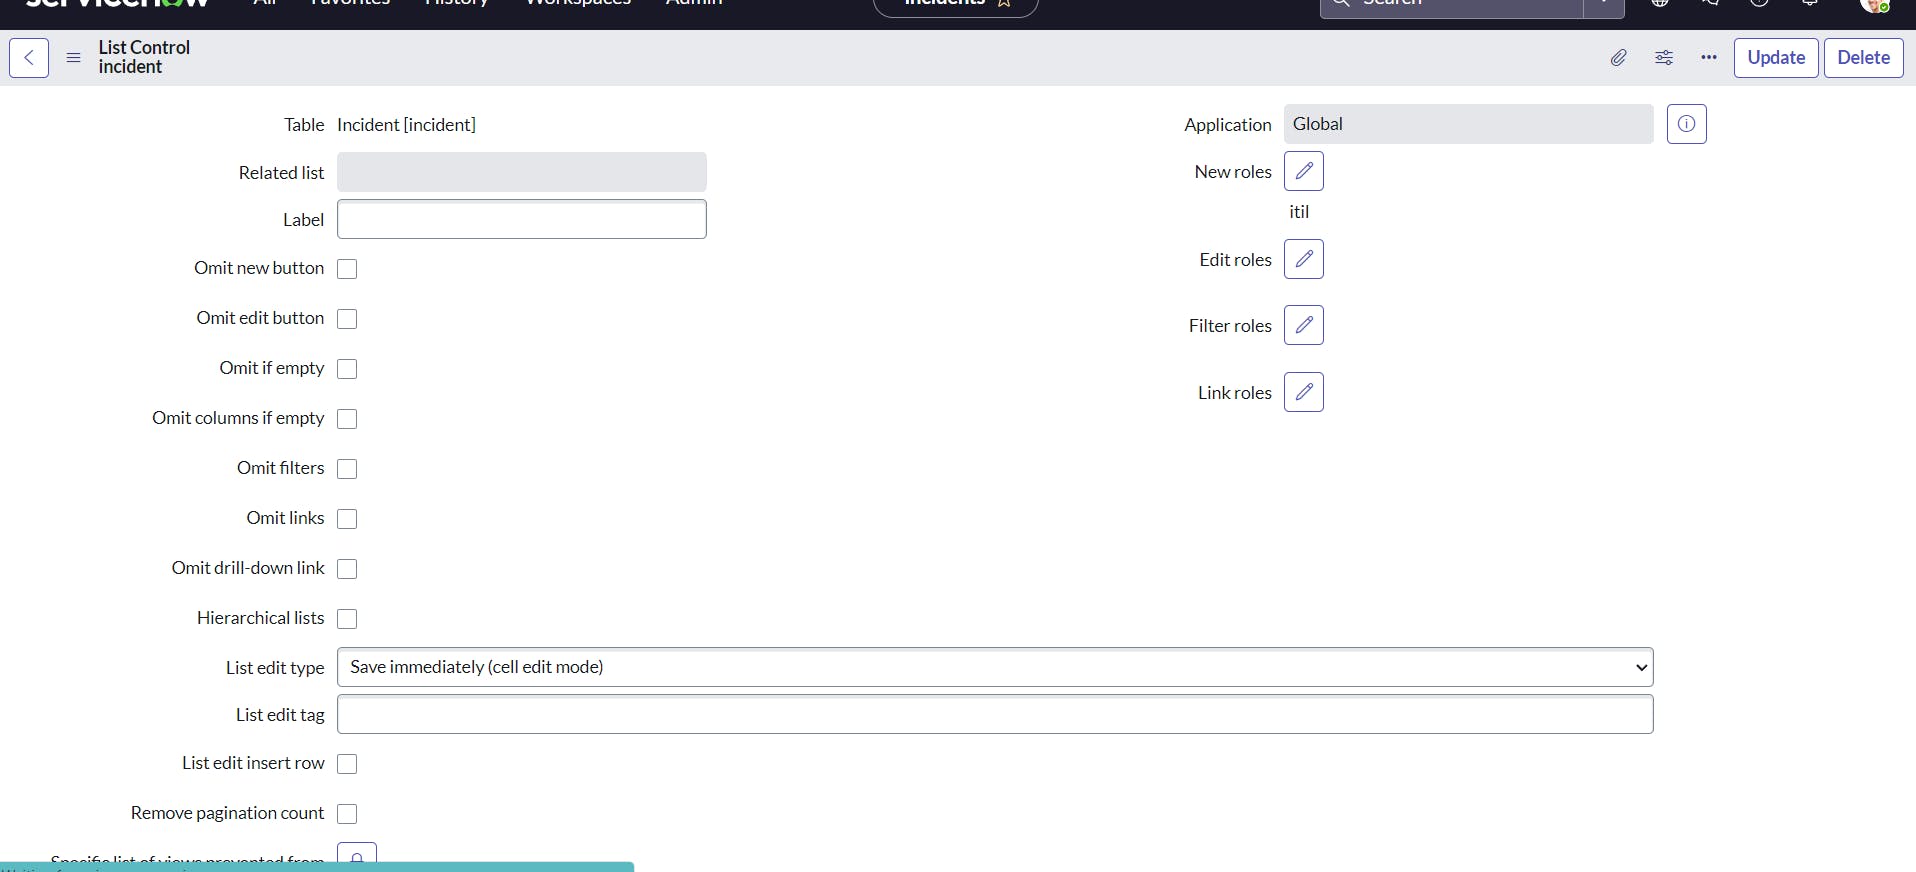
Permalinkconfigure list control
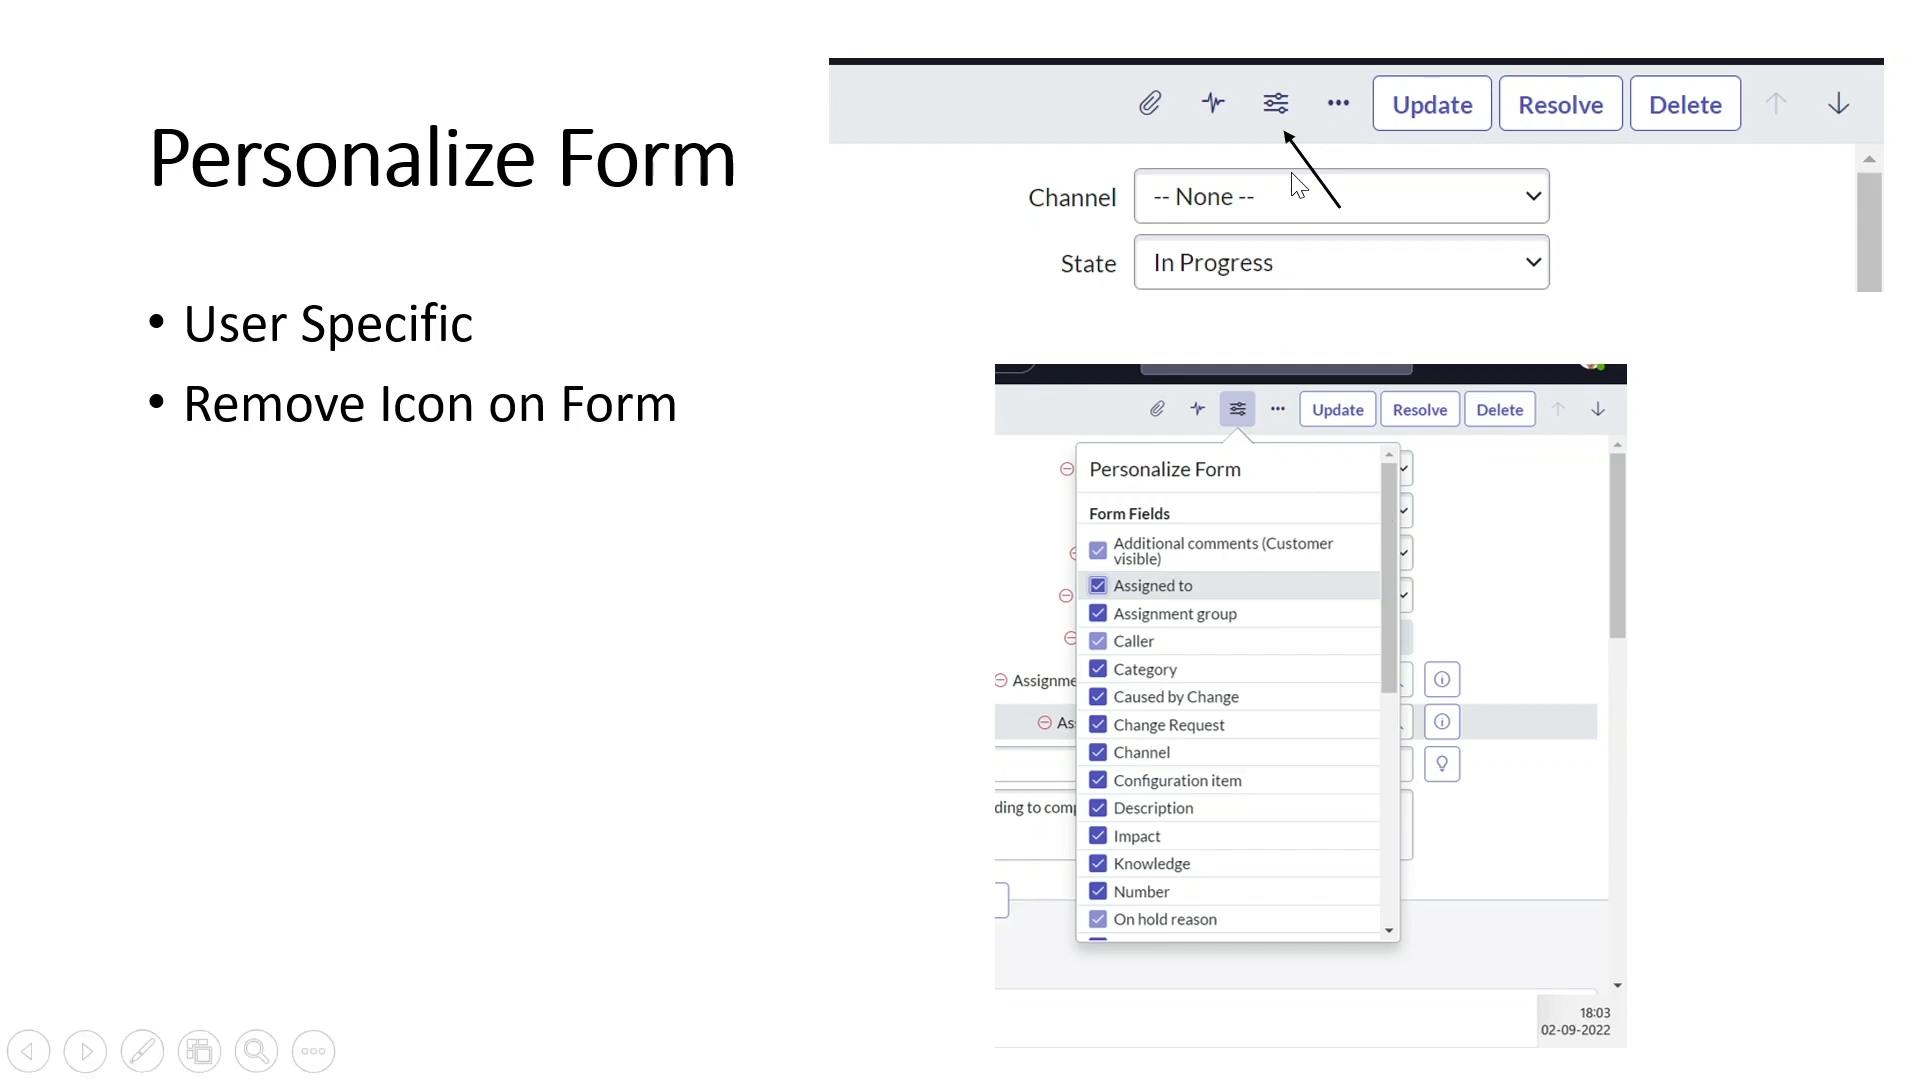
PermalinkPersonalize Form
first we have to open in form view
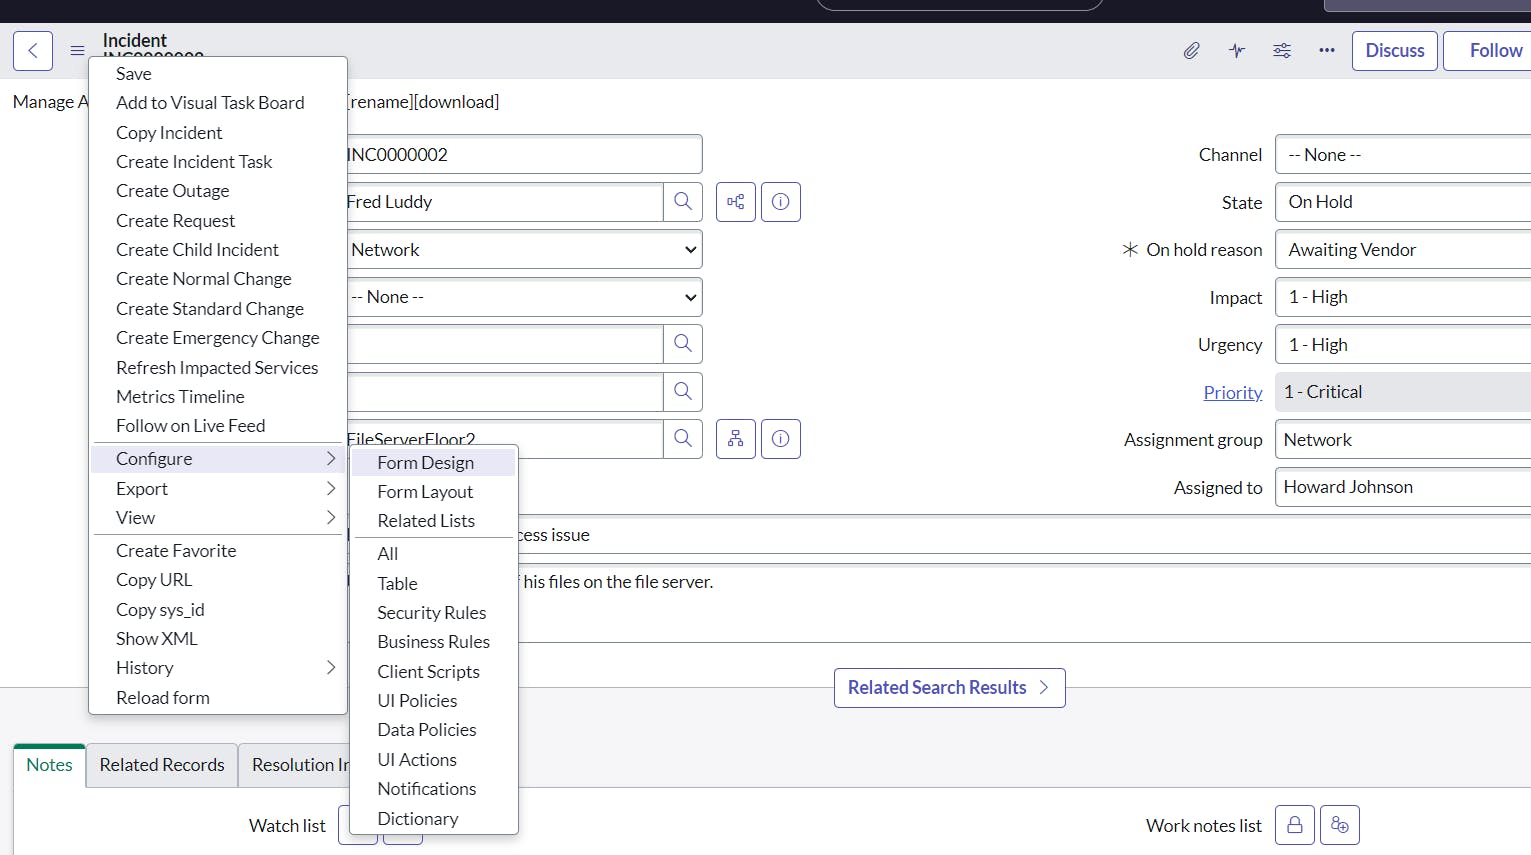
Permalinkconfigure Form Layout

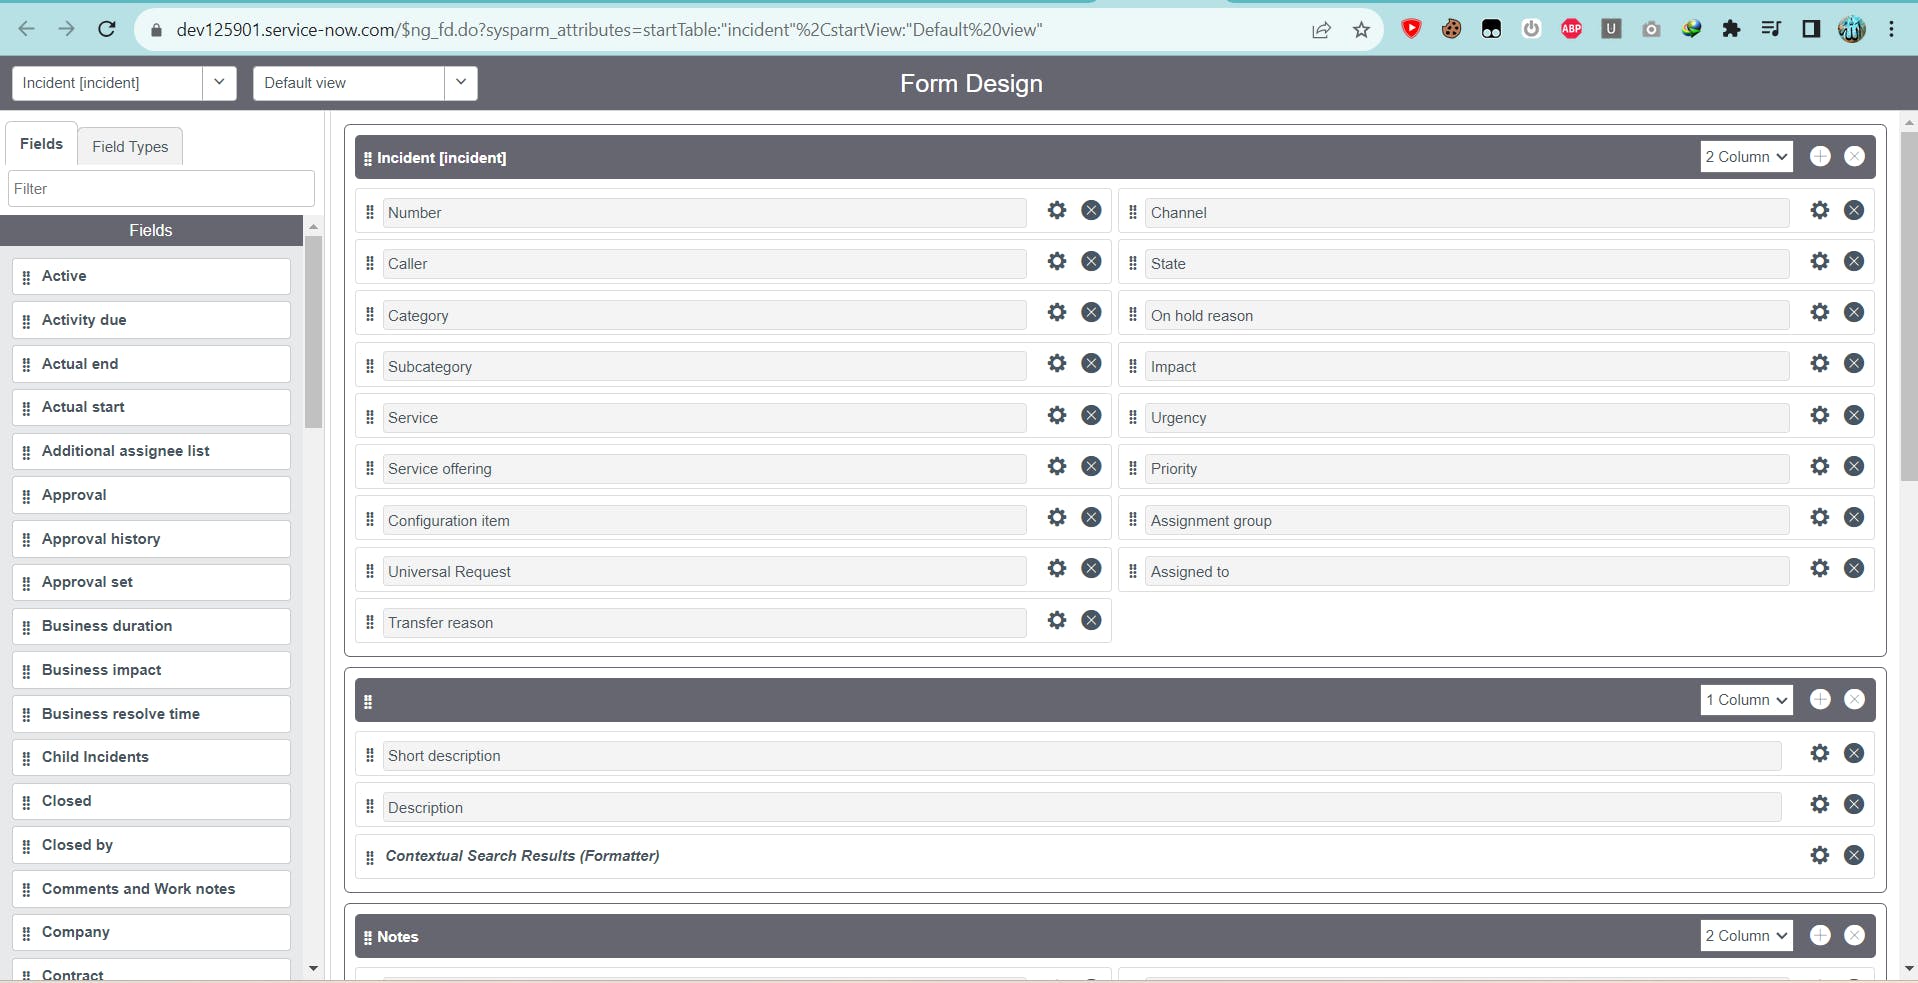
Permalinkconfigure form design

PermalinkClient-Side vs Server-Side
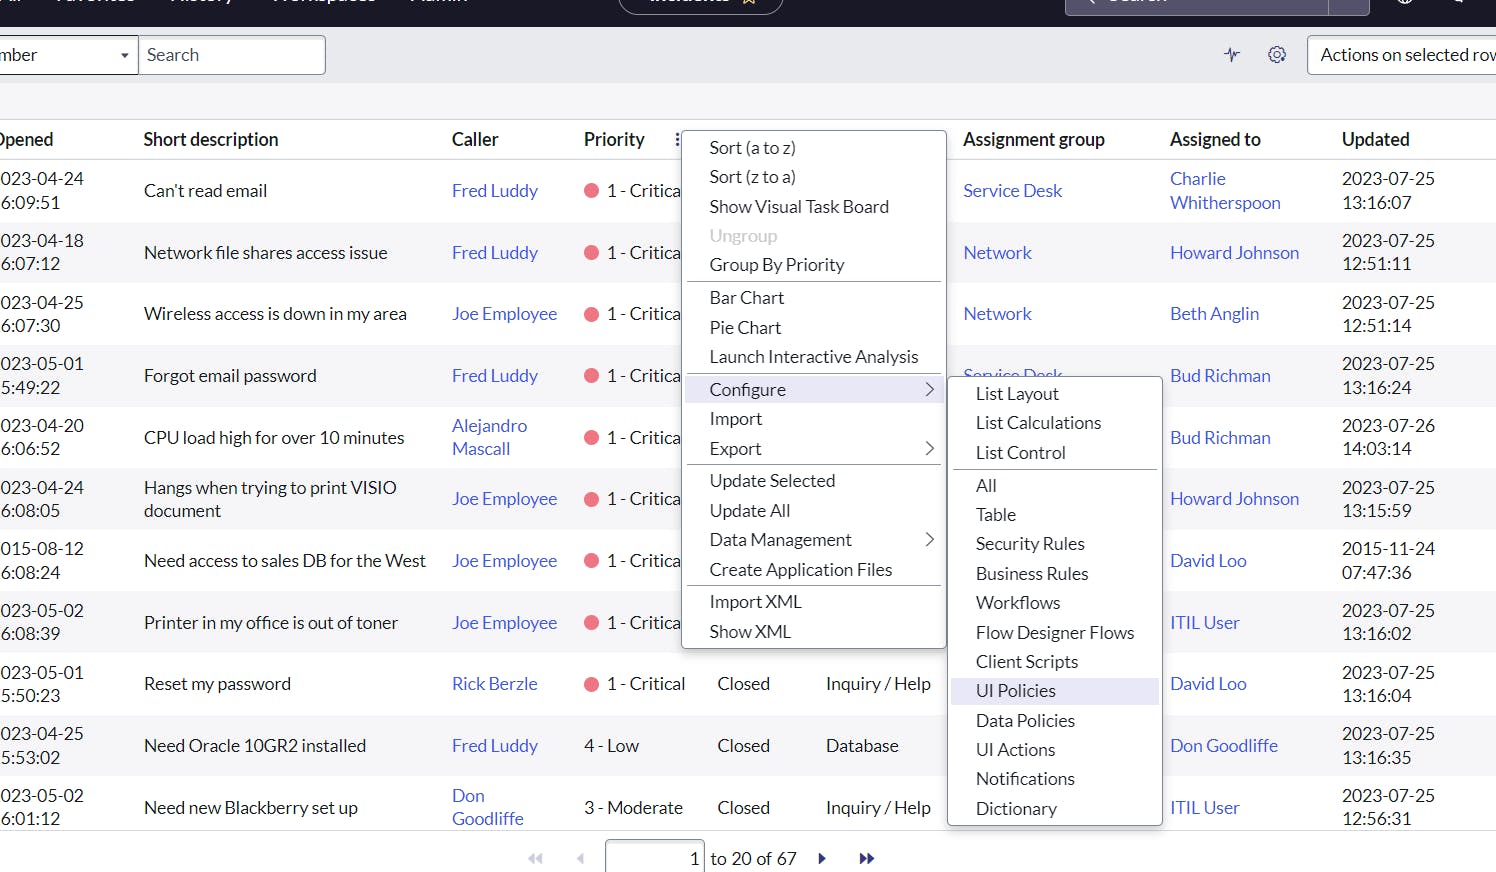
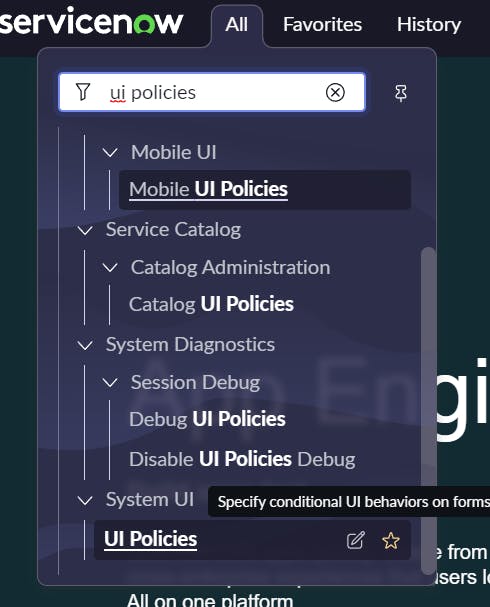
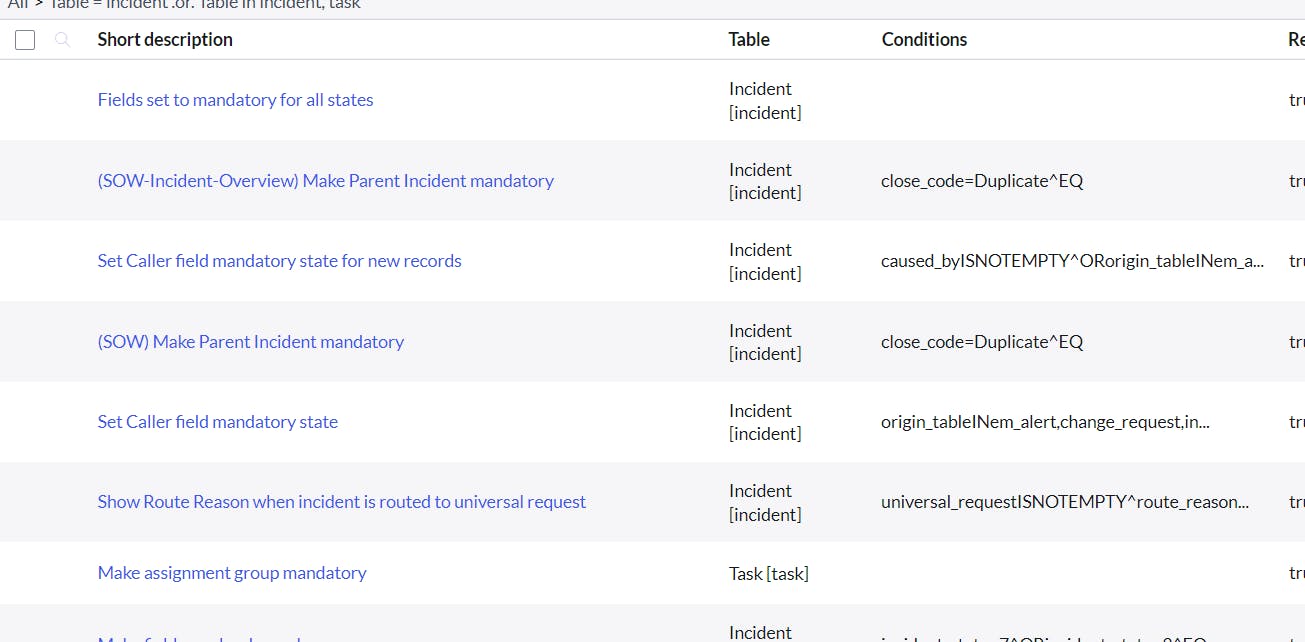
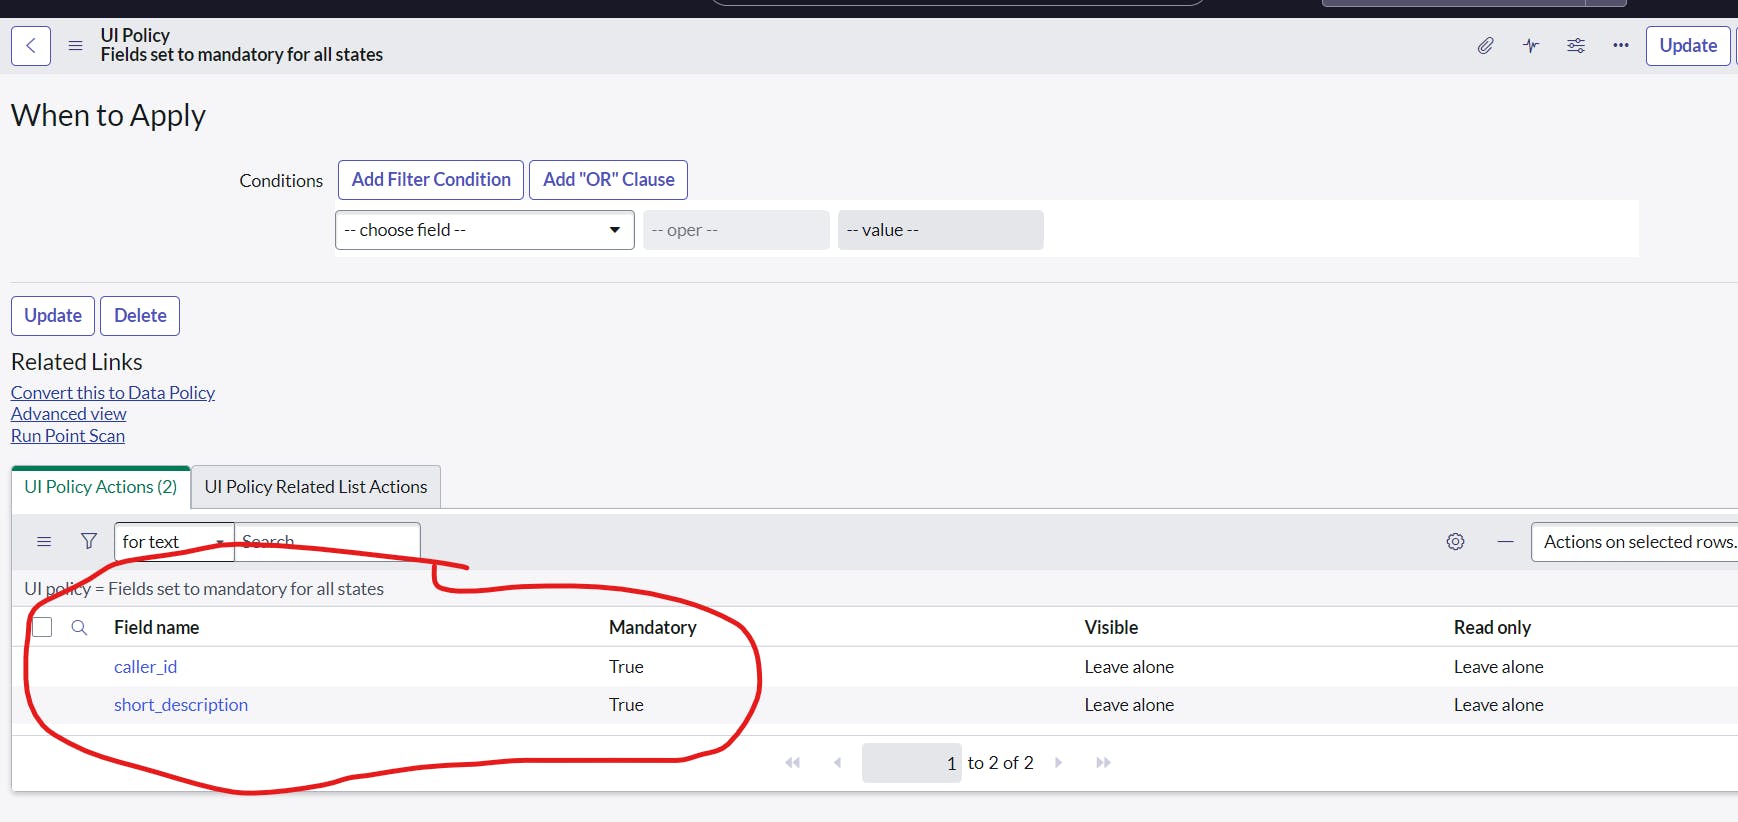
PermalinkUI Policies
UI Policies in ServiceNow are a powerful tool that allows administrators to dynamically control the behavior and visibility of form fields on the user interface. They enable you to simplify and streamline the user experience by showing or hiding fields, making fields mandatory, or read-only based on defined conditions. UI Policies are typically used to enforce business rules and improve data quality without requiring complex scripting.
Here's how UI Policies work:
Conditions:
A UI Policy is associated with a specific table (record type) and set of conditions. These conditions are based on the field values of the current record.
You define conditions using a combination of fields, operators (such as equals, not equals, contains), and values.
Actions:
Once conditions are met, you specify the actions that should be applied to certain fields on the form.
Actions include:
Visibility: Show or hide a field based on conditions.
Mandatory: Make a field required or optional based on conditions.
Read-Only: Prevent users from editing a field based on conditions.
Set Value: Automatically set a field's value based on conditions.
Example Use Case:
- Let's say you have an incident form. You want to make the "Root Cause" field mandatory only when the "Incident State" is set to "Resolved." You can create a UI Policy that triggers when the "Incident State" changes to "Resolved." The action in this case would be to make the "Root Cause" field mandatory.
Order of Execution:
UI Policies are evaluated and executed whenever a form is displayed or updated.
They are evaluated after client scripts and before the server-side processing, ensuring a responsive user experience.
Scope and Applicability:
UI Policies are specific to a table and apply to all forms associated with that table.
They are often used in conjunction with other UI features like Client Scripts, Business Rules, and Access Control Rules to create comprehensive solutions.
Benefits:
UI Policies simplify the UI by showing only relevant fields to users based on their actions or record state.
They help enforce data integrity by making certain fields mandatory when needed.
UI Policies can be configured by administrators without requiring extensive coding knowledge.

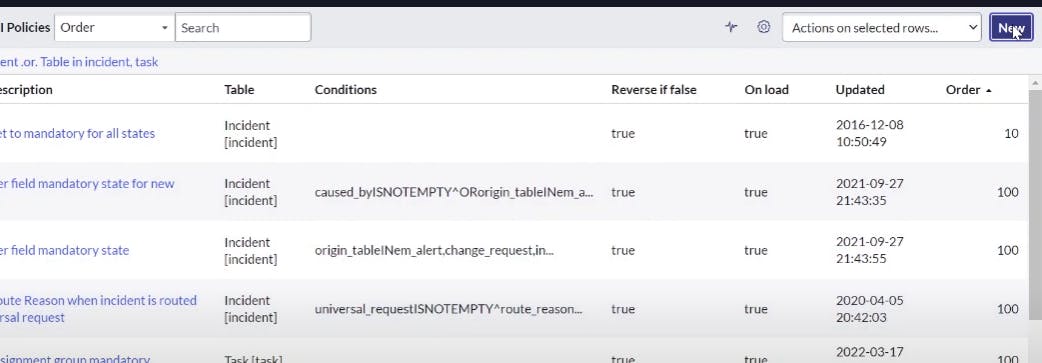
we can open ui policies like this
you have to define what actions they should do and you can edit all of those by defining what they should do
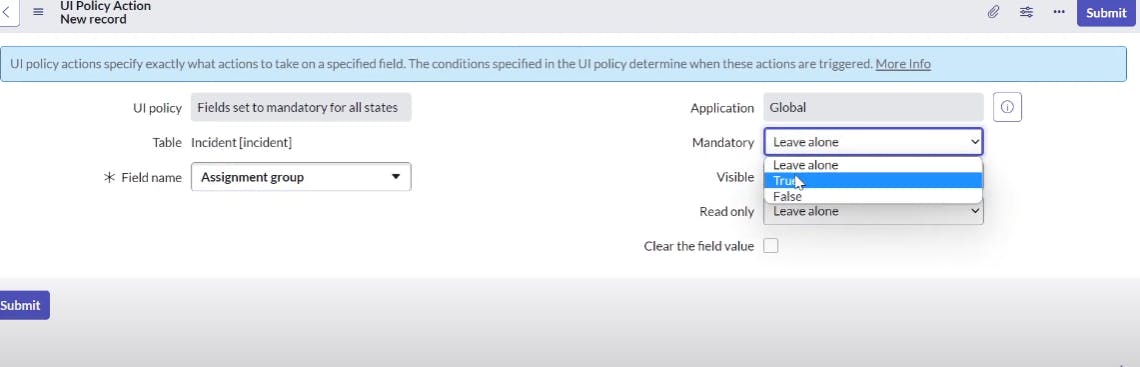
these fields caller_id, short des should be mandatory for all states, you can define a policy to keep the both should be mandatory
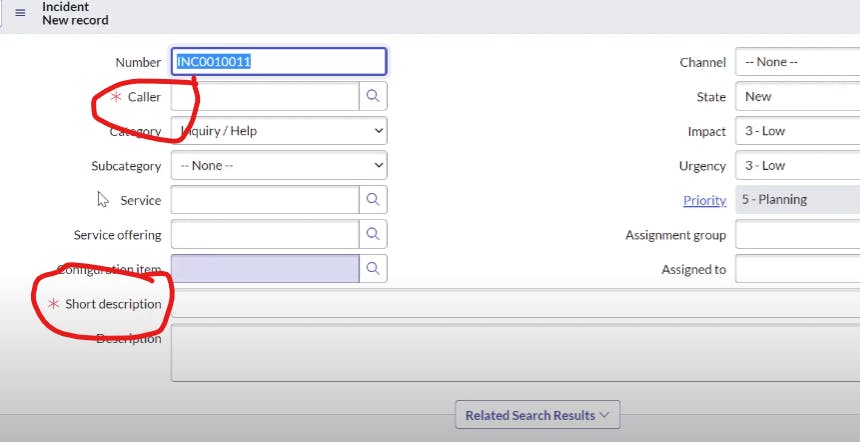
To define new rules we select new

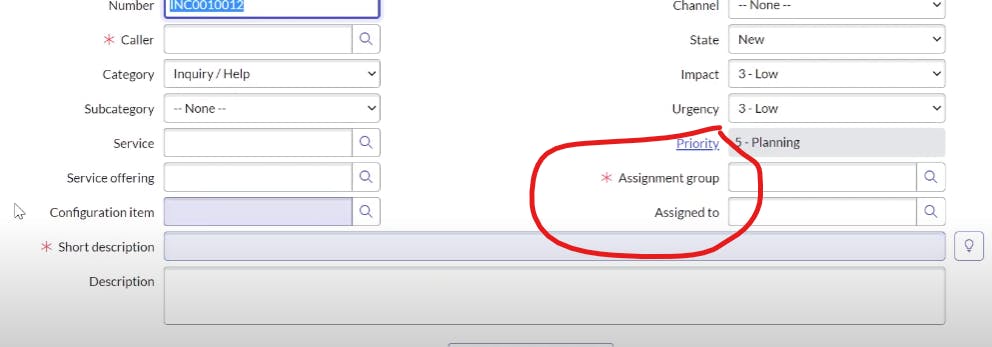
now if we want to keep assignment group as mandatory we should do this
on clicking submit you get this
Example 1:
Now we want to write a policy where when user select category as database then service field should not appear
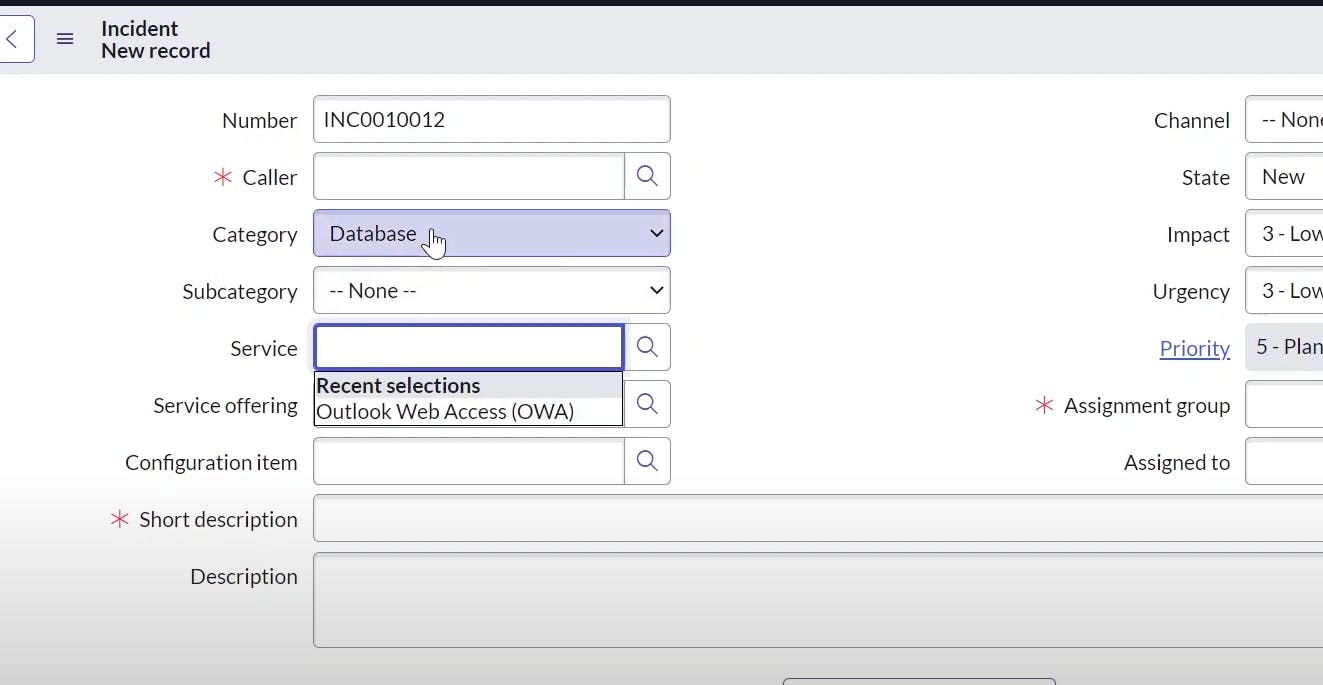
step 1 : you click new
step 2: write a short description of what we do and set condition as category is database
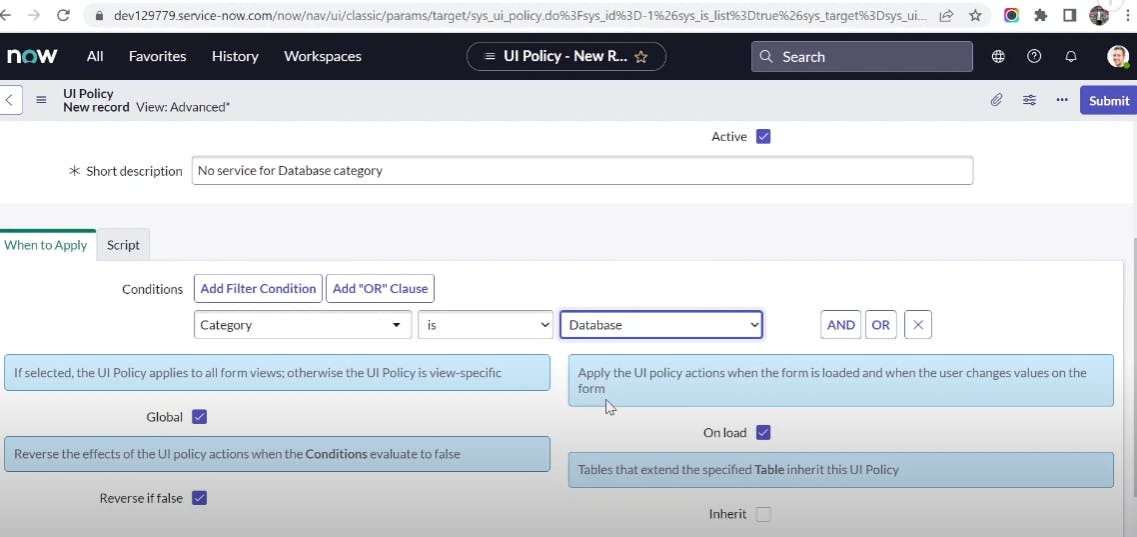
then right click and save ,dont submit it yet as it will submit it completely
and then we have to add what action it should do after category is database
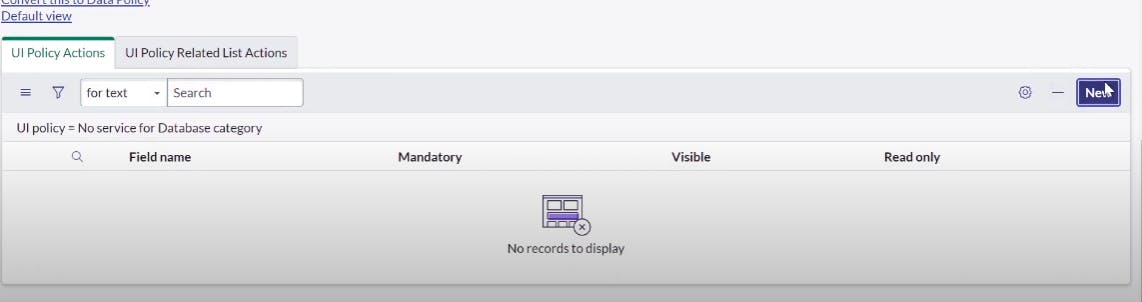
select field name as service
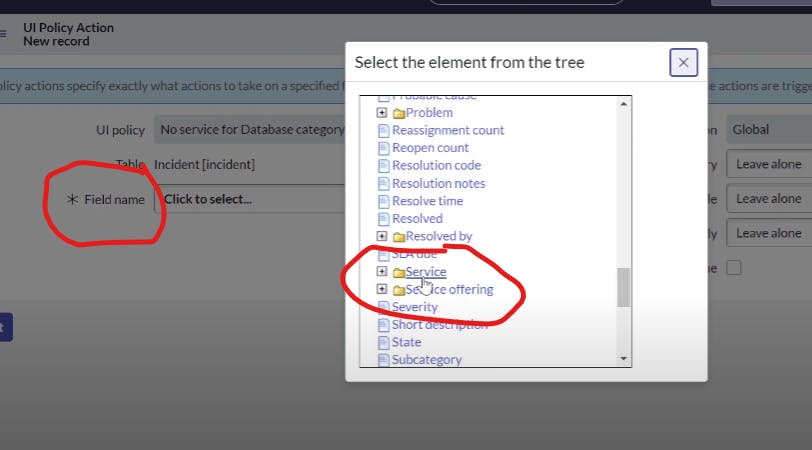
then set visible to false
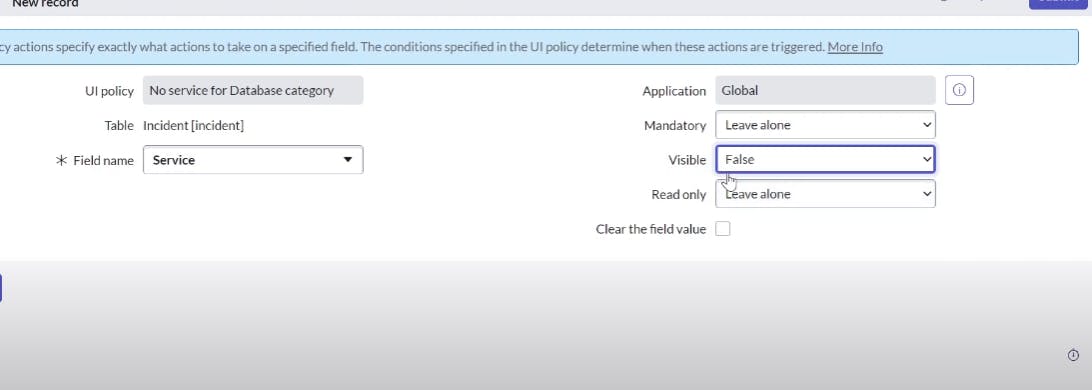
after choosing database the service field will disappear

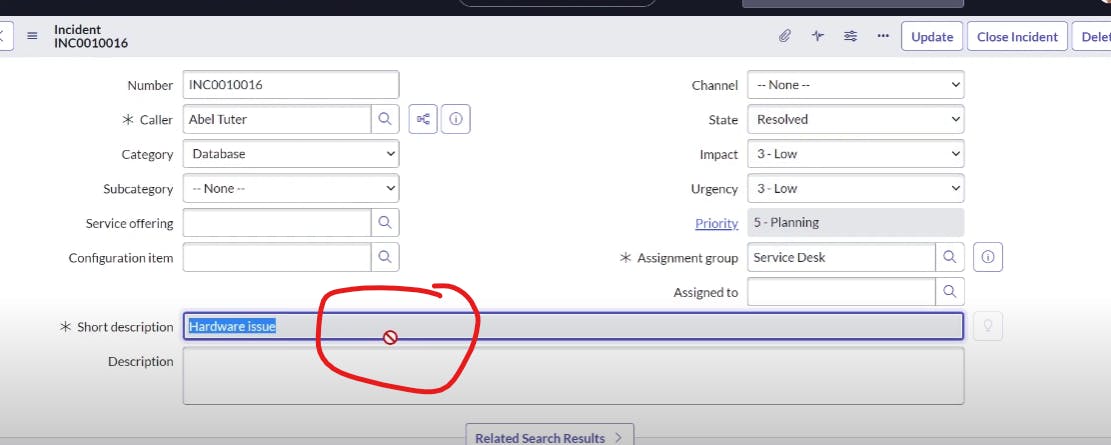
example 2:
when we keep state field as resolved we want short description read only

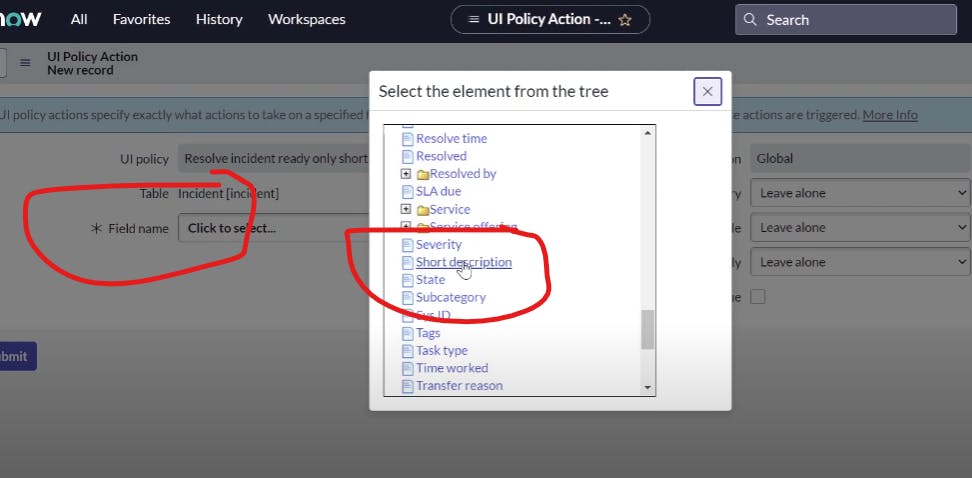
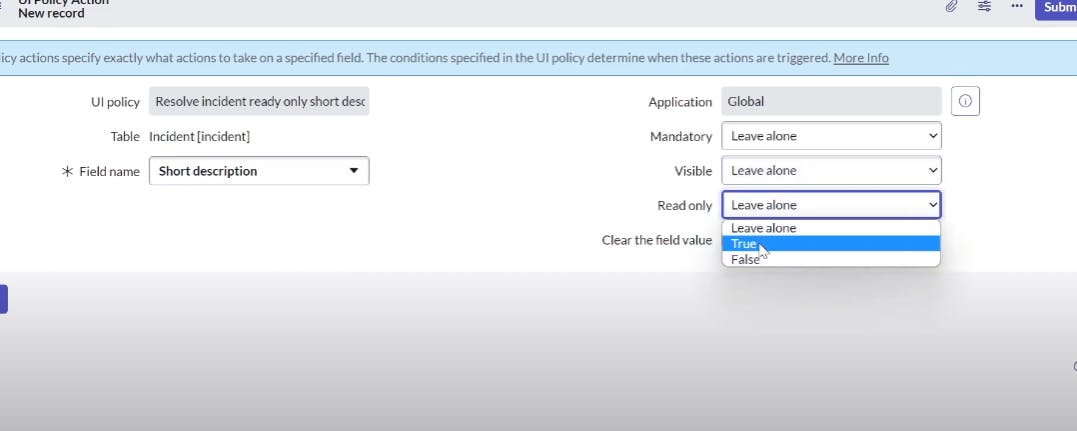
now you cannot change the short description
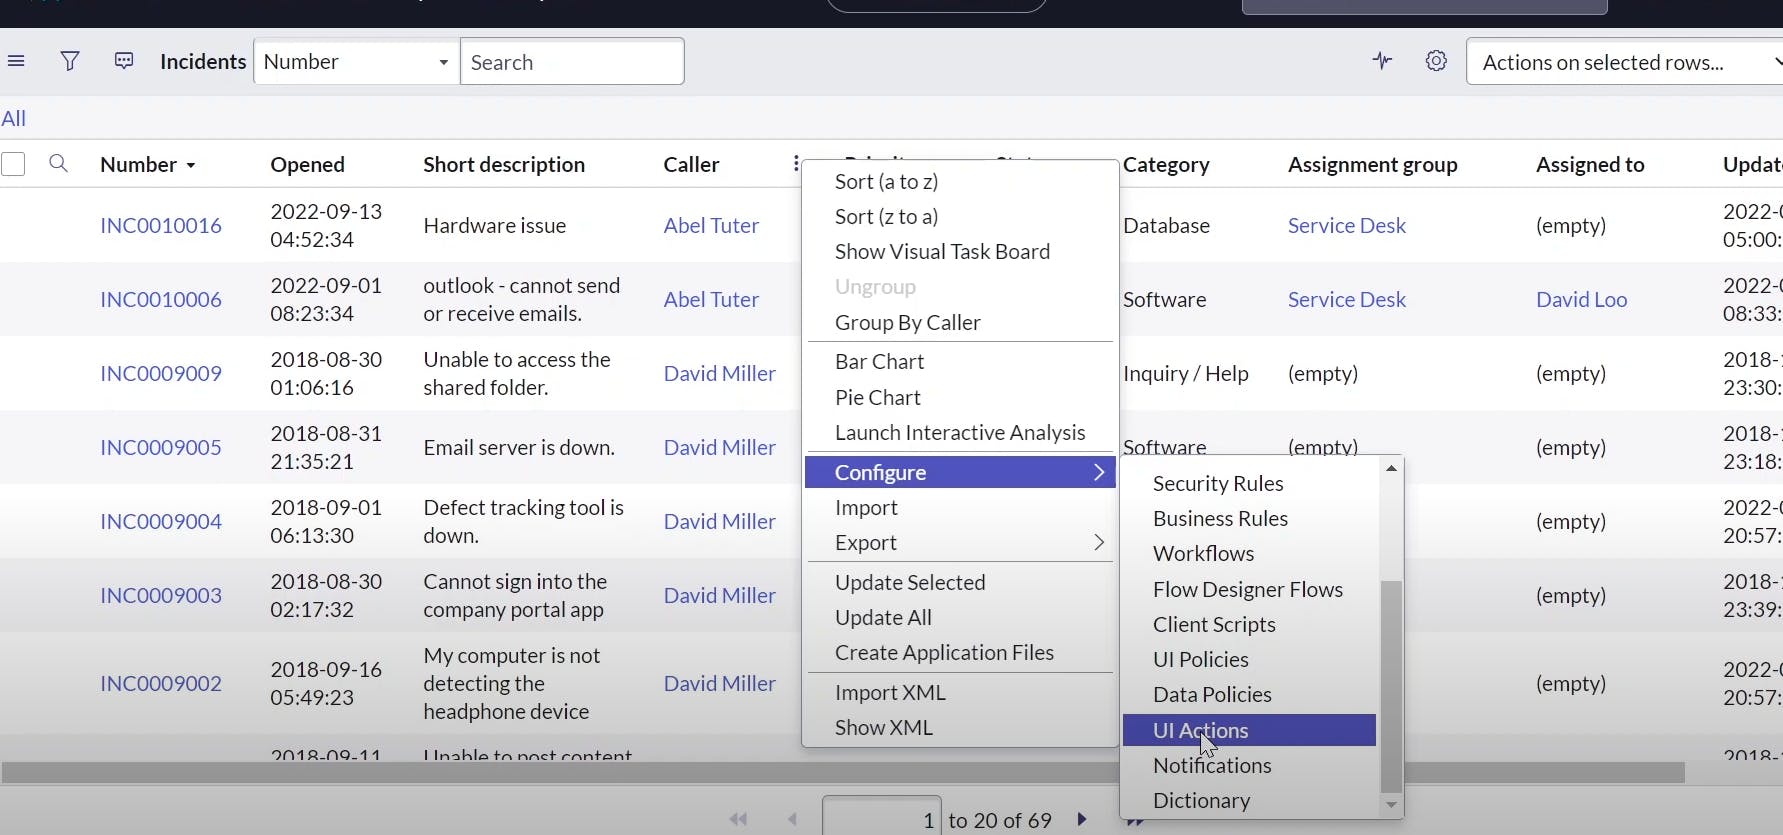
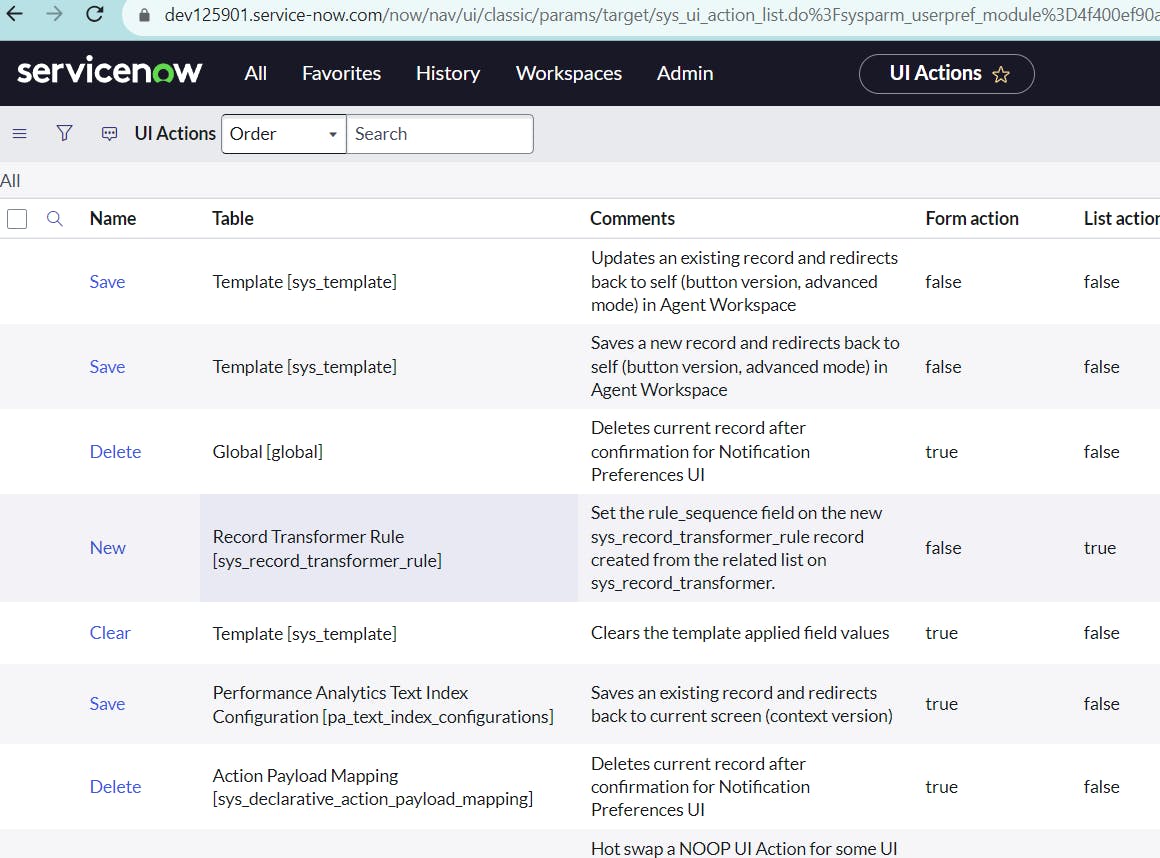
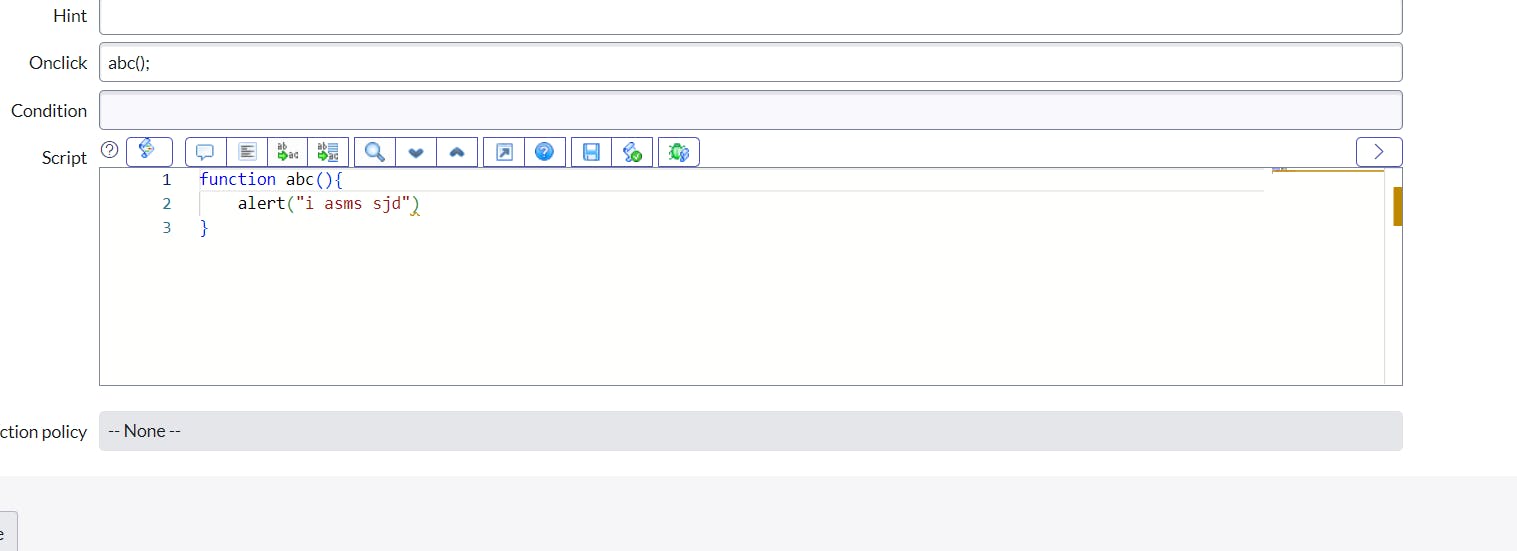
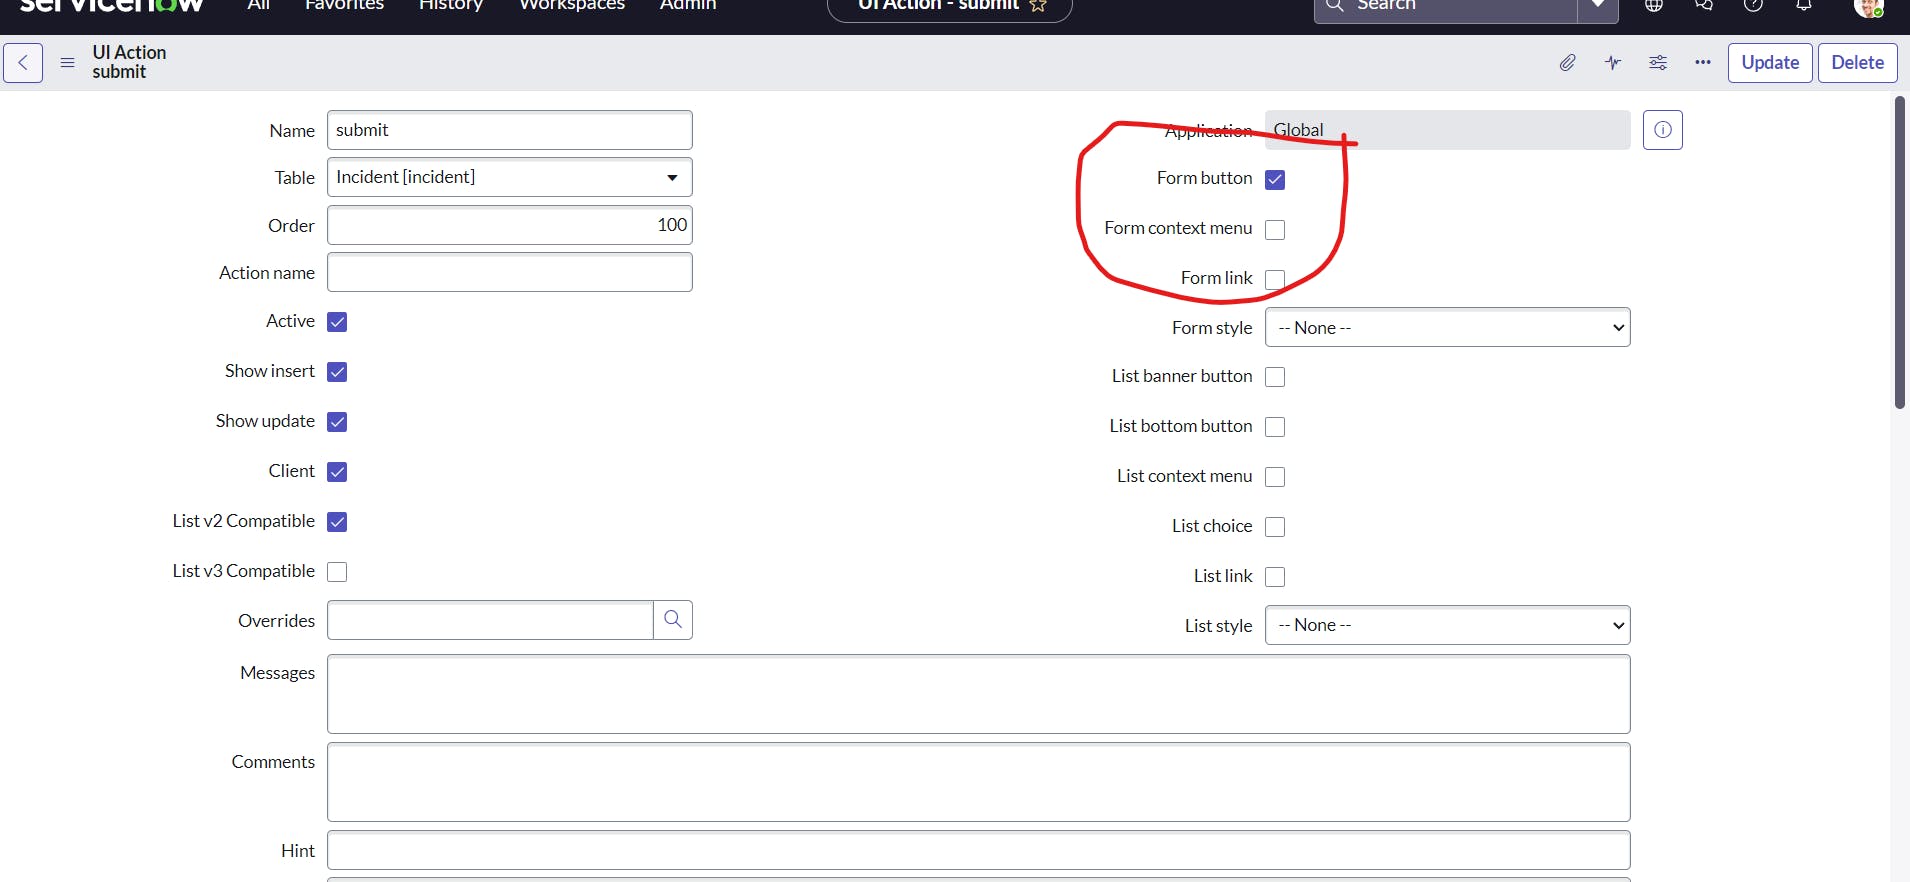
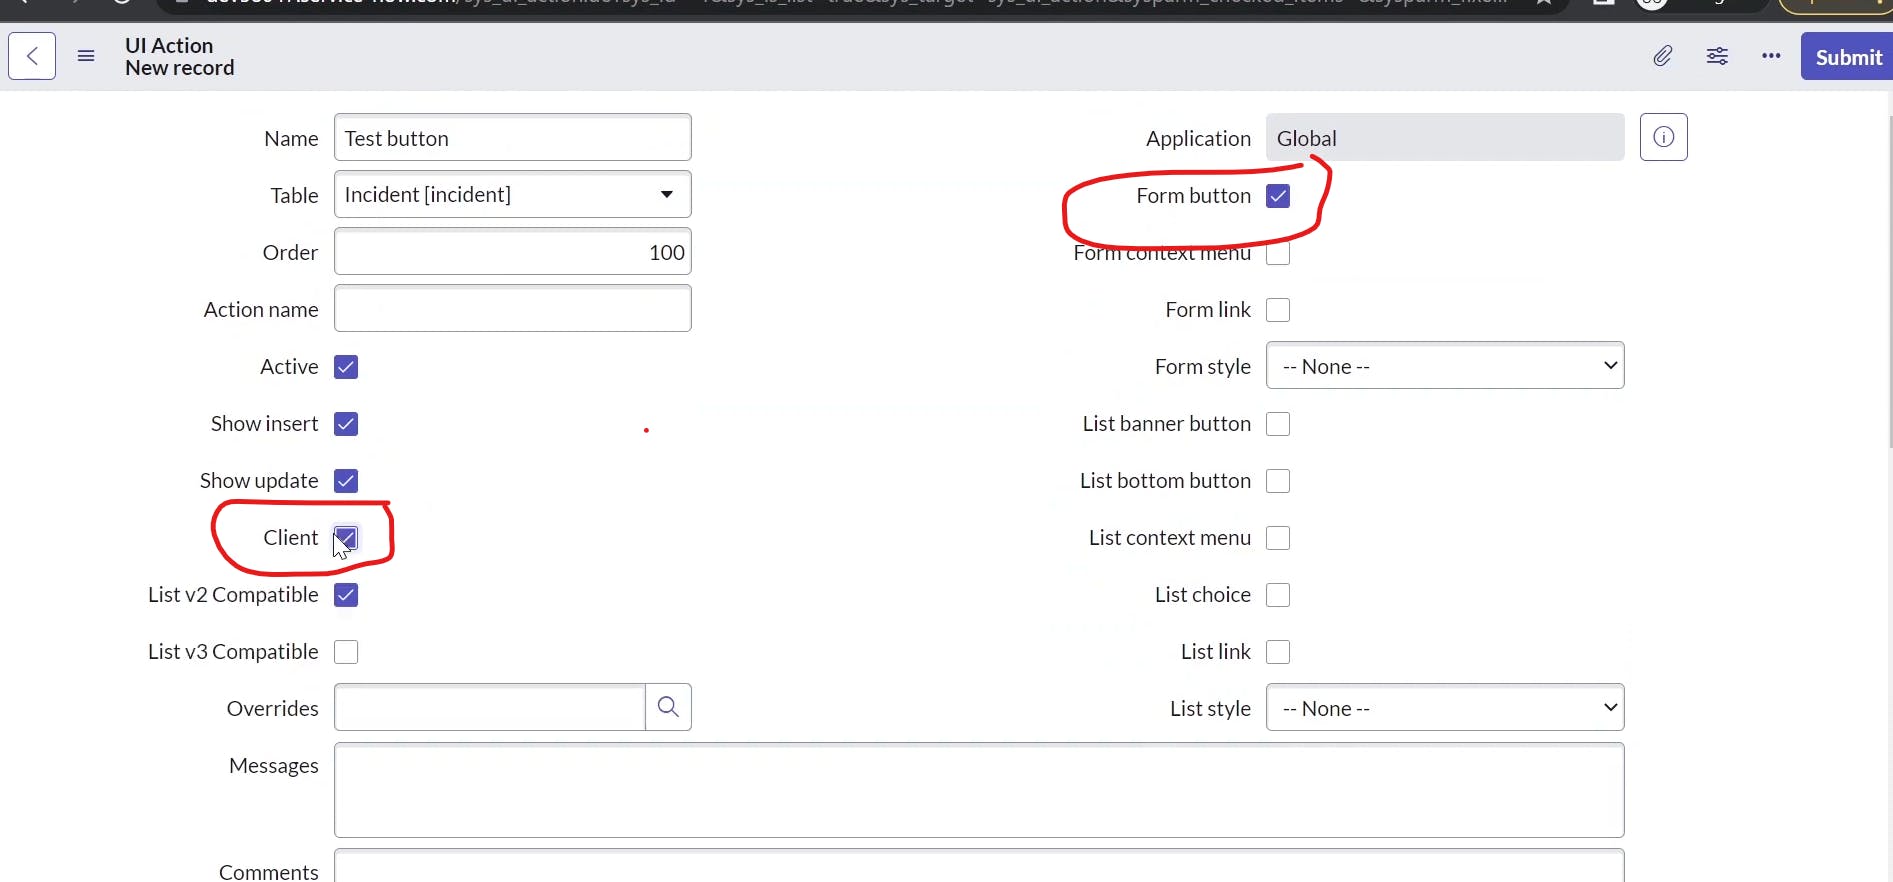
PermalinkUI Action
UI Actions in ServiceNow are elements that allow administrators to create custom buttons, links, or context menu items on forms and lists. UI Actions enable you to extend the functionality of ServiceNow by allowing users to perform specific actions with a single click. These actions can range from simple tasks like opening a URL to more complex operations involving scripts and record creation.
Here's an overview of UI Actions:
Types of UI Actions:
Form Button: Appears on a form and triggers an action when clicked.
List Context Menu: Appears in the context menu when right-clicking on a list record.
List Button: Appears above or below a list and triggers an action when clicked.s
Configuration:
To create a UI Action, administrators define its name, table association, and behavior (form, list, or both).
You can specify when the UI Action should be visible using conditions based on roles, states, or other field values.
Action Types:
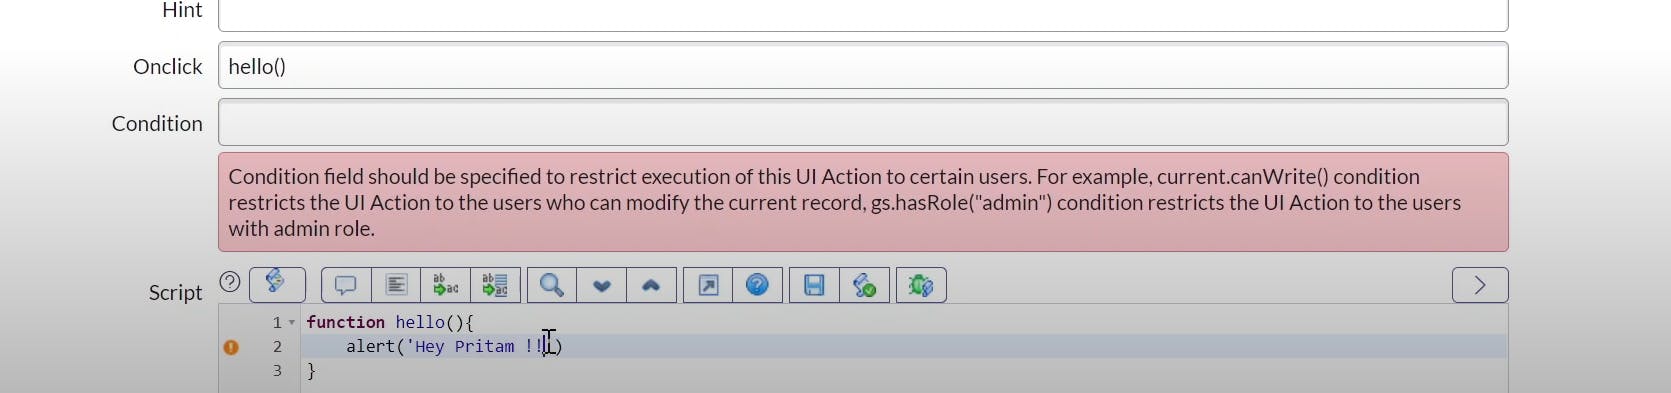
On-Click Script: Executes a JavaScript function when the UI Action is clicked. This is useful for performing complex logic, updating fields, or creating related records.
Script Action: Directly executes a predefined script without additional JavaScript.
Link: Opens a URL or a new browser window/tab when clicked.
List Control: Provides additional options on list views, similar to the context menu.
Example Use Case:
- Suppose you want to allow users to escalate an incident to a higher support level with a single click. You can create a UI Action named "Escalate" on the incident form. When clicked, it could trigger a script that updates the "Assignment Group" and "Assigned To" fields.
Order of Execution:
UI Actions are executed in the client-side browser environment, allowing for quick and responsive interactions.
They are evaluated and executed after the form or list has loaded but before data is sent to the server.
Benefits:
UI Actions provide a user-friendly way to trigger actions without navigating to different areas of the application.
They can improve efficiency by automating tasks that users frequently perform.
UI Actions can be customized based on user roles, improving security and data integrity.
Considerations:
While UI Actions are versatile, remember to keep them focused on specific tasks to avoid overwhelming users.
Proper testing and validation are essential to ensure the UI Action behaves as intended.
UI Actions are a valuable tool for enhancing the user experience and extending the capabilities of ServiceNow without requiring extensive coding efforts.
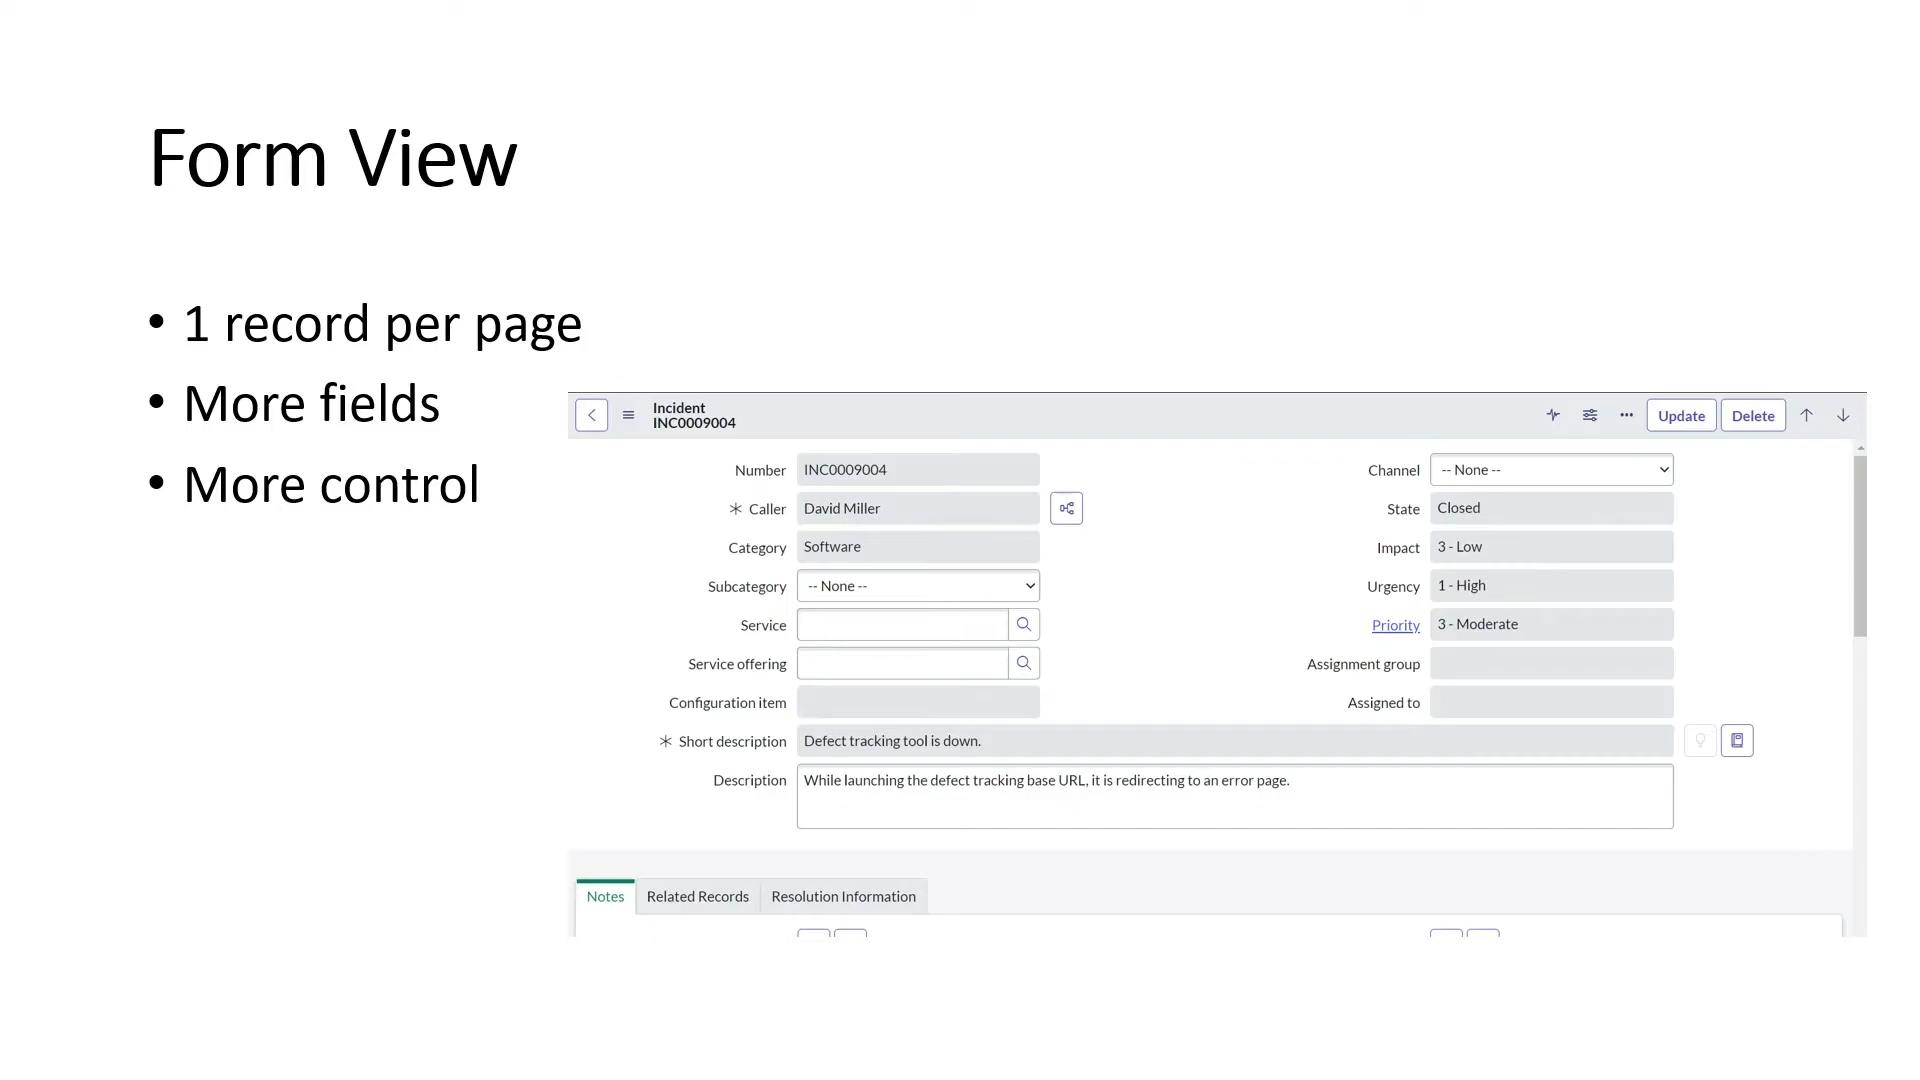
form view

list view

open it like this
these actions define what happens after we click the button
you have to select new to newly add a action and
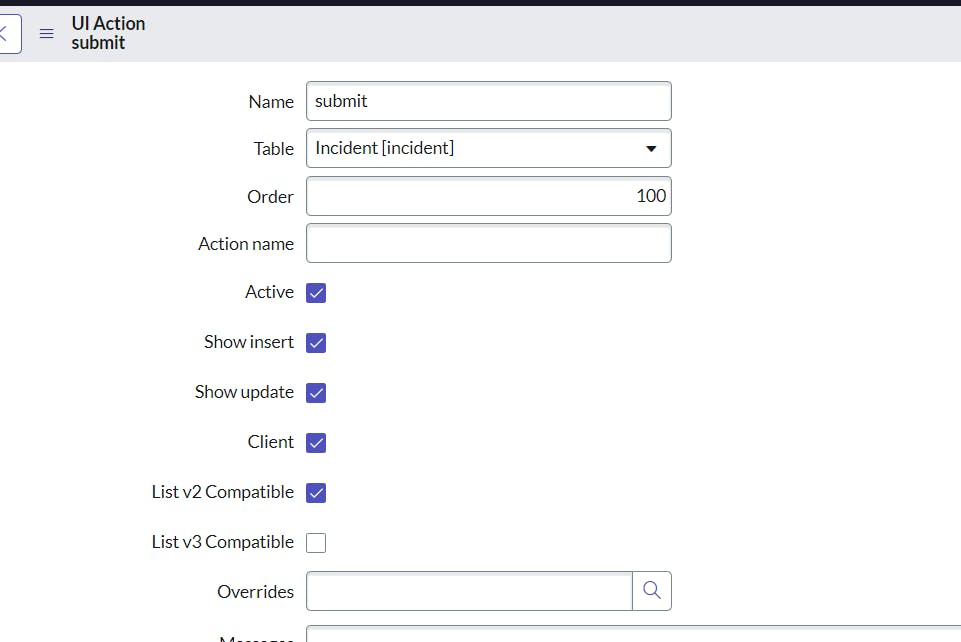
write name of button we want
and click client then onclick field opens and you can choose what client should see
then write code what should display after clicking submit
now choose where you want to display it and save and open forms you will get button
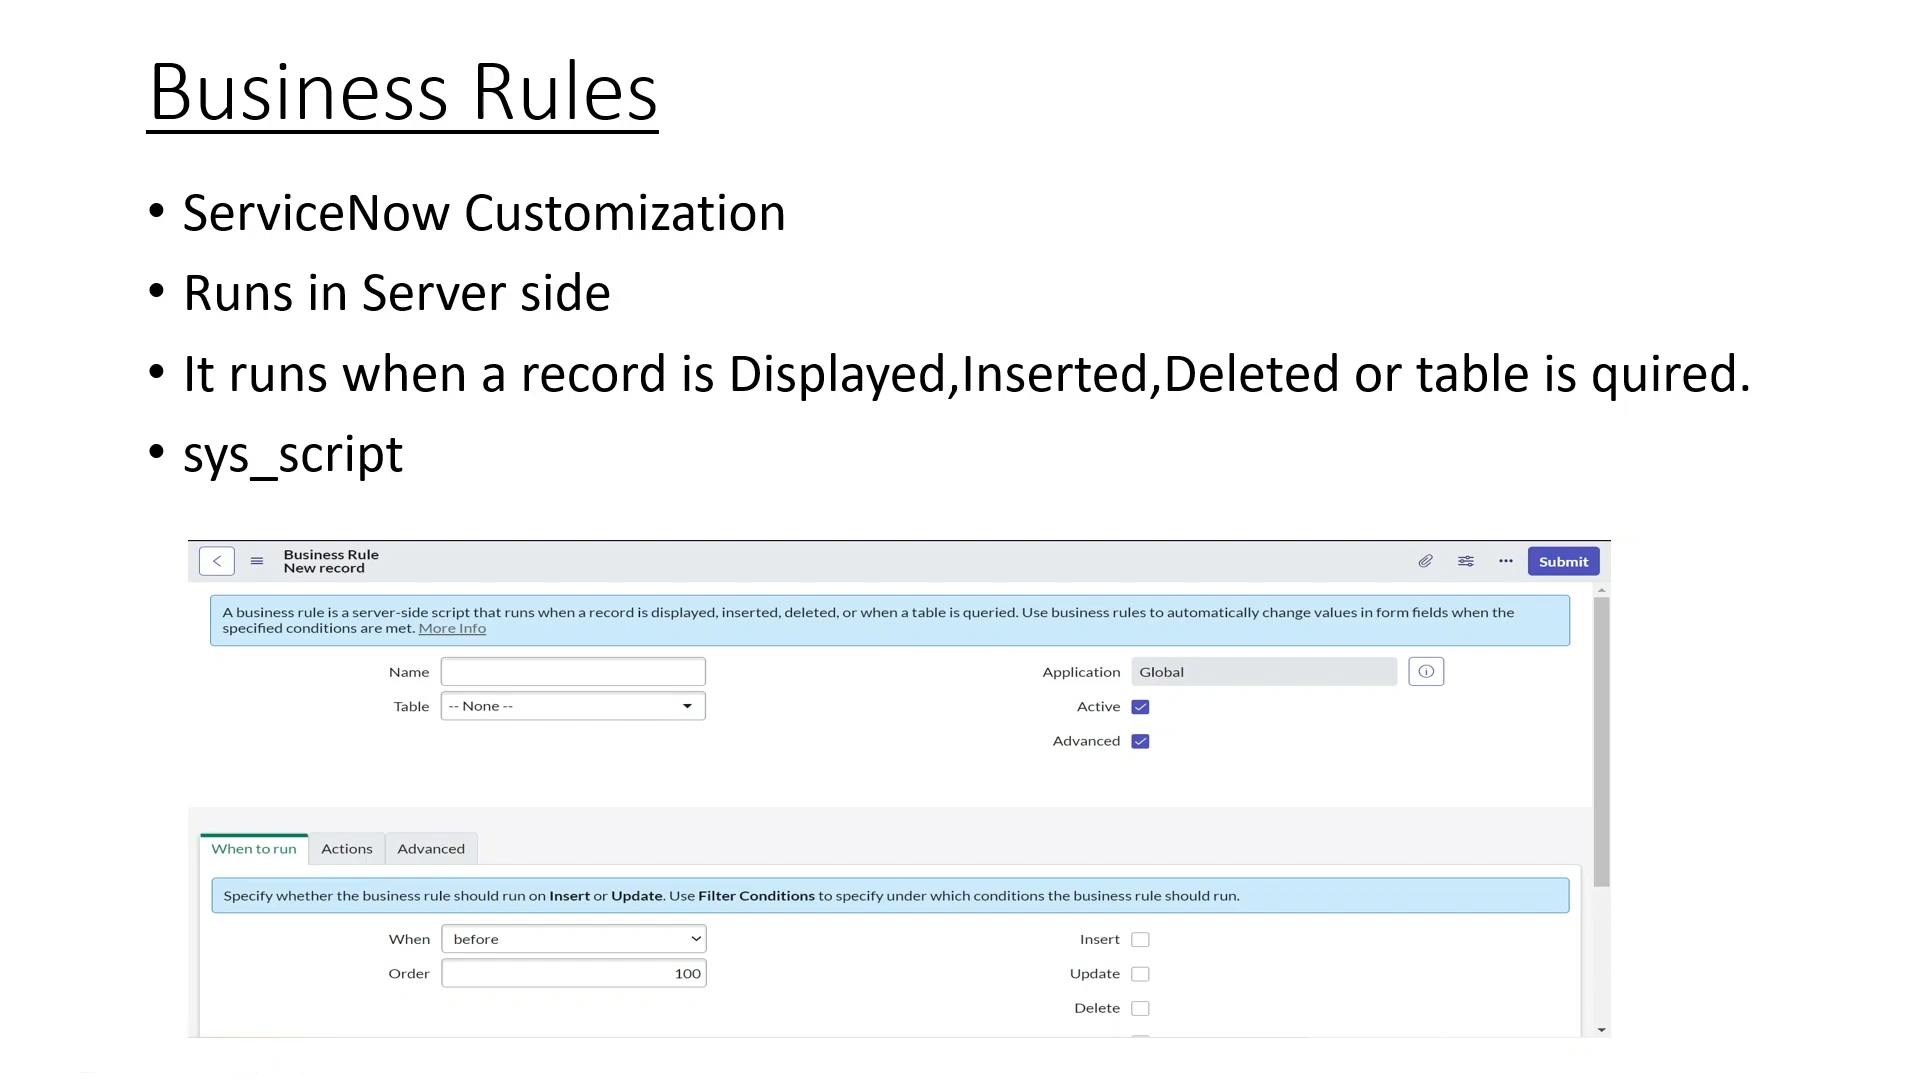
PermalinkBusiness Rules
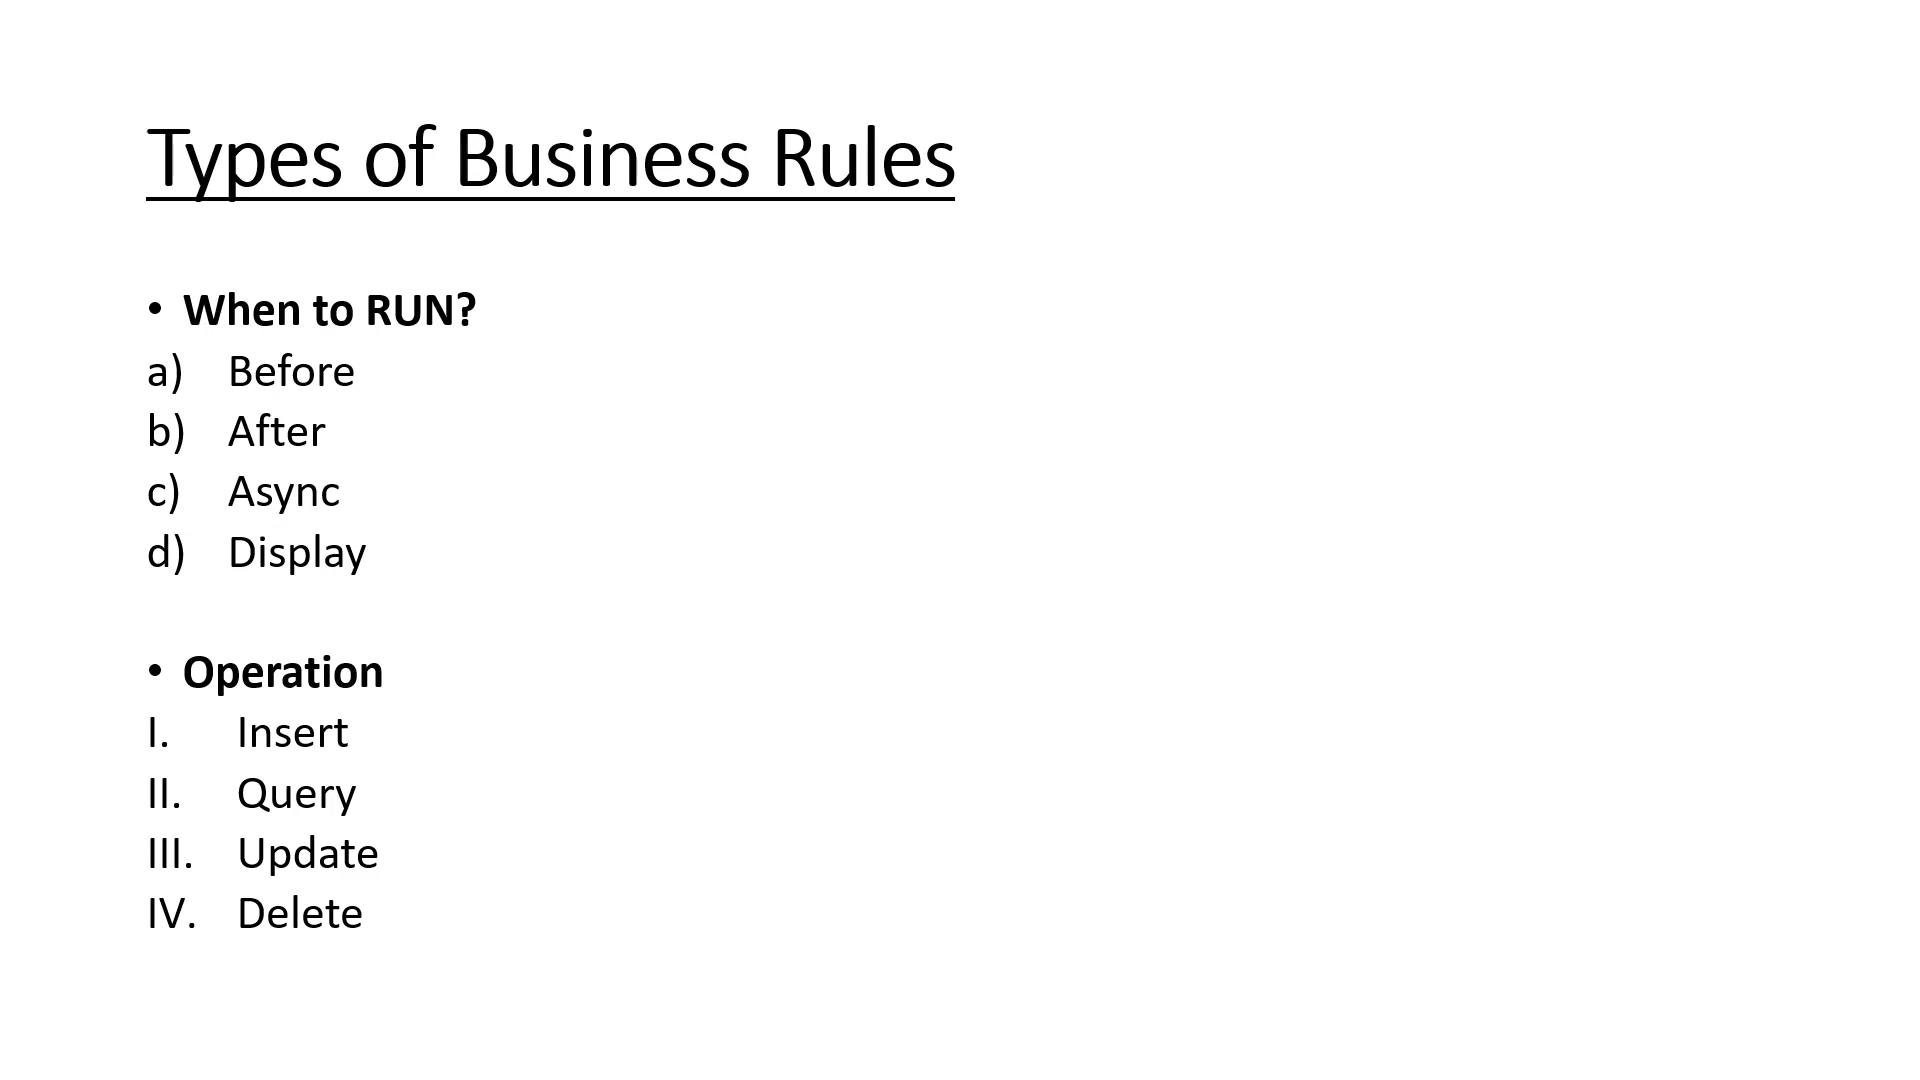
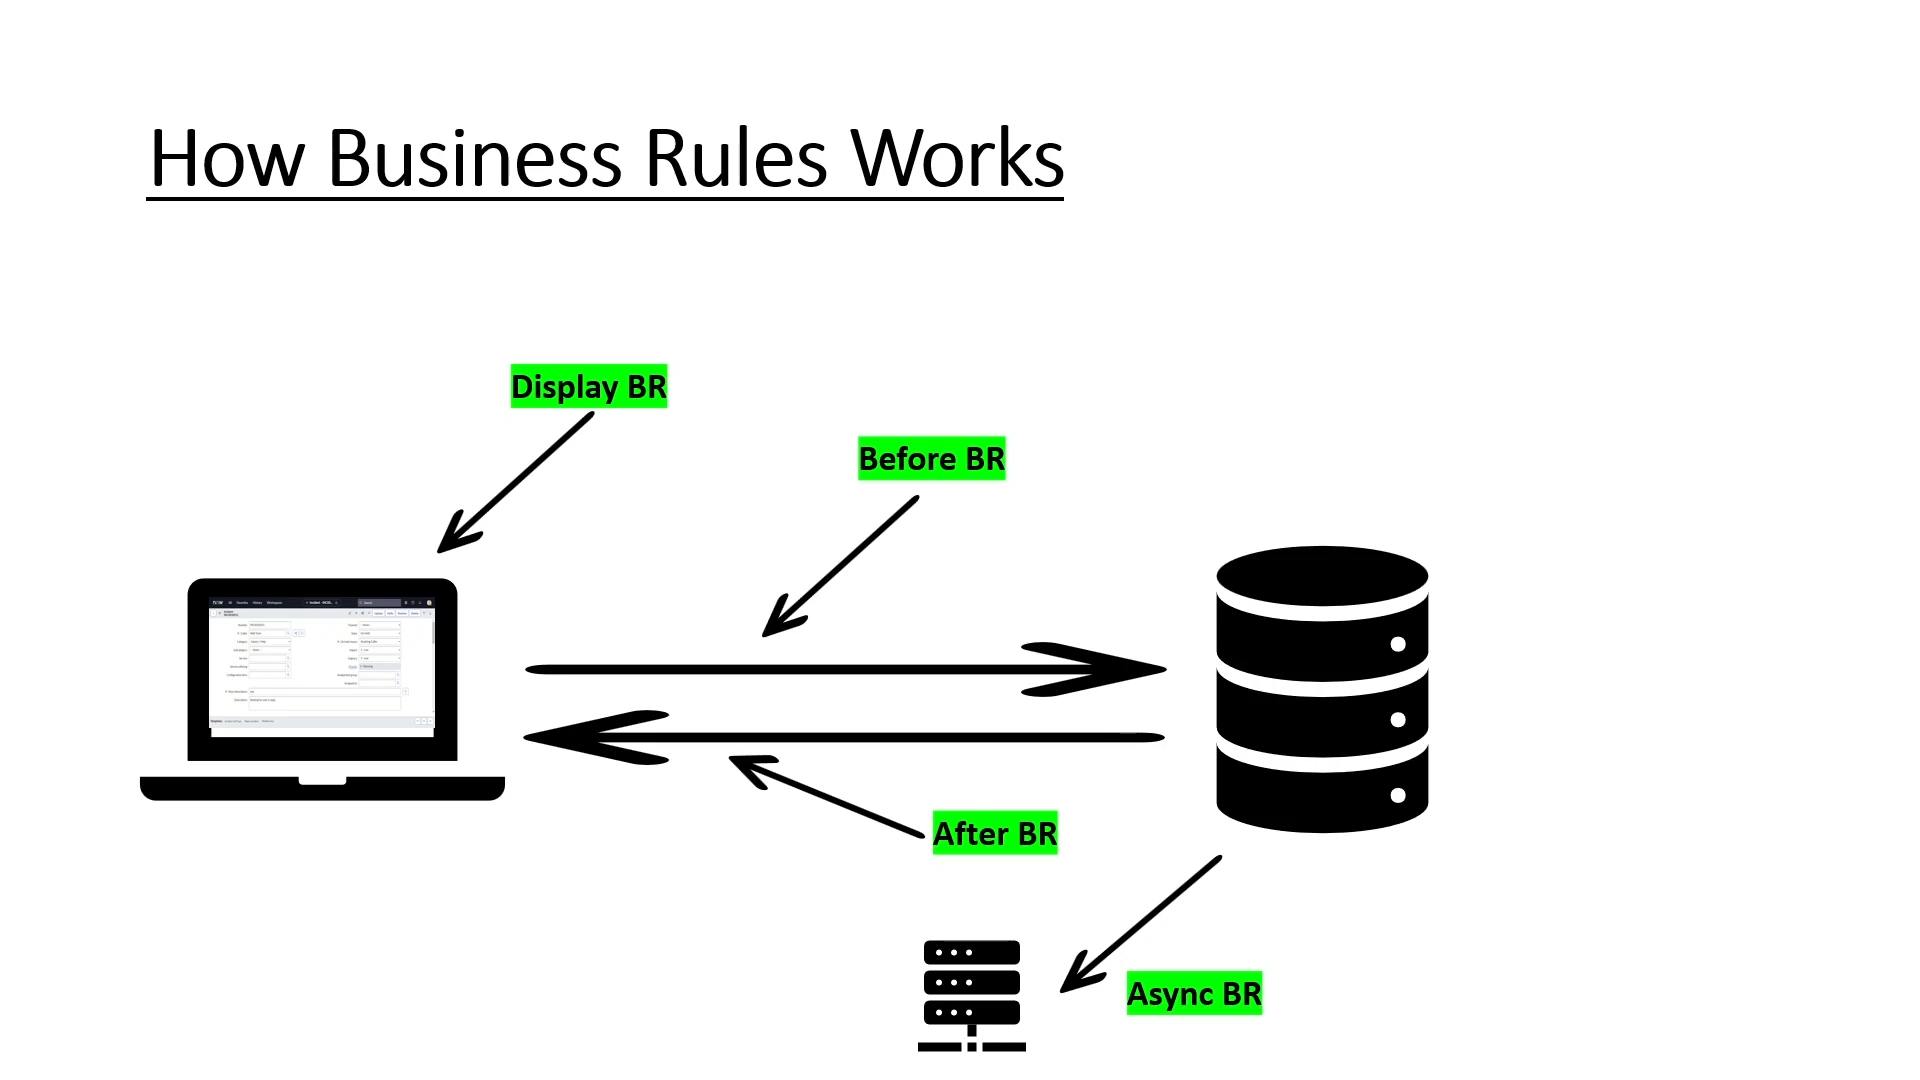
In ServiceNow, Business Rules are server-side scripts that run automatically when specific conditions are met, typically during record insert, update, or delete operations. Business Rules are used to enforce business logic, automate tasks, and maintain data integrity across the platform. They allow administrators to define custom behaviours that are triggered based on predefined conditions.
Here's how Business Rules work in ServiceNow:
Conditions:
Business Rules are associated with specific tables (record types) and conditions.
Conditions are defined using script logic and evaluate the values of fields on the record being processed.
Actions:
When the conditions of a Business Rule are met, the defined actions are executed.
Actions can include field updates, notifications, script execution, or even preventing certain actions (canceling the insert or update).
Server-Side Execution:
- Business Rules are executed on the server-side, which means they have direct access to the database and can perform complex operations.
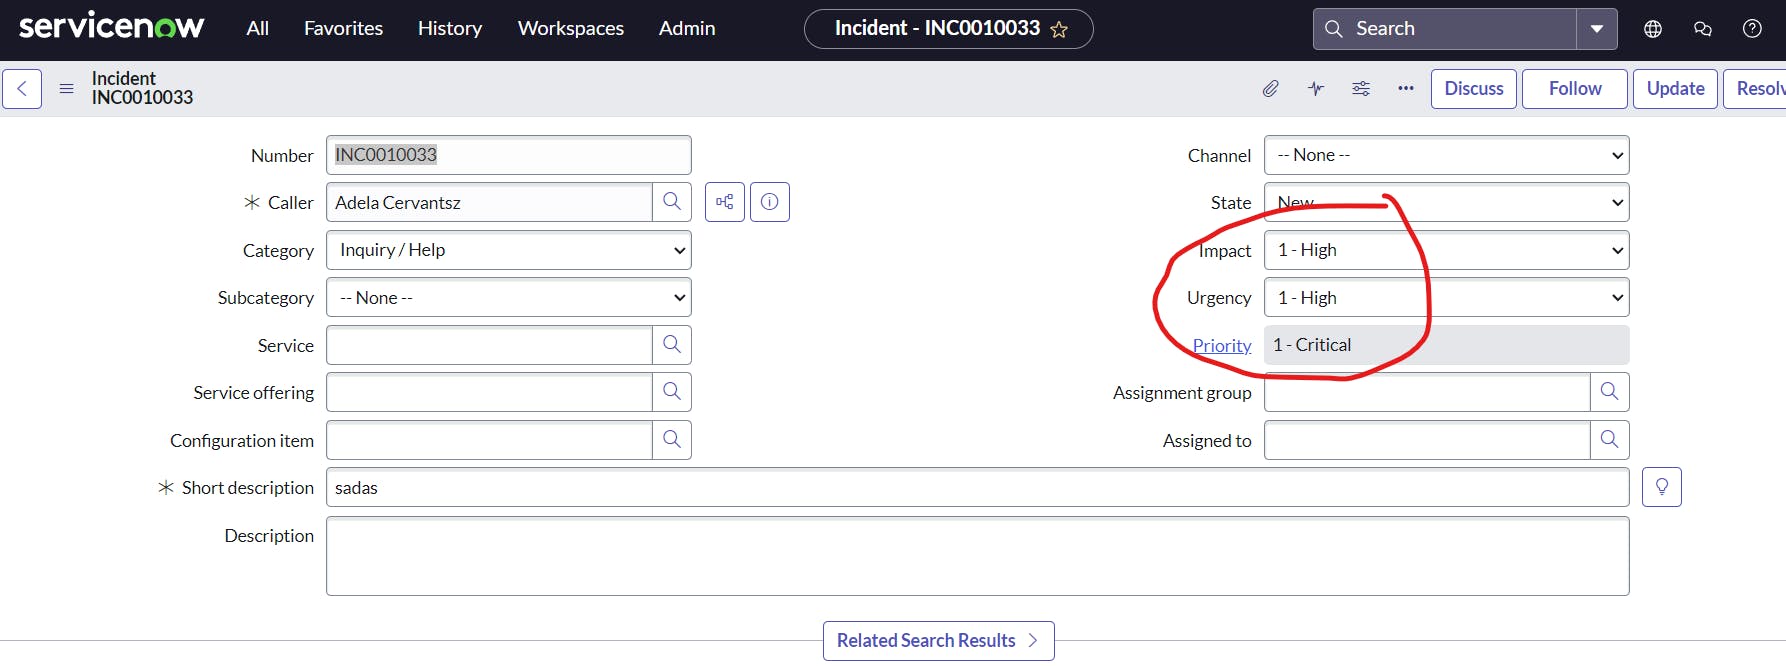
Example Use Case:
- Suppose you have an incident table, and you want to ensure that the "Priority" field is automatically set based on the value of the "Urgency" field. You can create a Business Rule that triggers whenever an incident is updated. If the "Urgency" is set to "High," the Business Rule can set the "Priority" to "1 - Critical."
Order of Execution:
Business Rules are executed after a record has been inserted, updated, or deleted, but before the changes are saved to the database.
They are processed after client scripts but before UI Policies and UI Actions.
Benefits:
Business Rules help enforce consistent business logic and data integrity across the platform.
They automate routine tasks, reducing manual efforts and potential errors.
Complex calculations and updates can be performed using scripting within Business Rules.
Considerations:
Business Rules should be used judiciously and designed to be efficient, as they run on the server-side and can impact performance.
Proper testing is crucial to ensure that Business Rules behave as expected and don't cause unintended side effects.
In summary, Business Rules in ServiceNow provide a mechanism for automating and enforcing business logic across the platform. They are essential for maintaining data accuracy, improving operational efficiency, and ensuring consistent processes.
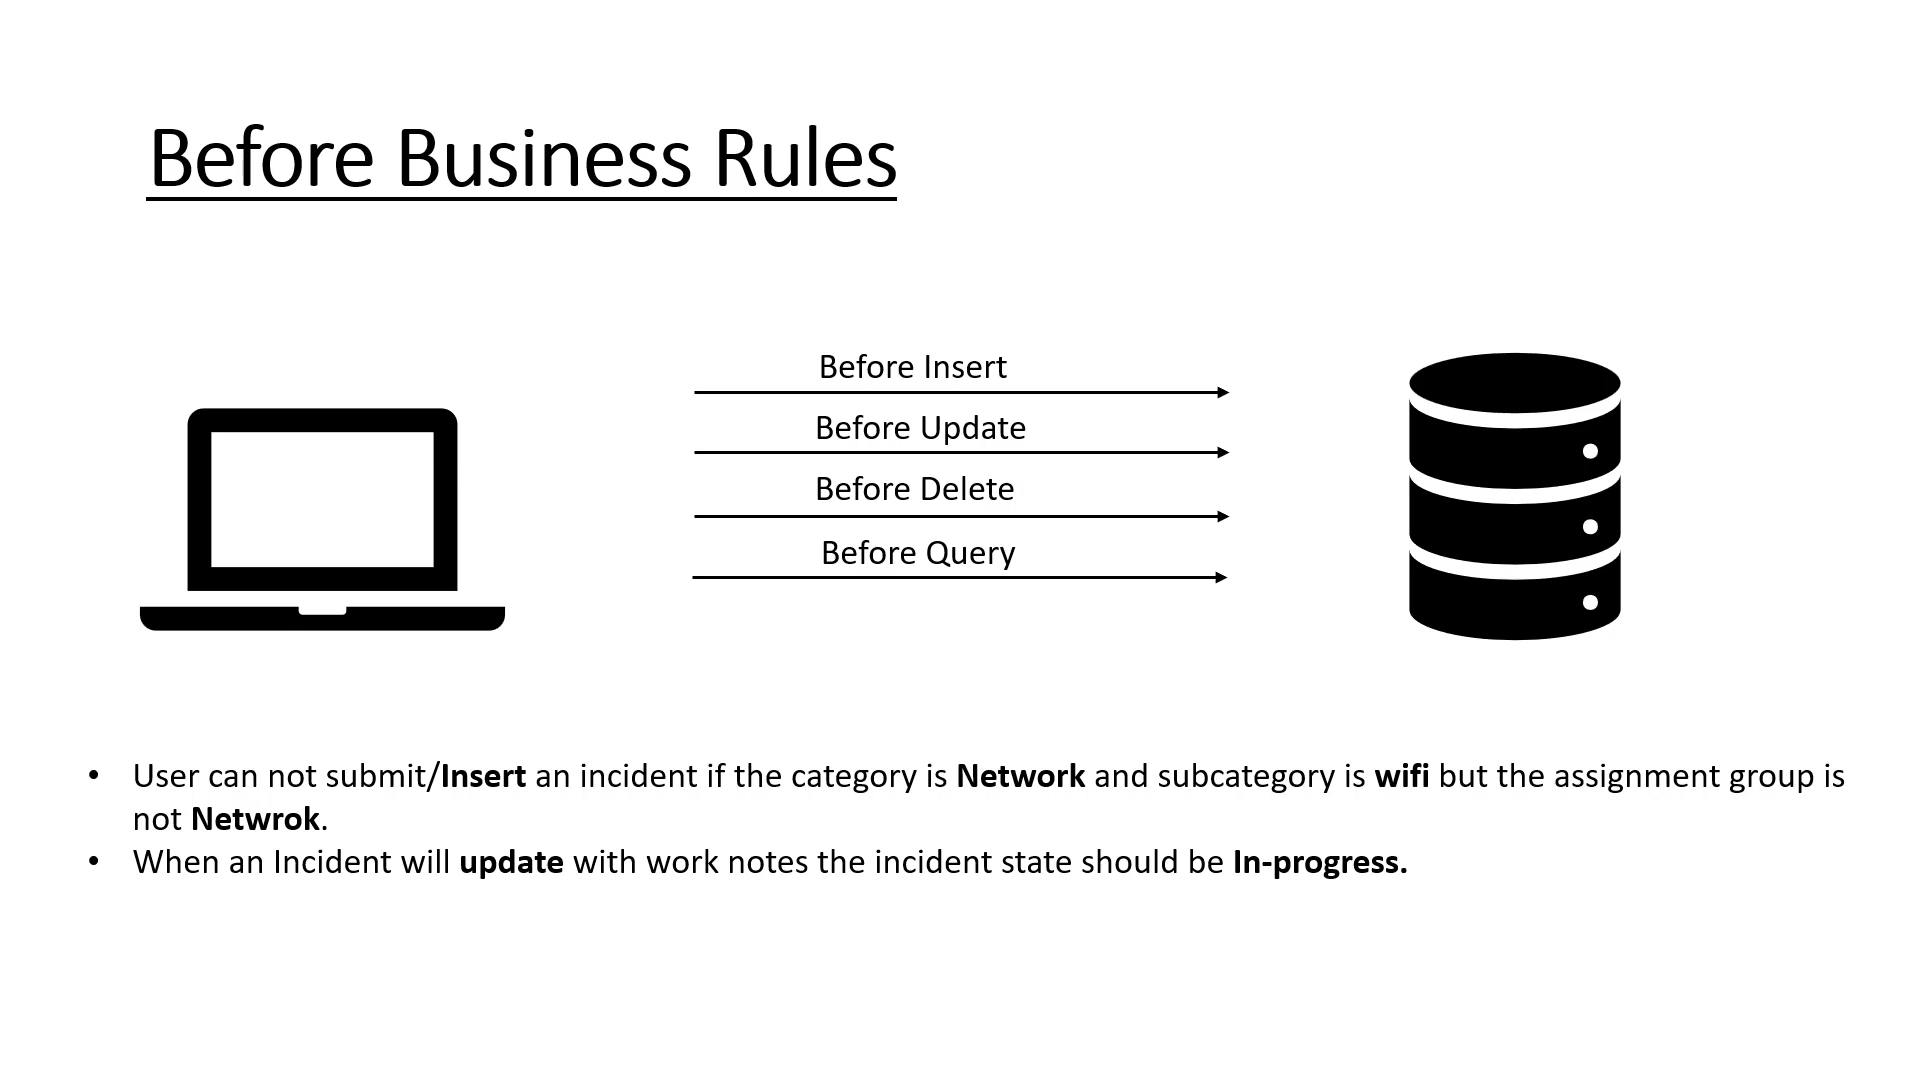
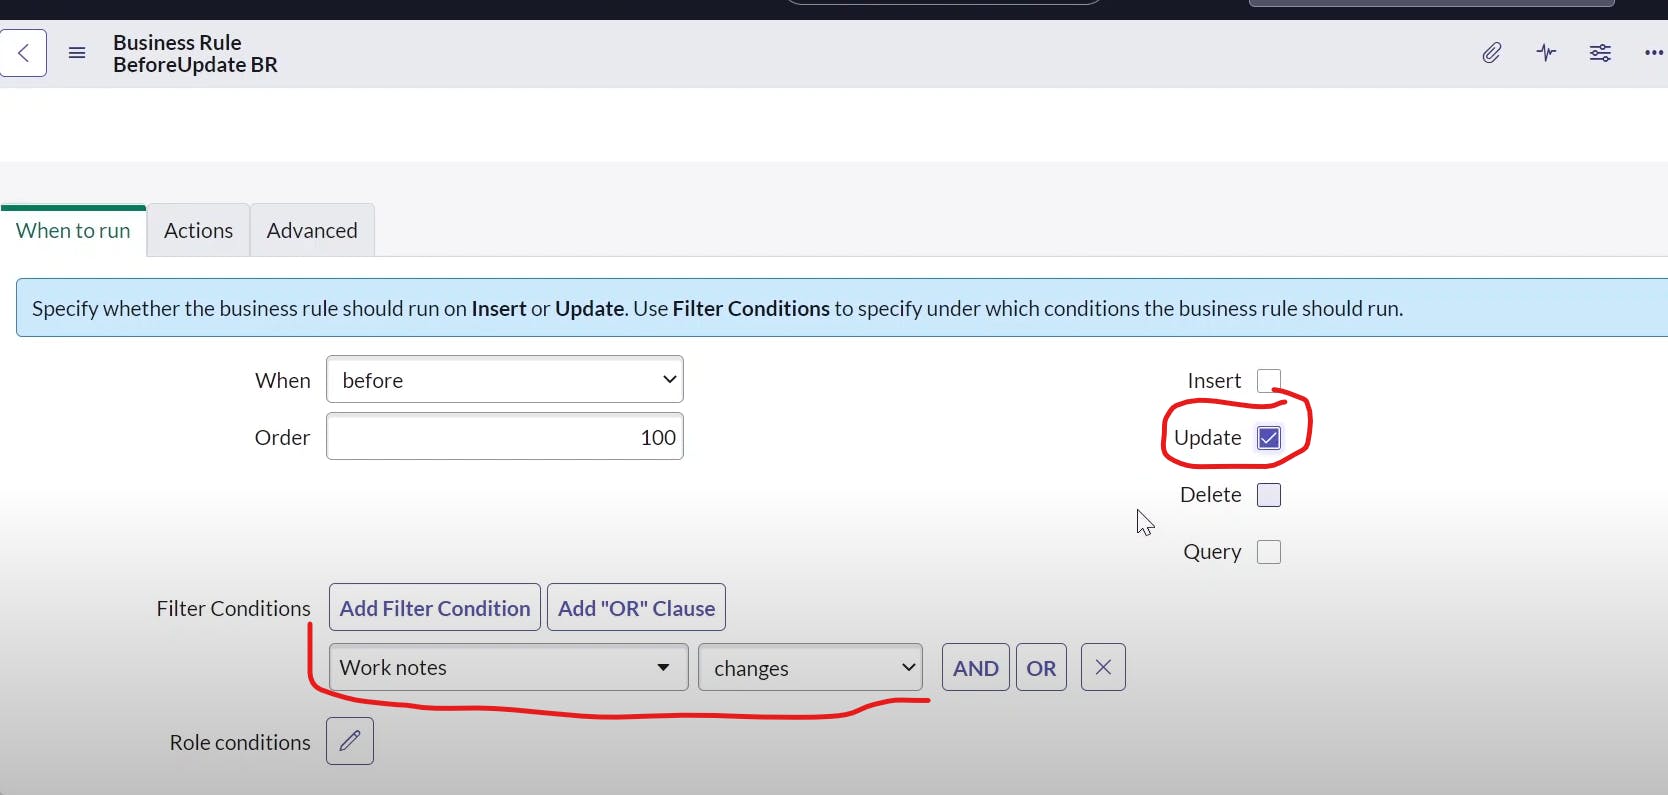
PermalinkCreate Before Insert Business rule
we have to specify conditions if the category is network, subcategory is wireless then if the assignment group is not network then we have to specify this condition
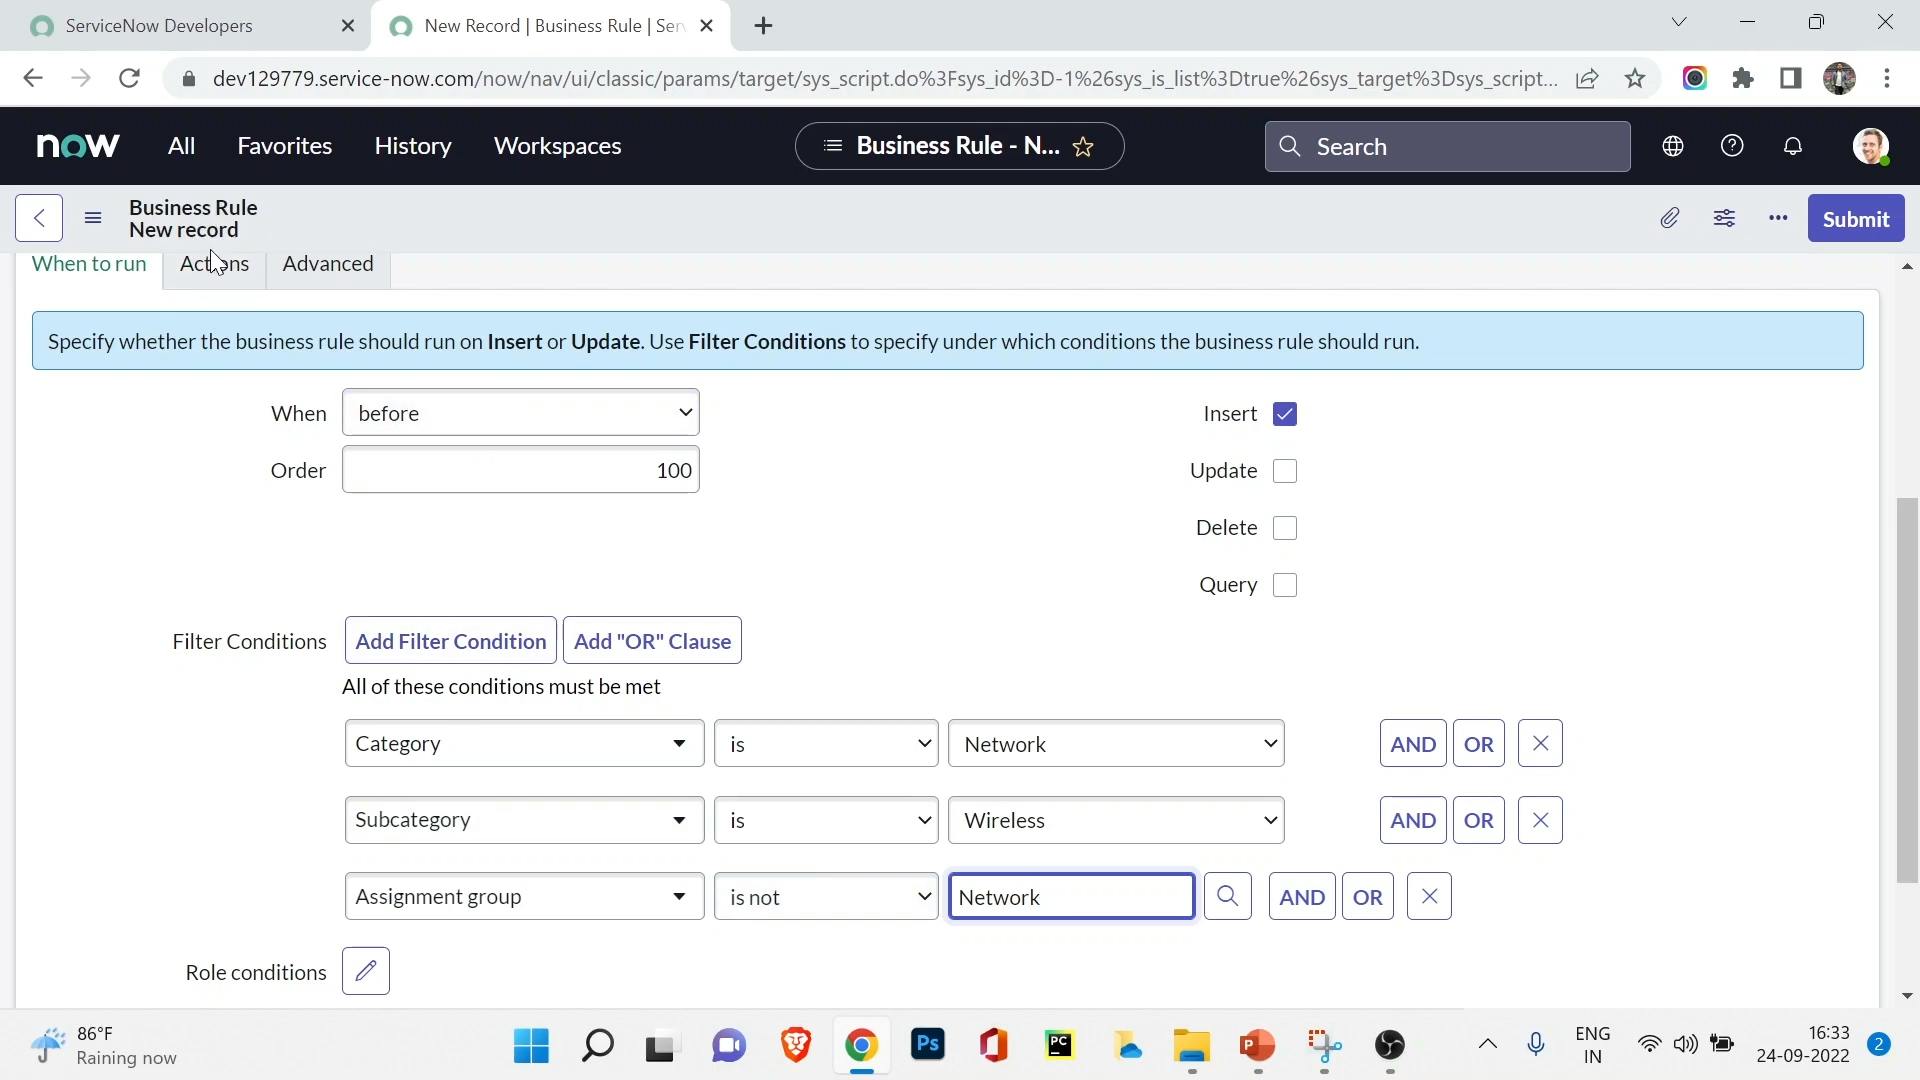
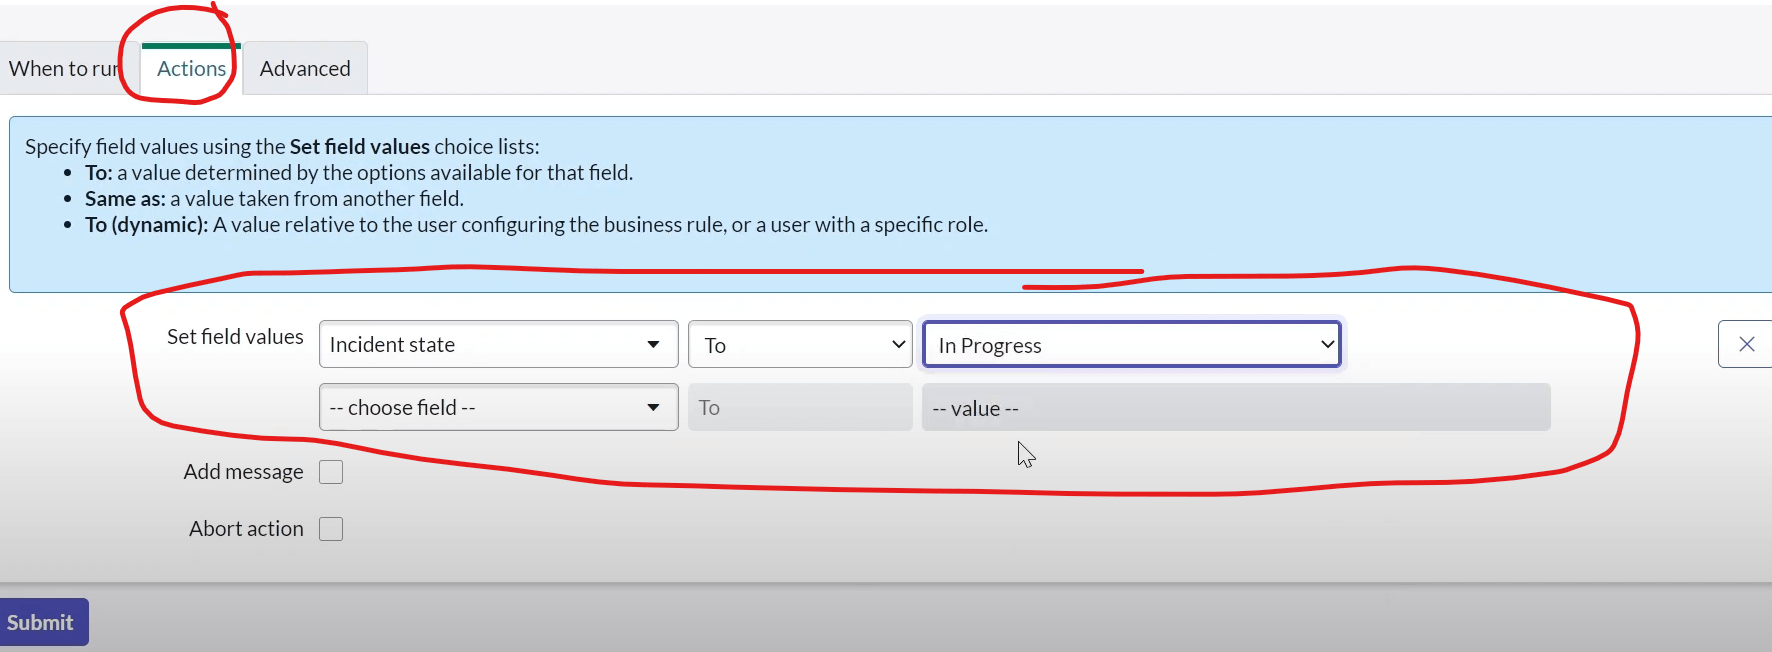
we have to then specify actions that what actions it should do after that
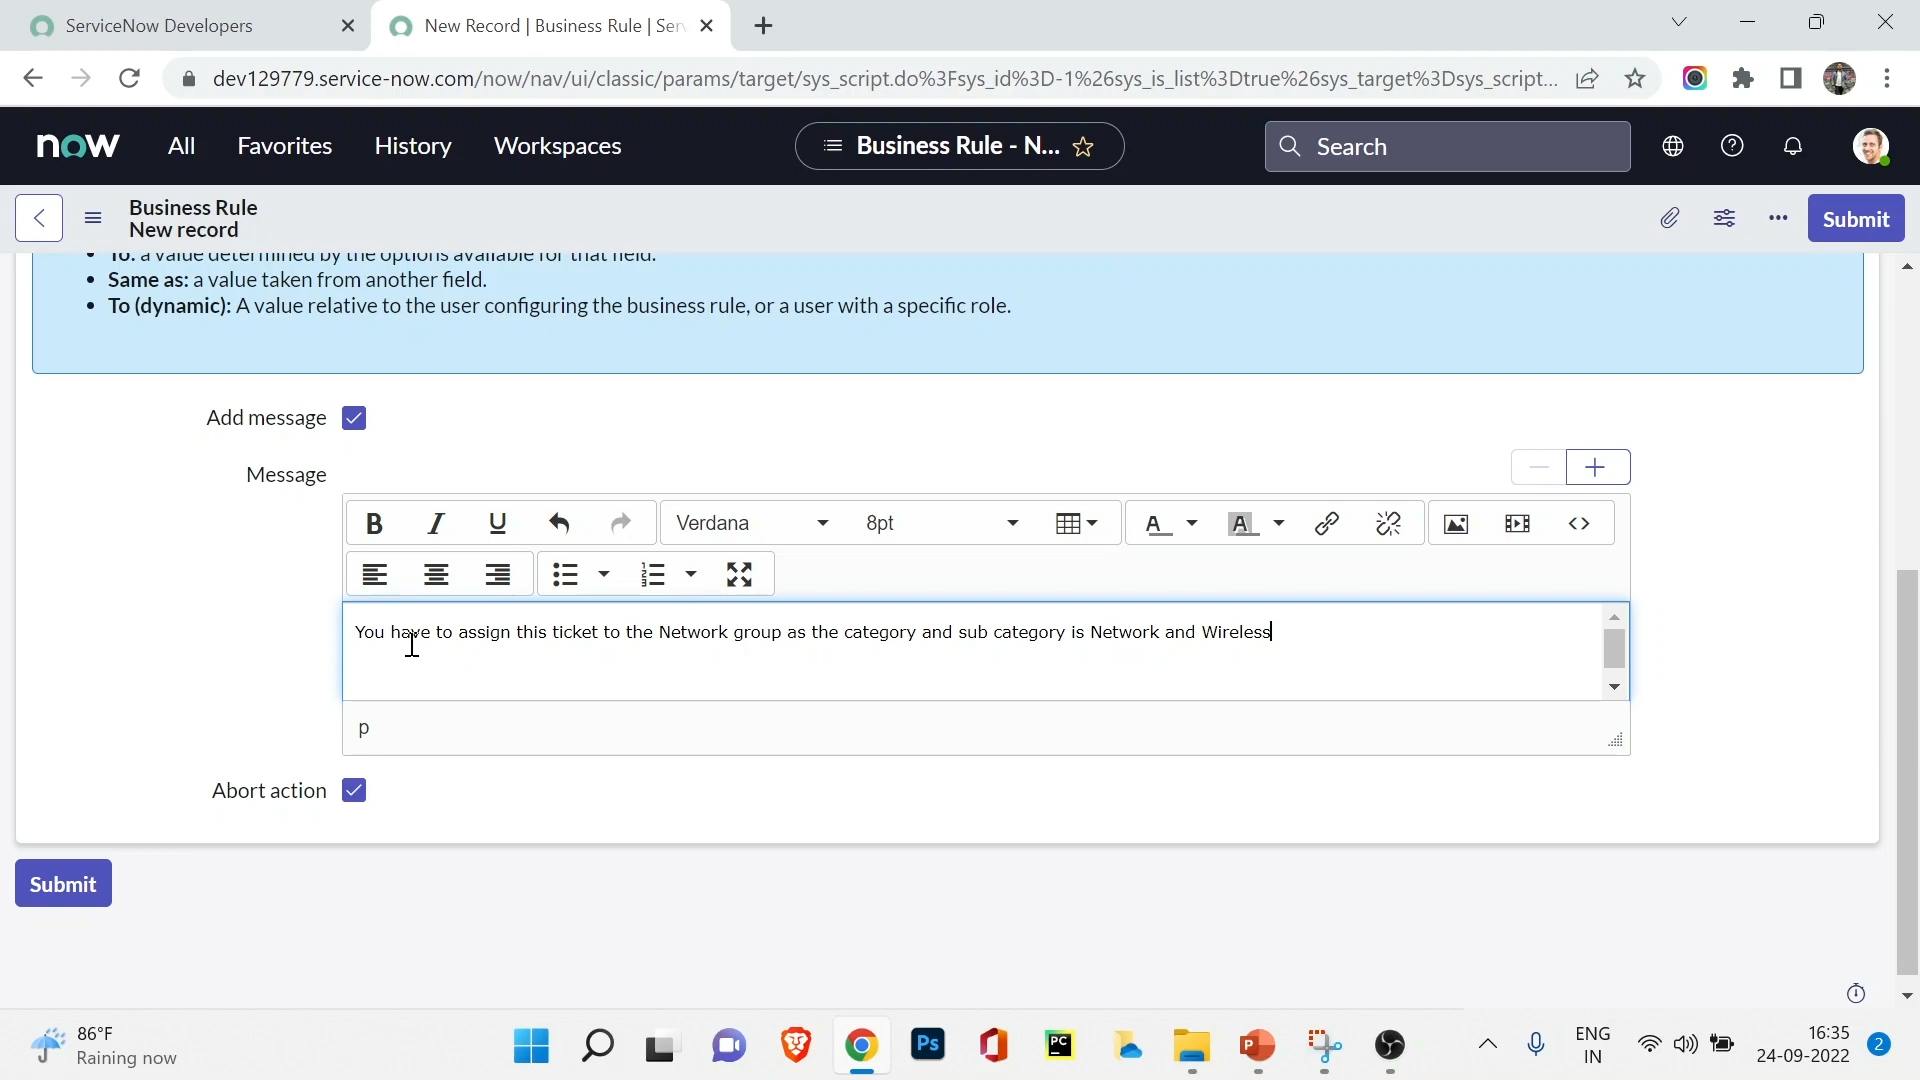
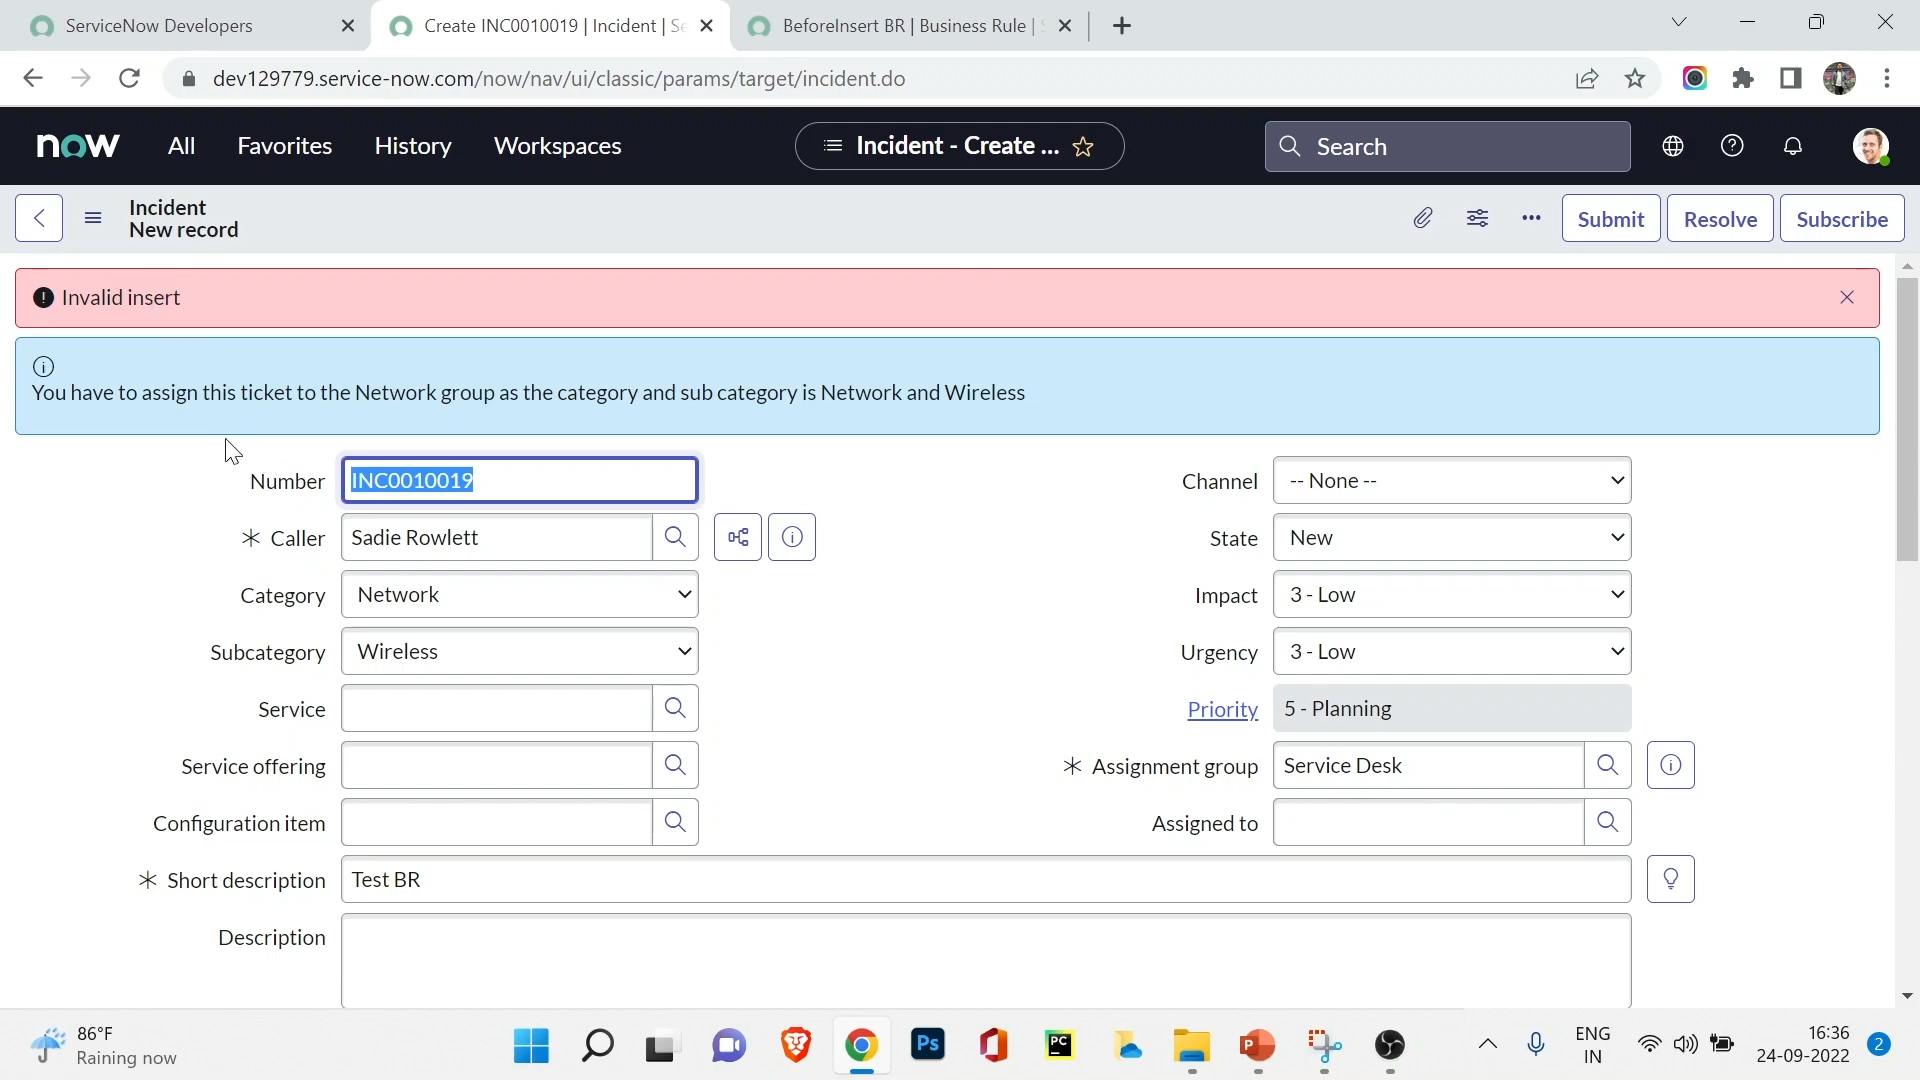
when we kept category is network, subcategory is wireless and assignment group as service desk and not network it returned a error
PermalinkCreate Before Update Business rule

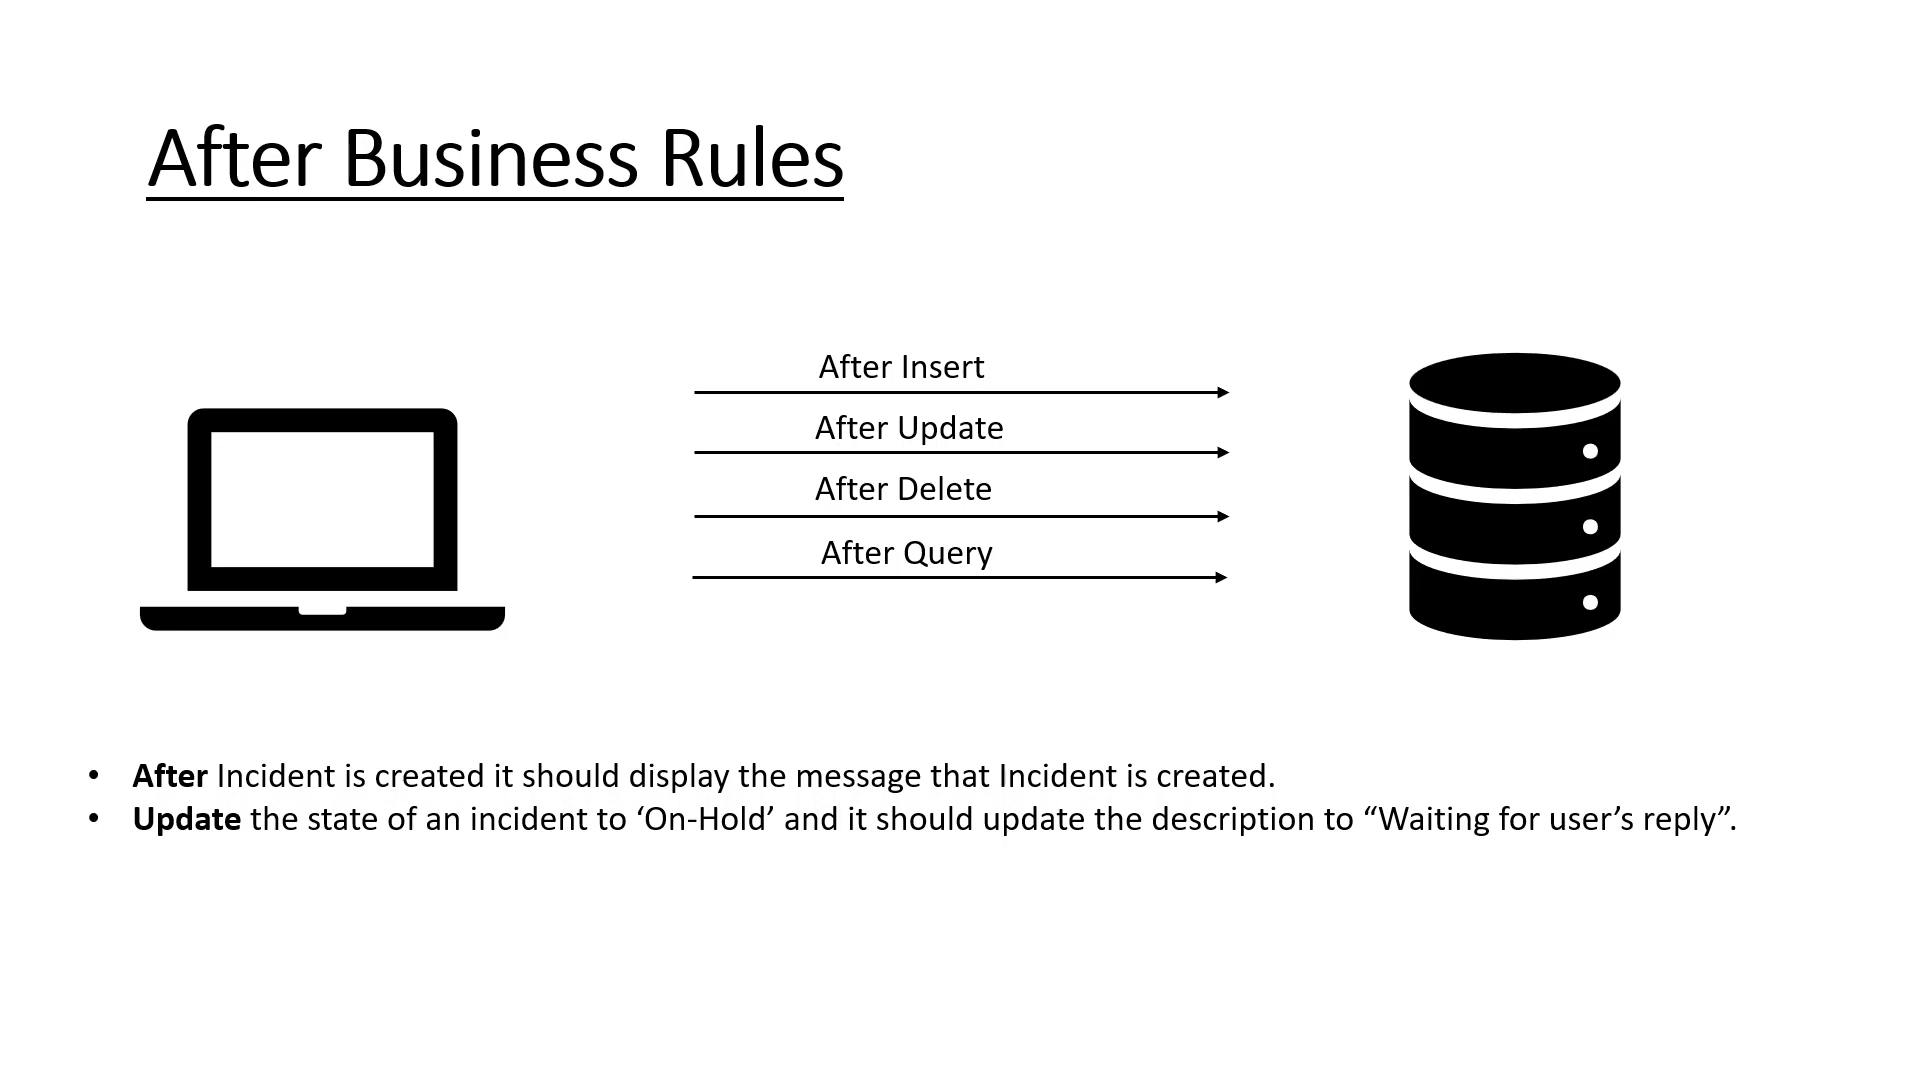
PermalinkCreate After Insert Business rule
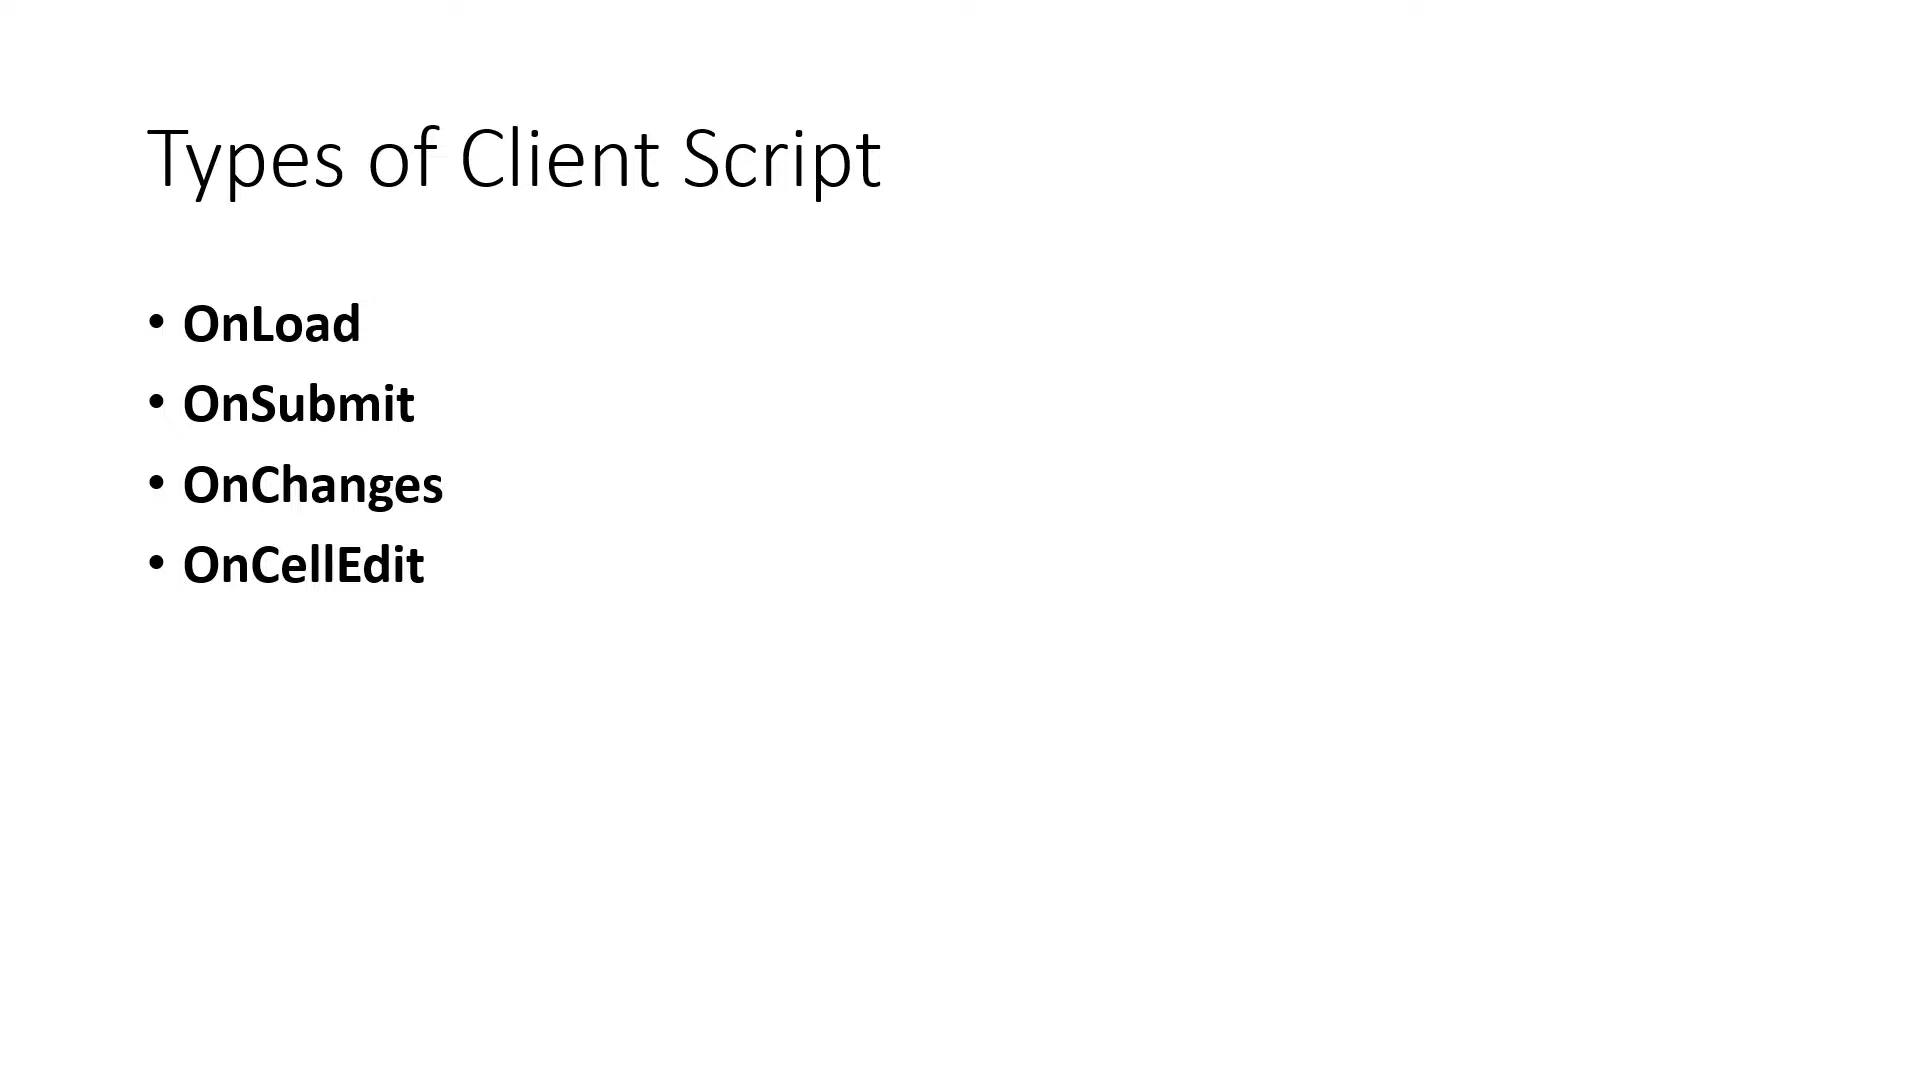
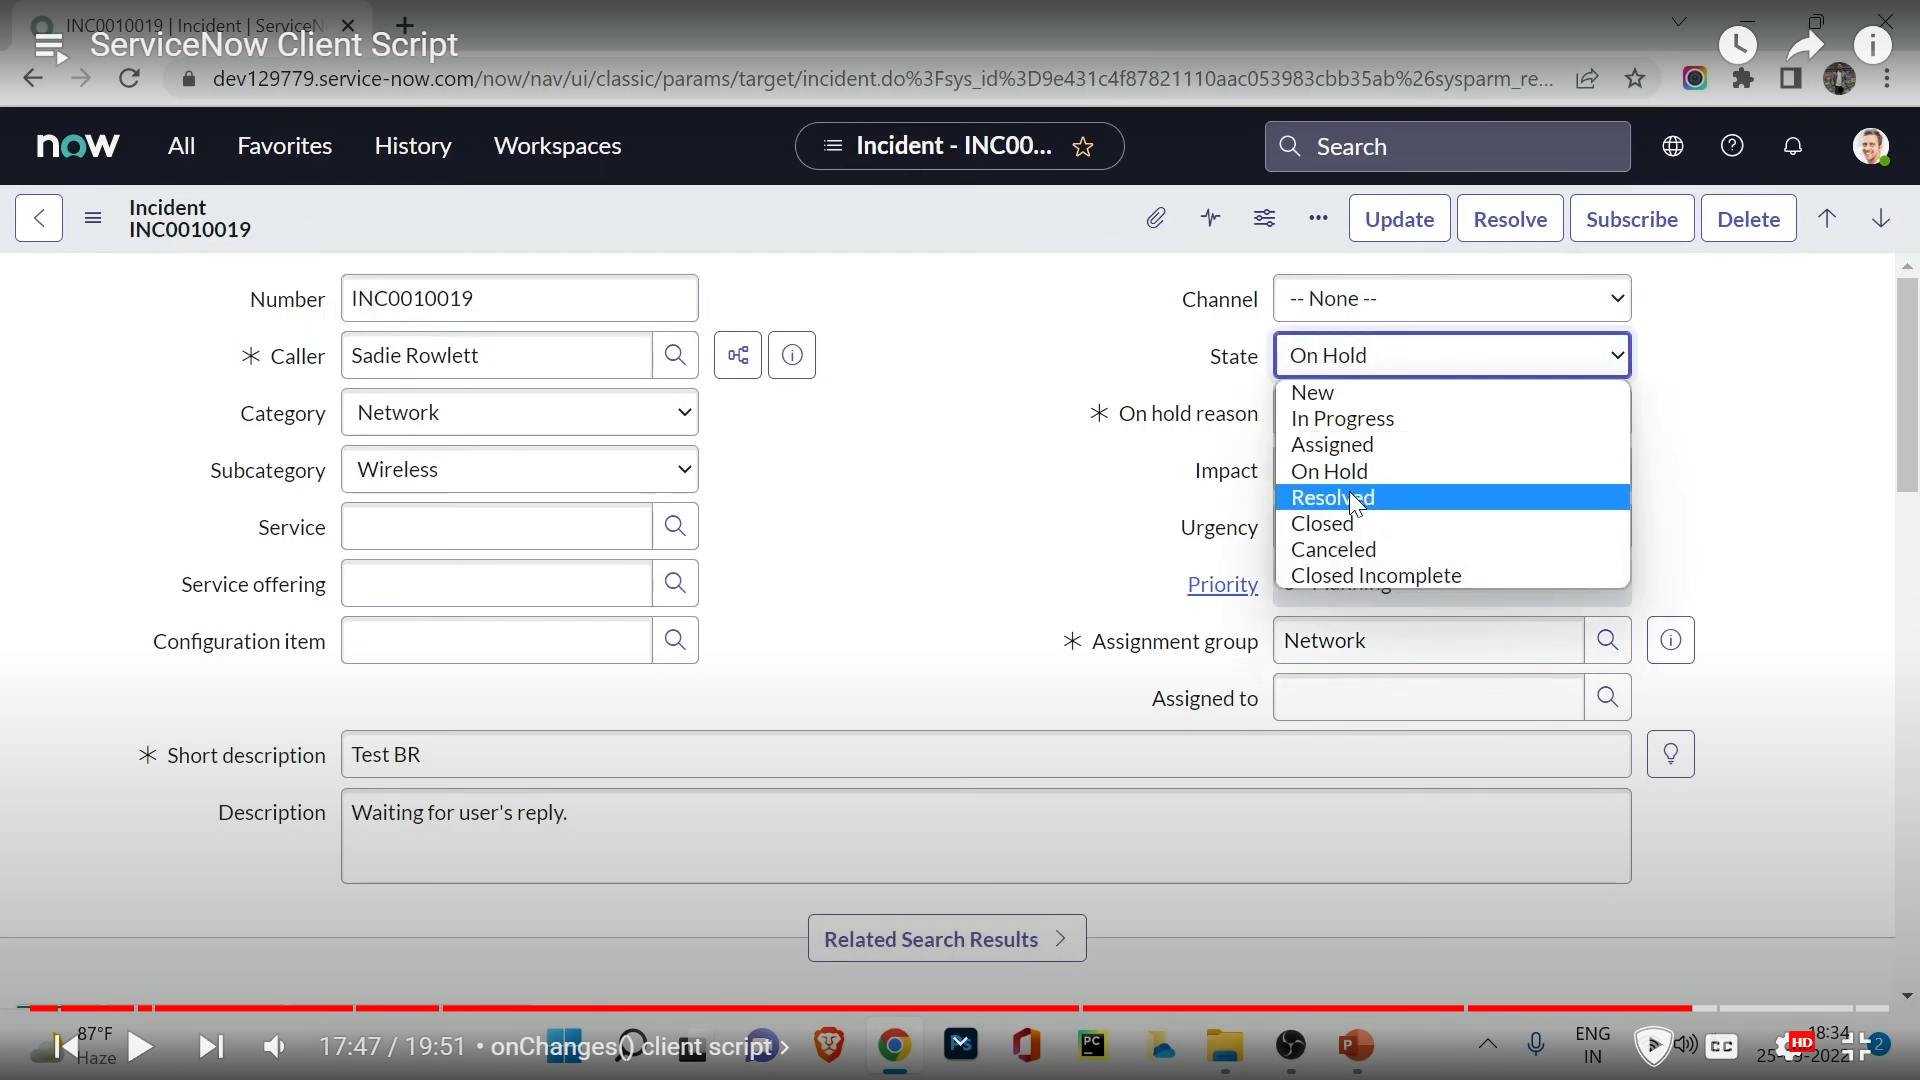
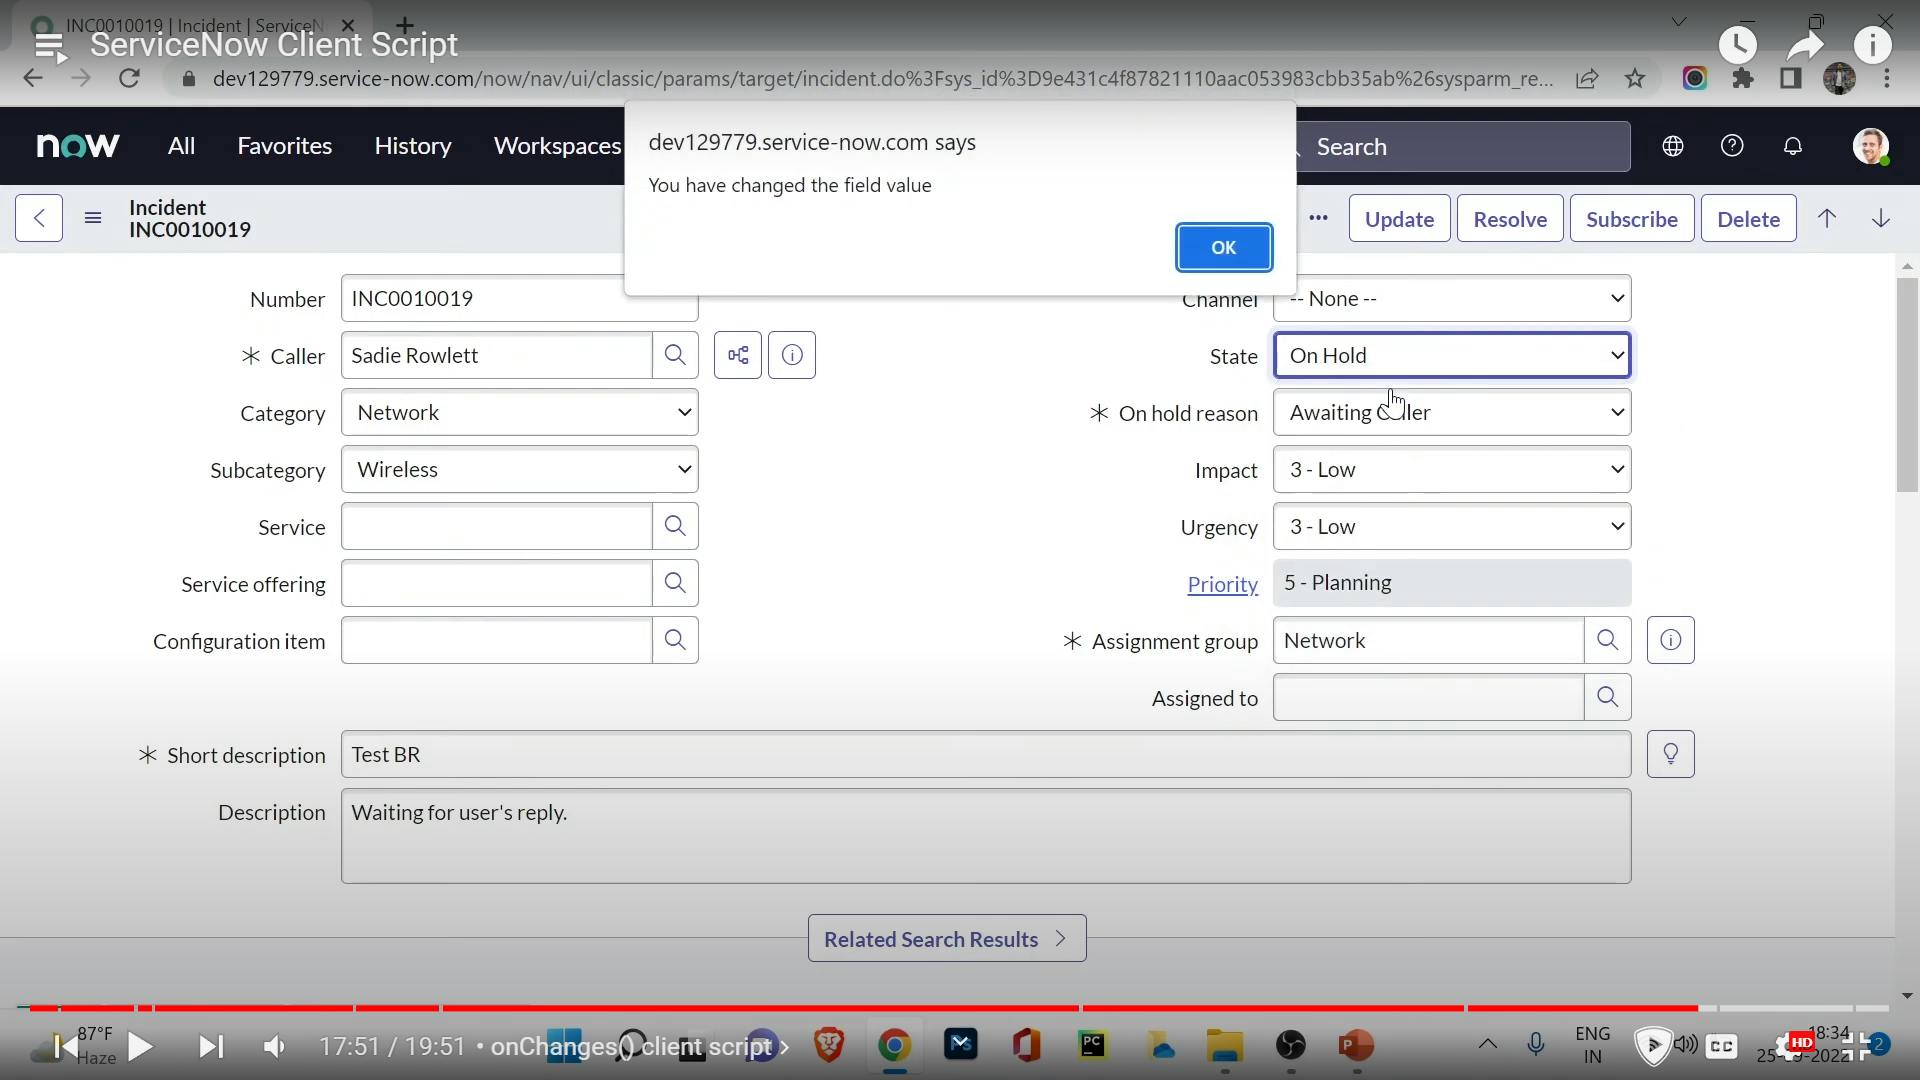
PermalinkClient Scripts
In ServiceNow, Client Scripts are scripts that run on the client side (in the user's browser) to enhance the user interface and user experience. They allow you to add custom behaviour and interactions to forms and lists without making server-side requests. Client Scripts are typically written in JavaScript and are used to validate data, manipulate field values, show/hide fields dynamically, and provide instant feedback to users.
Here's how Client Scripts work in ServiceNow:
Events:
- Client Scripts are triggered by specific events that occur on the client-side. These events include field changes, form loads, and button clicks.
Scope:
- Client Scripts can be applied globally, on a specific table (record type), or even on a specific form or field.
Actions:
When a triggering event occurs, the associated Client Script's code is executed.
Actions can include validating user input, calculating field values, and displaying messages or alerts.
Example Use Case:
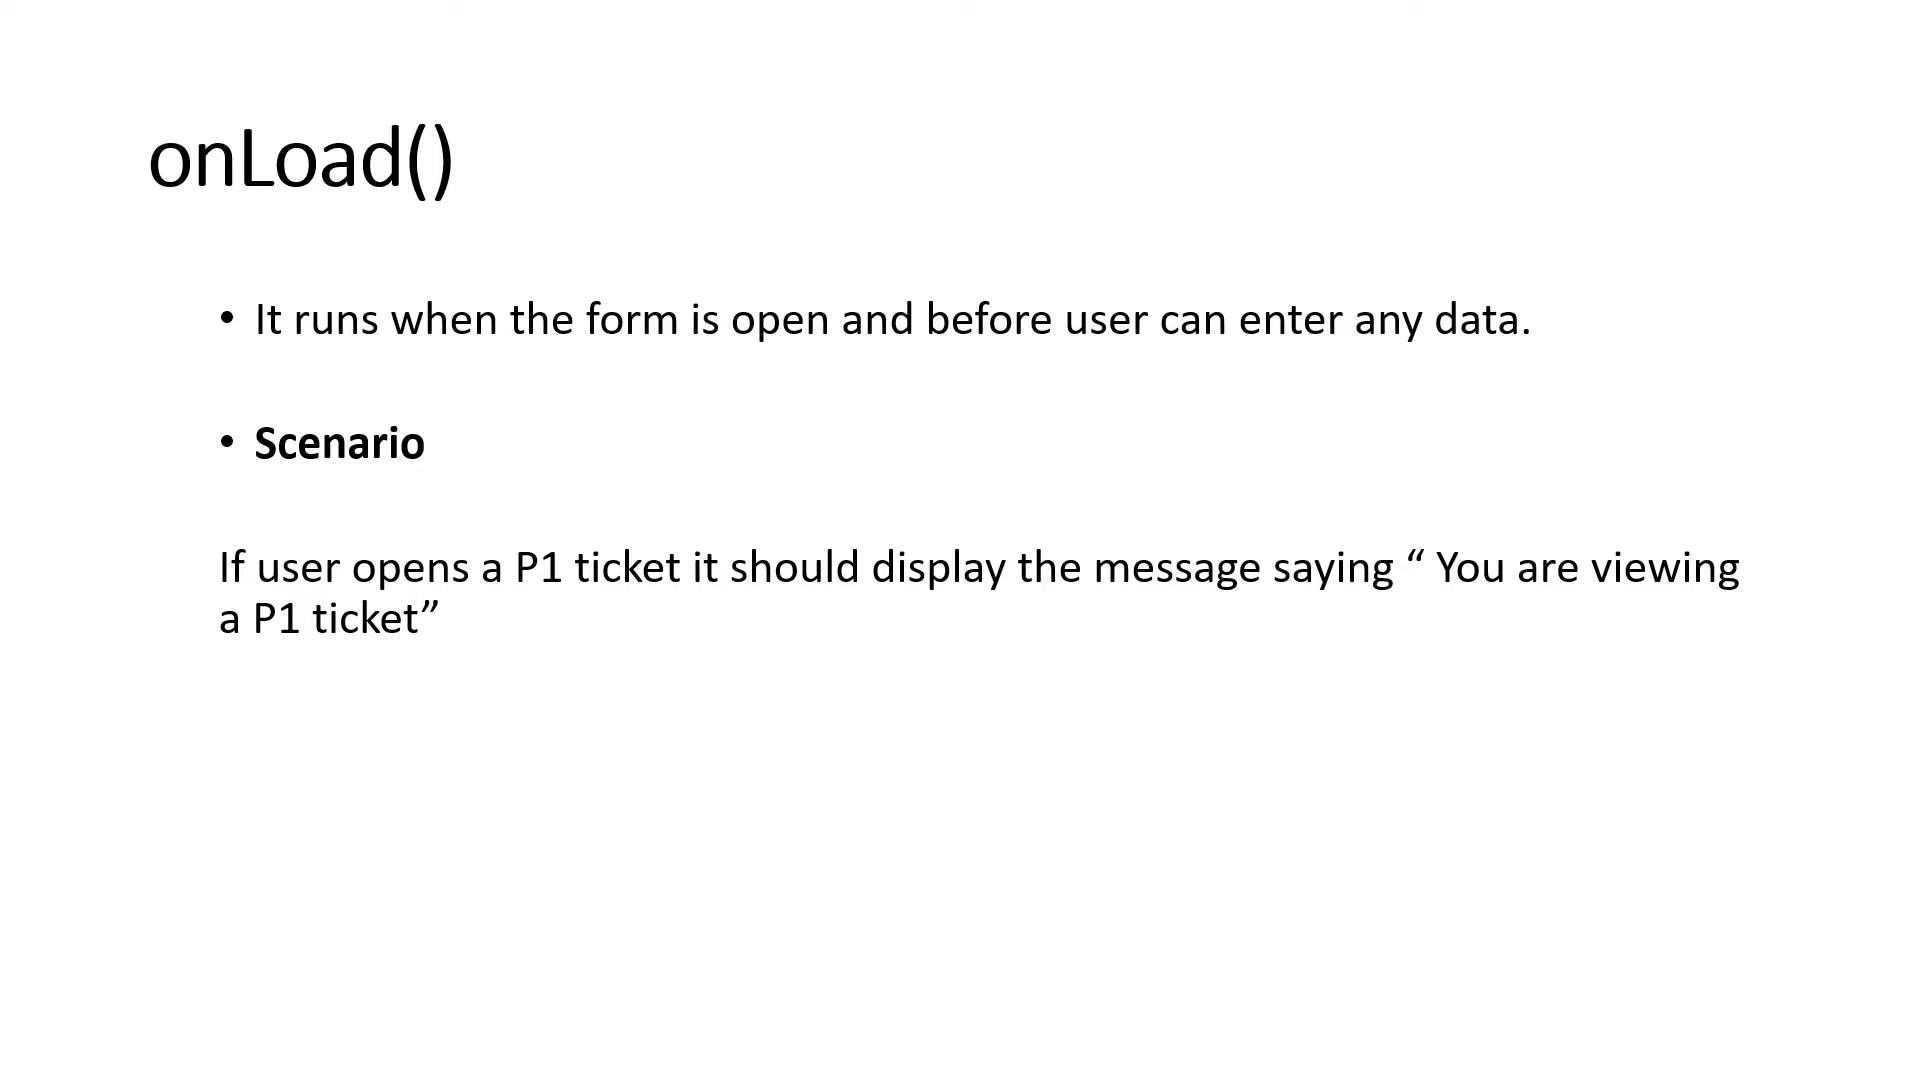
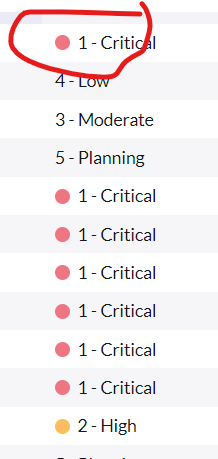
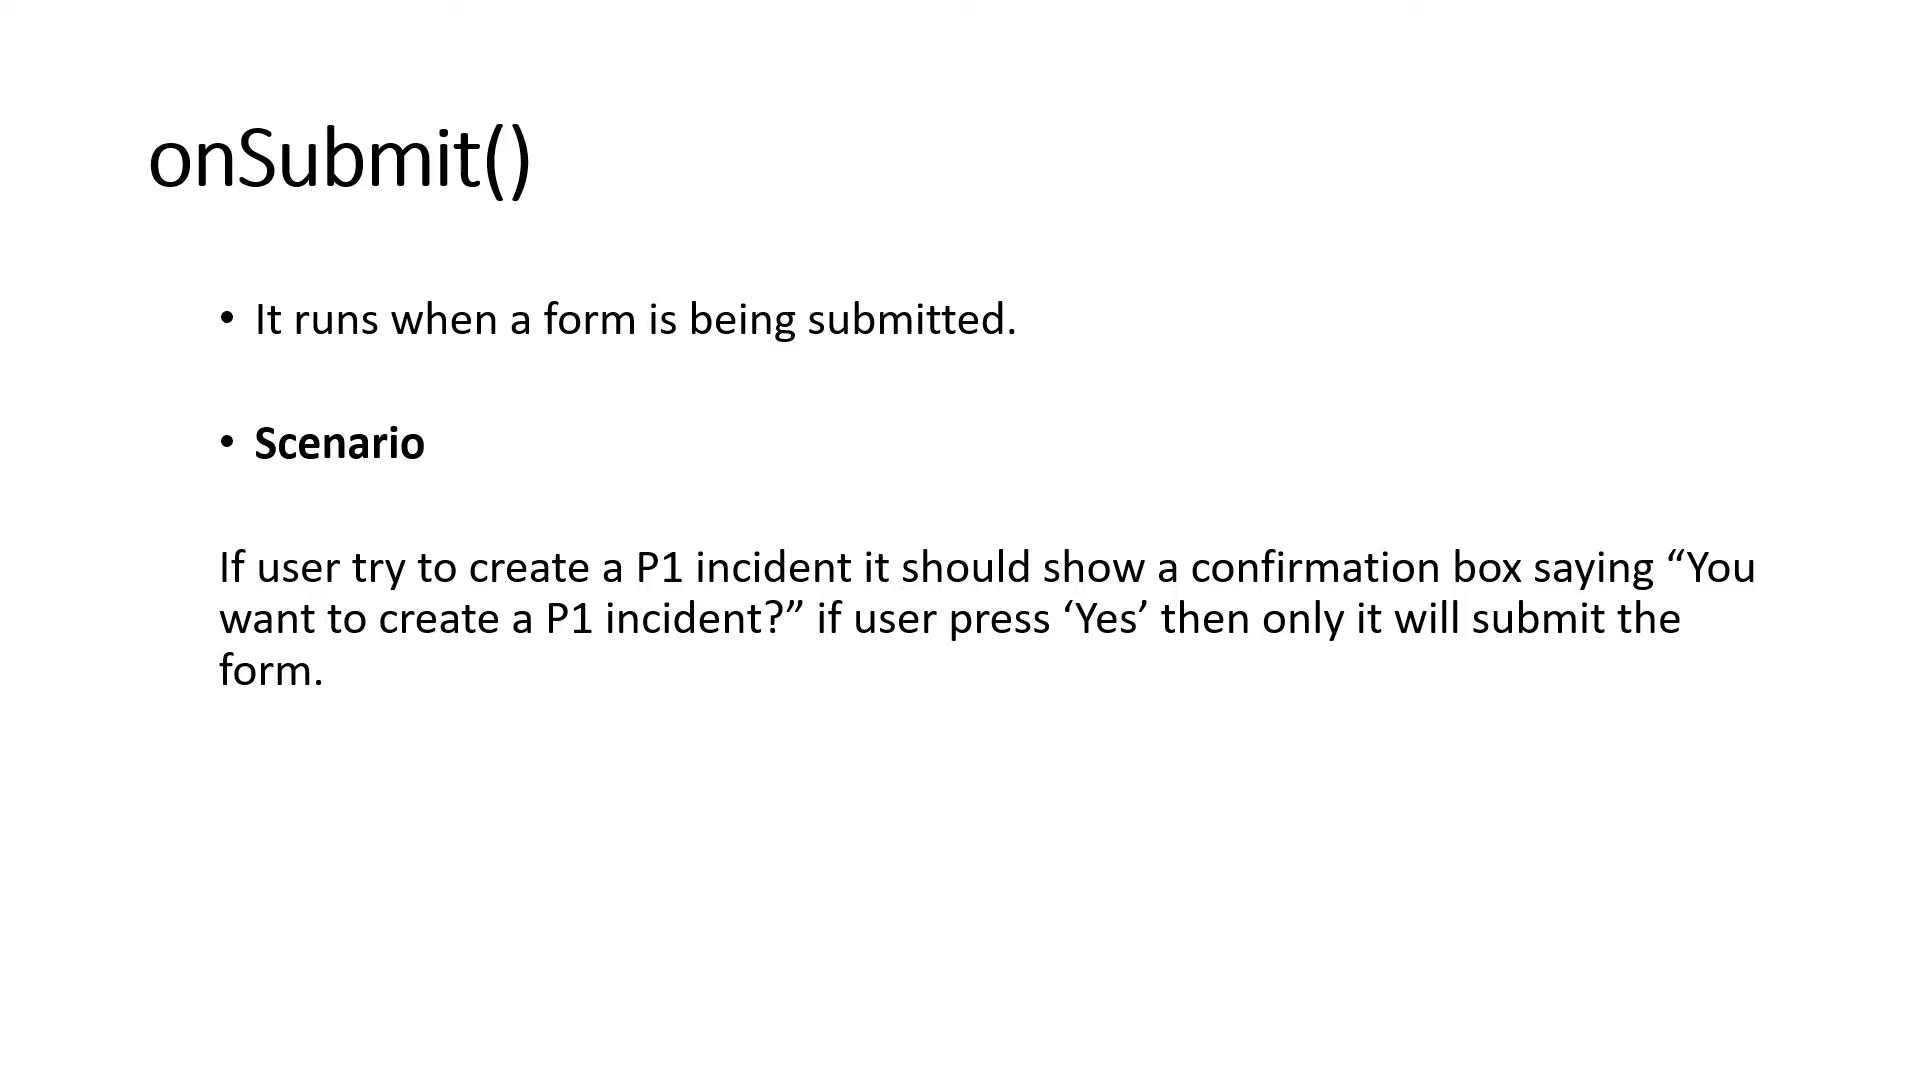
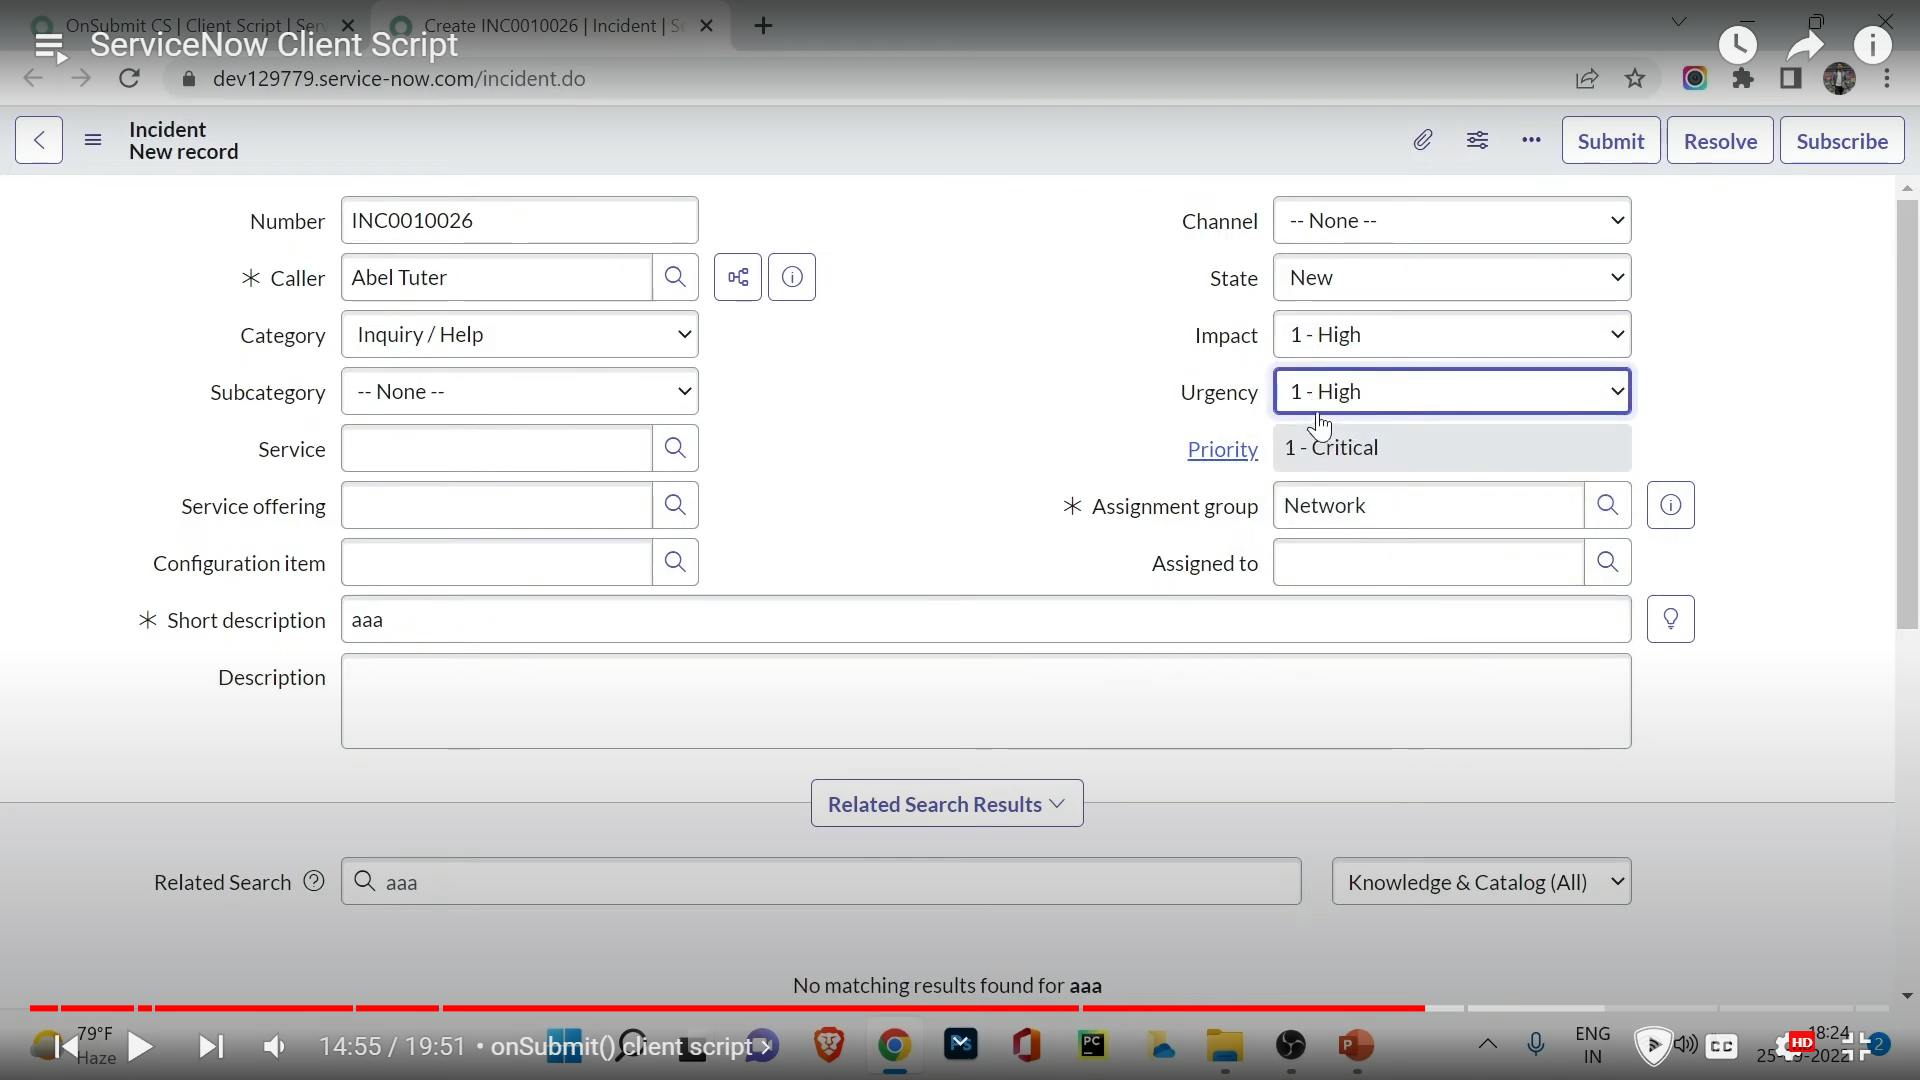
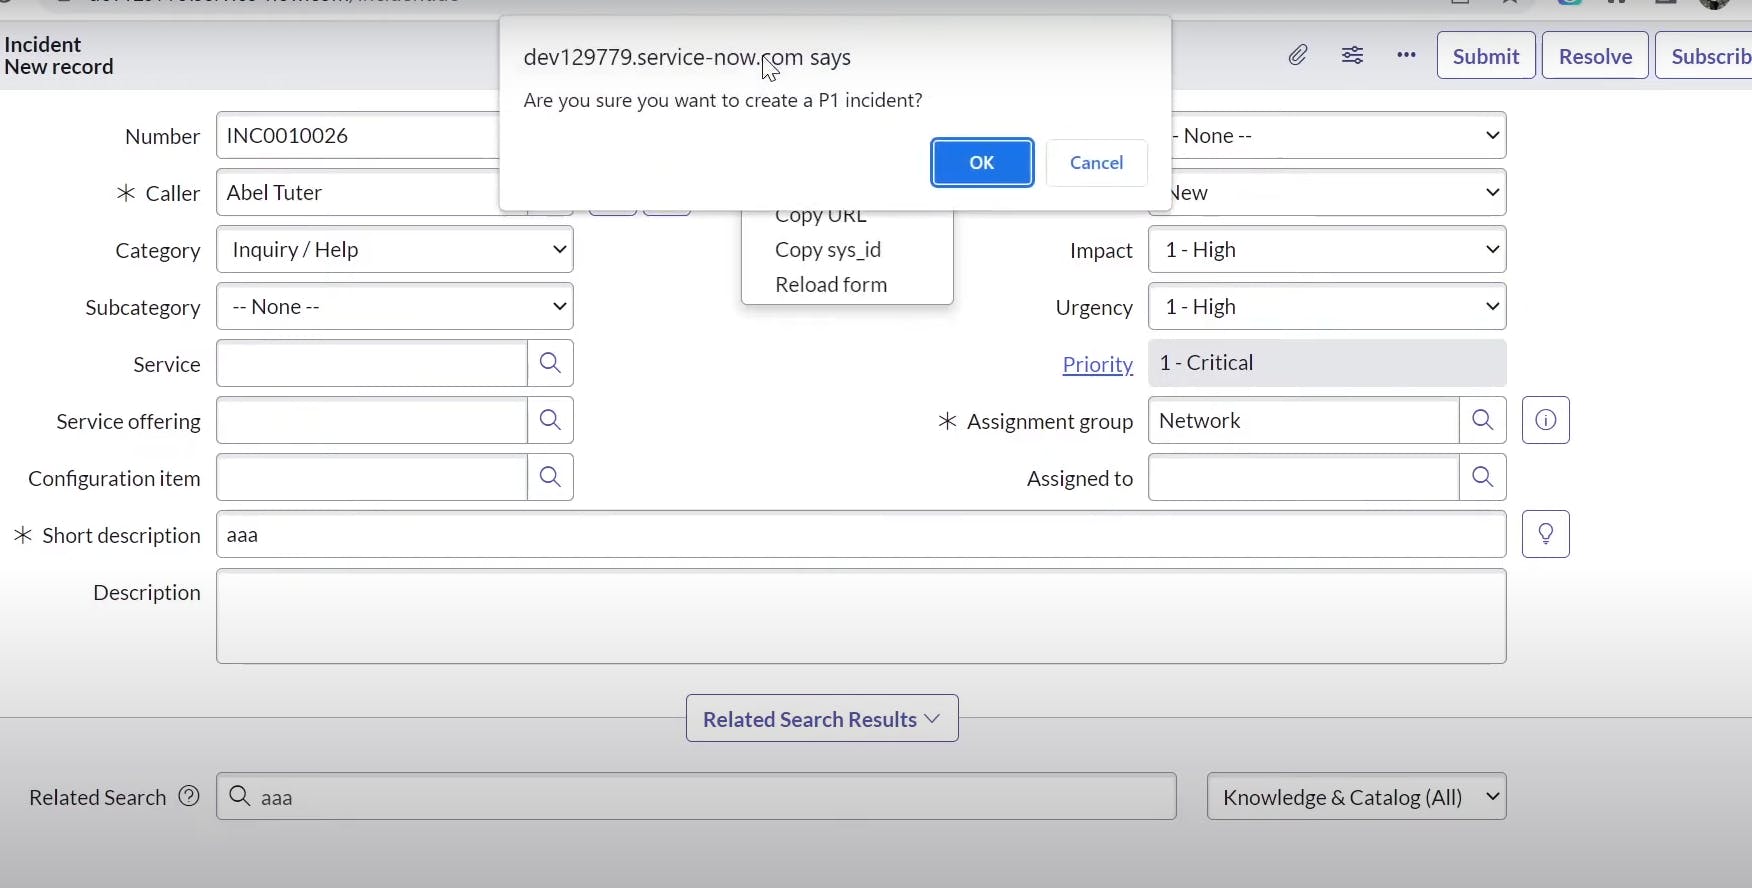
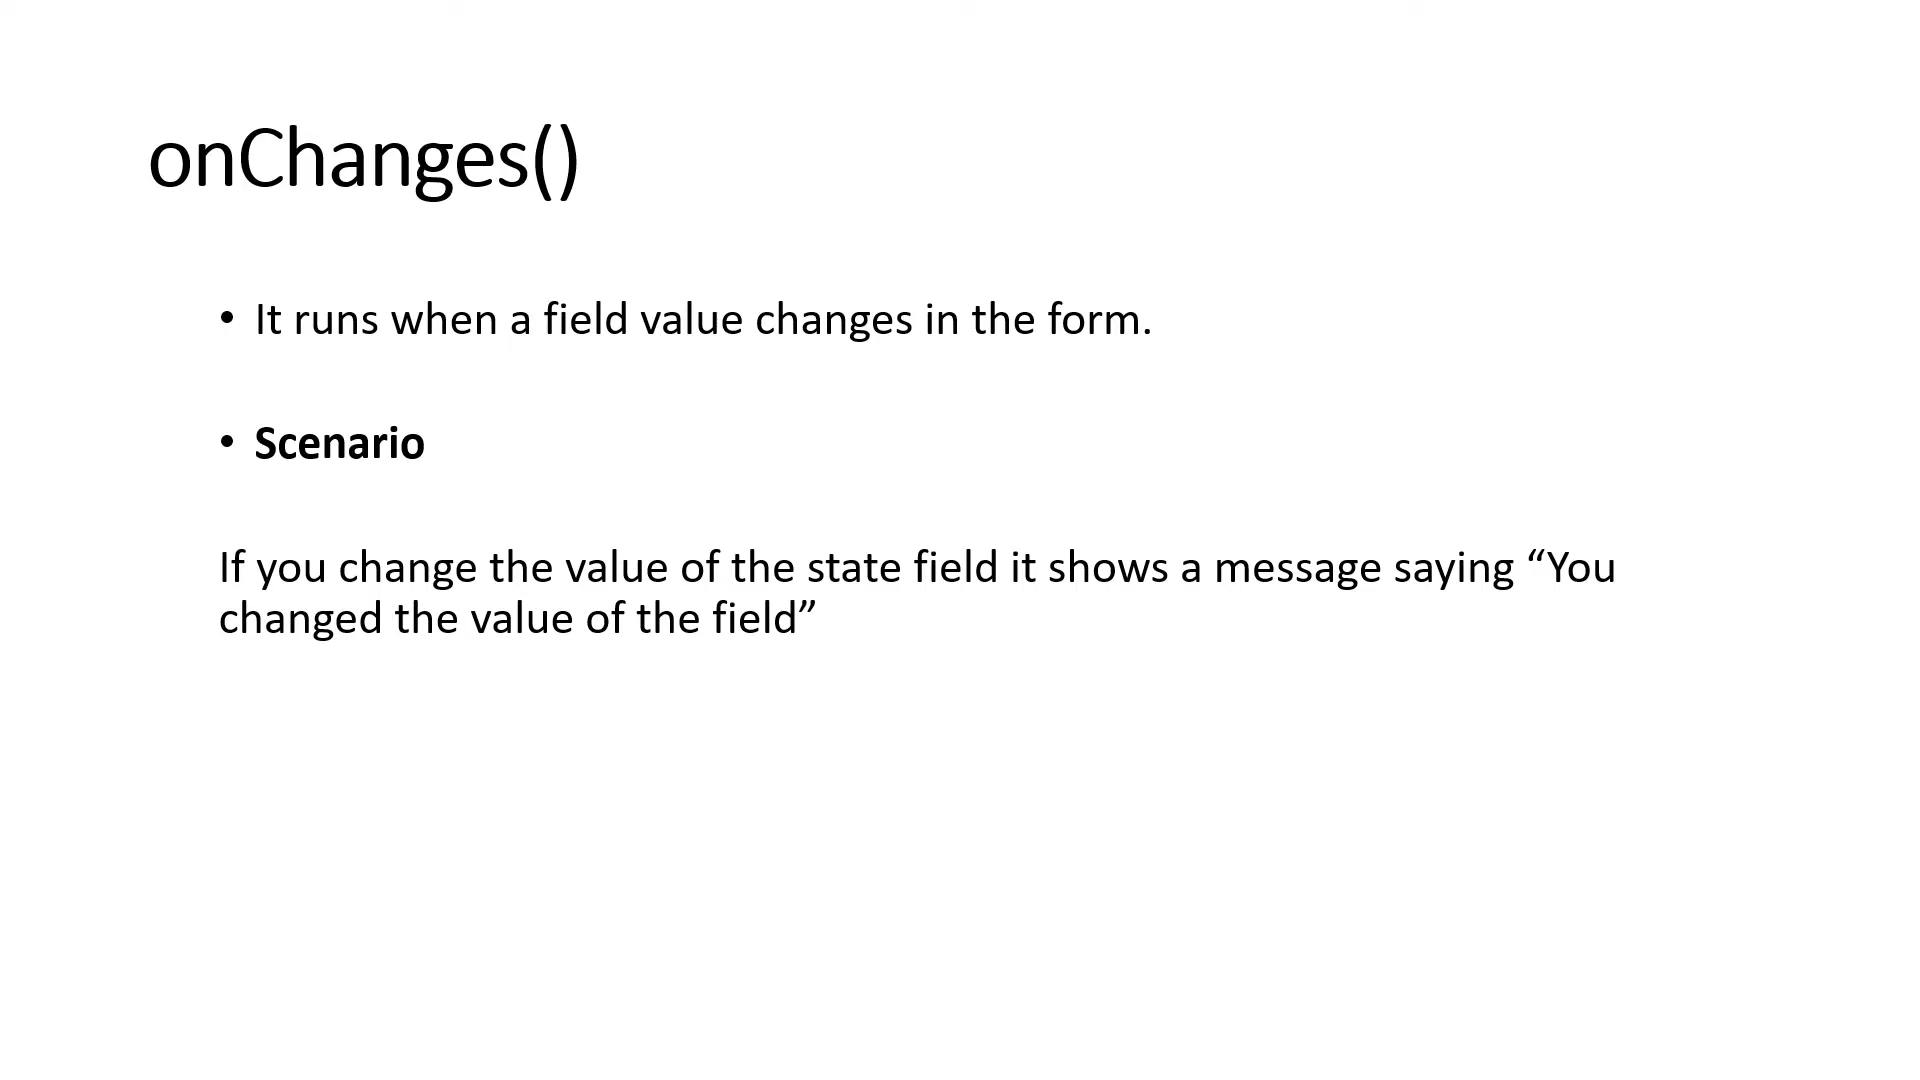
- Let's say you have an incident form, and you want to display a warning message when the user sets the "Priority" field to "Critical." You can create a Client Script that triggers on the "onchange" event of the "Priority" field. When the "Priority" is changed to "Critical," the Client Script displays a warning message to the user.
Client-Side Execution:
Client Scripts run directly in the user's browser, so they can provide instant feedback without requiring server requests.
They can make the user interface more dynamic and responsive.
Order of Execution:
Client Scripts are executed after the user performs an action that triggers the associated event (such as changing a field value).
They are executed before Business Rules, UI Policies, and UI Actions.
Benefits:
Client Scripts enhance the user experience by providing real-time validation and feedback.
They allow you to enforce data consistency and quality at the point of entry.
Custom interactions and field manipulations can be implemented without relying solely on server-side logic.
Considerations:
Since Client Scripts run on the user's browser, they don't have direct access to server-side resources and security features.
Proper testing is essential to ensure that Client Scripts work as intended and do not negatively impact the user experience.
In summary, Client Scripts in ServiceNow are a valuable tool for improving the user interface by adding dynamic behavior and instant feedback to forms and lists. They help streamline data entry, enhance data quality, and provide a more interactive user experience.
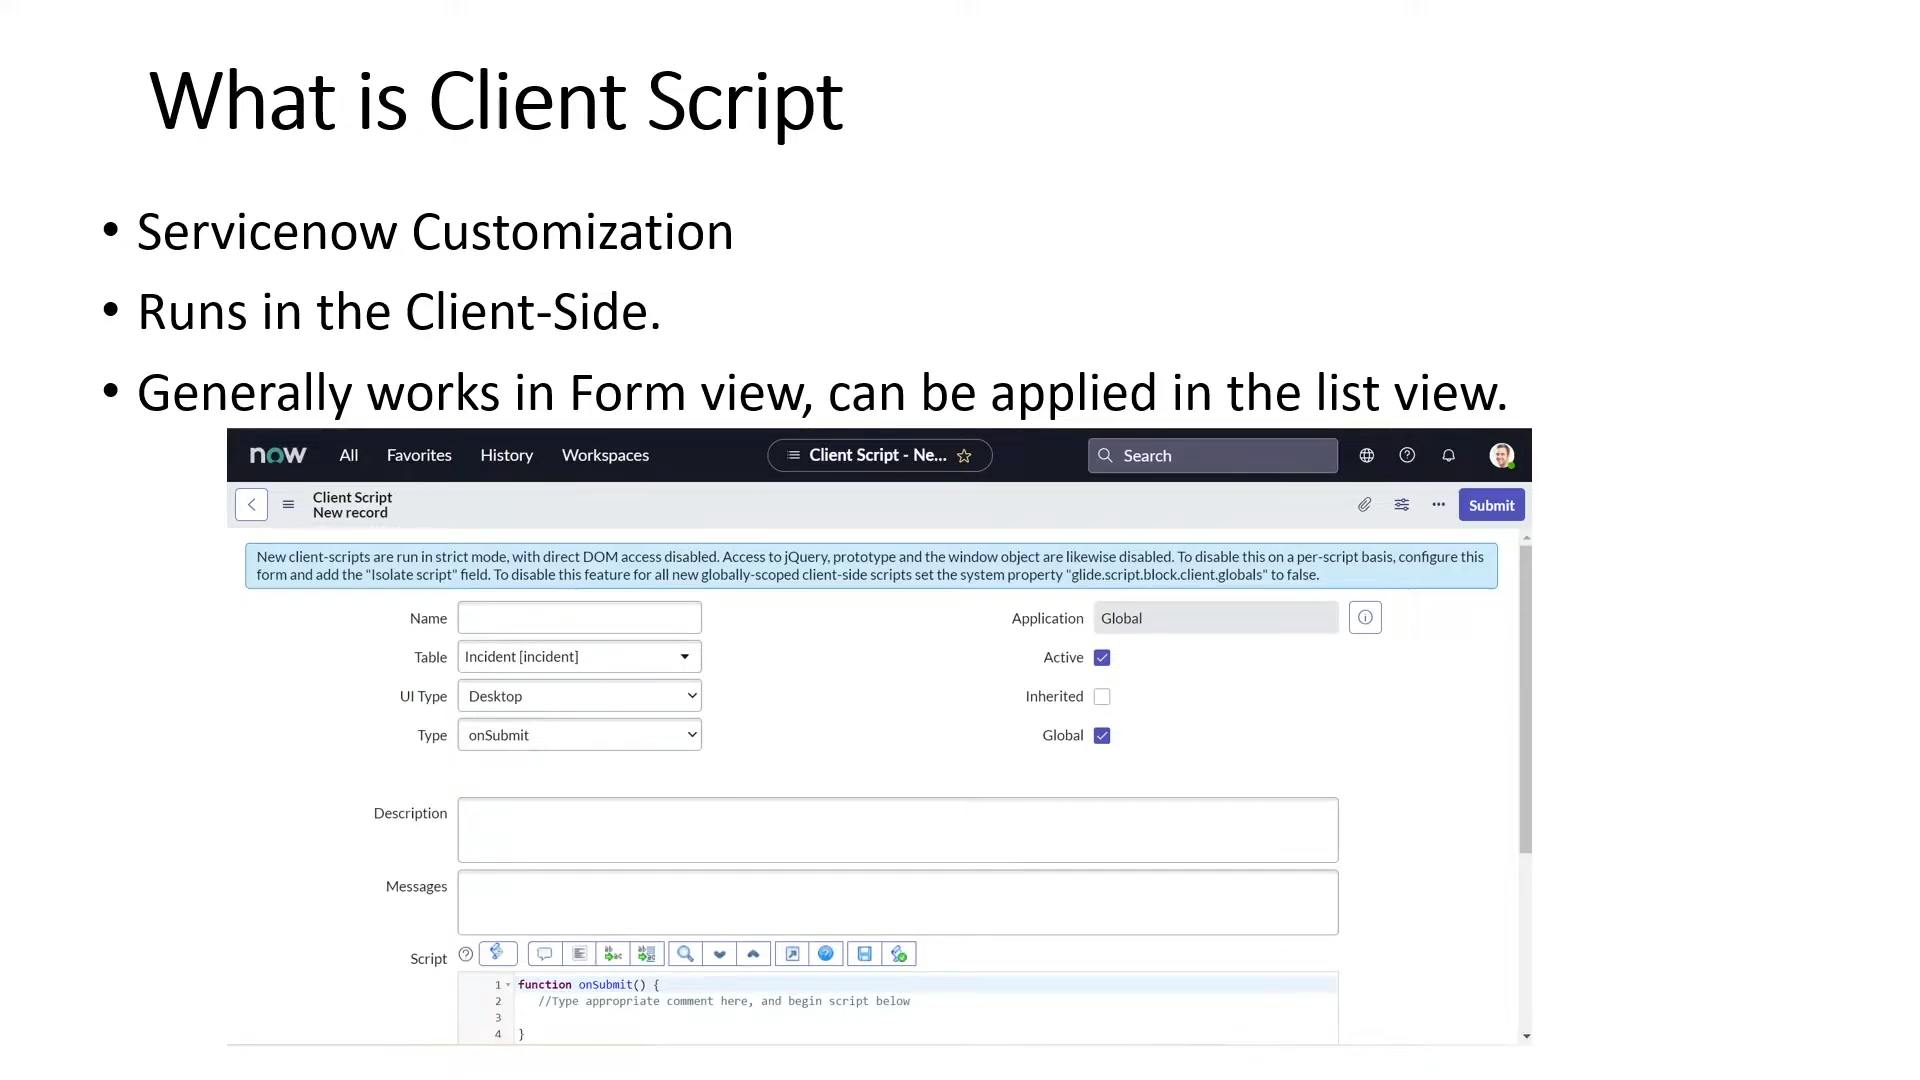
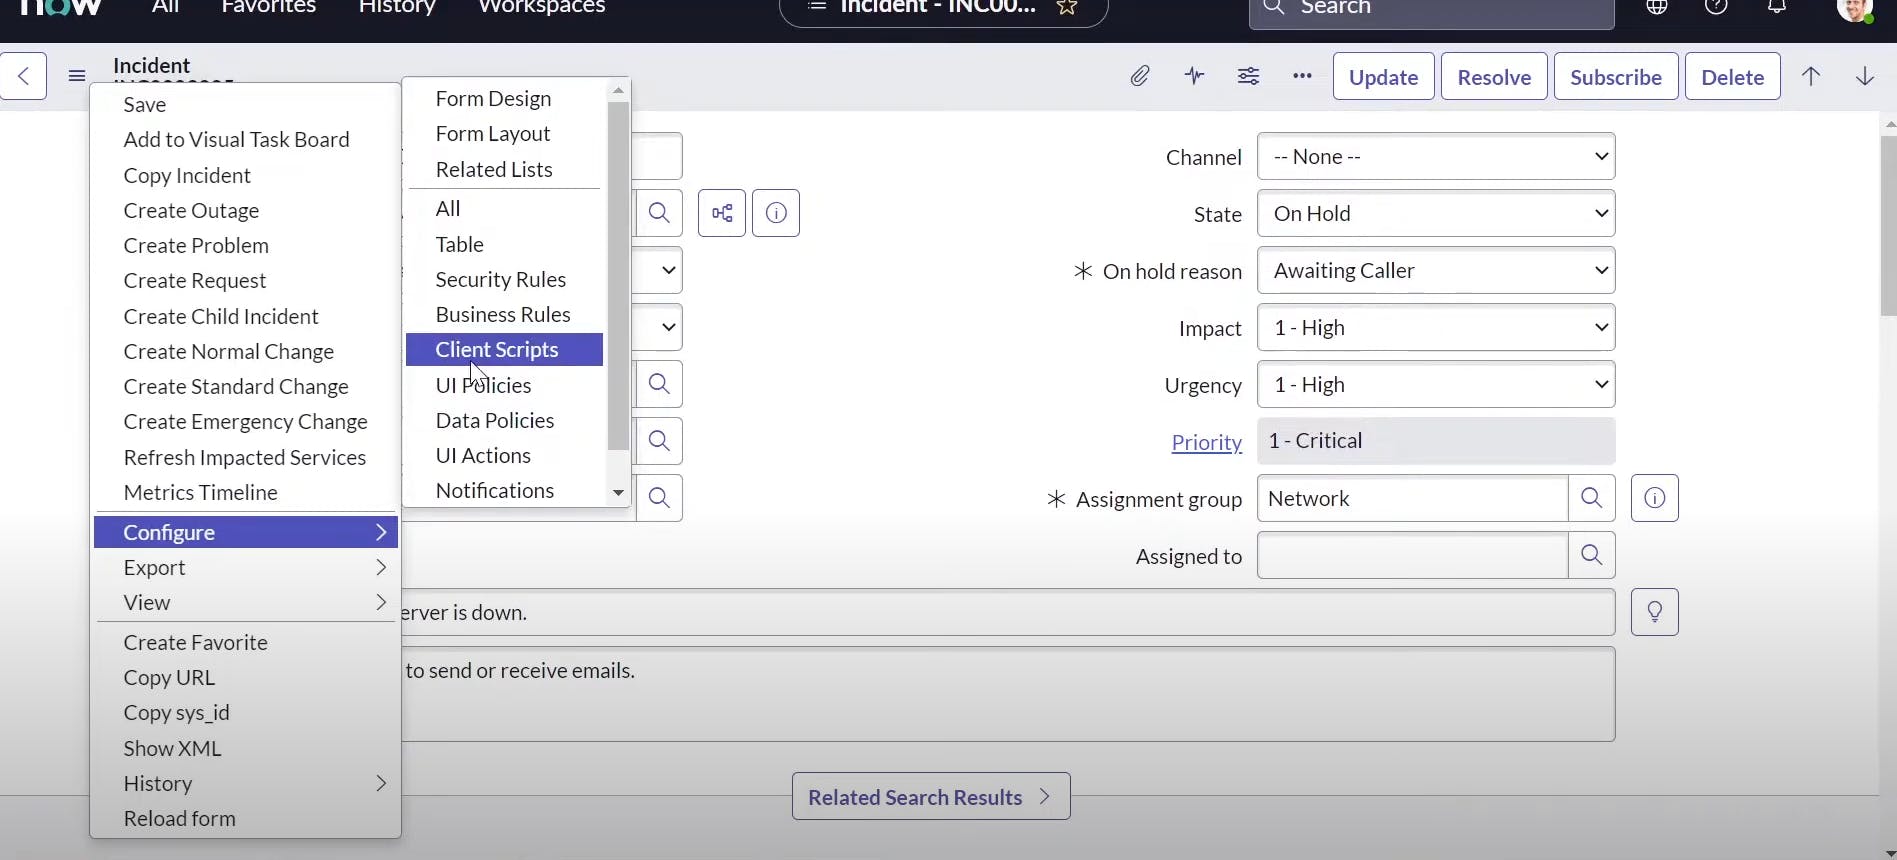
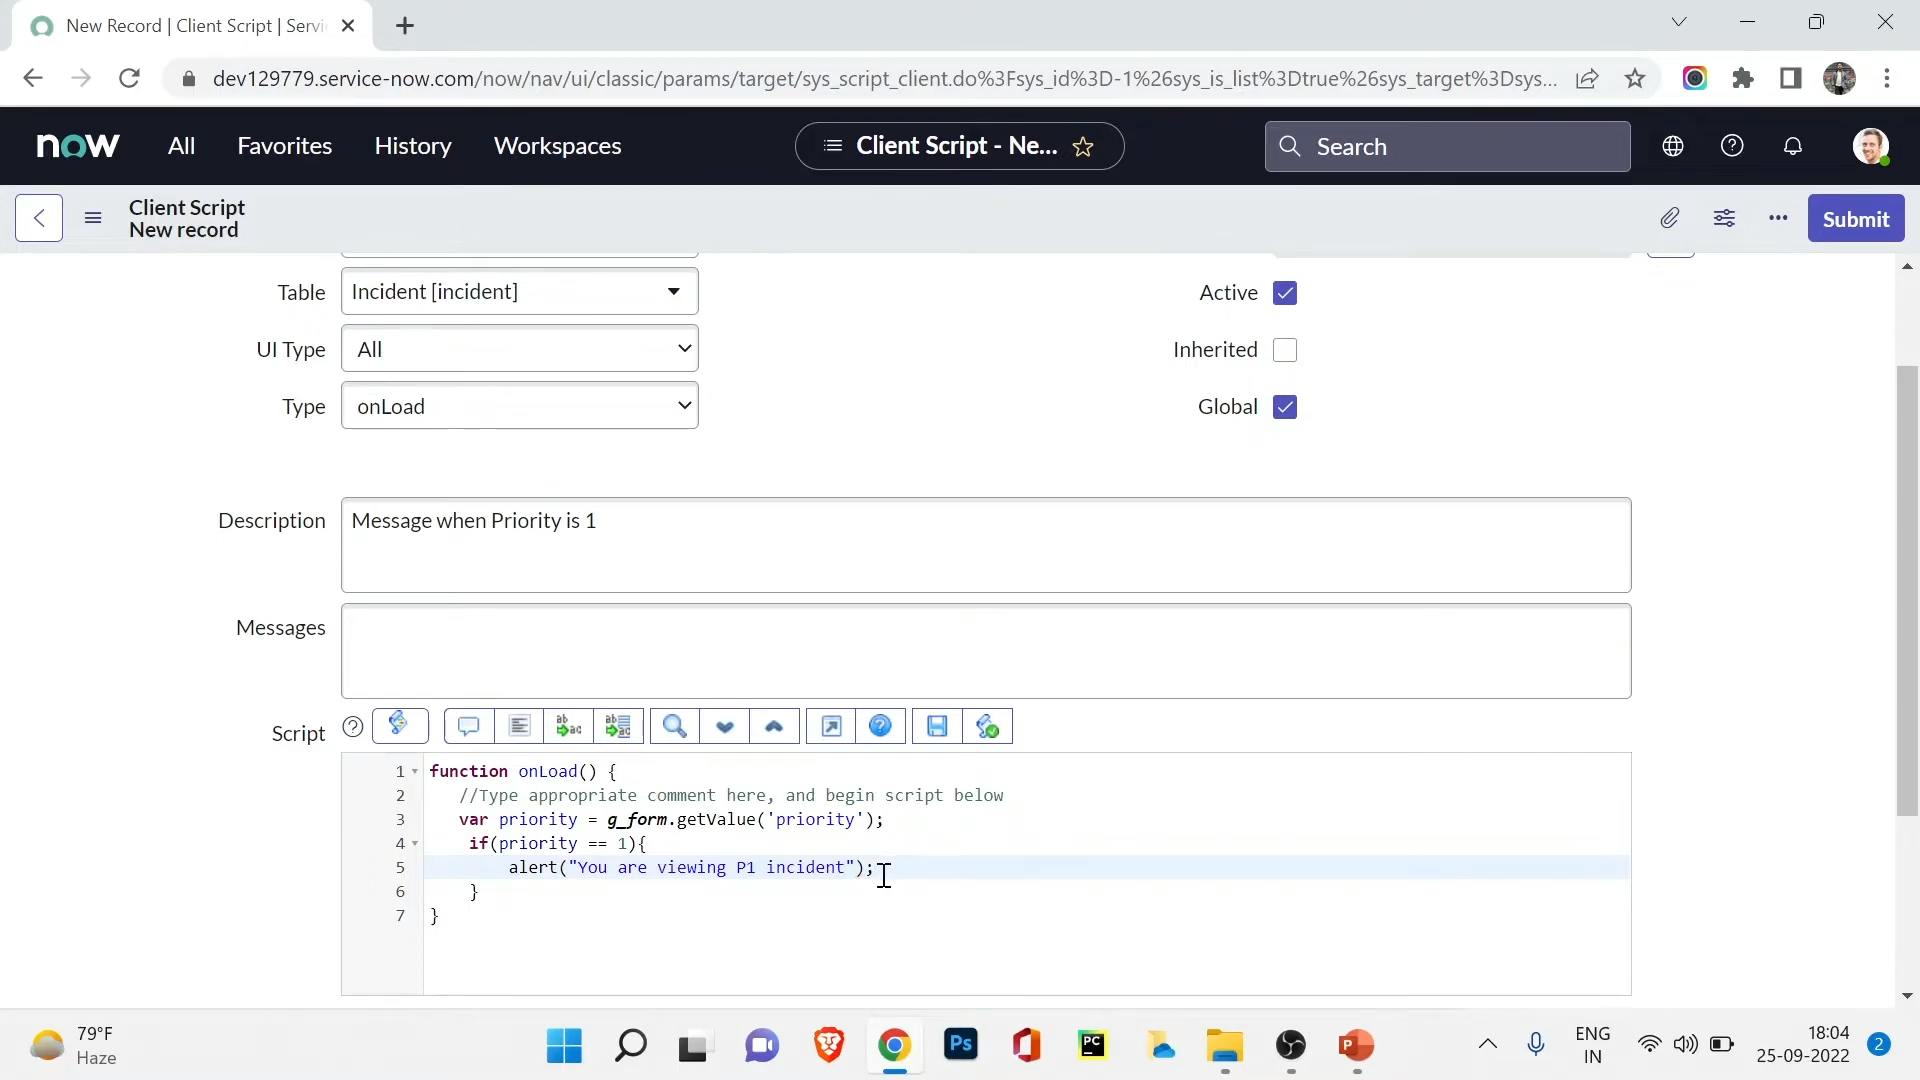
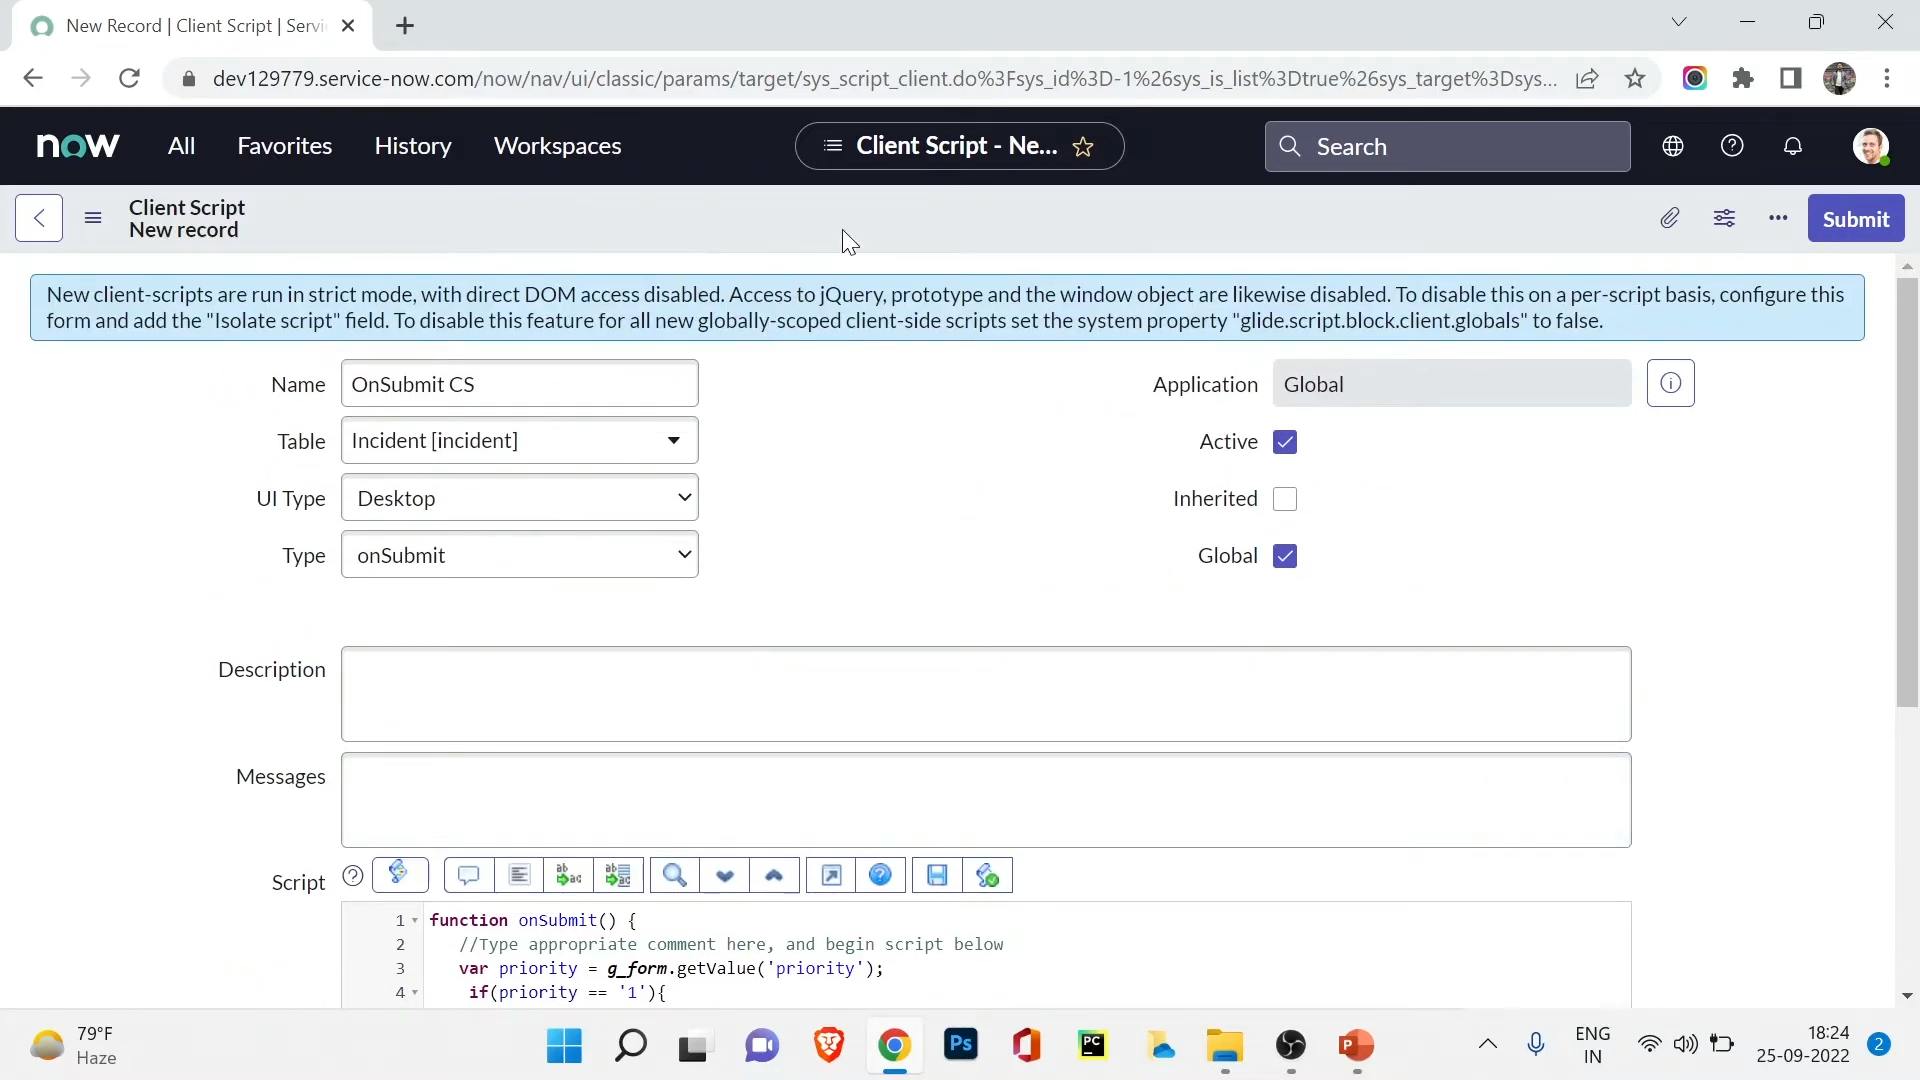
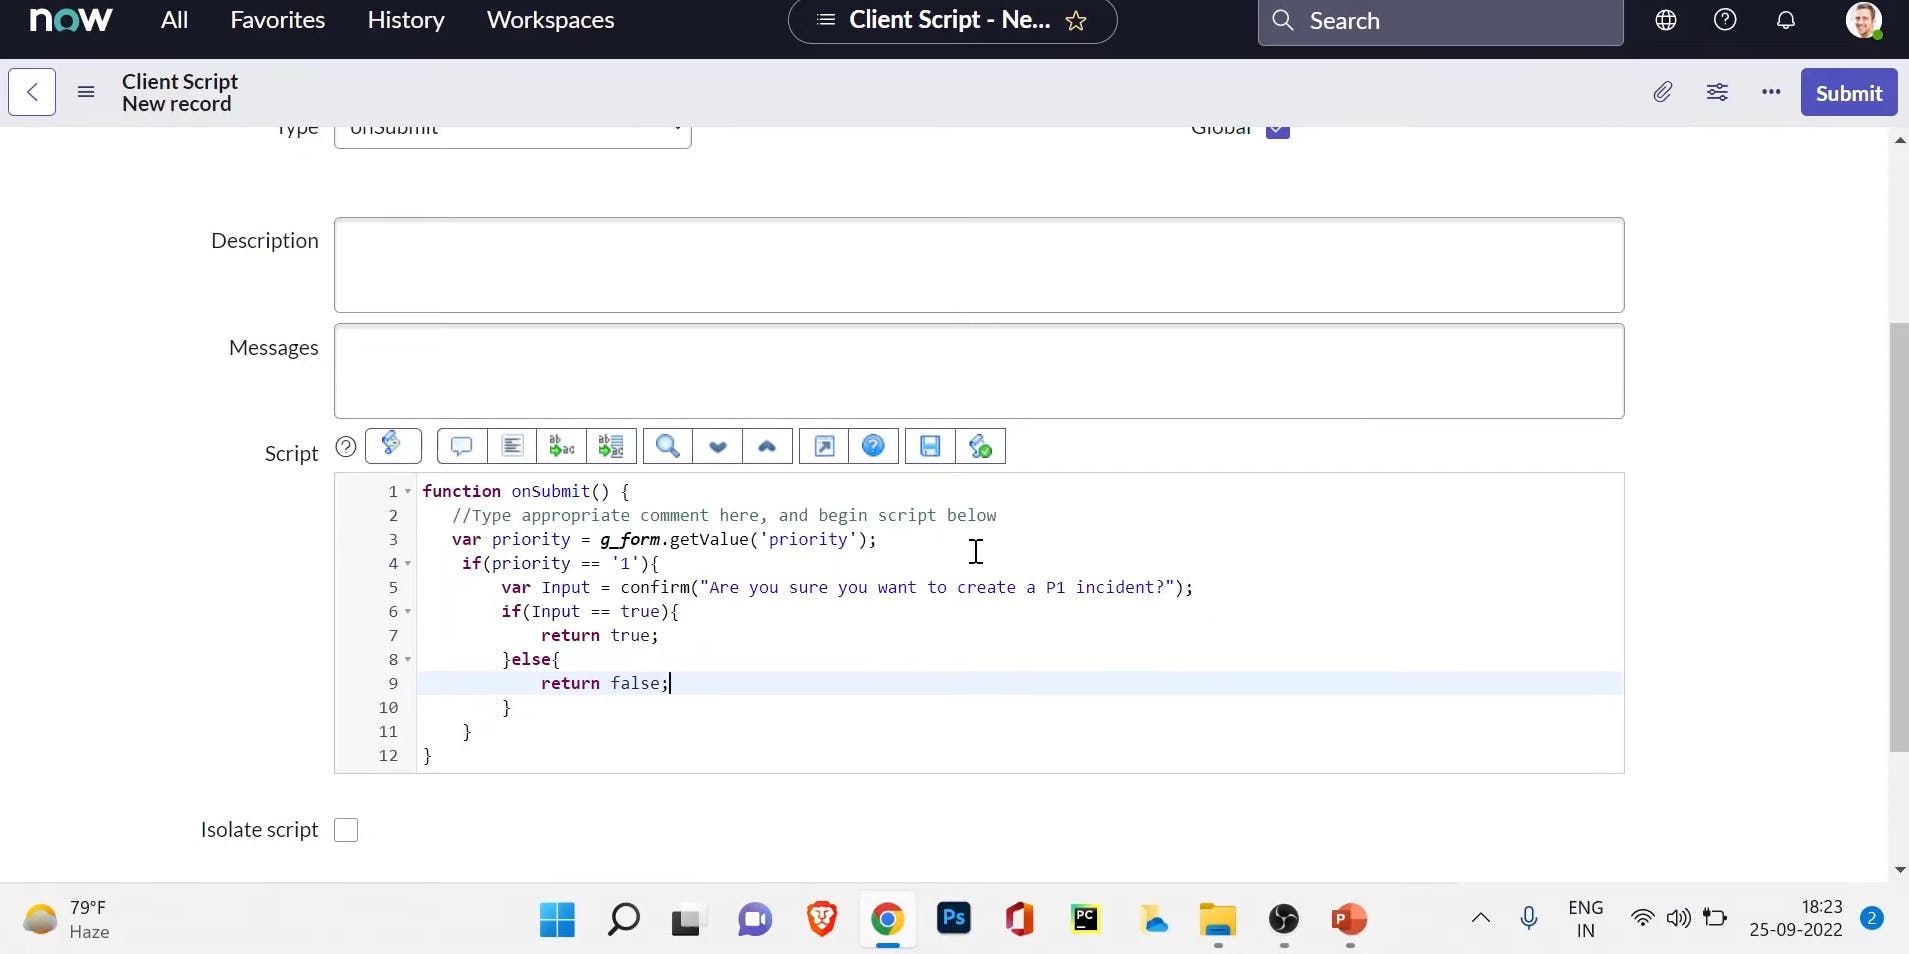
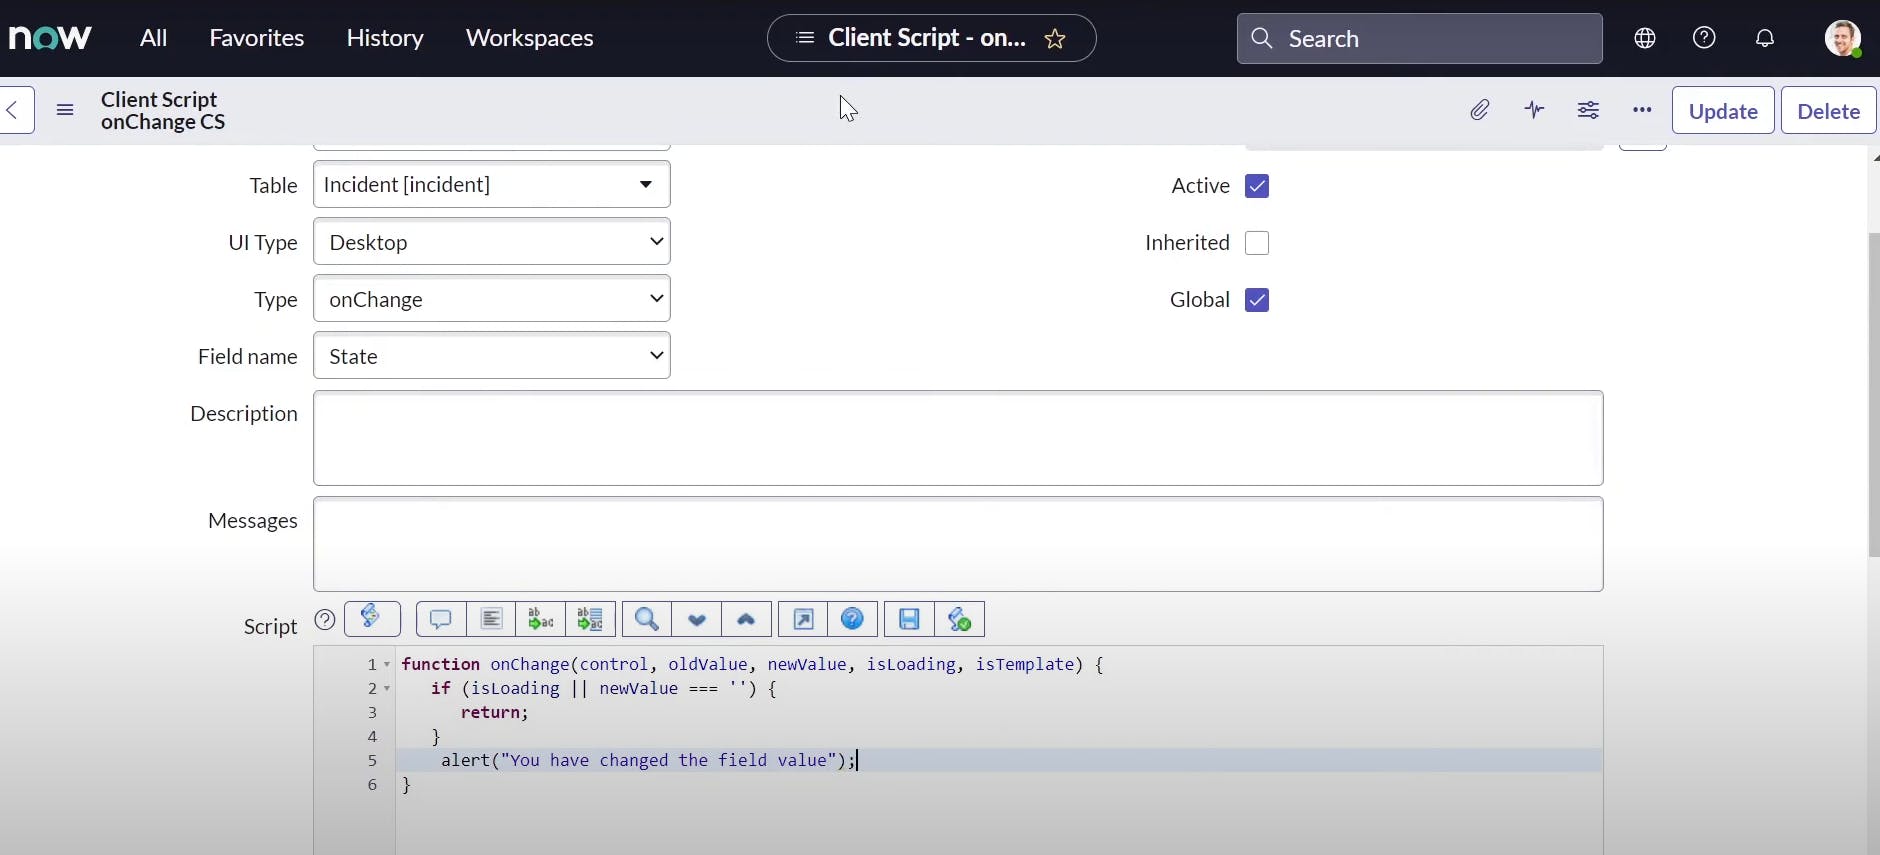
open client scripts like this
set type to onload and write script for that if priority is 1 then alert message you are viewing p1
when we open incidents where priority is critical

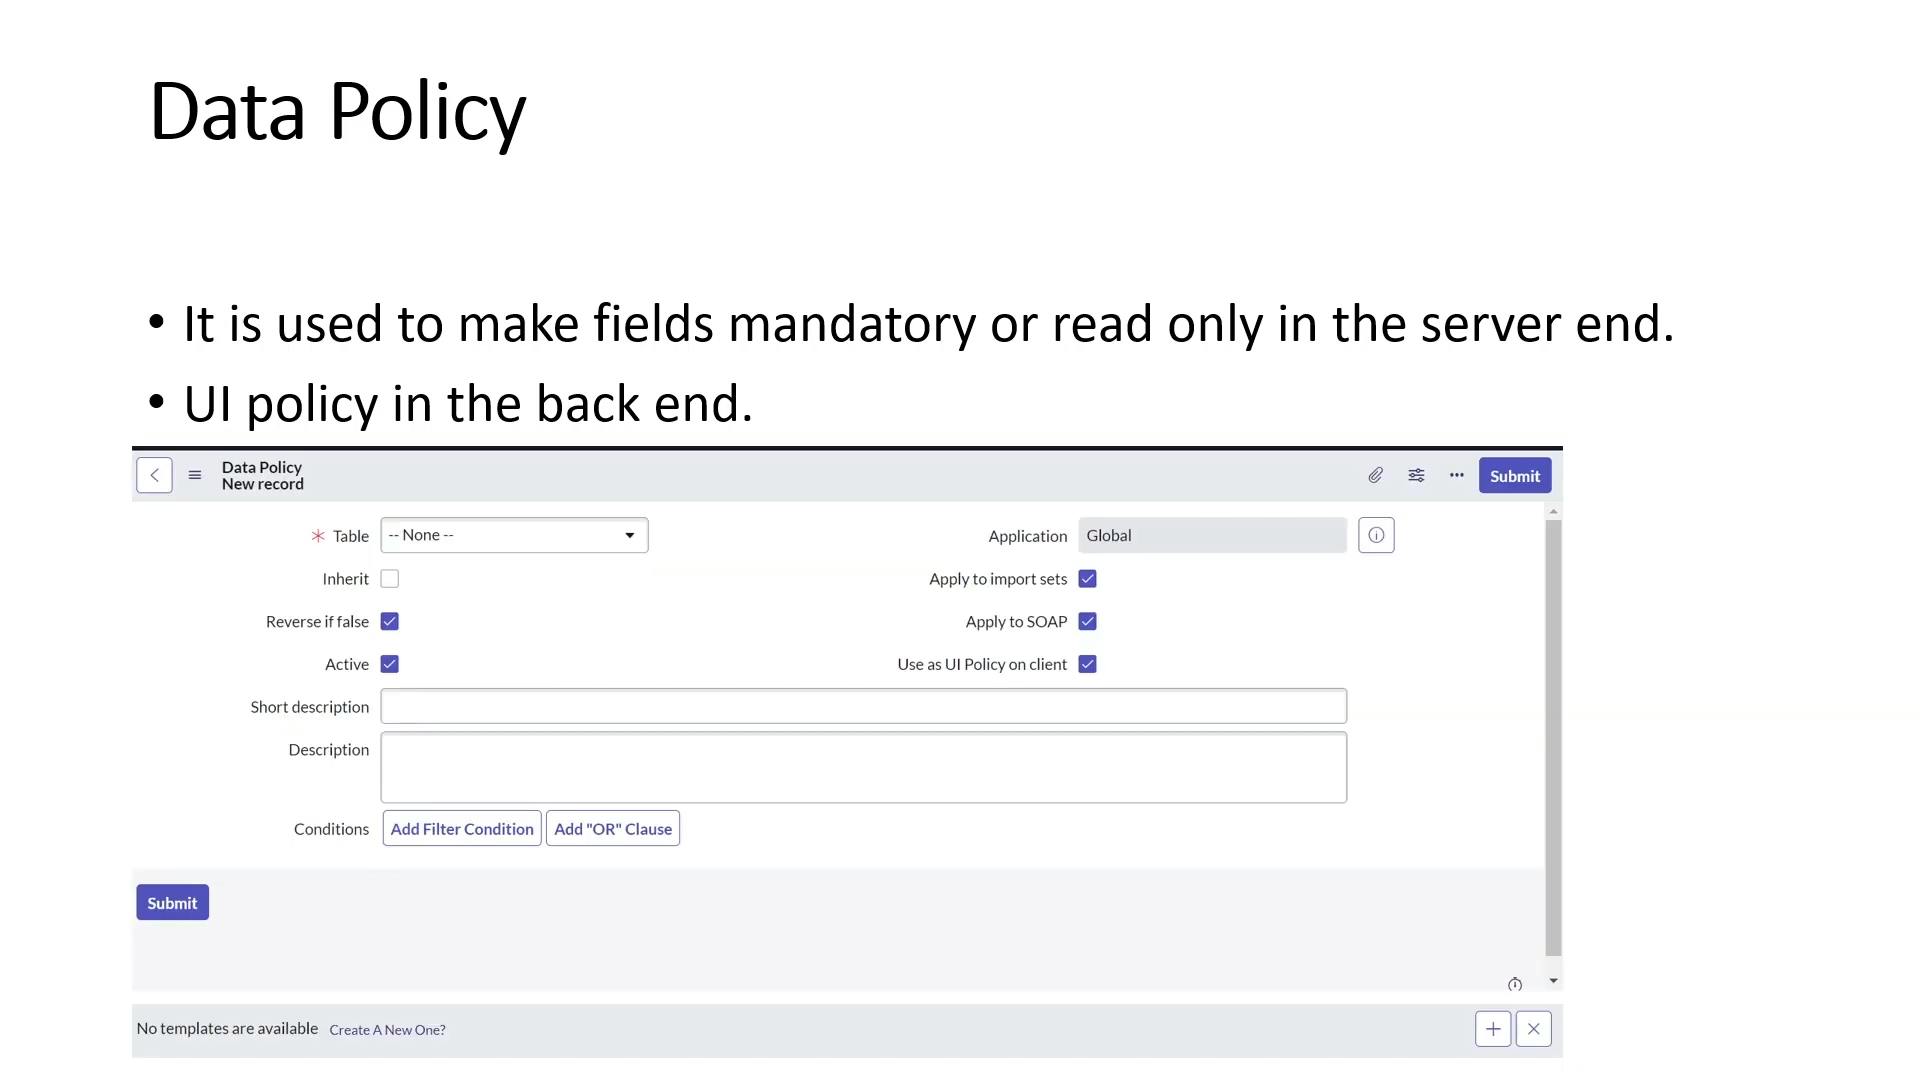
PermalinkData Policies
In ServiceNow, a Data Policy is a tool used to enforce data consistency and validation rules on fields in records of a specific table. Data Policies help maintain data integrity by automatically applying rules when records are inserted or updated, ensuring that data entered into the system adheres to defined standards.
Key features and aspects of Data Policies in ServiceNow include:
Validation Rules: Data Policies allow you to define validation rules for fields within a table. These rules can include conditions that data must meet in order to be considered valid.
Automatic Enforcement: When a record is inserted or updated, the defined validation rules are automatically applied. If the data doesn't meet the criteria, the system prevents the record from being saved or updated.
Error Messages: When a Data Policy detects that a validation rule is violated, it generates an error message indicating the issue, helping users understand what needs to be corrected.
Field-Level Control: Data Policies can be applied to specific fields within a table, allowing for fine-grained control over the validation rules for each field.
Use Cases: Data Policies are useful when you want to ensure data consistency, accuracy, and adherence to defined standards. For example, you can use them to enforce formatting requirements for phone numbers or email addresses, limit acceptable values for certain fields, or ensure that mandatory fields are filled out.
Configuration: Data Policies are configured within the "Data Policy Rules" module. Each Data Policy Rule defines the table, field, and validation conditions to be applied.
Integration with Other Tools: Data Policies can work in conjunction with other ServiceNow features like UI Policies and Business Rules to provide a comprehensive approach to data validation and enforcement.
Overall, Data Policies play a crucial role in maintaining data quality and accuracy within ServiceNow. They help prevent incorrect or inconsistent data from entering the system, ensuring that the information used for reporting, analysis, and decision-making remains reliable.
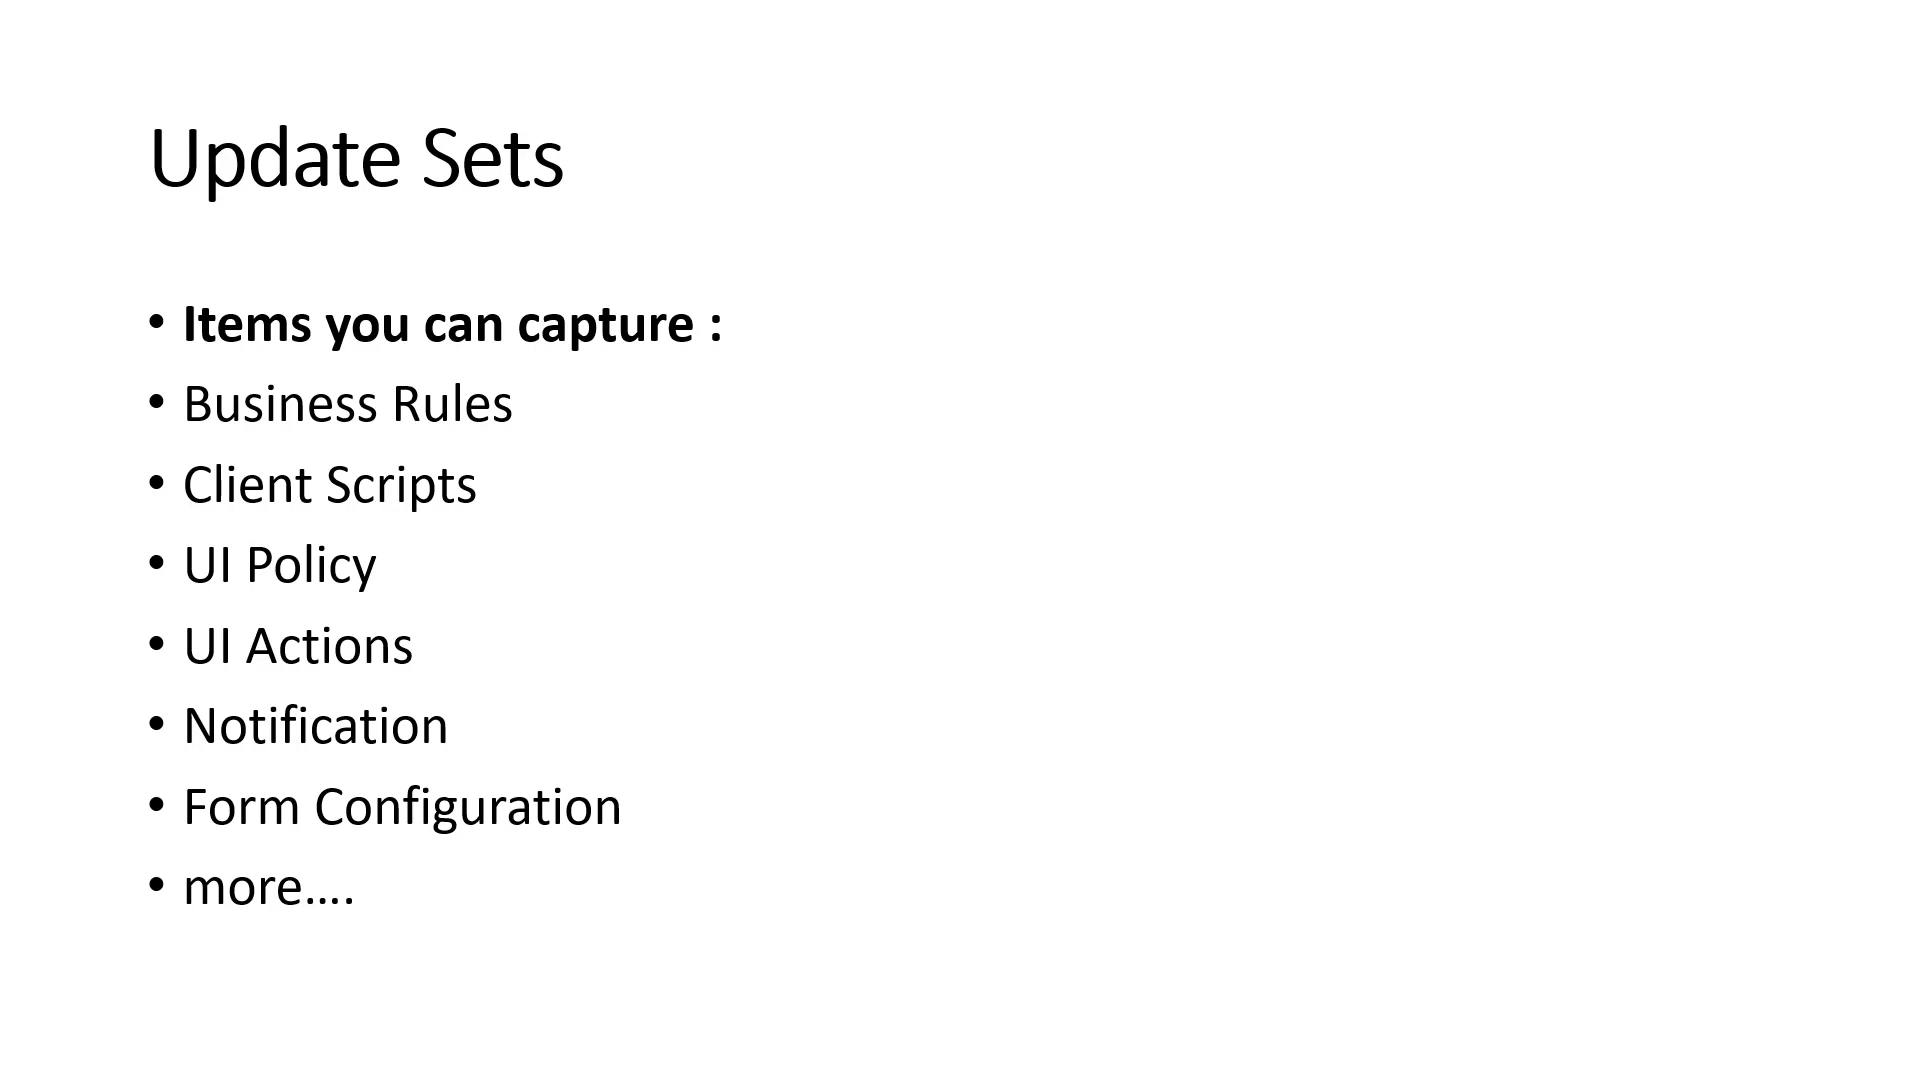
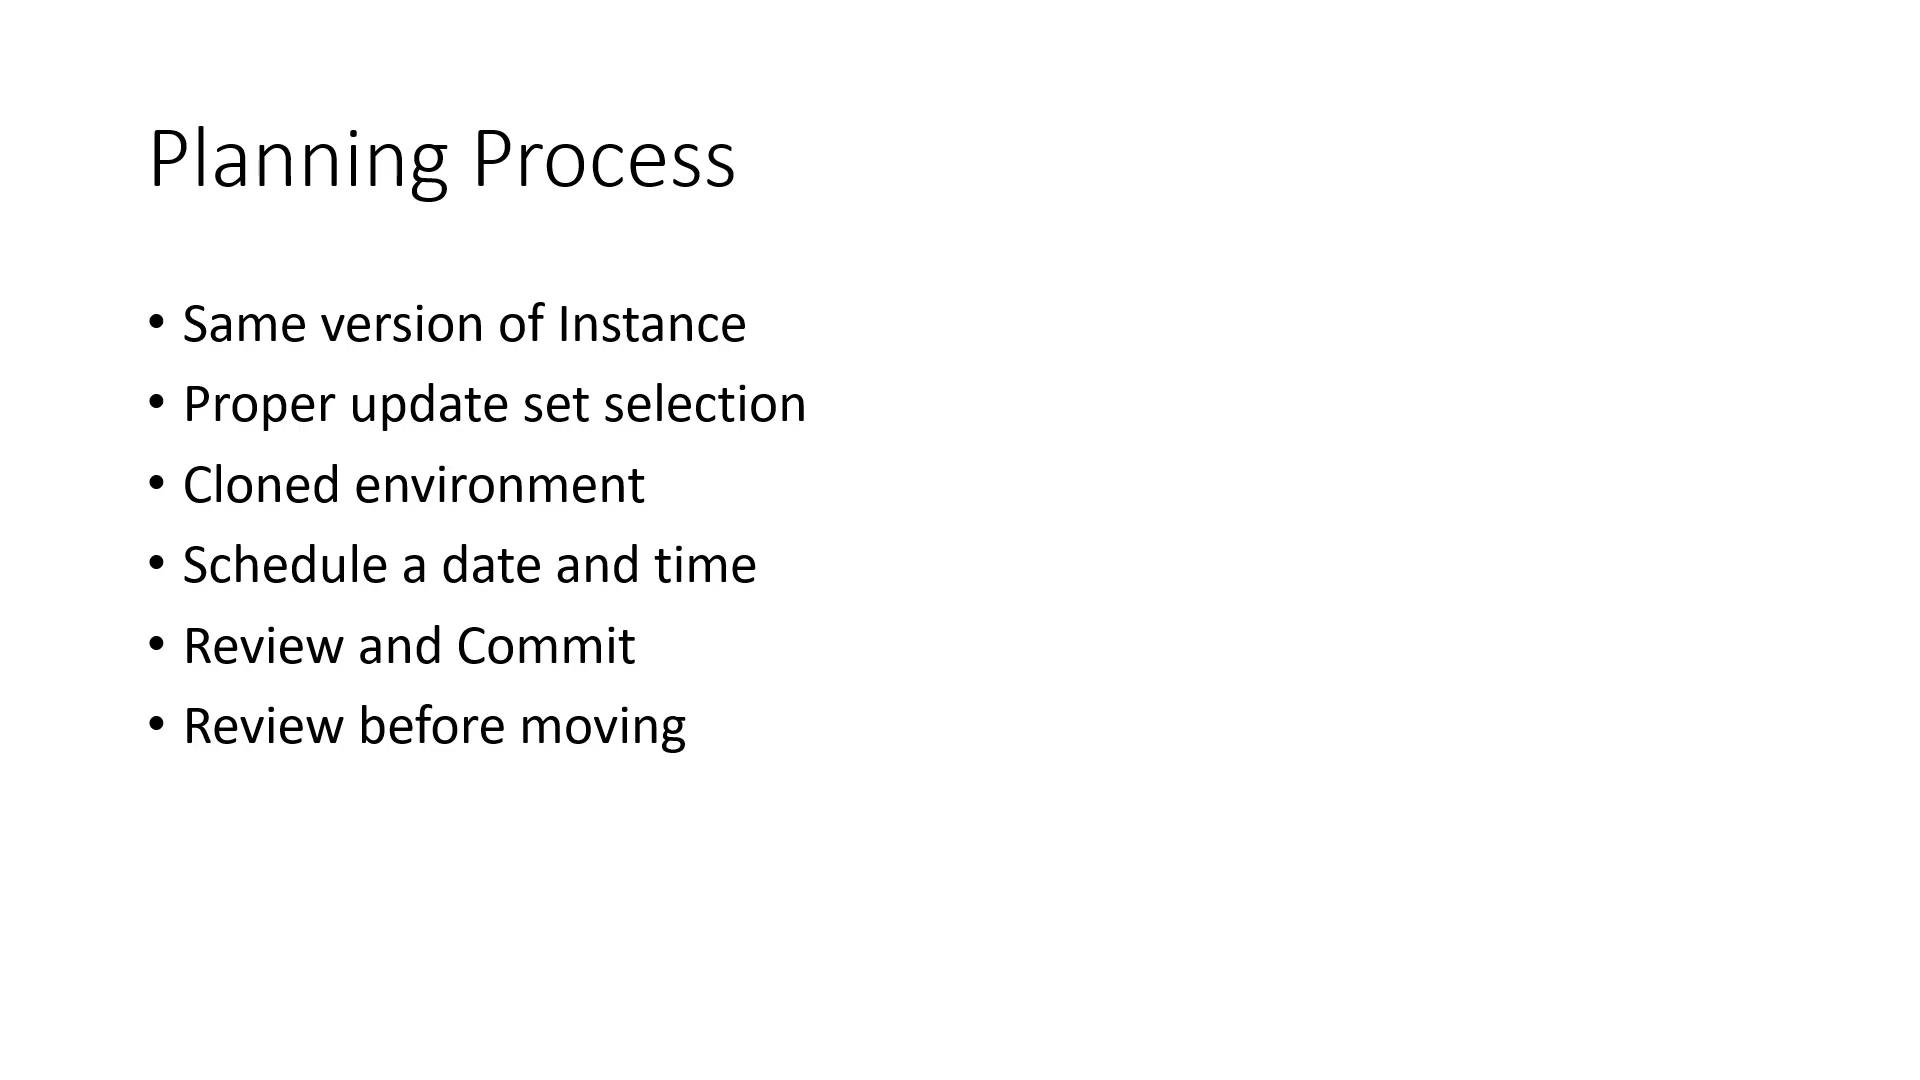
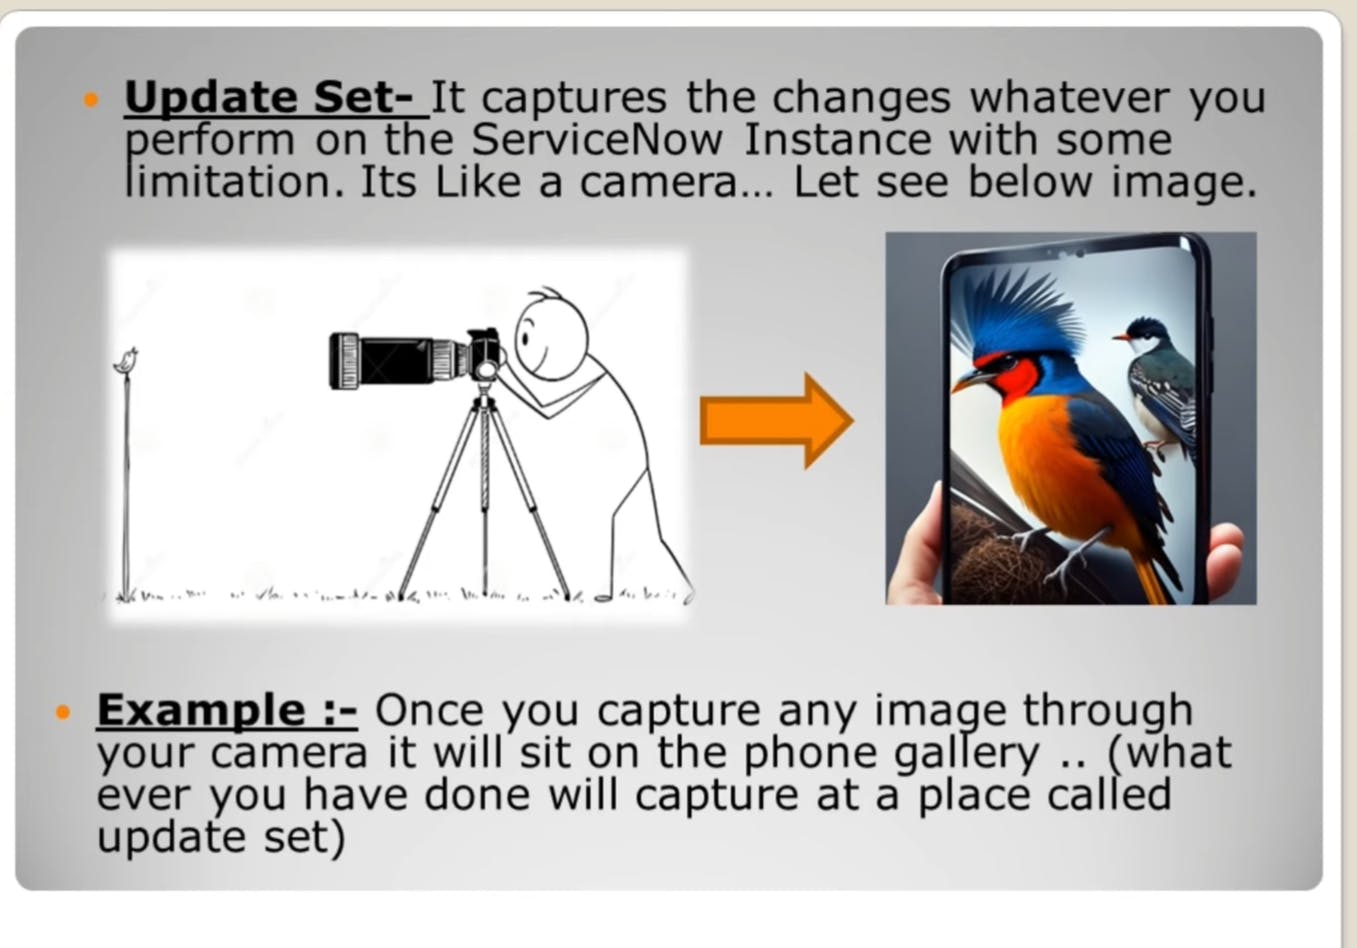
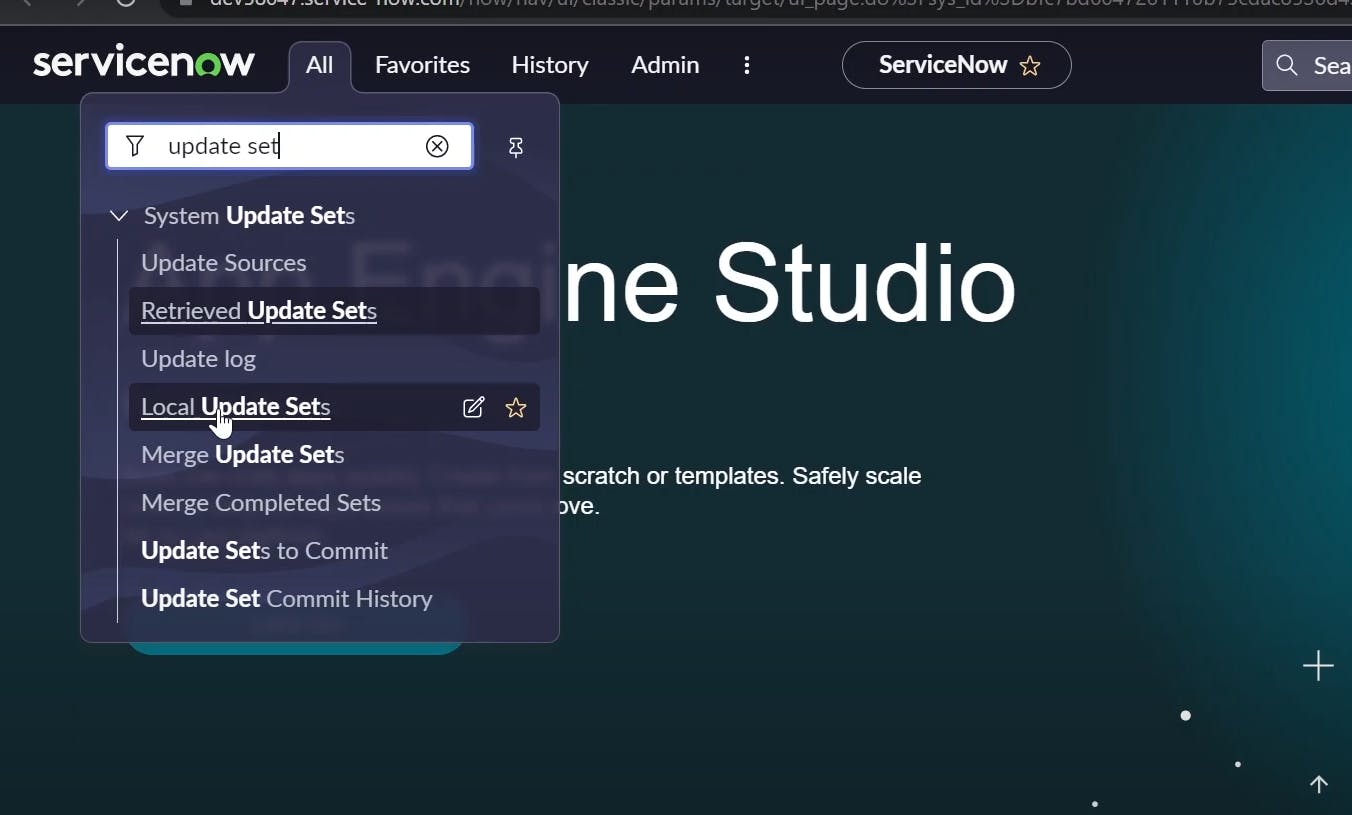
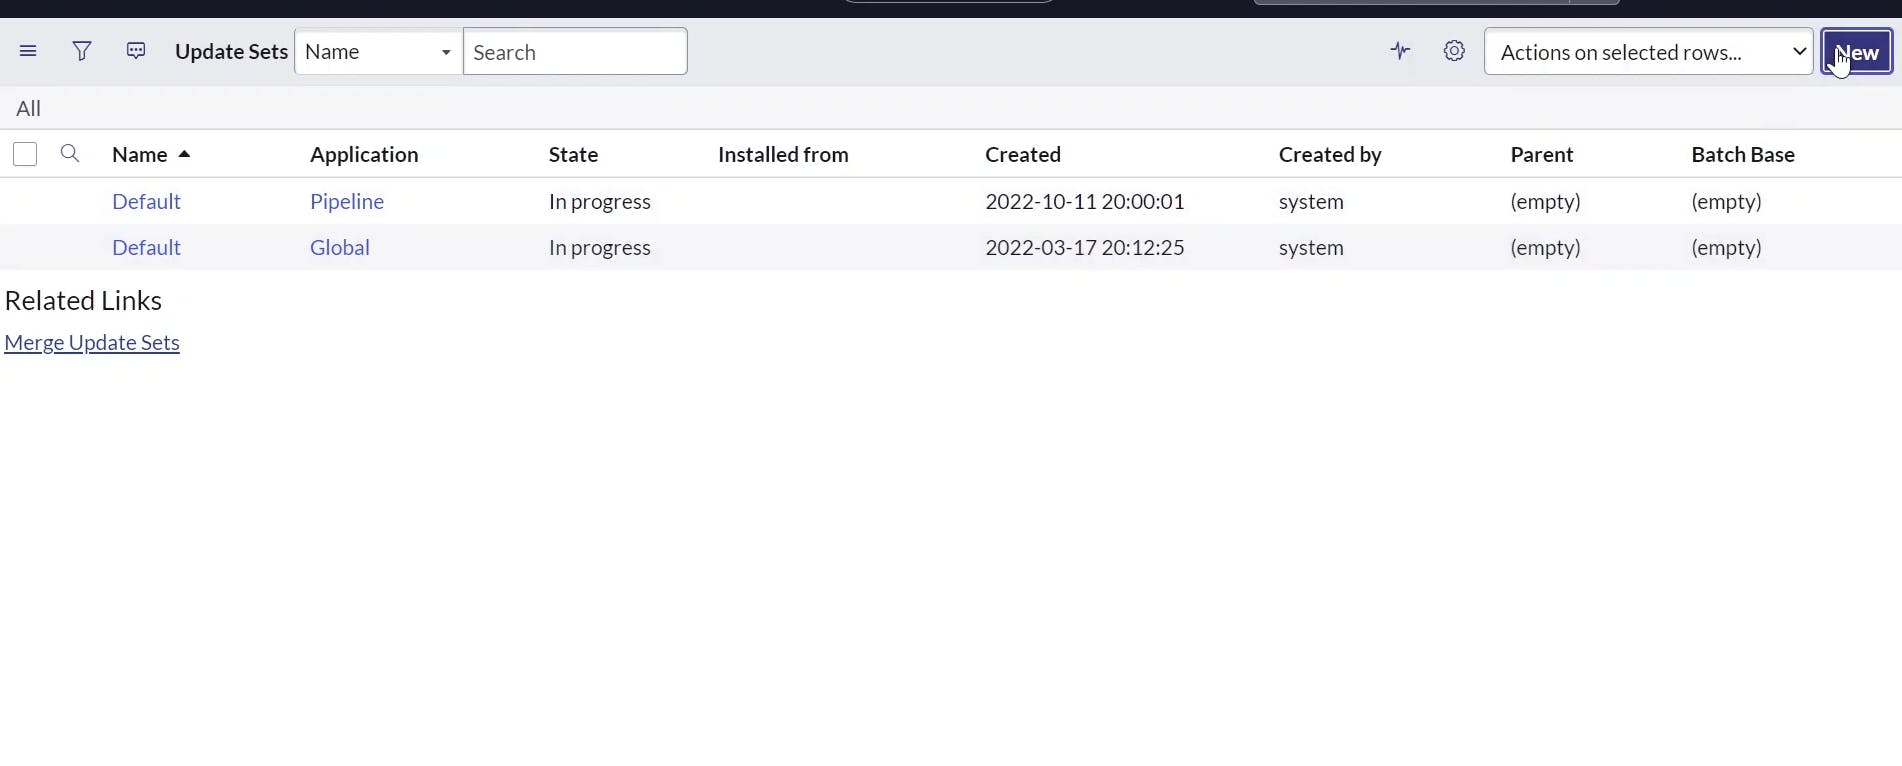
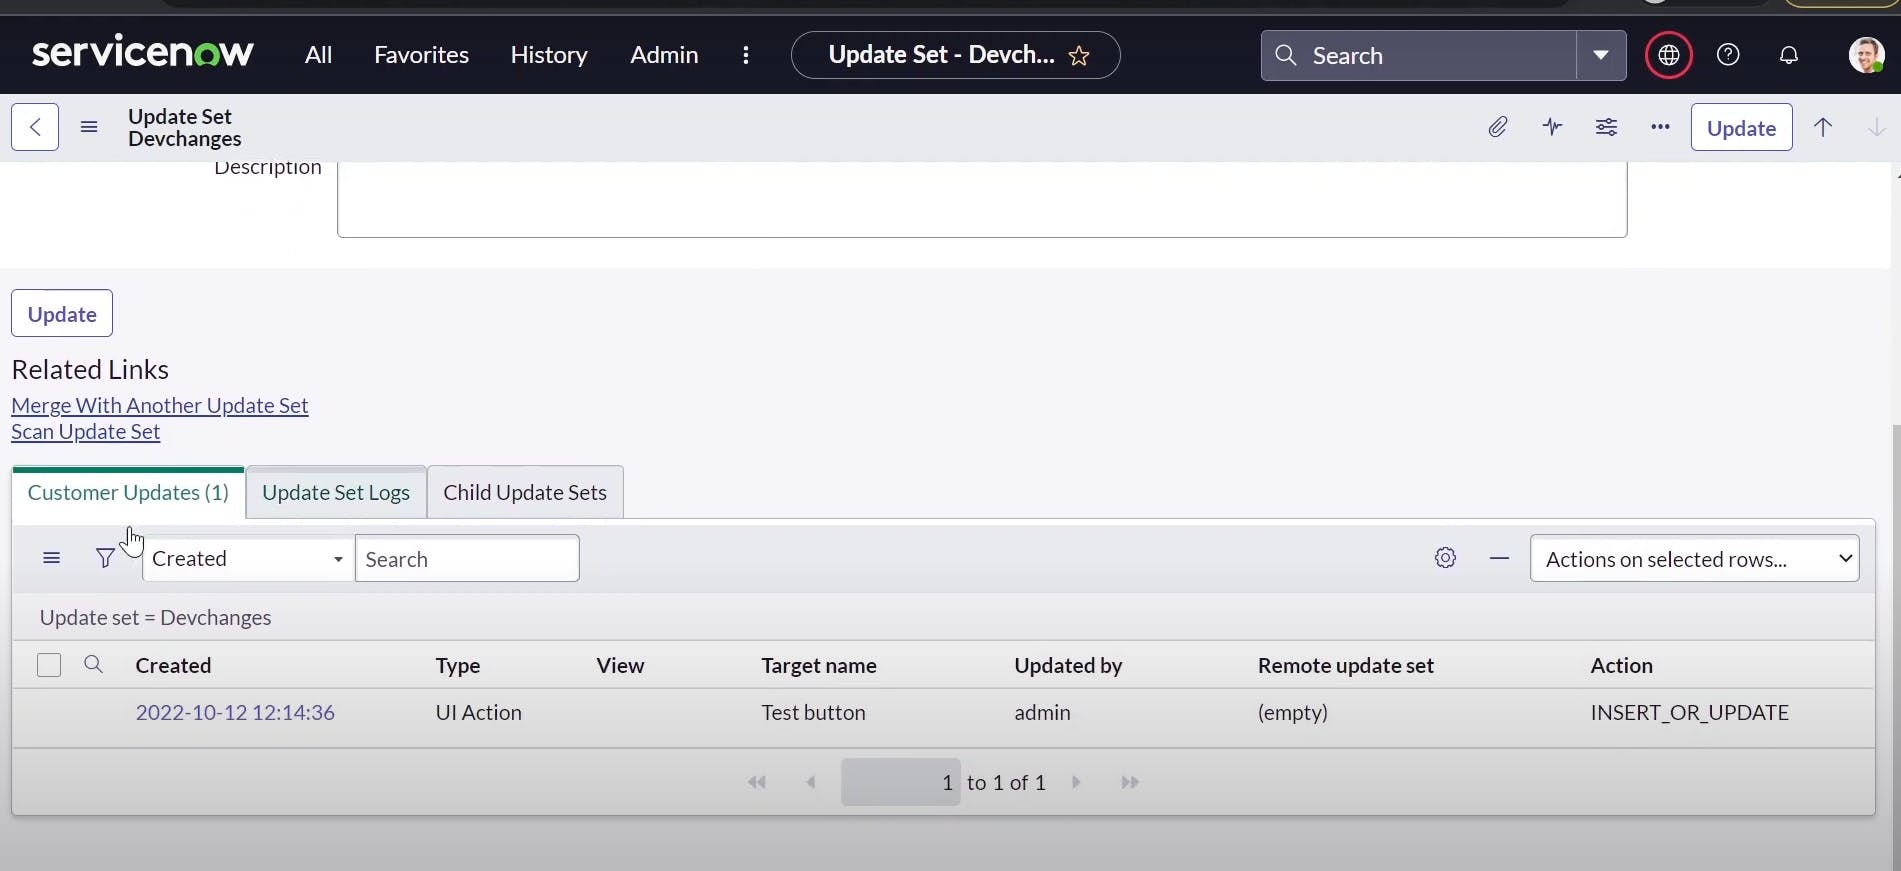
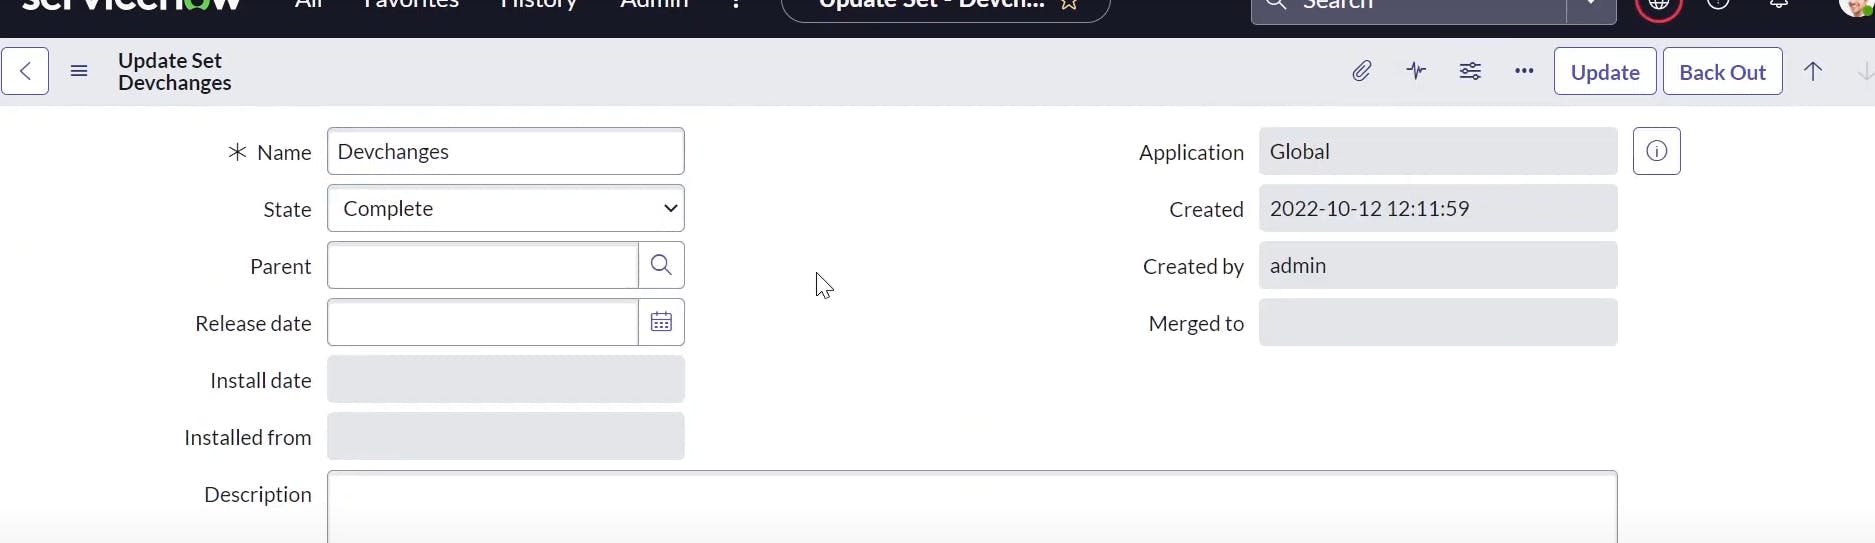
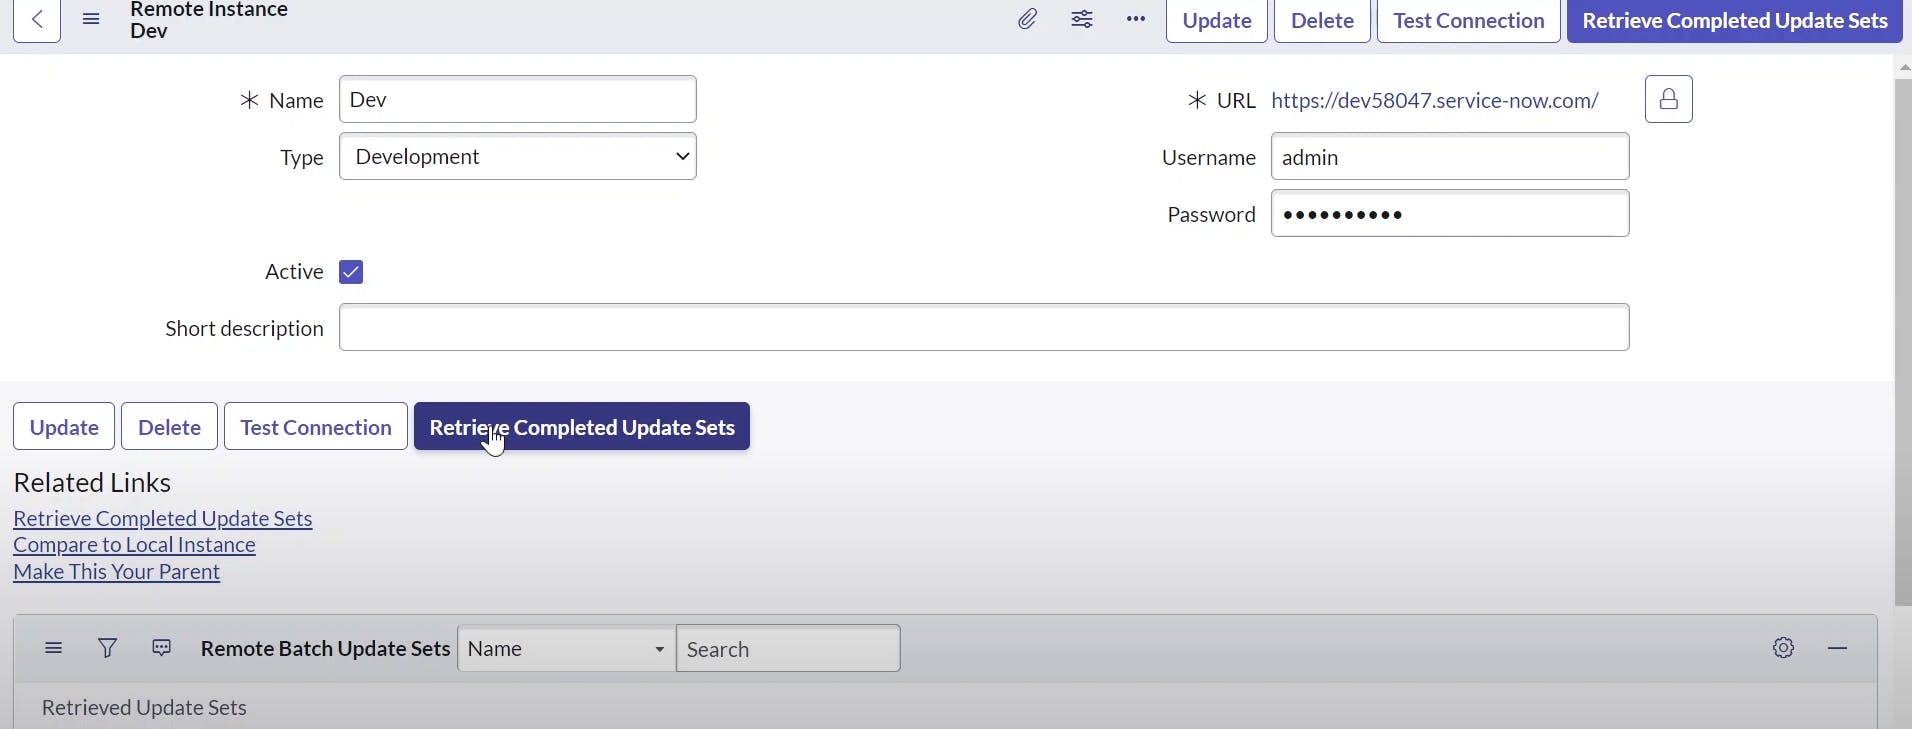
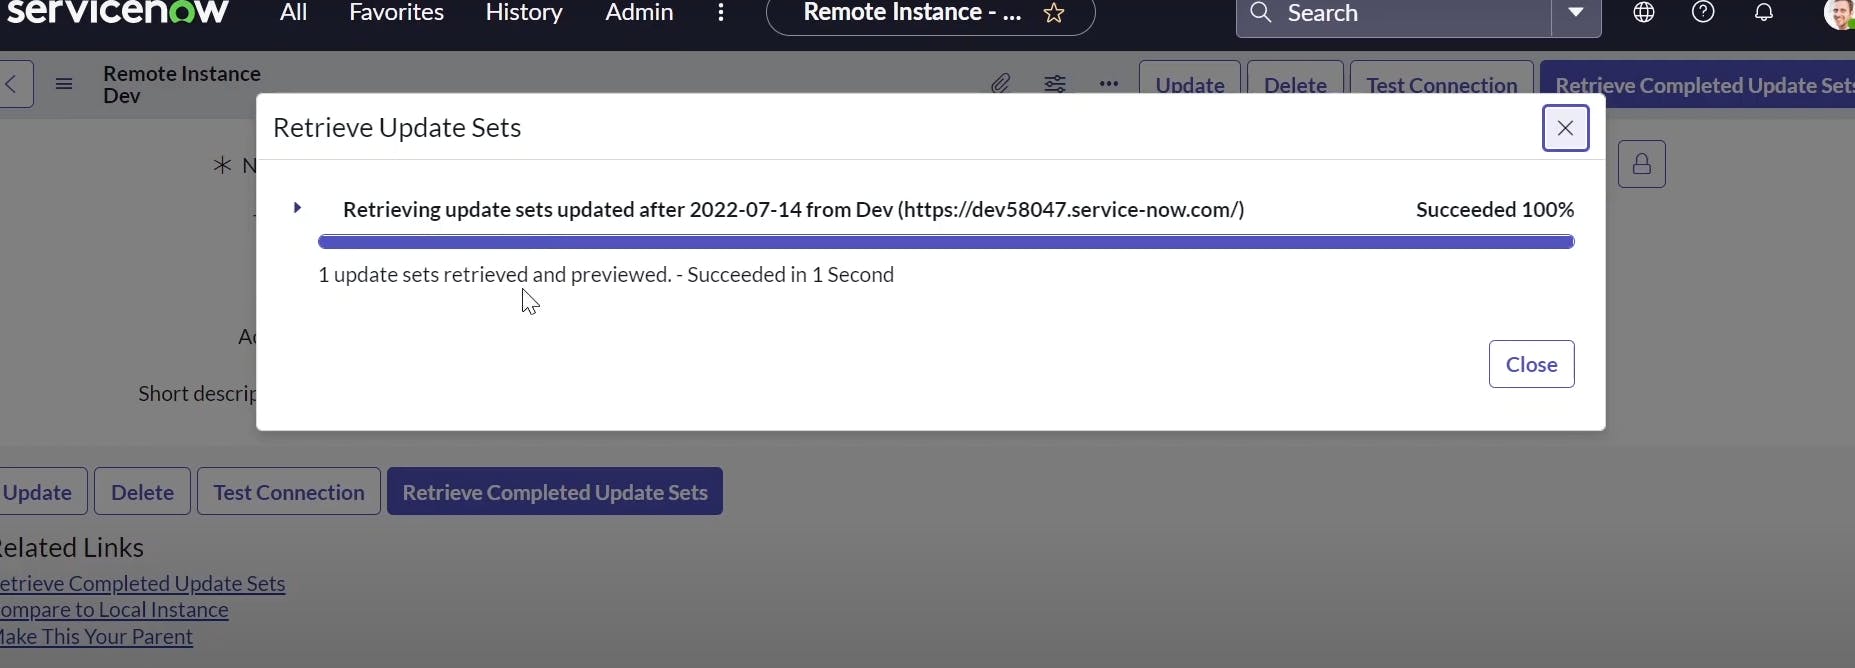
PermalinkUpdate Set
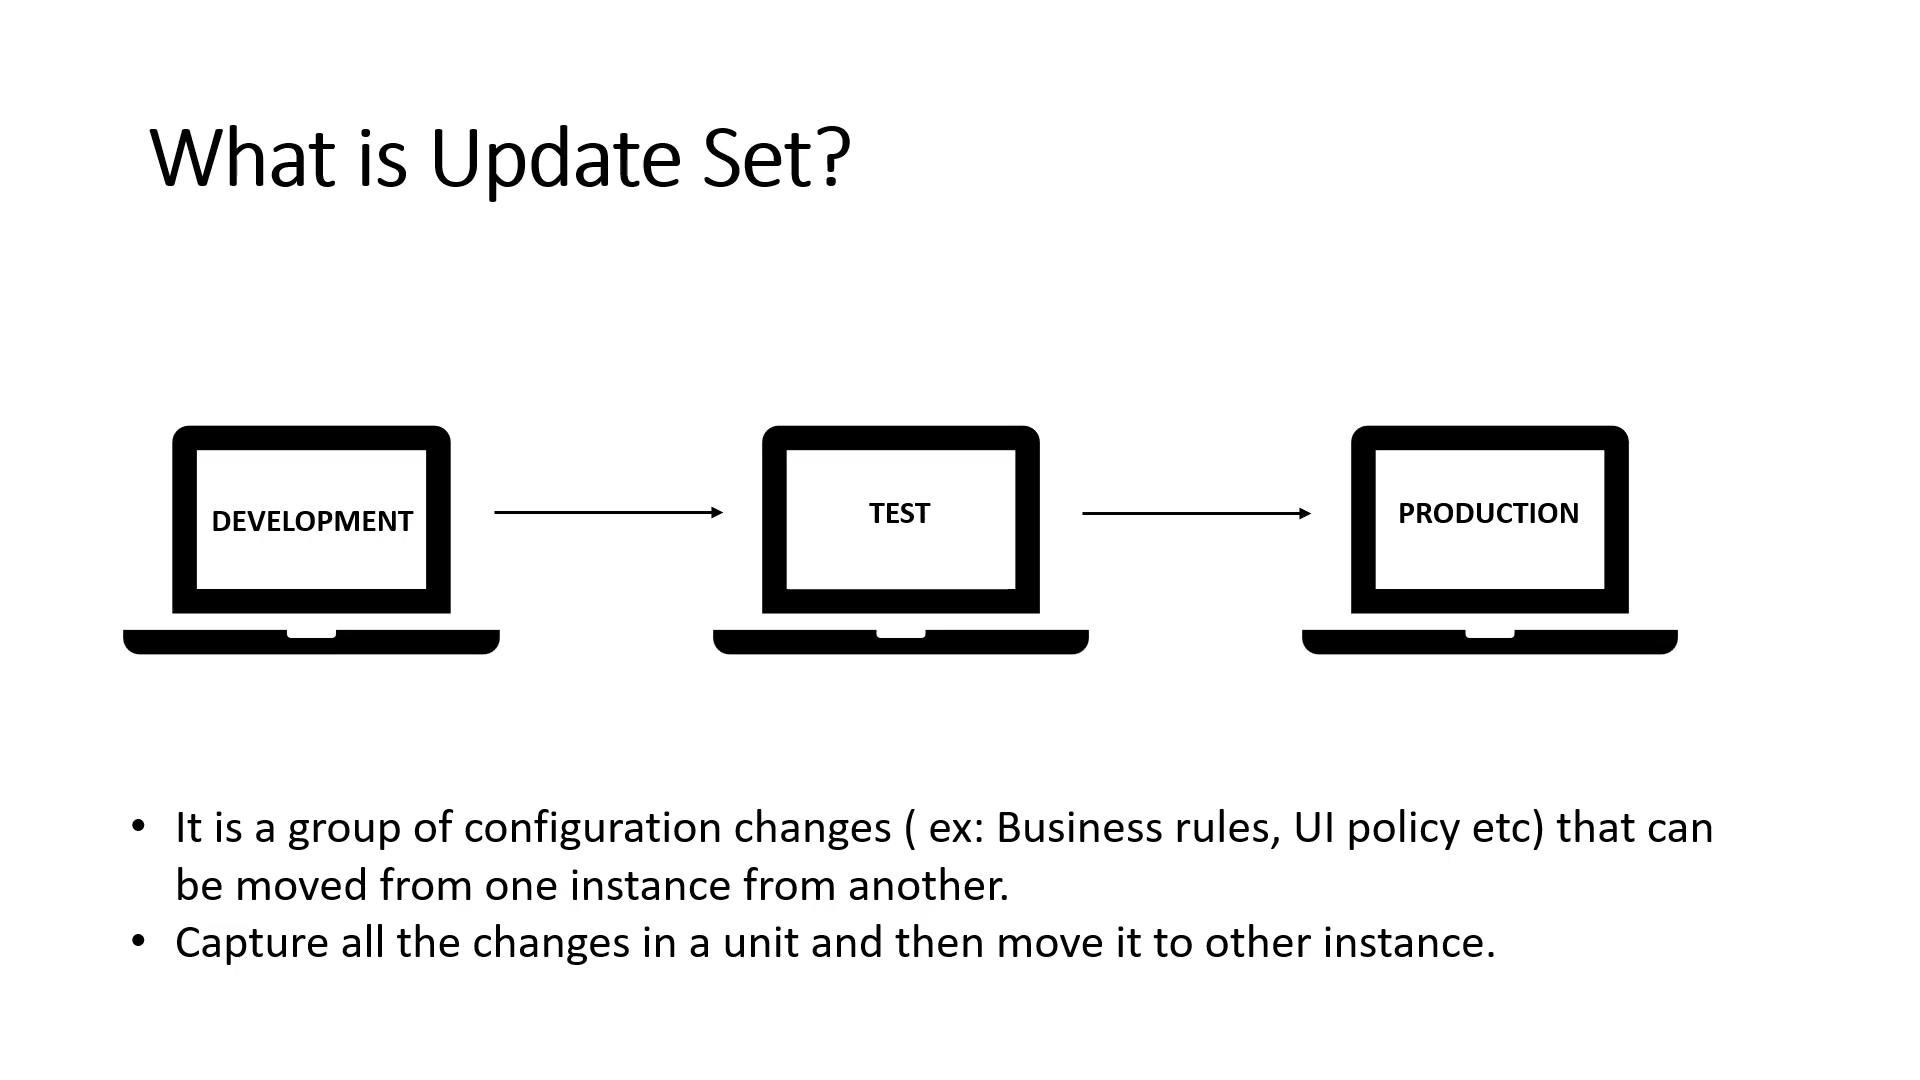


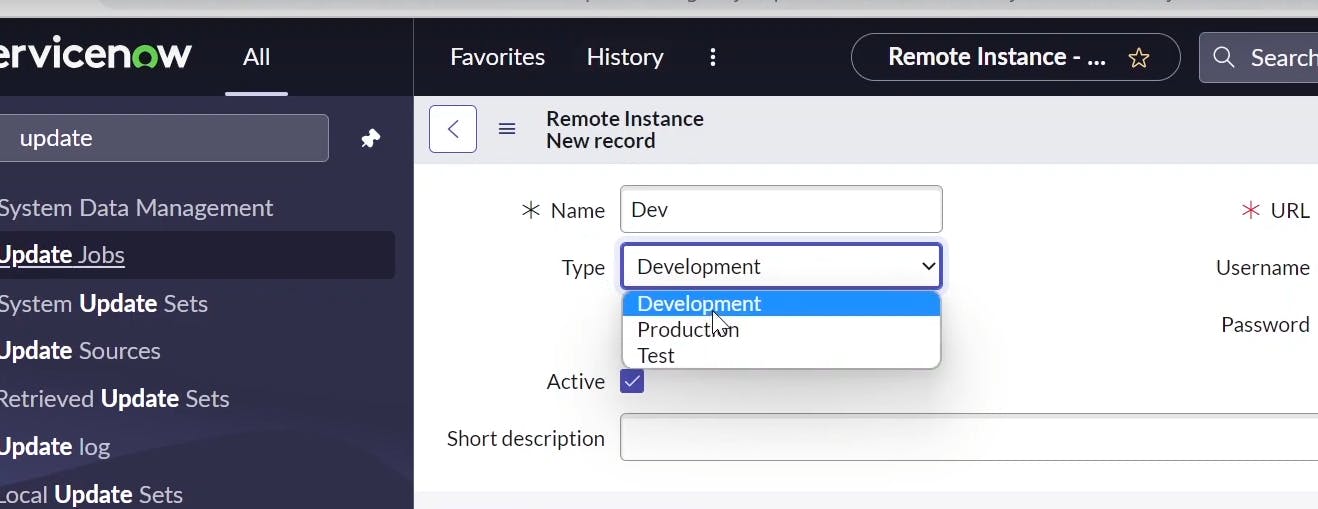
we create two instances and connect developer to other account
by clicking new we connect the develooper instance while we are in production instance
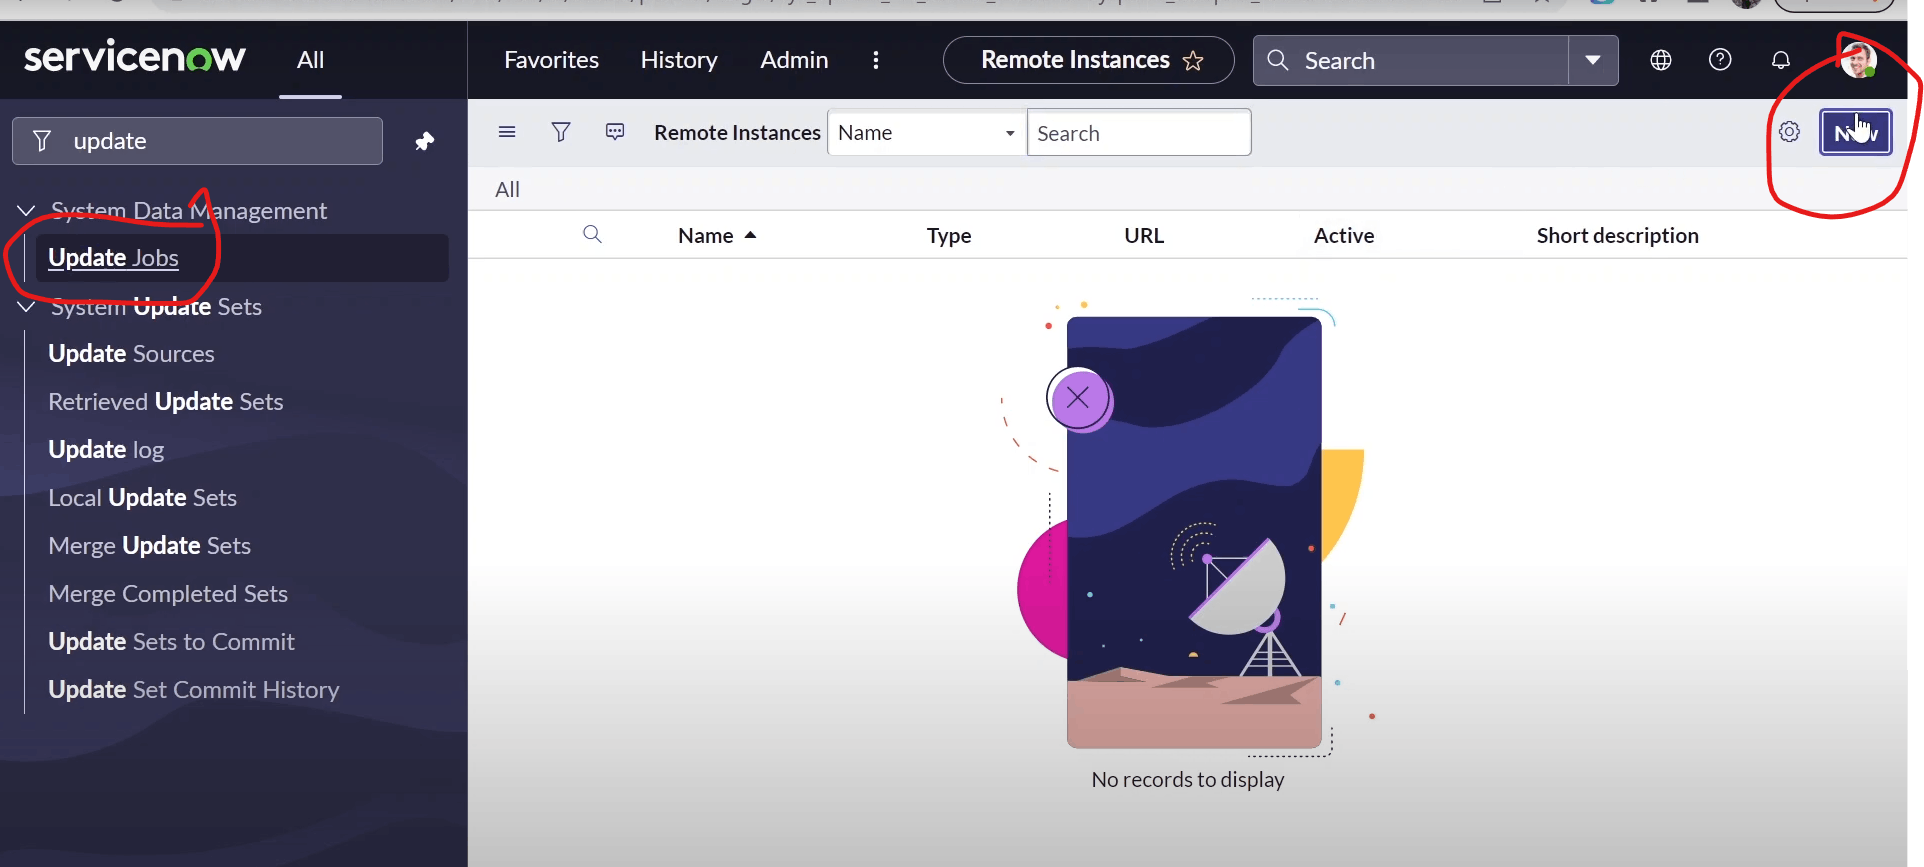
from production instance connect to developer instance
from developer you copy those and paste in production

paste them production instance

to create a update set
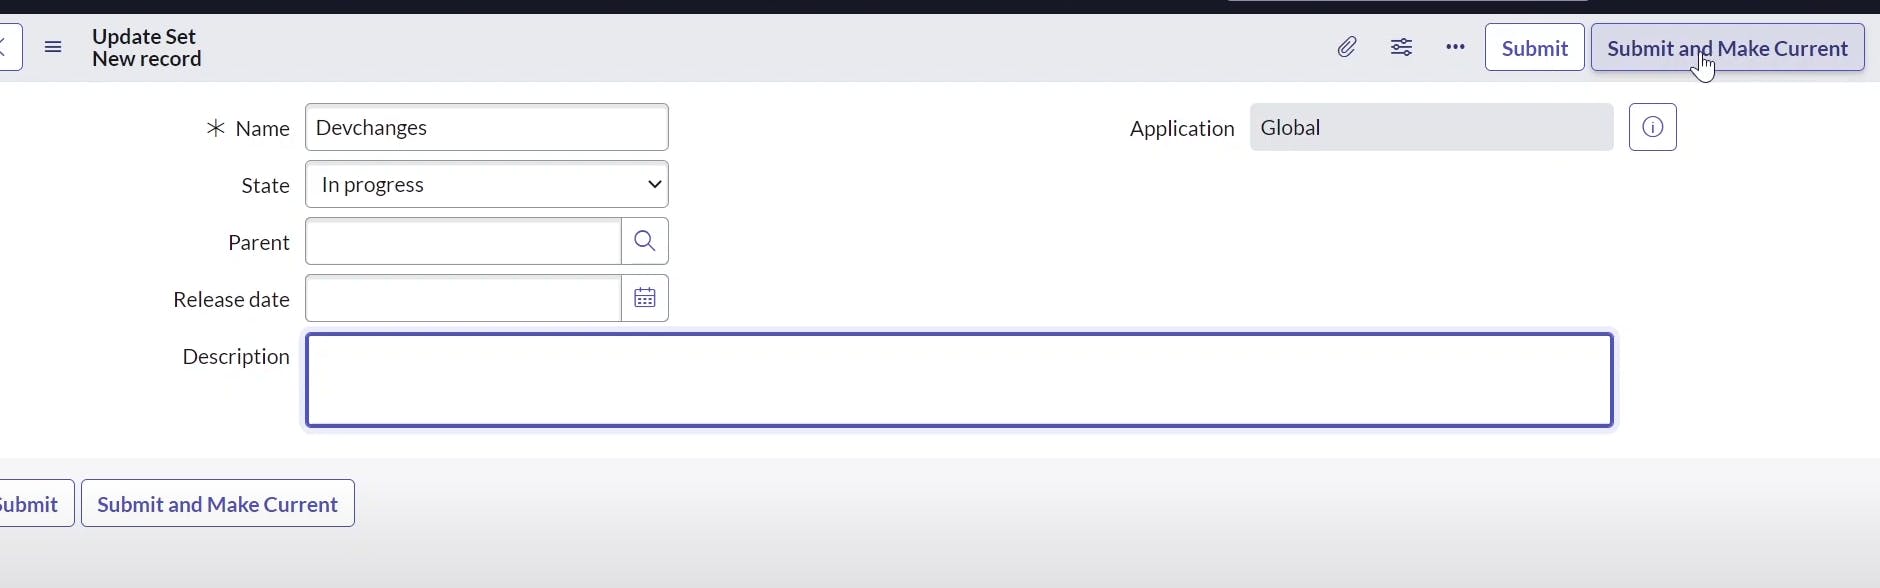
now after you click submit and make current now all changes we do will go to the devchanges we have created
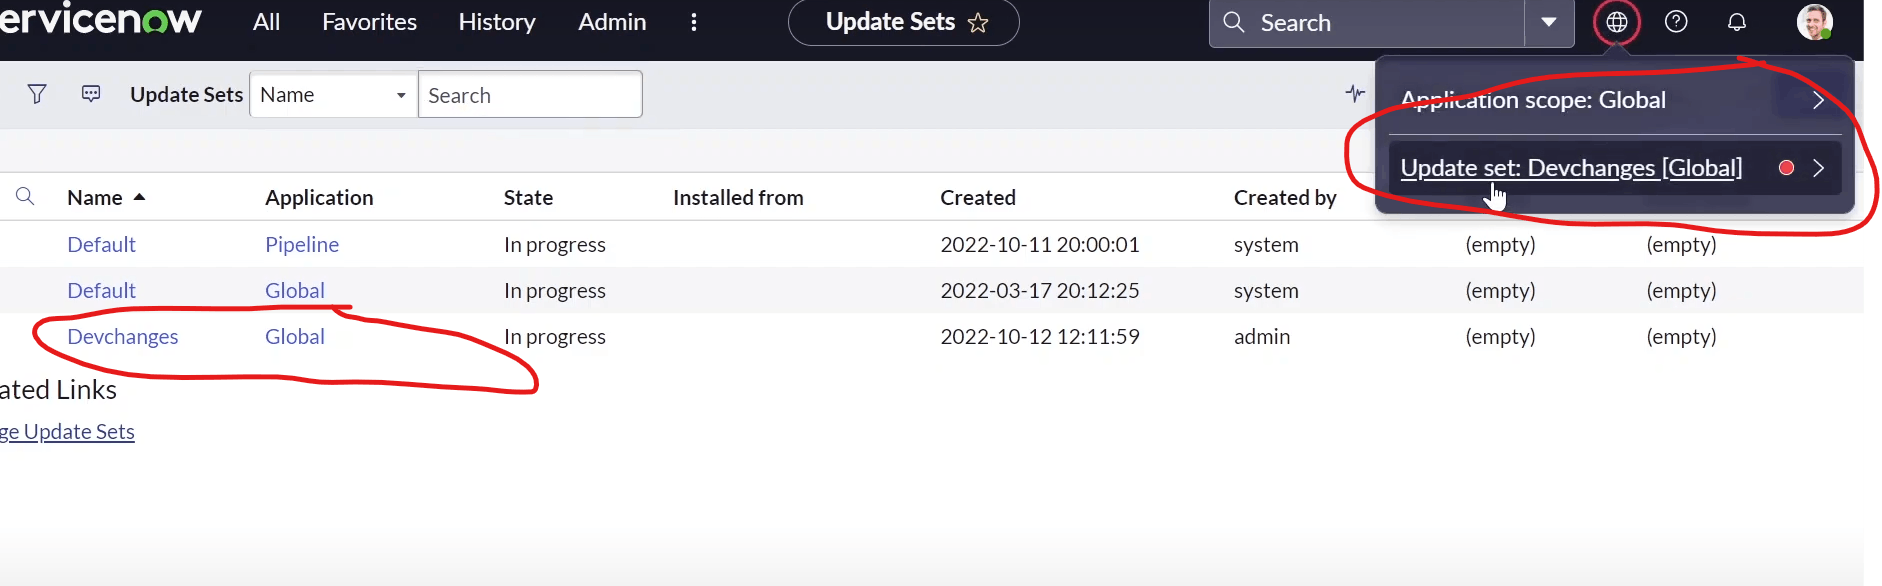
now create a ui action
now the action is stored in new update set we have created
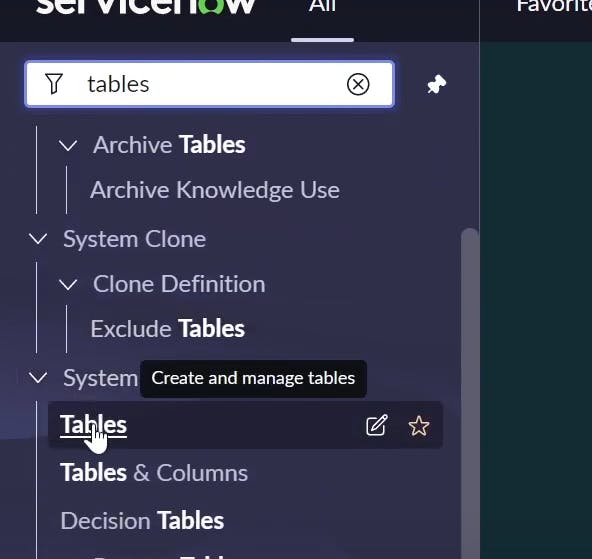
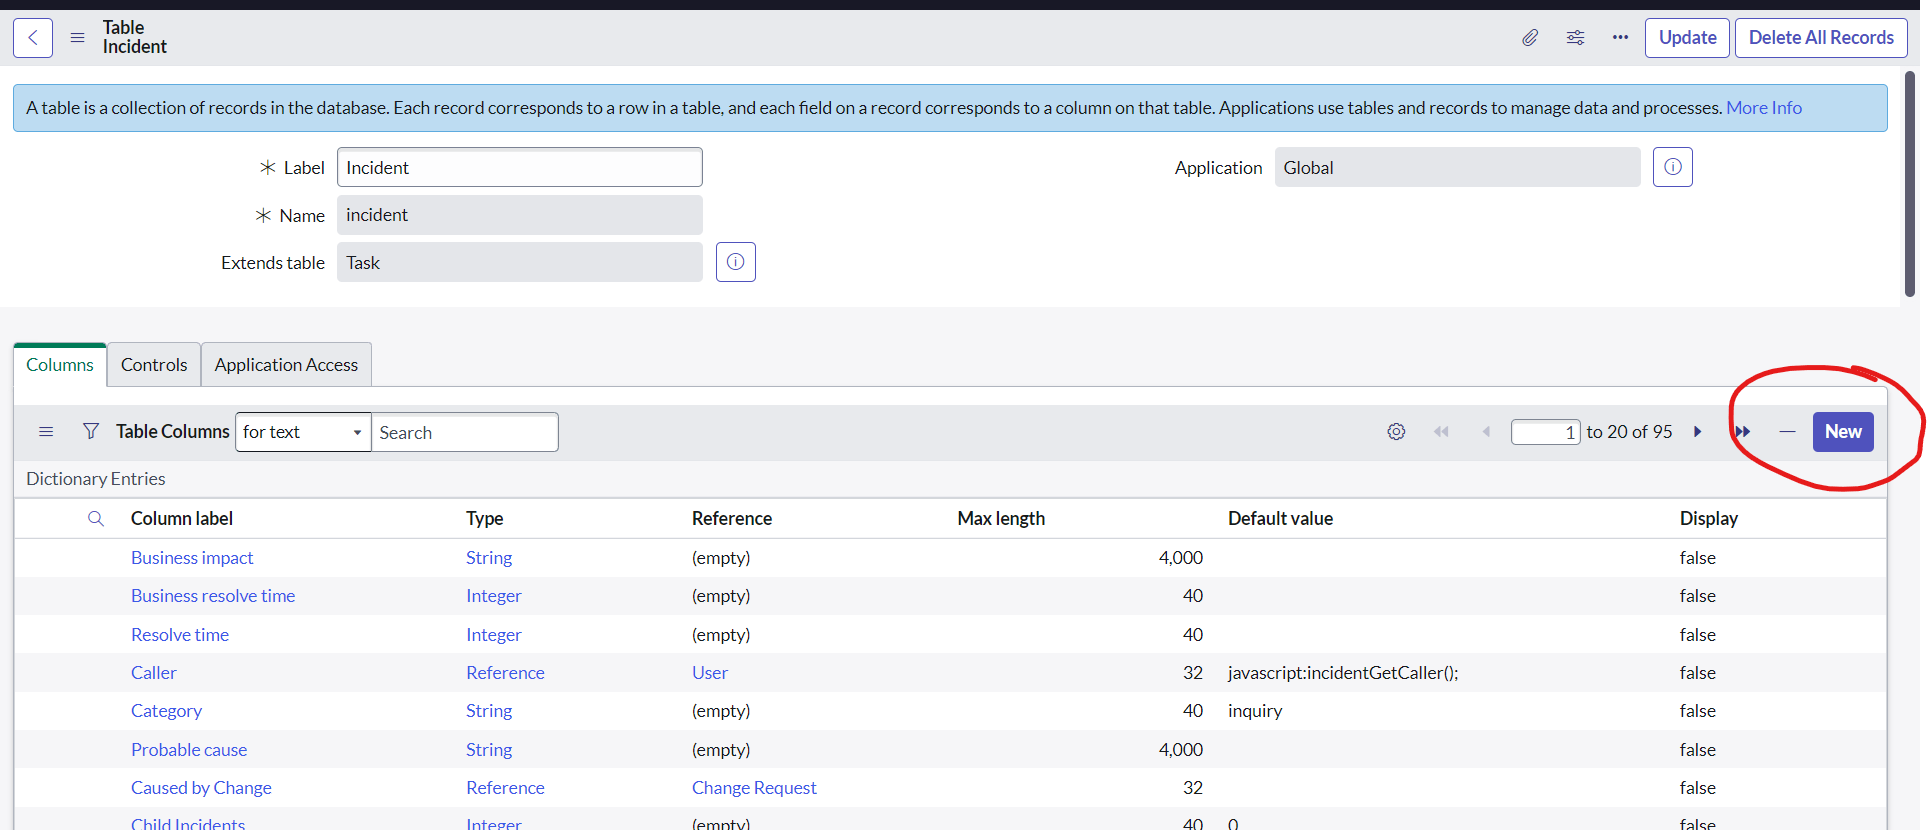
PermalinkServiceNow Tables


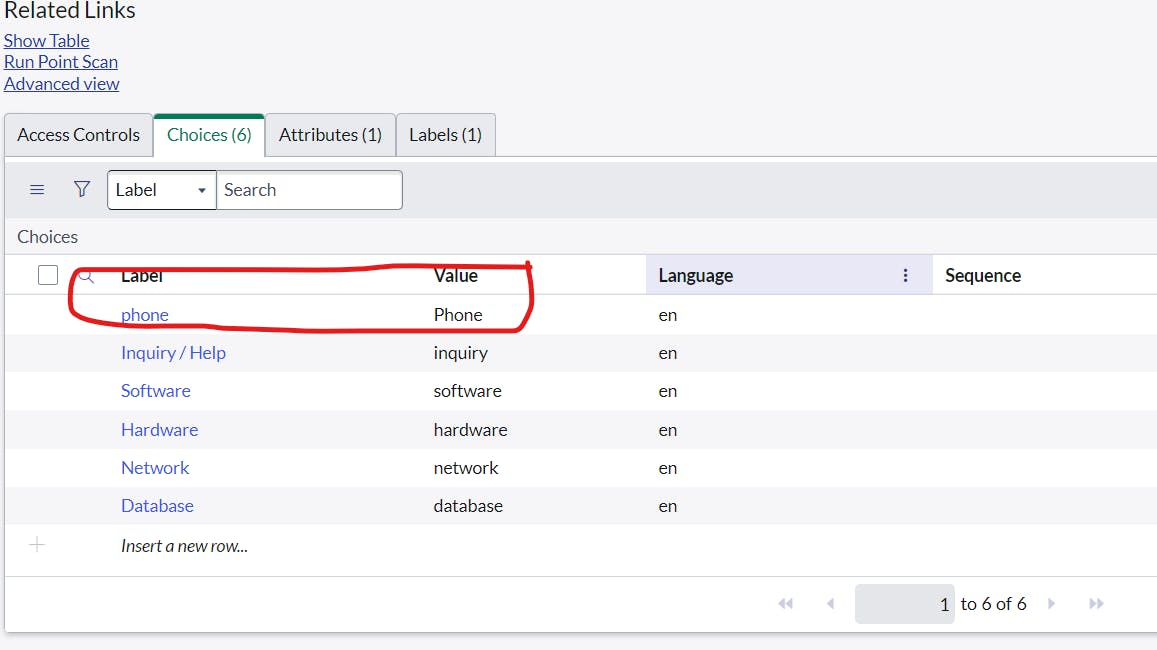
to create a new category
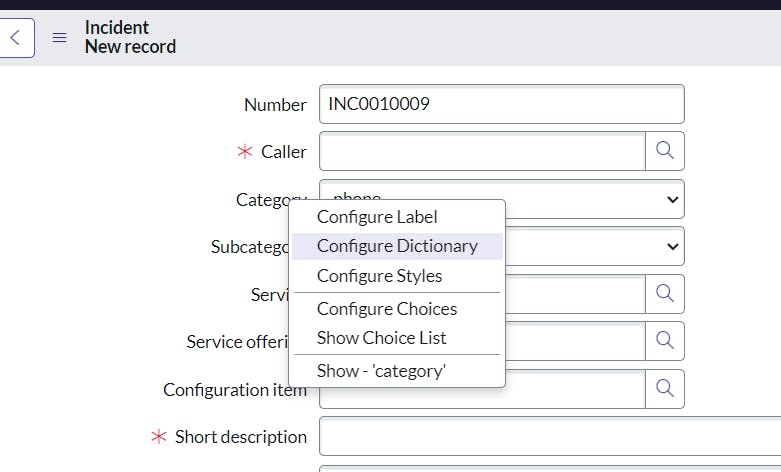
add phone as category
to change the subcategory

To create new fields inn incident form


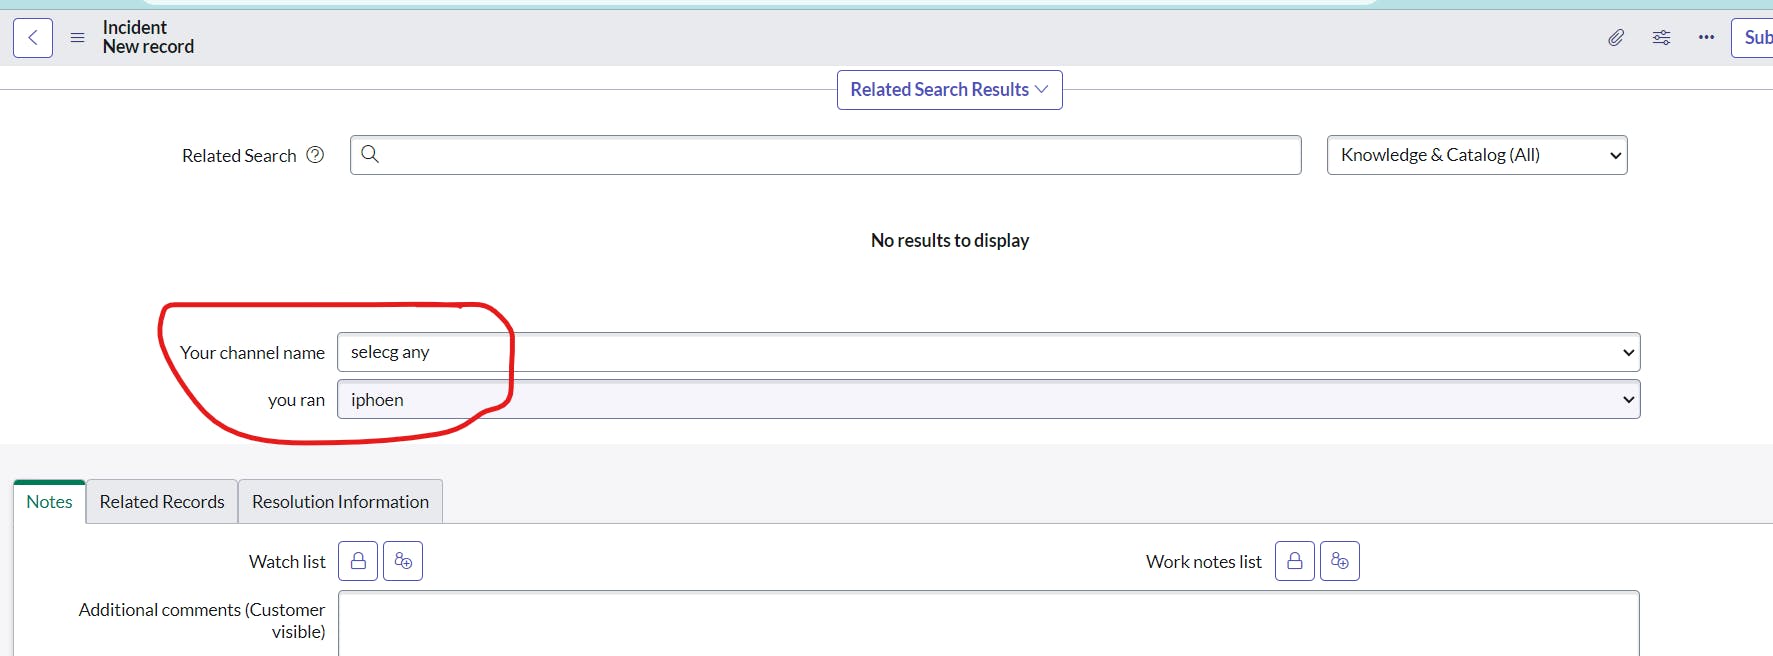
PermalinkServiceNow Table Relationships and Schema Map


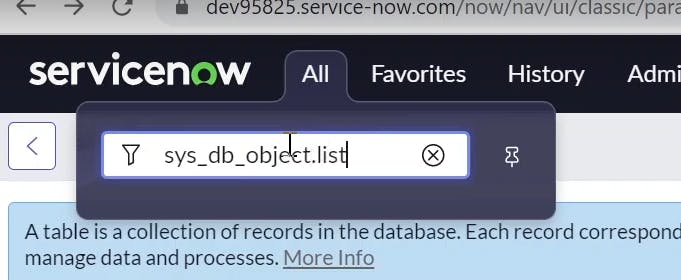
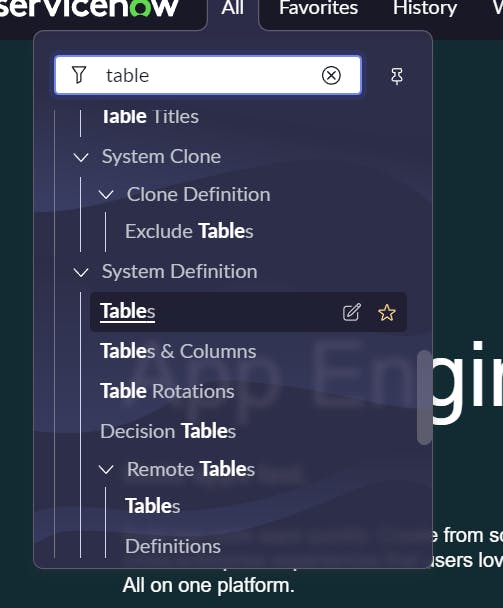
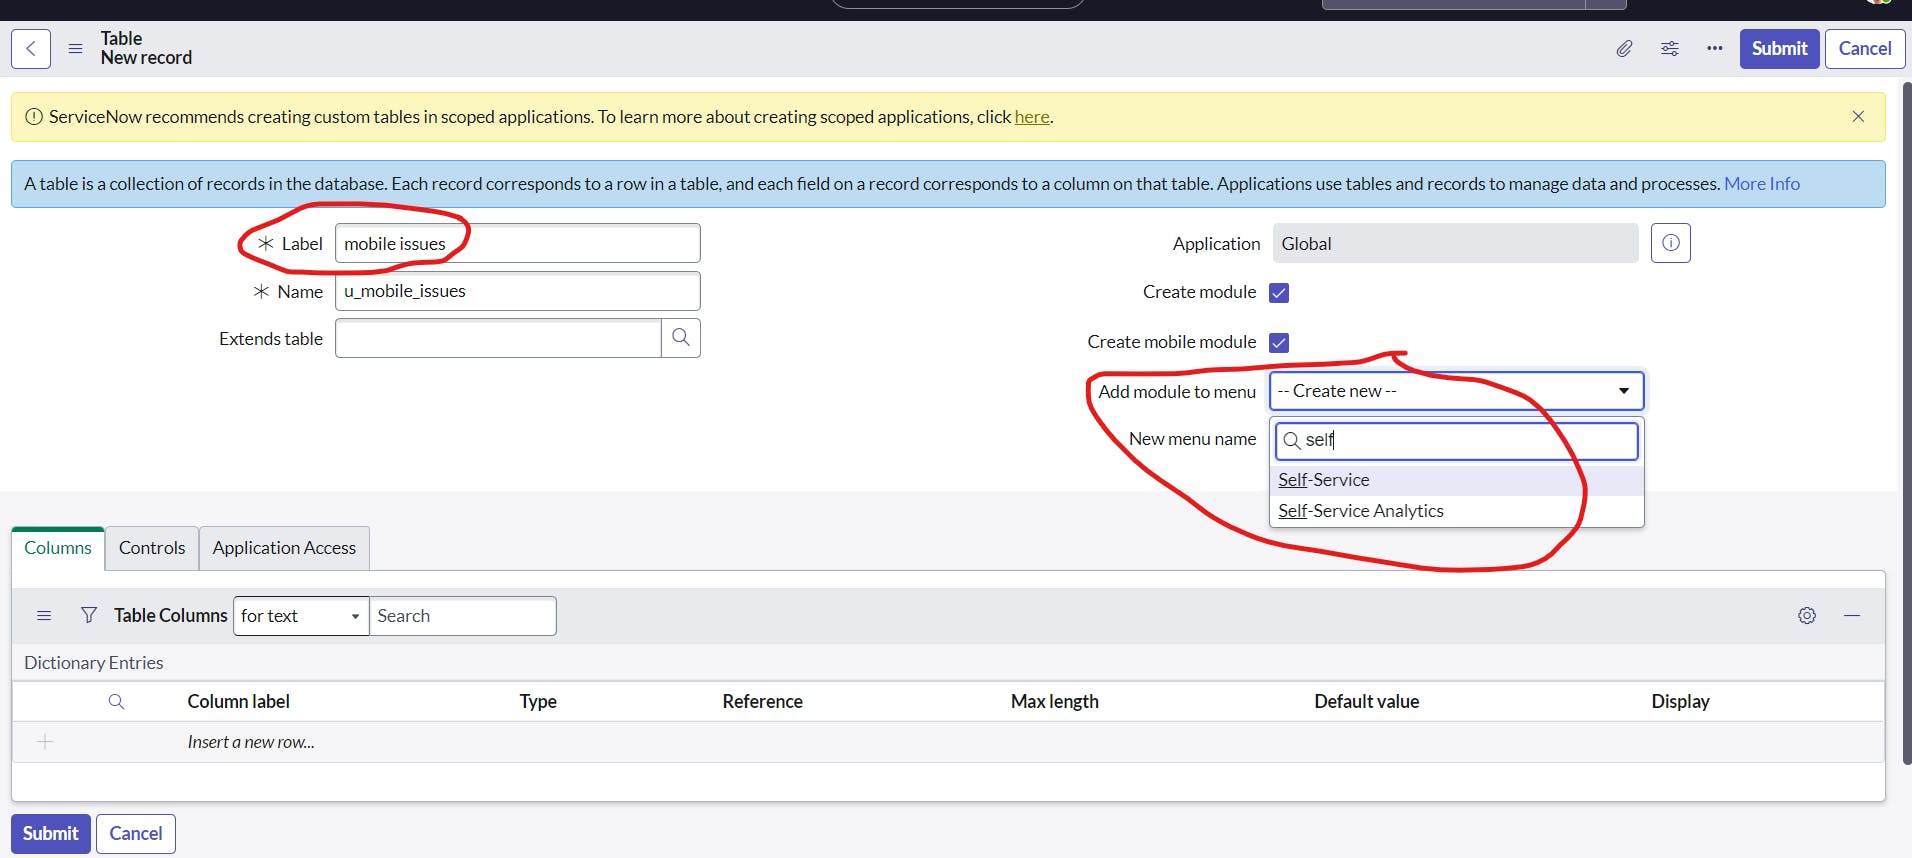
PermalinkCreating custom table
you can open like this or search sys_db_object.list

or you can select tables and columns and select Create table
after clicking save
column labels are created automatically
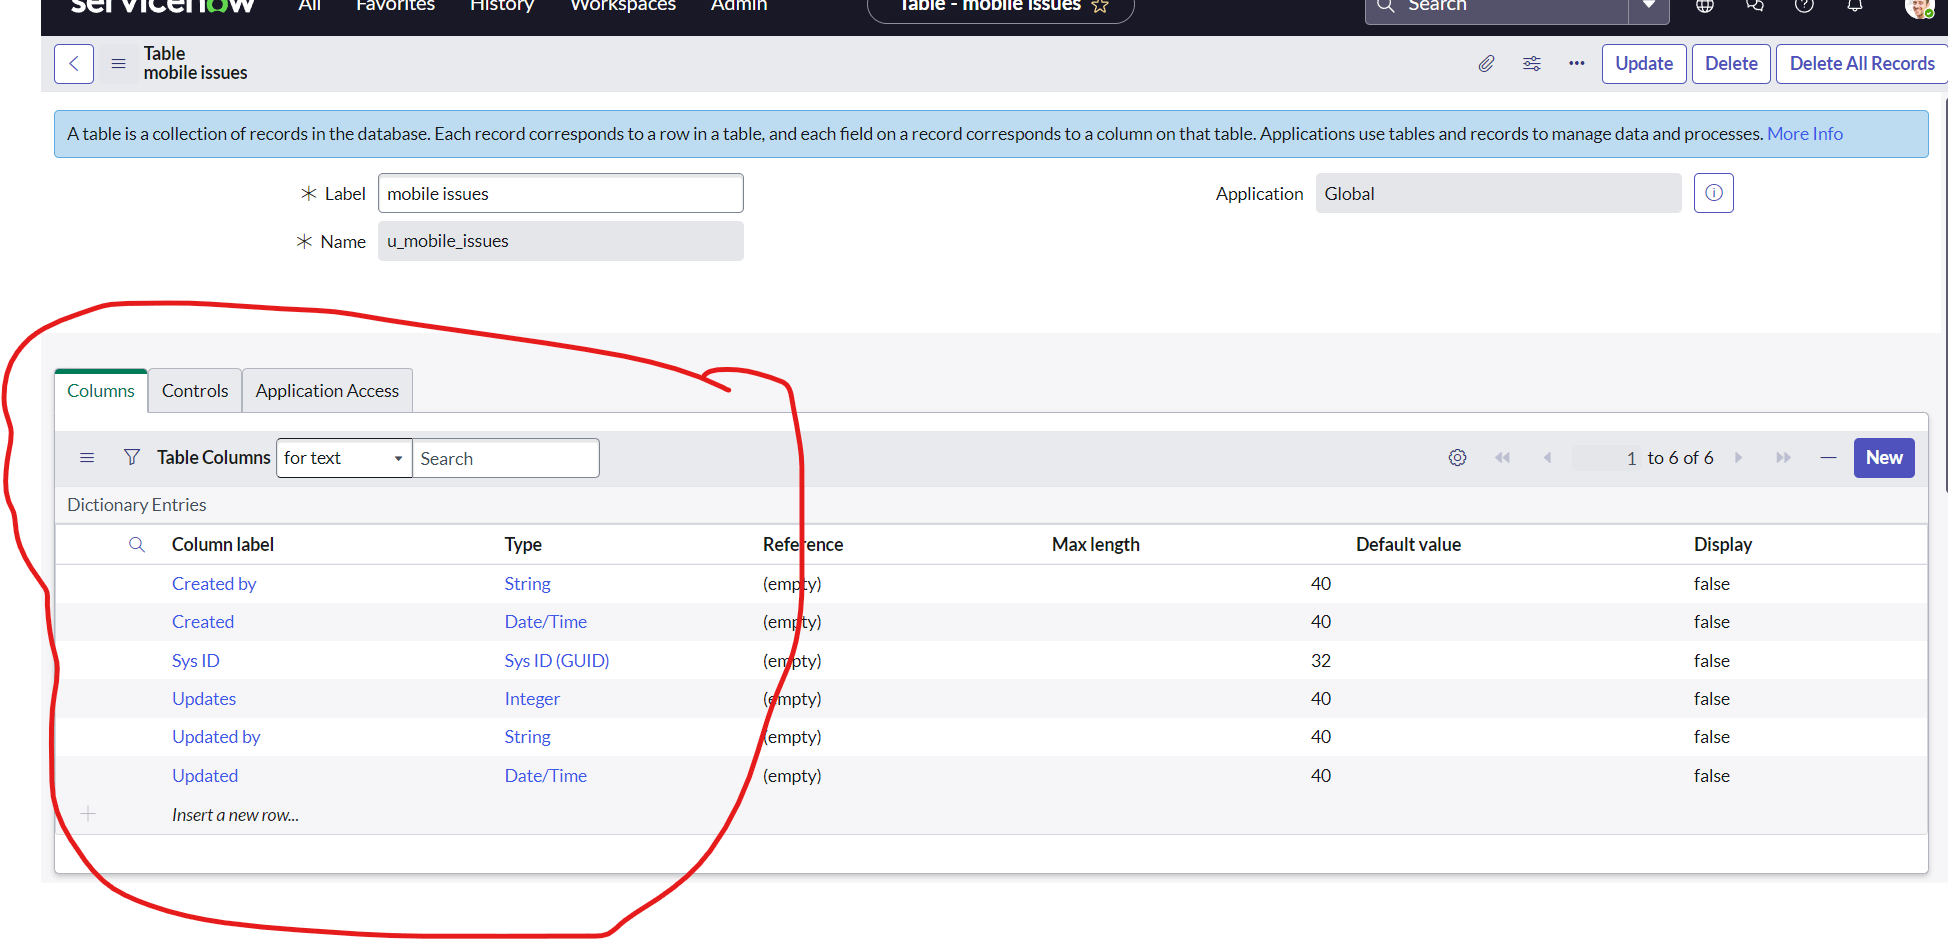
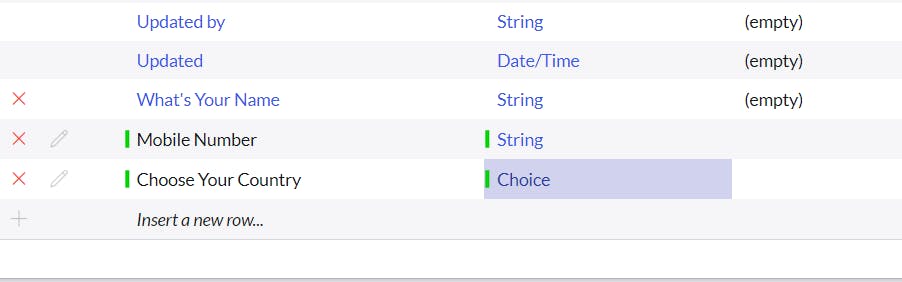
click new to add a new field

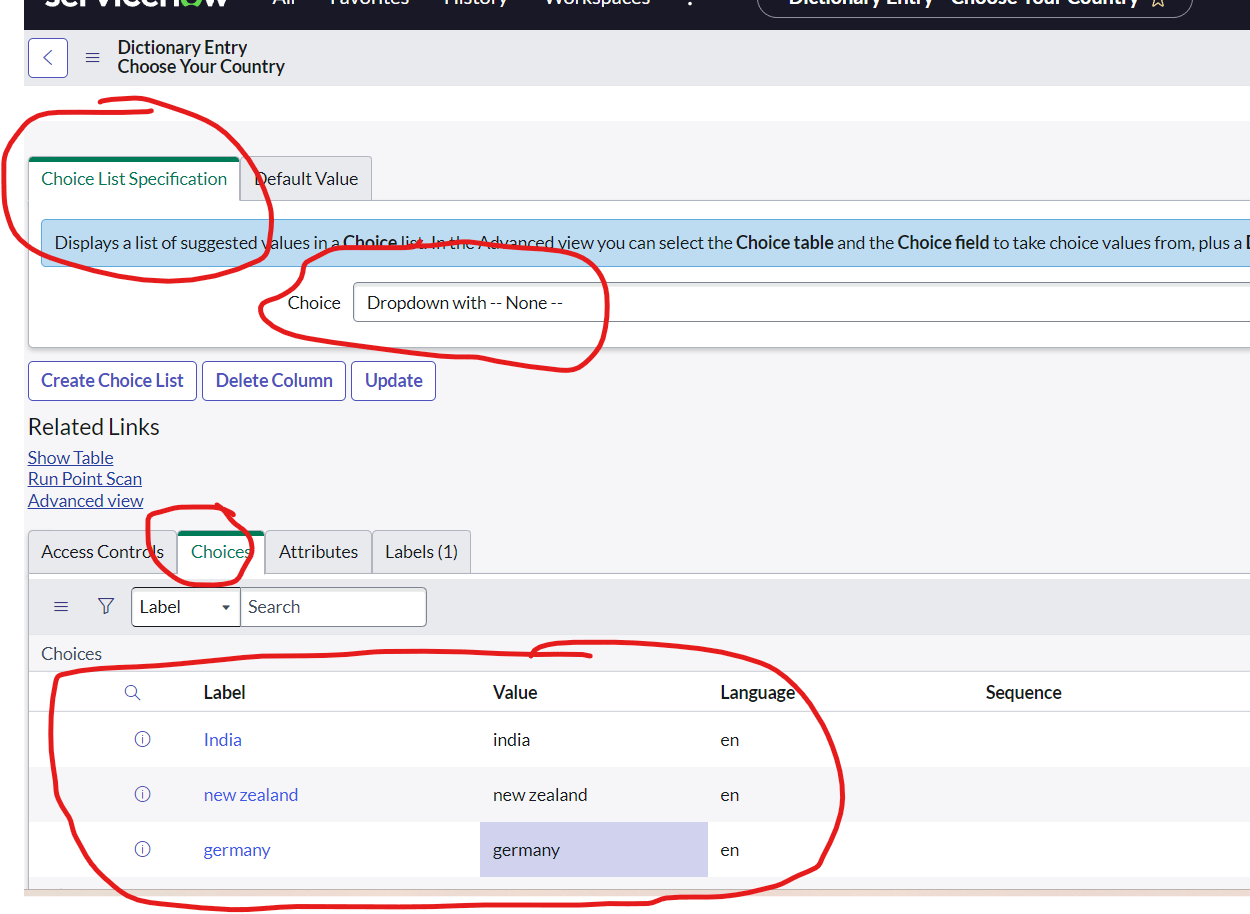
if we select string the input is string value and if we select choics we select choices to select
by clicking on choose your country after clicking save we are able to select choices
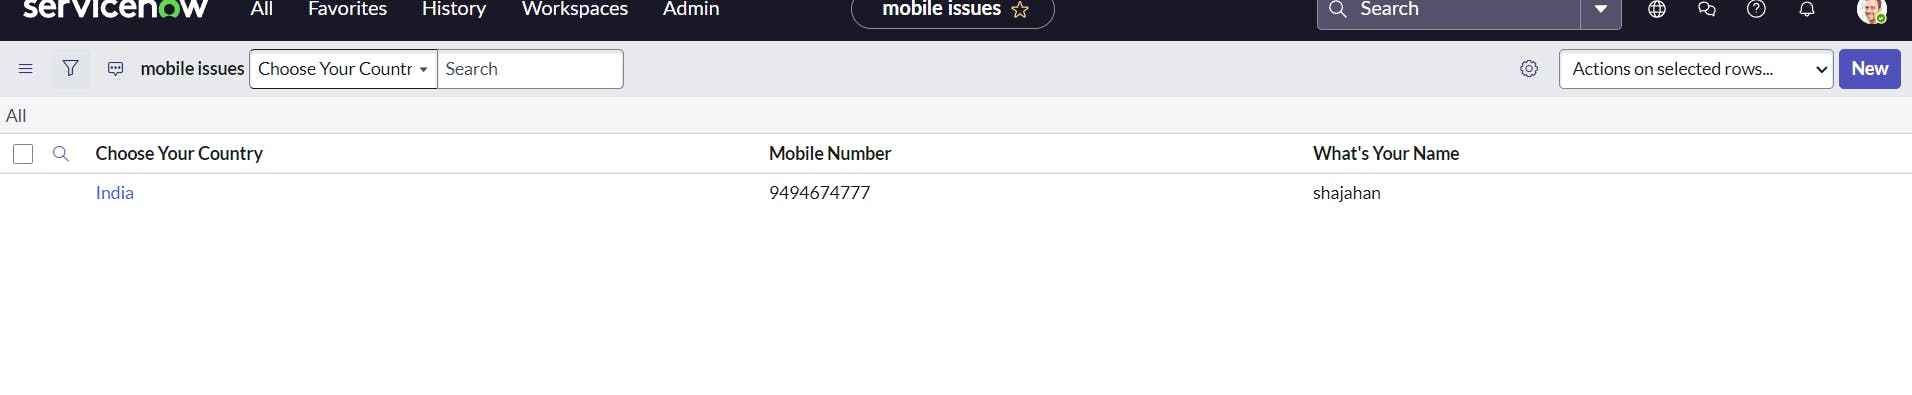
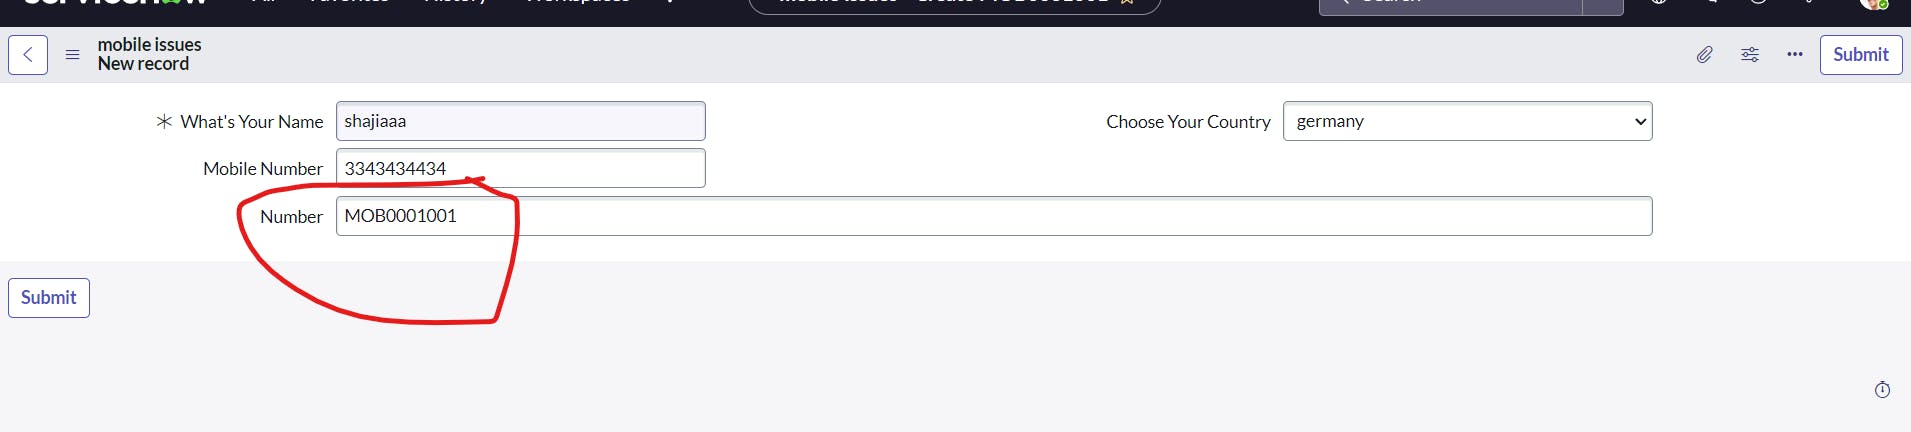
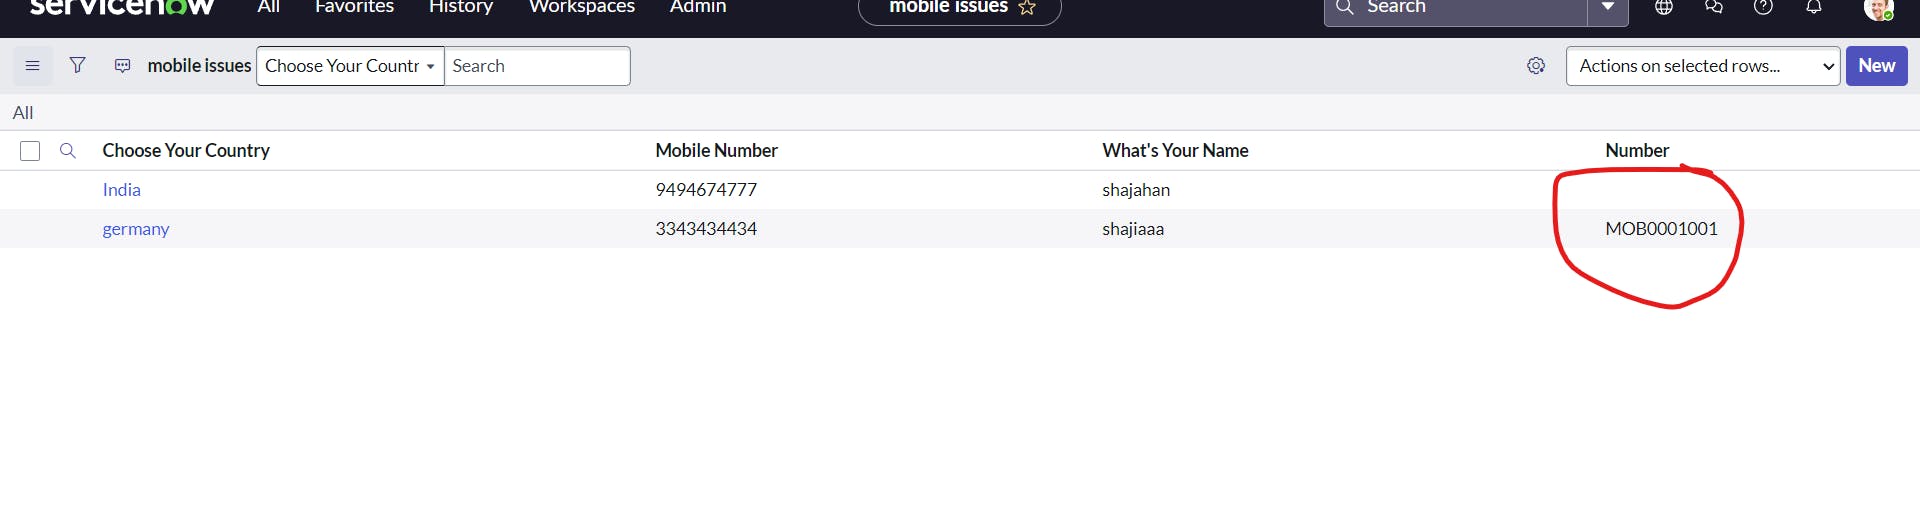
search for mobile issues and click new and create

to put a auto generated number for record we create click on controls and click auto number
and add prefix MOB or any thing and how many numbers after that
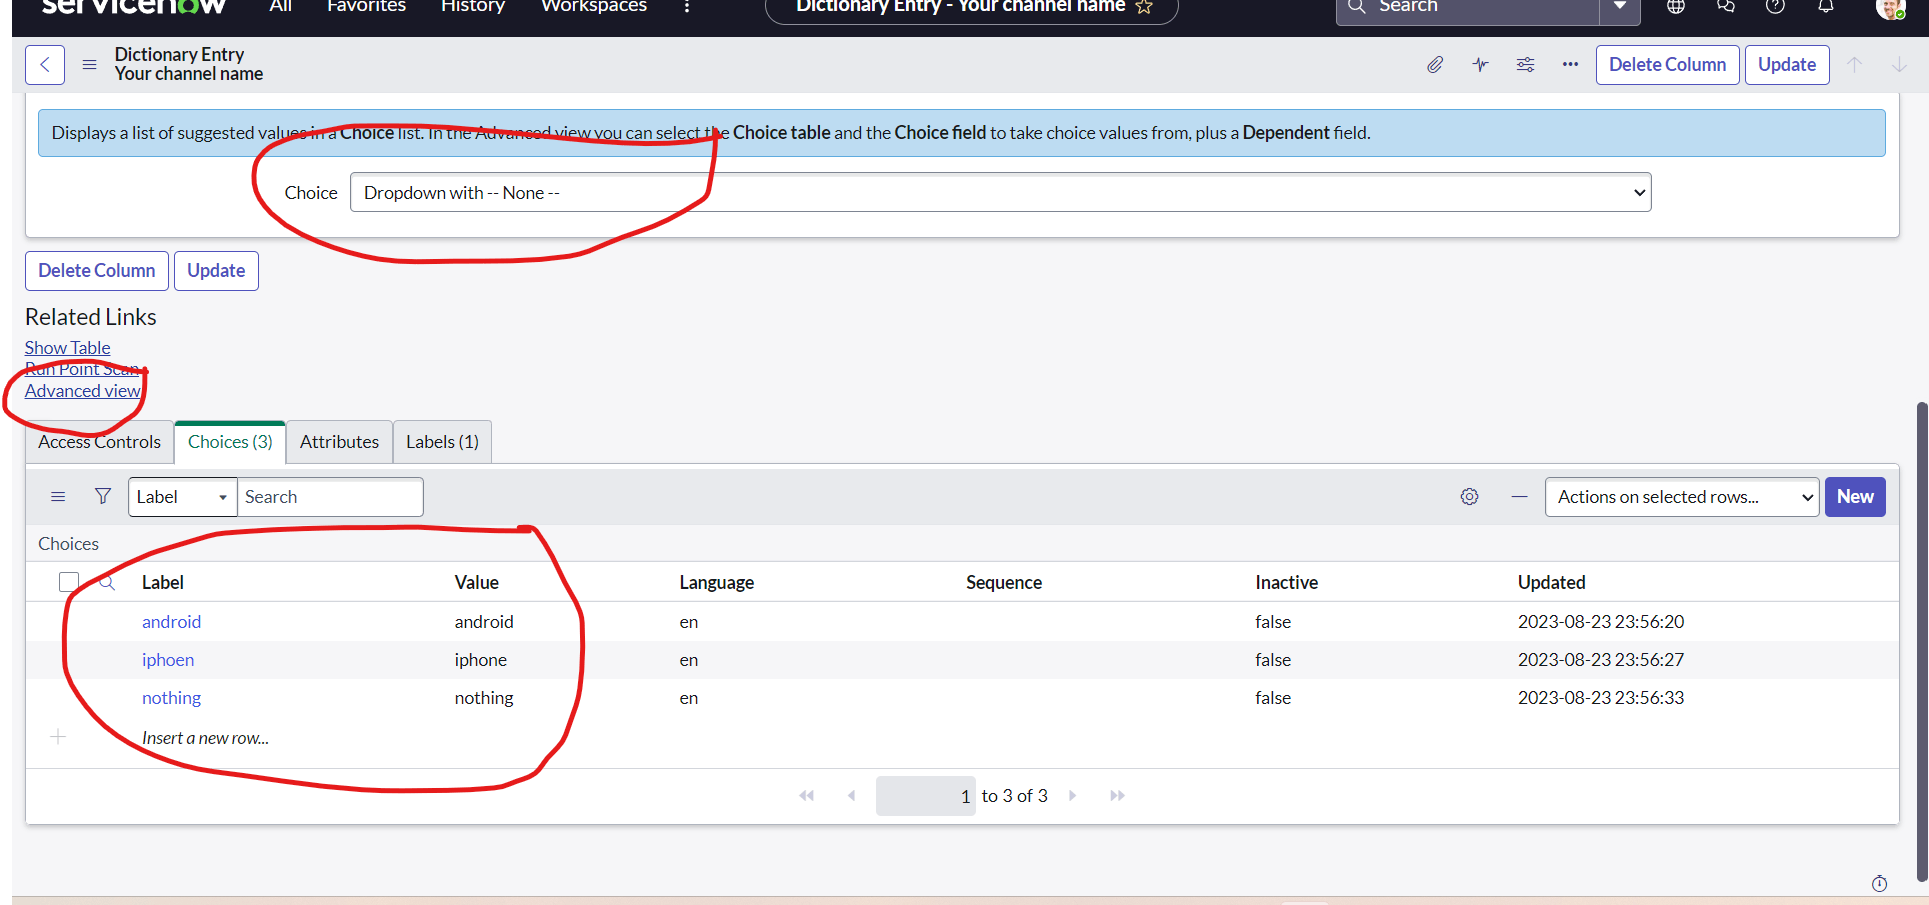
PermalinkExtends Table
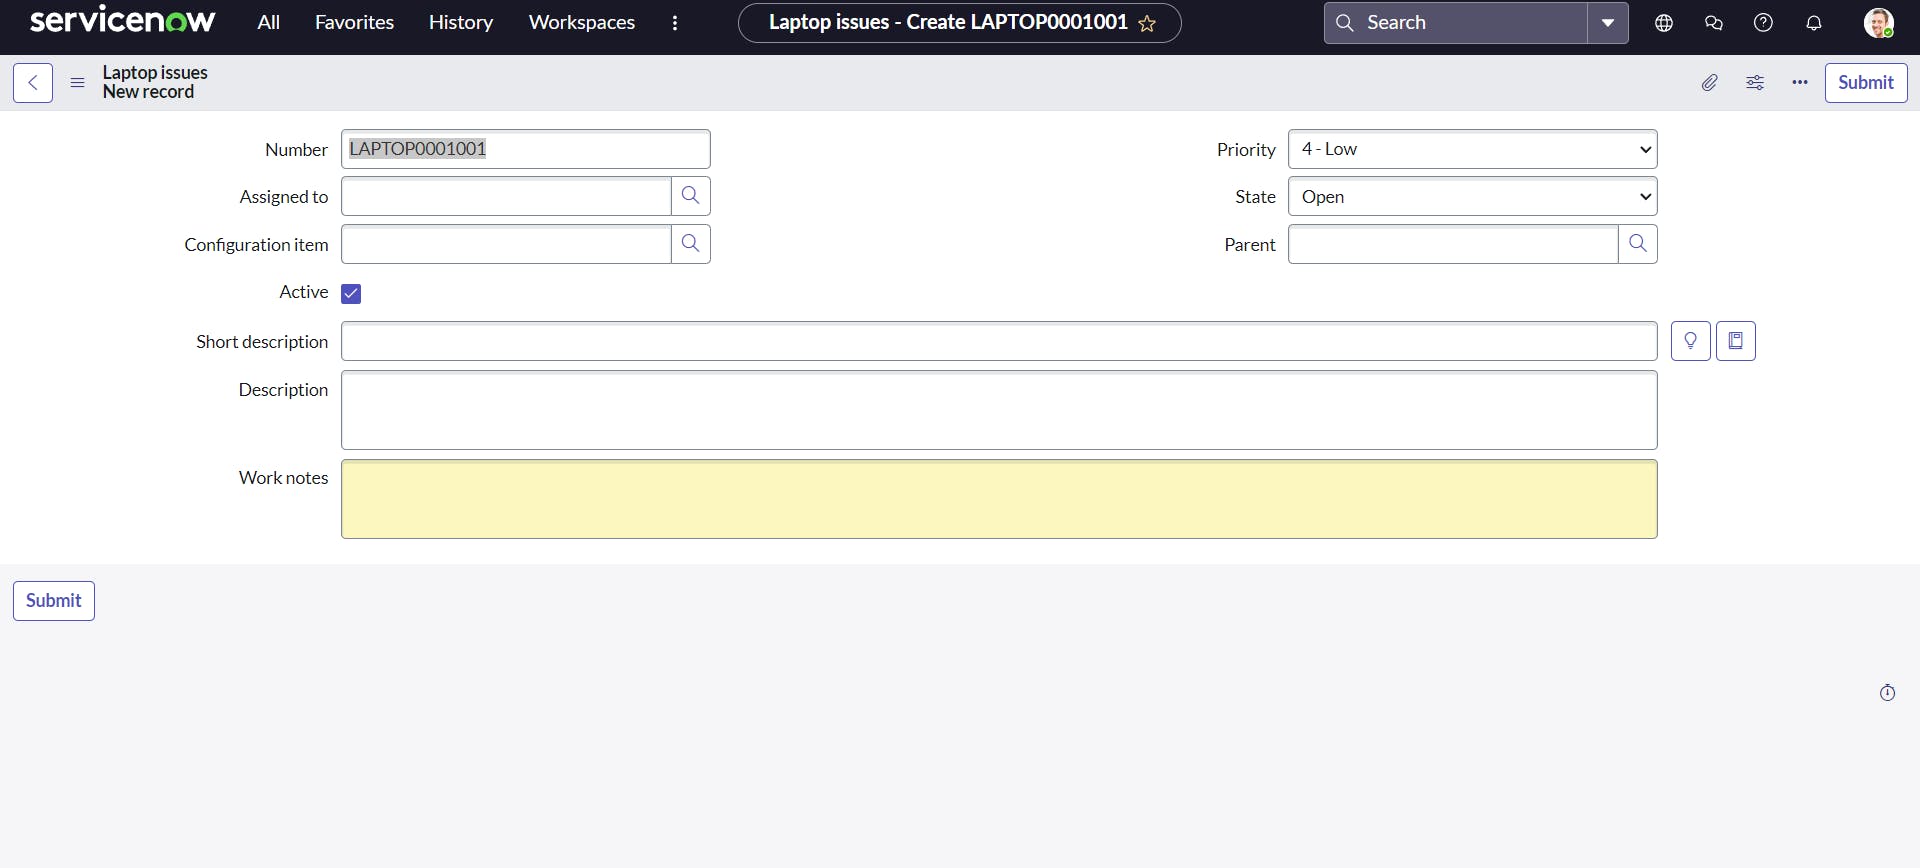
create a new table called laptop issues and extend it by task
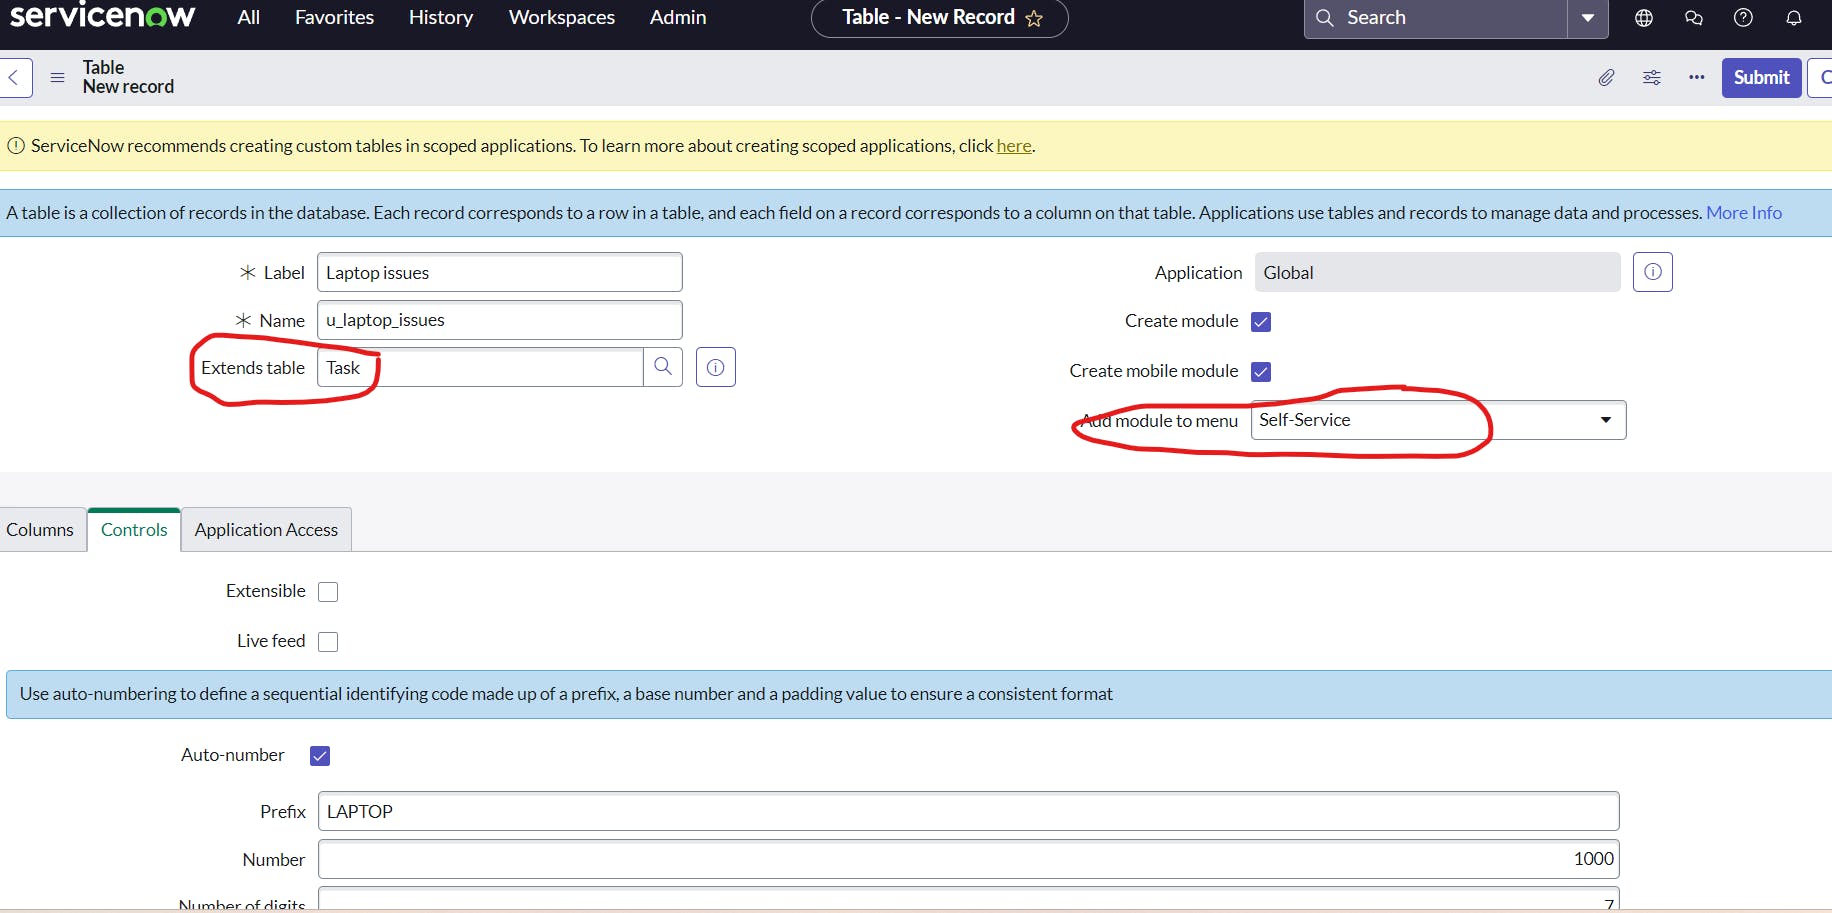
it extends all the task fields to laptop issues table
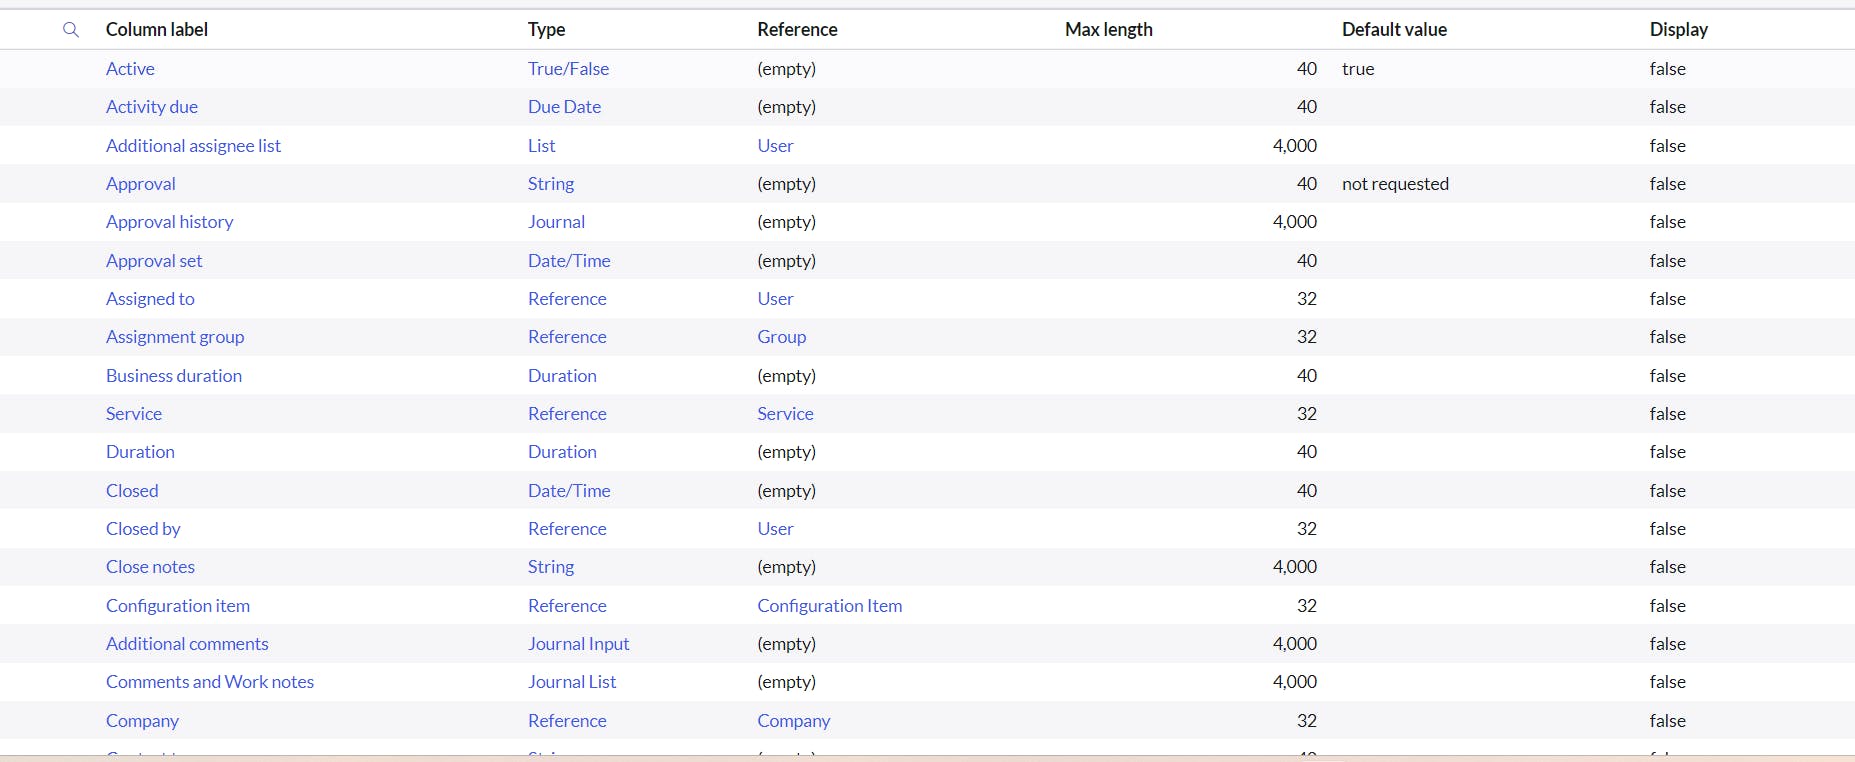
you get all these fields from task table as we have extended them
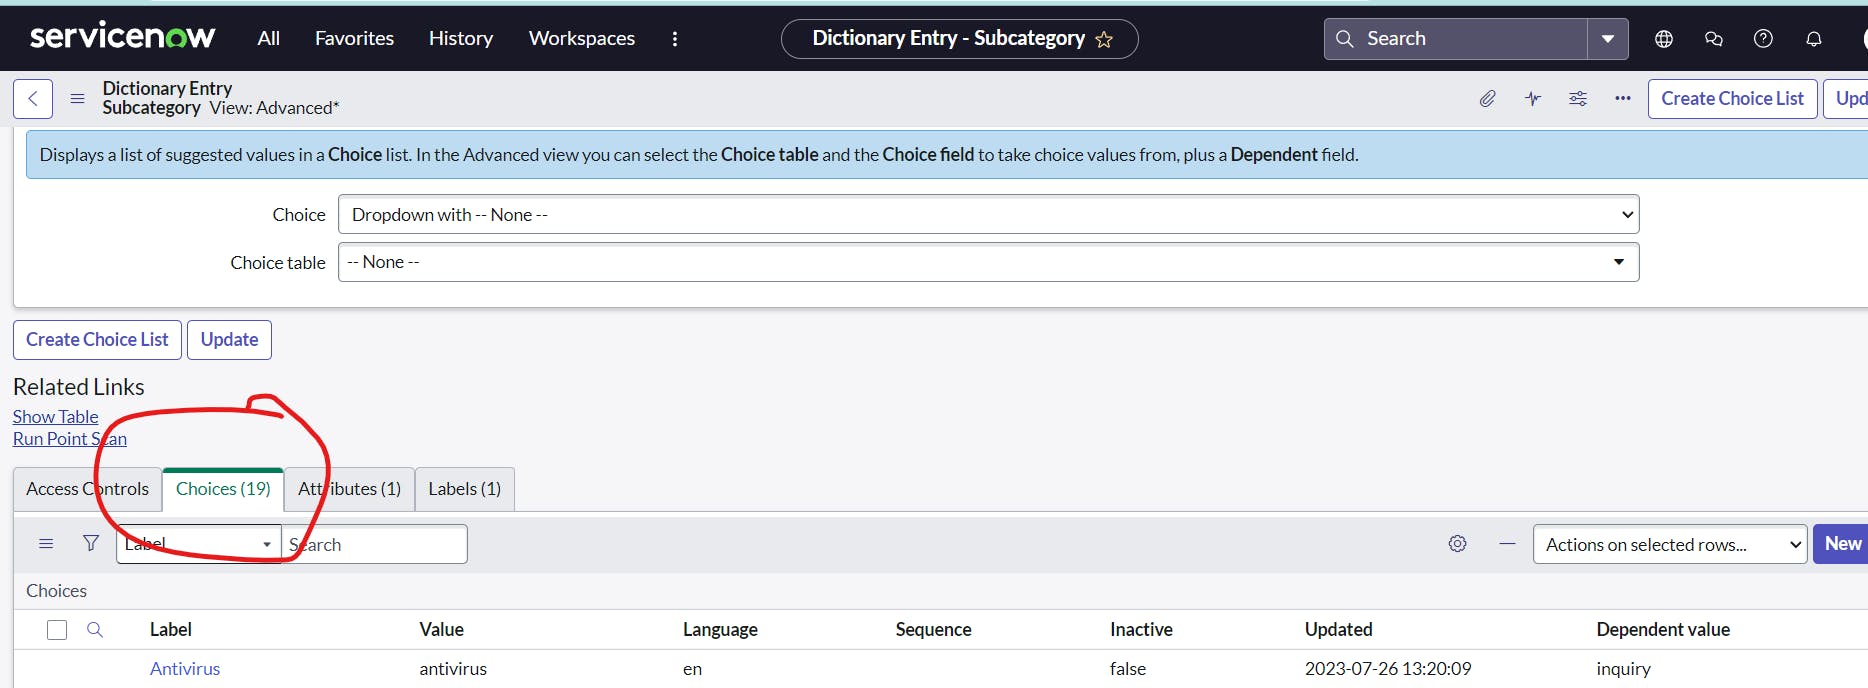
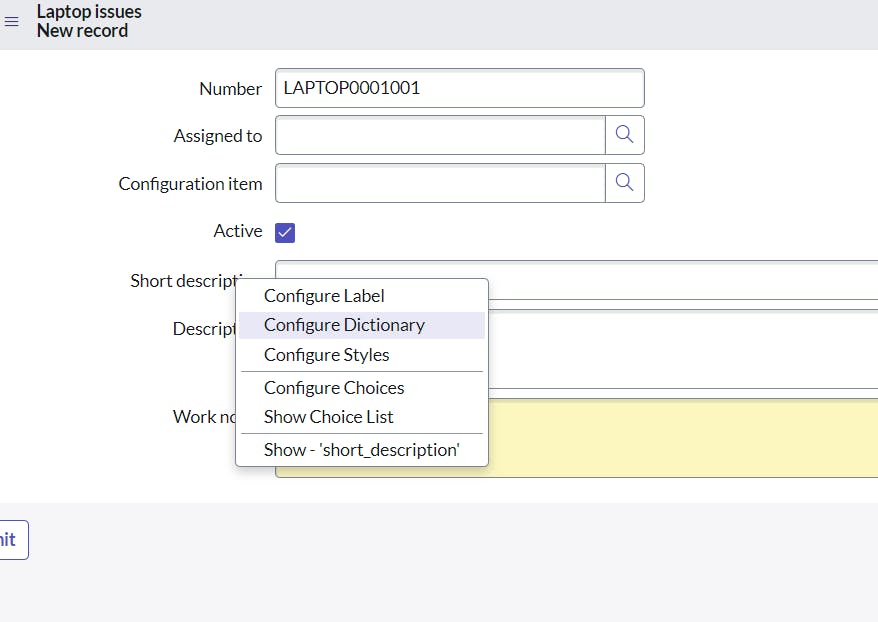
PermalinkDictionary override
lets create a new field in task table
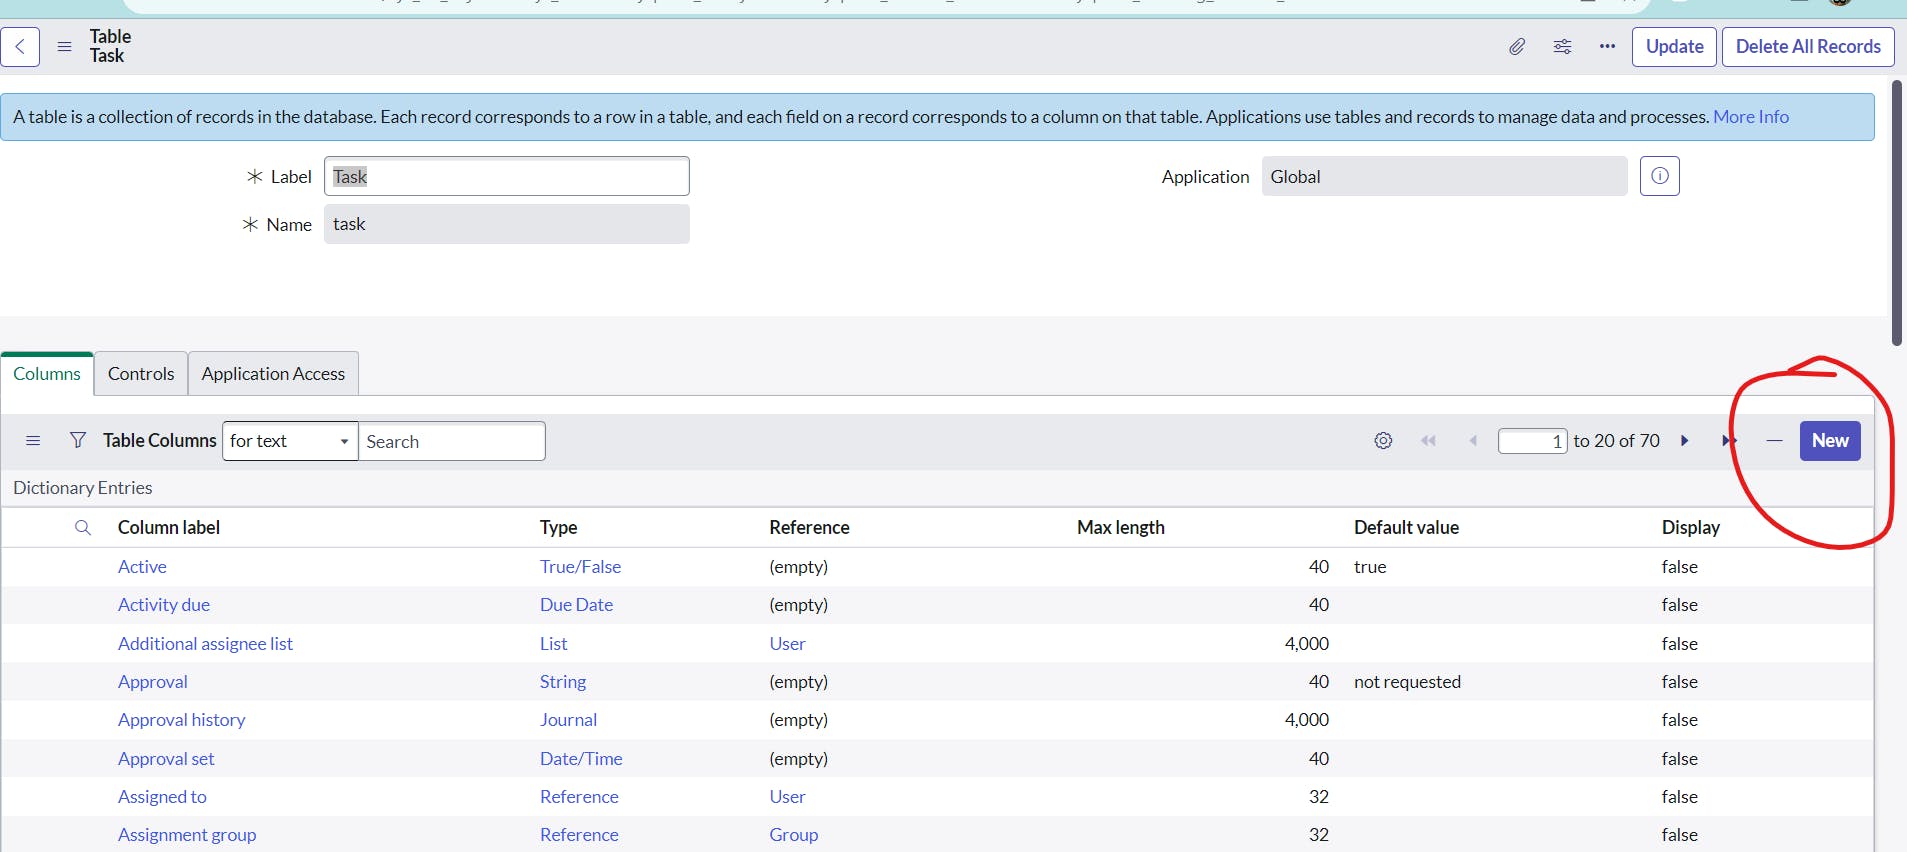

in the laptop issues table where we extended task table lets add the home address field

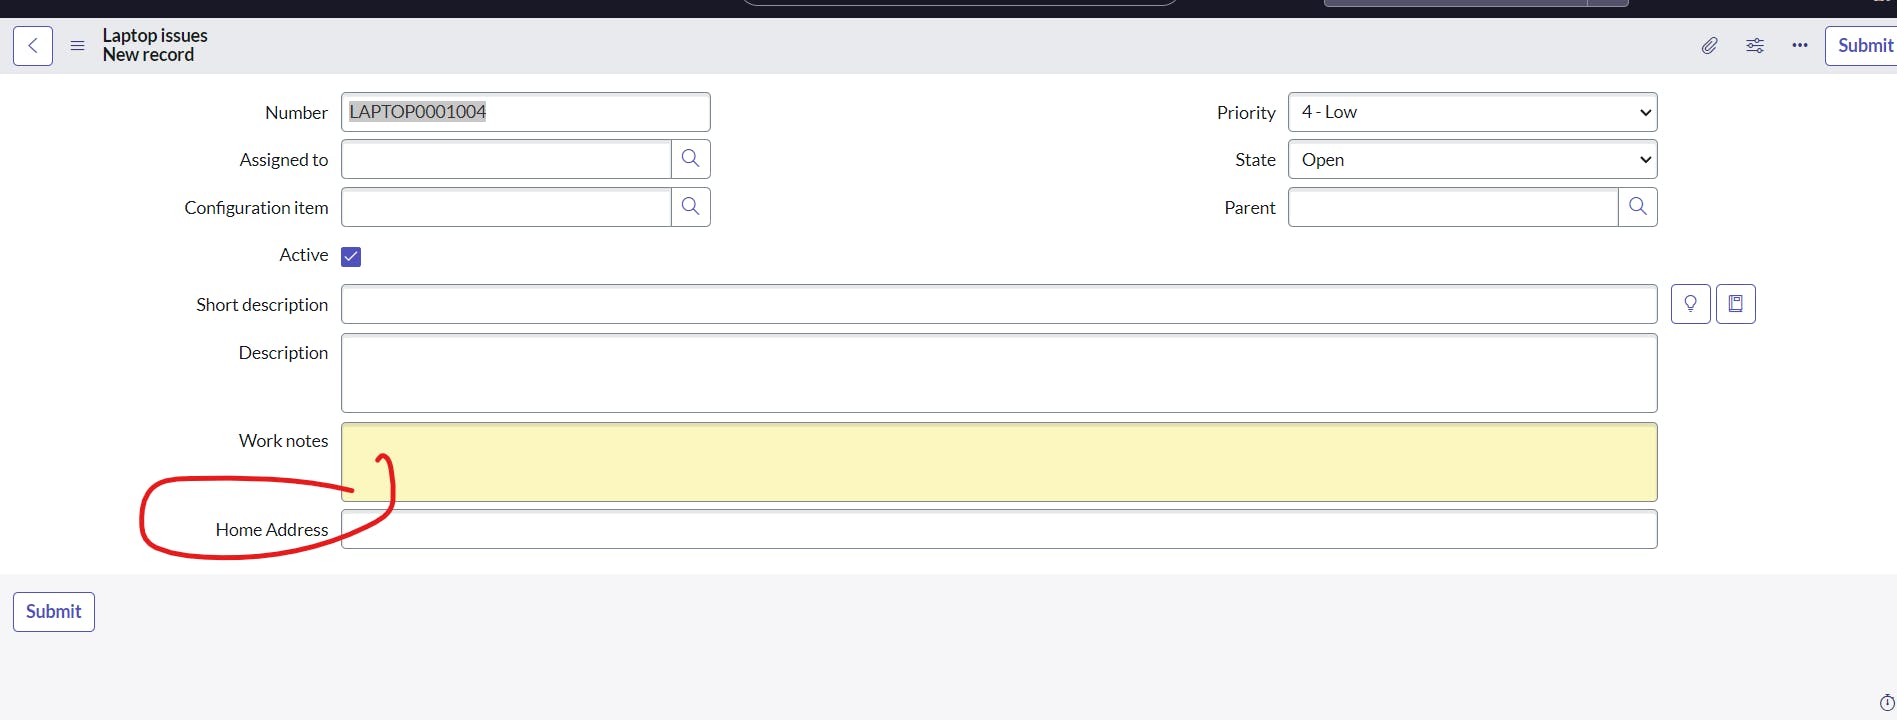
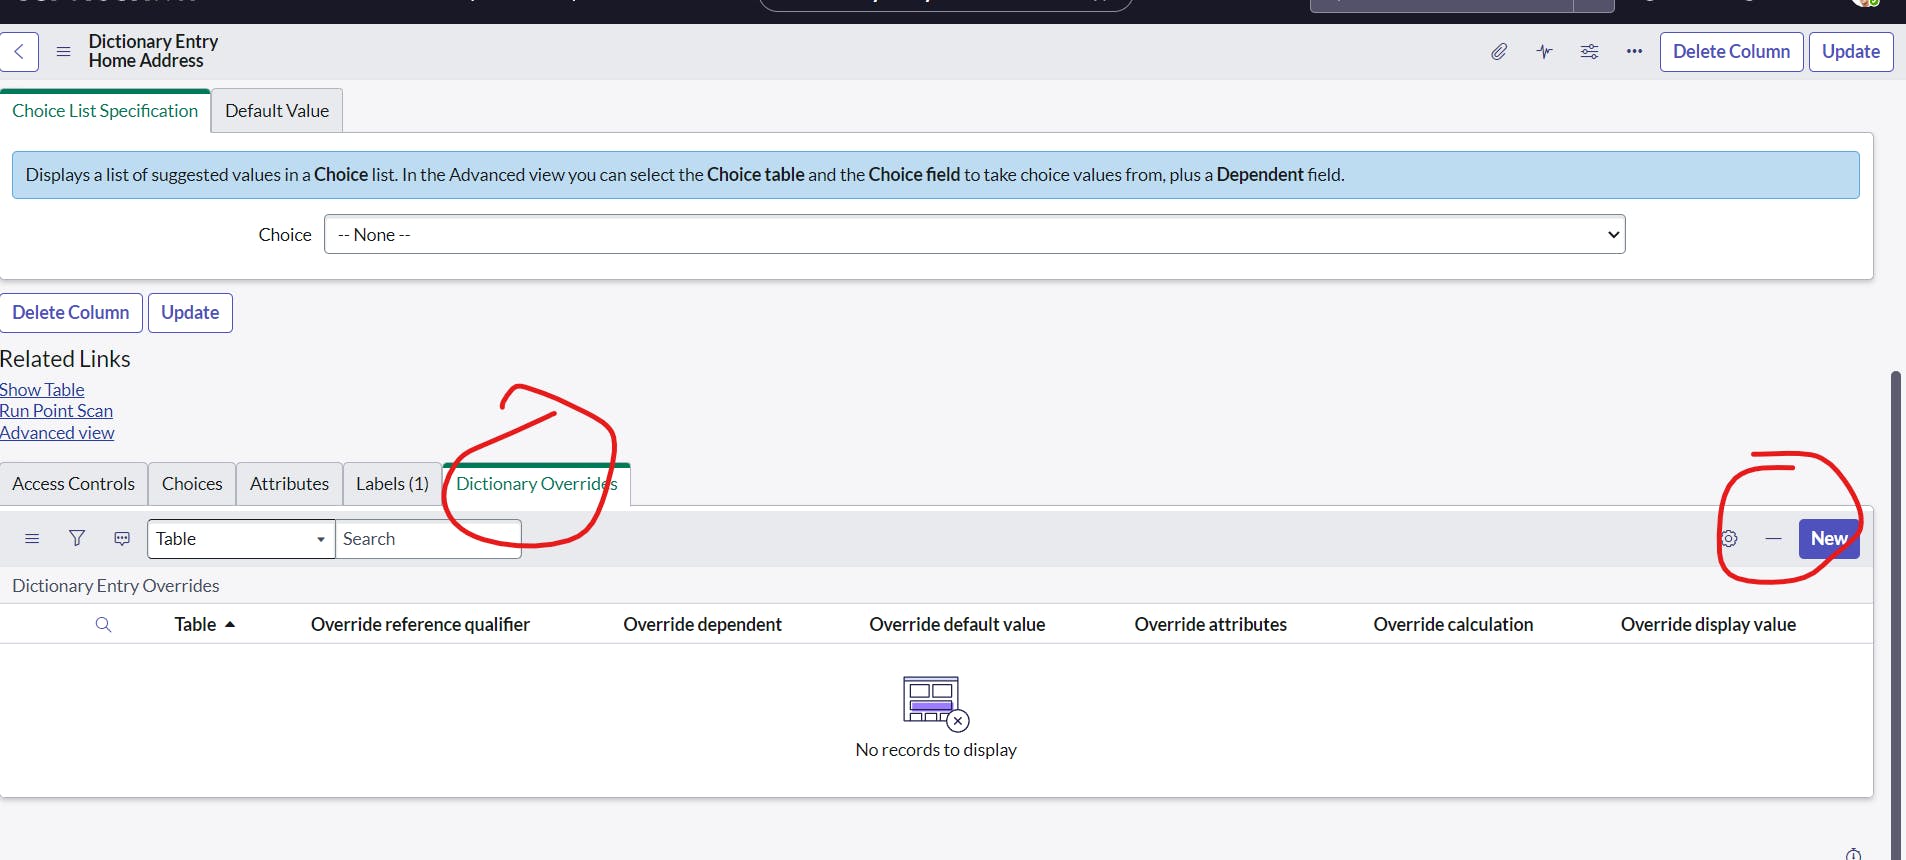
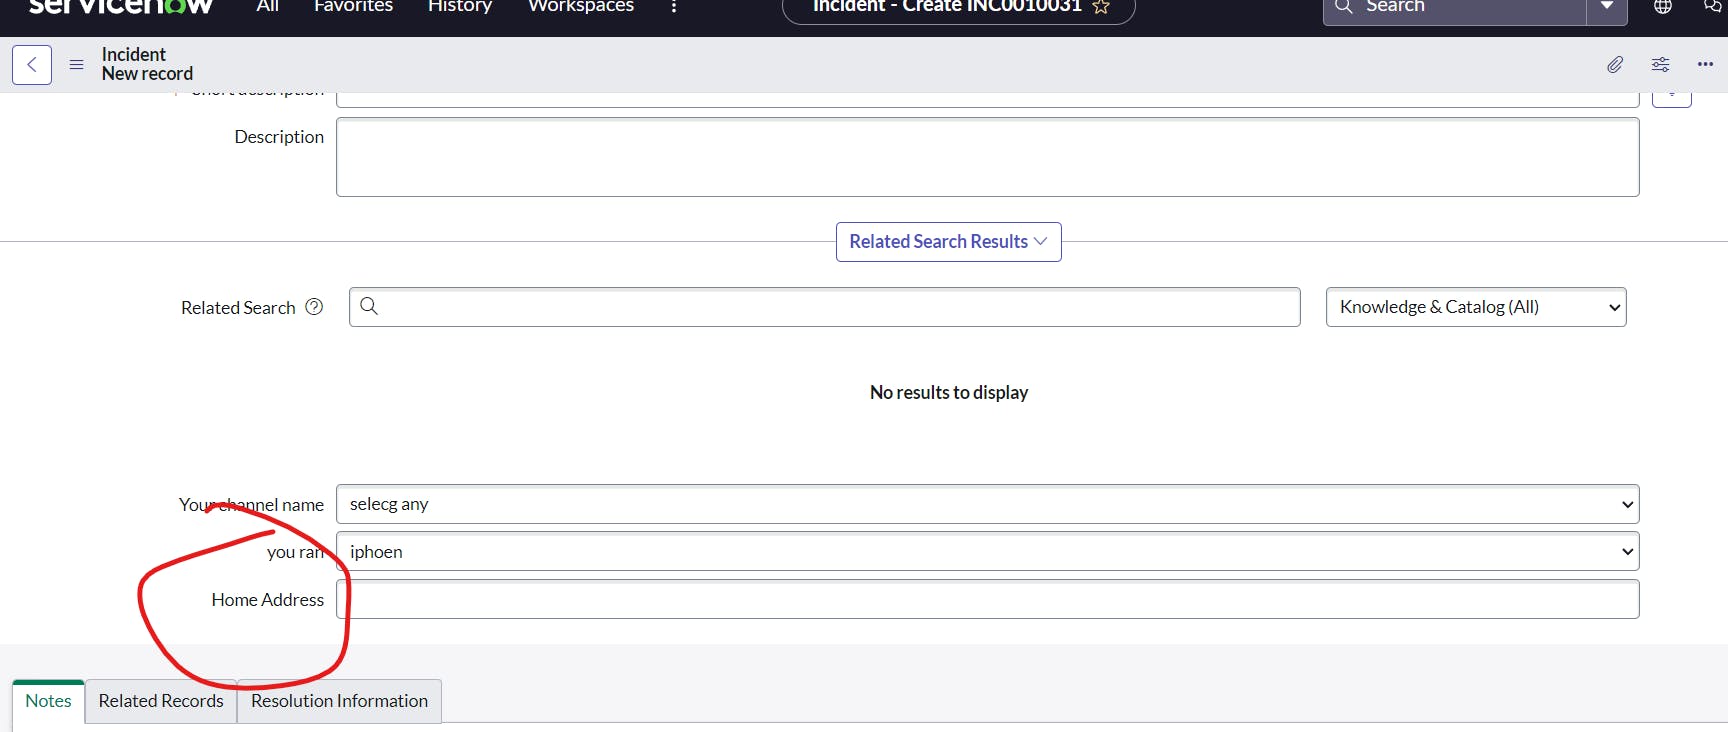
and we have extended task in incident form and laptop issues form and if we want to make the home address field mandatory in configure dictionary it will apply to the incident form too and if we want to apply this only to laptop issues form we have to use Dictionary Override
click on configure dictionary adn open Dictionary Override

in laptop issues form
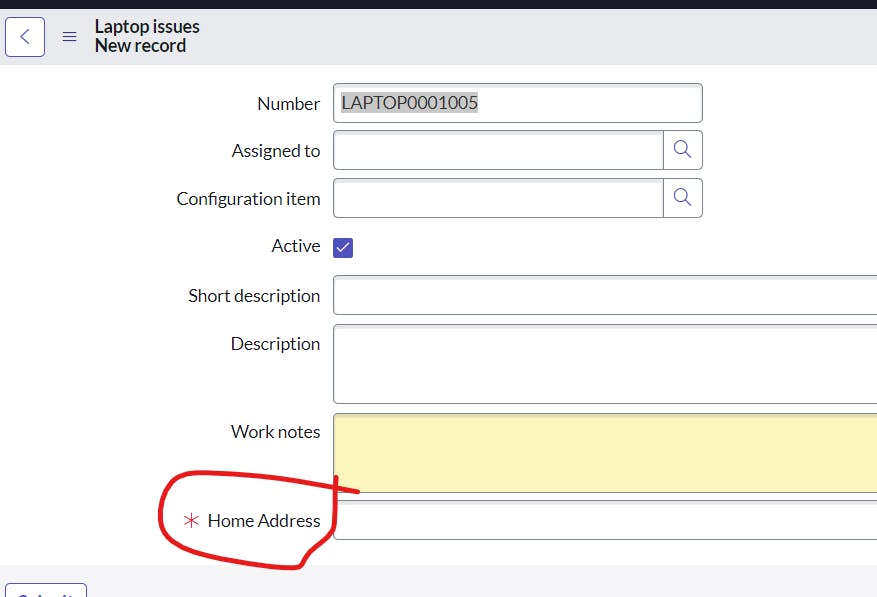
in incident table it is not mandatory
PermalinkUsers and Groups
click on new
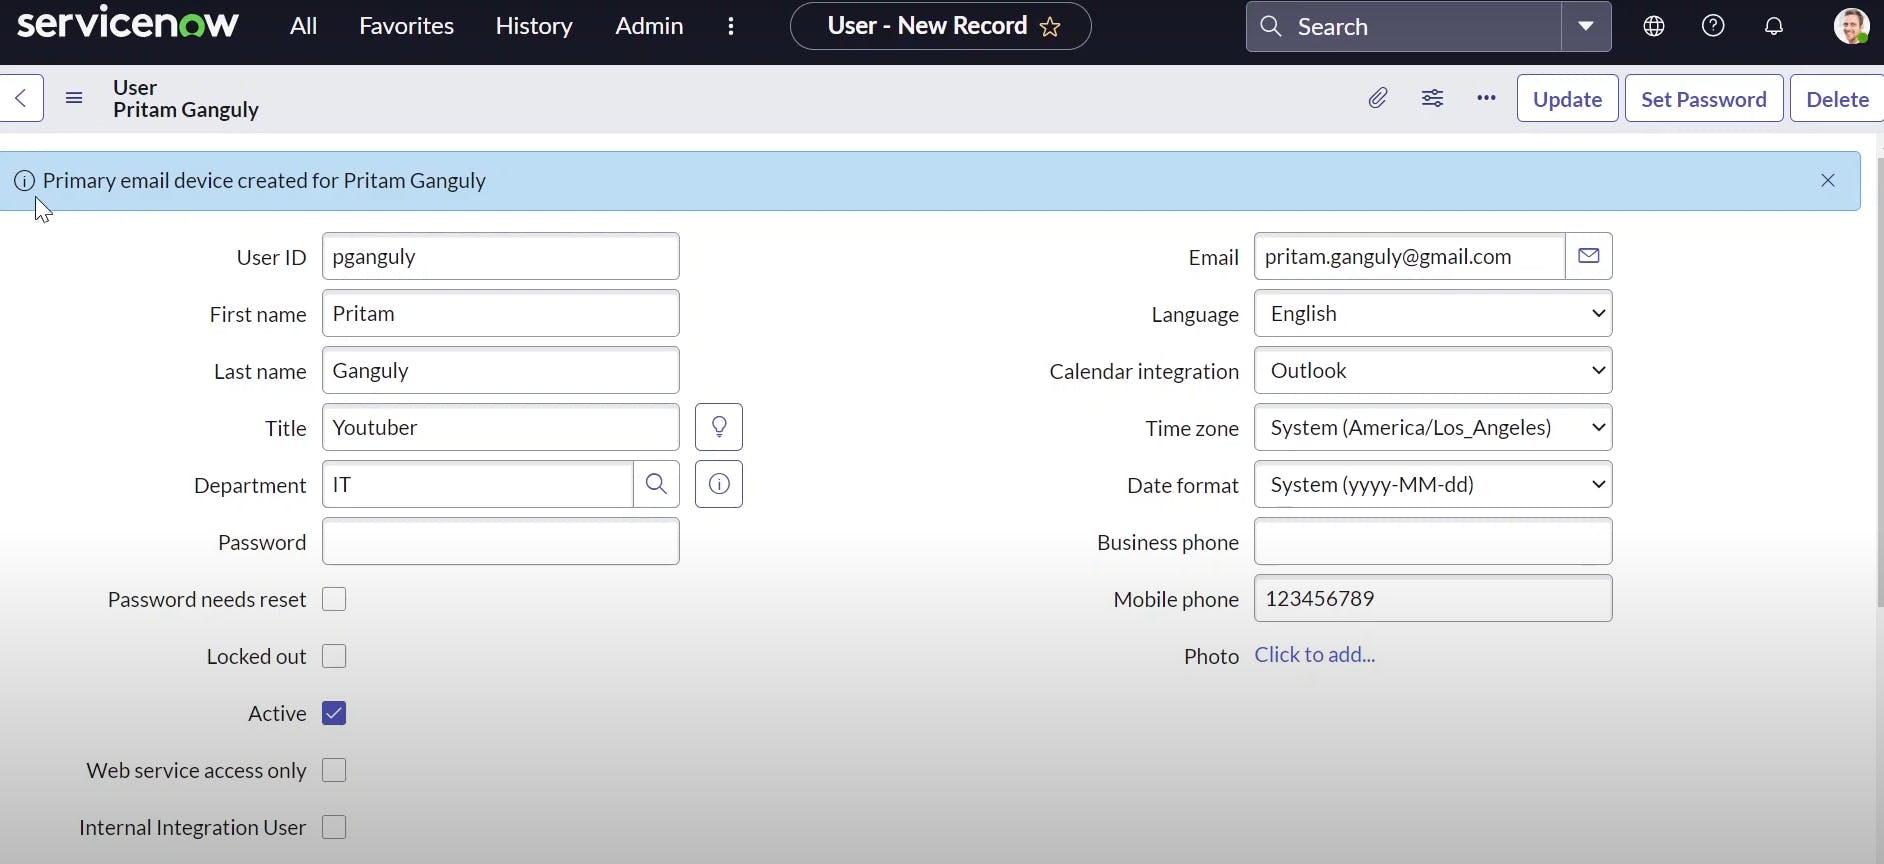
you can set password
GROUPS

click on new
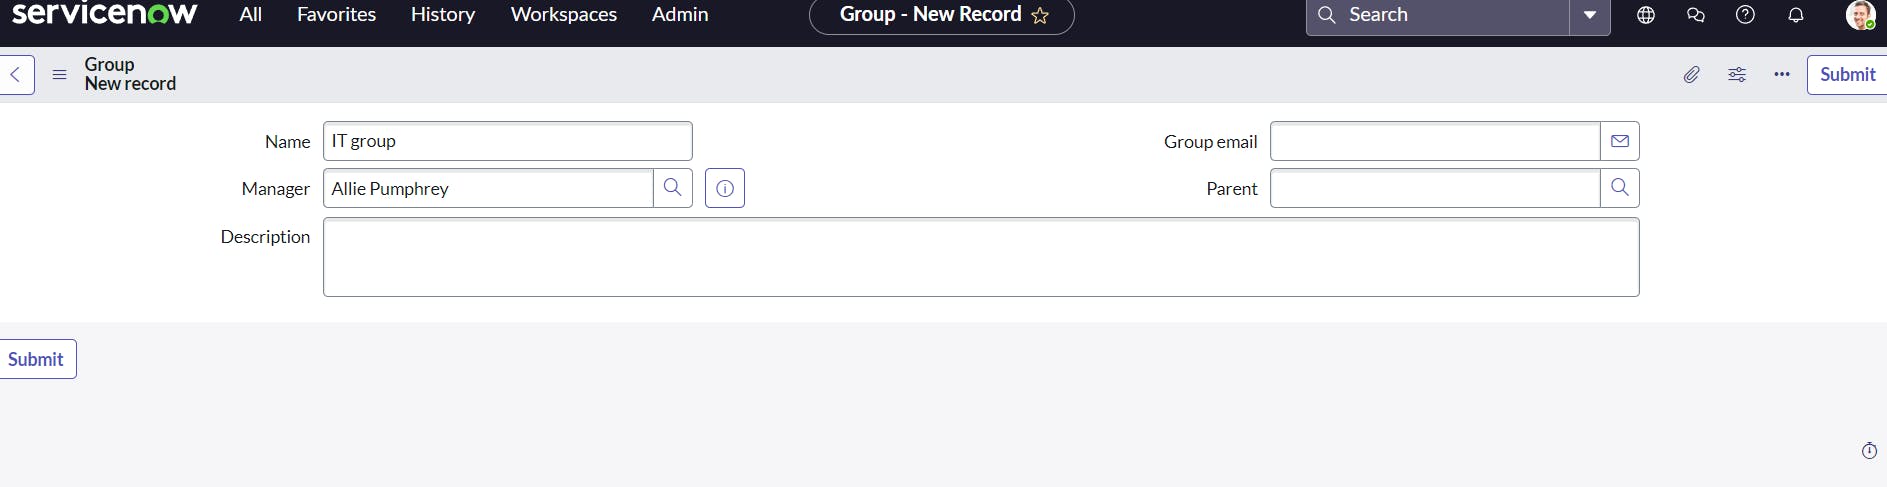
save it then

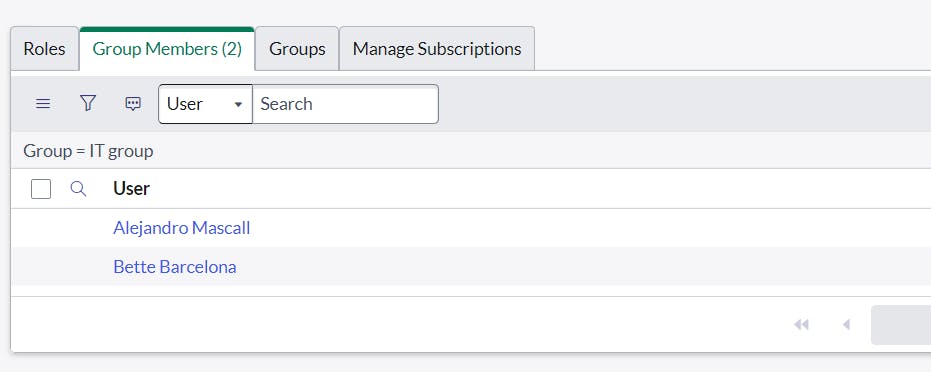
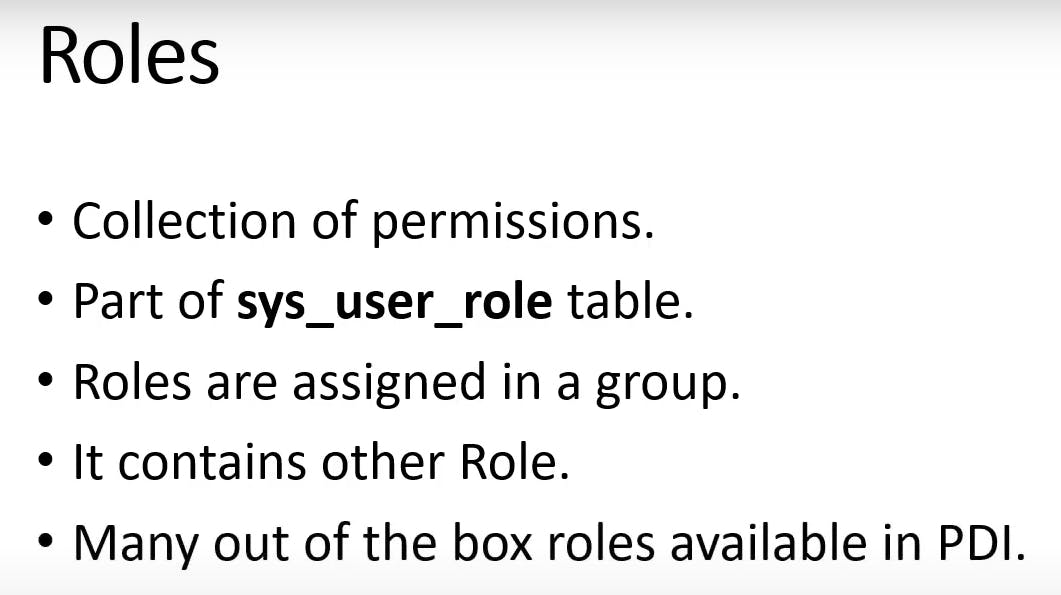
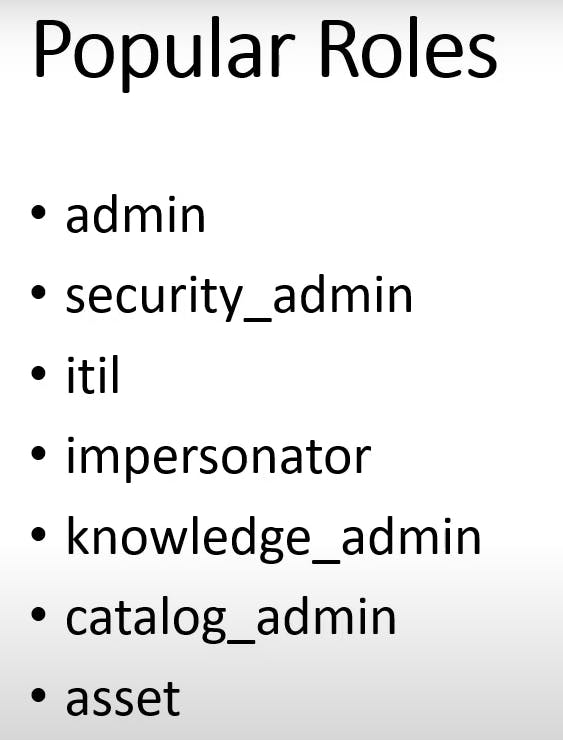
PermalinkRoles
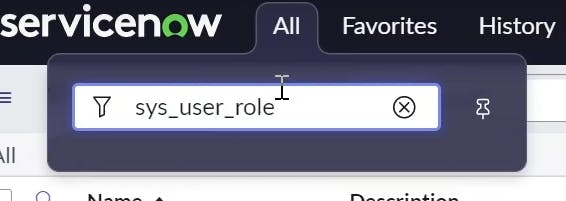
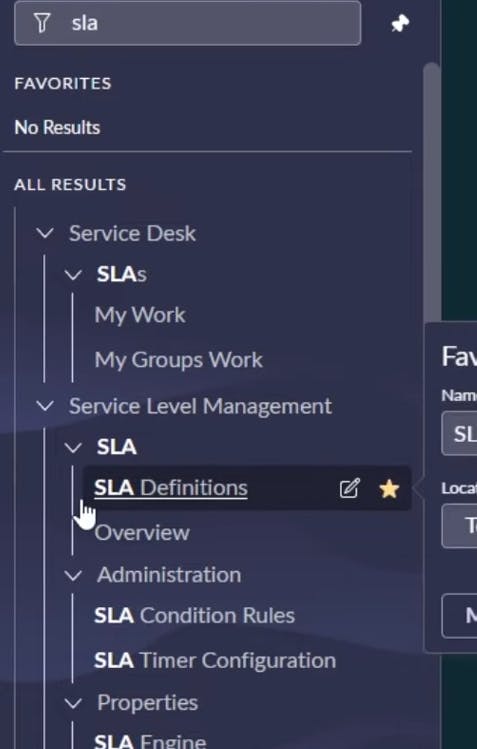
search or get roles like this
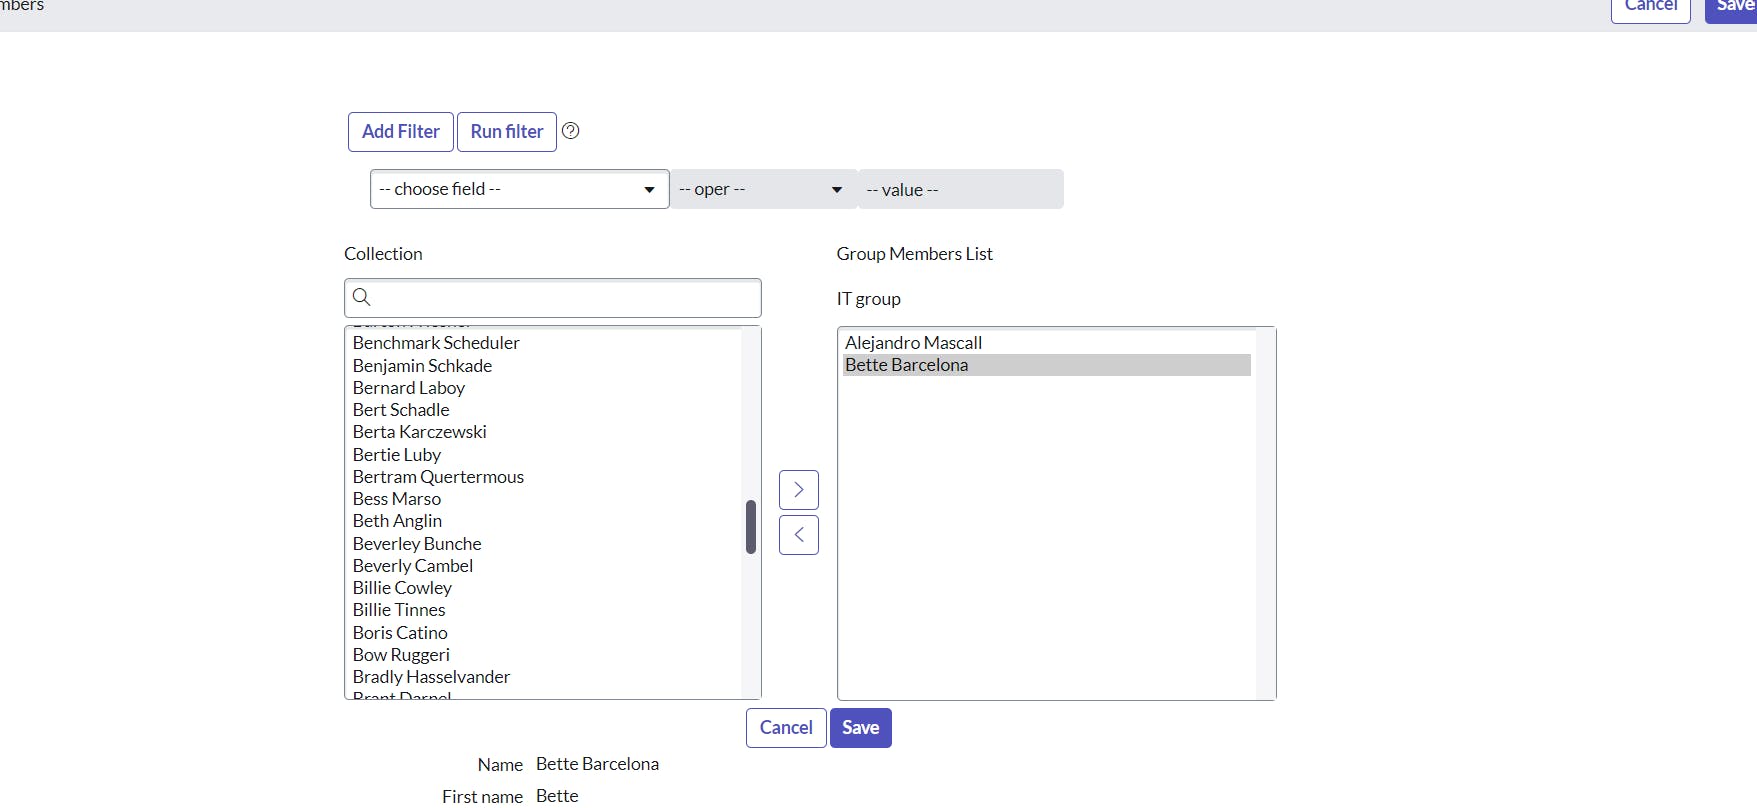
to assign roles we have to add in groups table the role to users
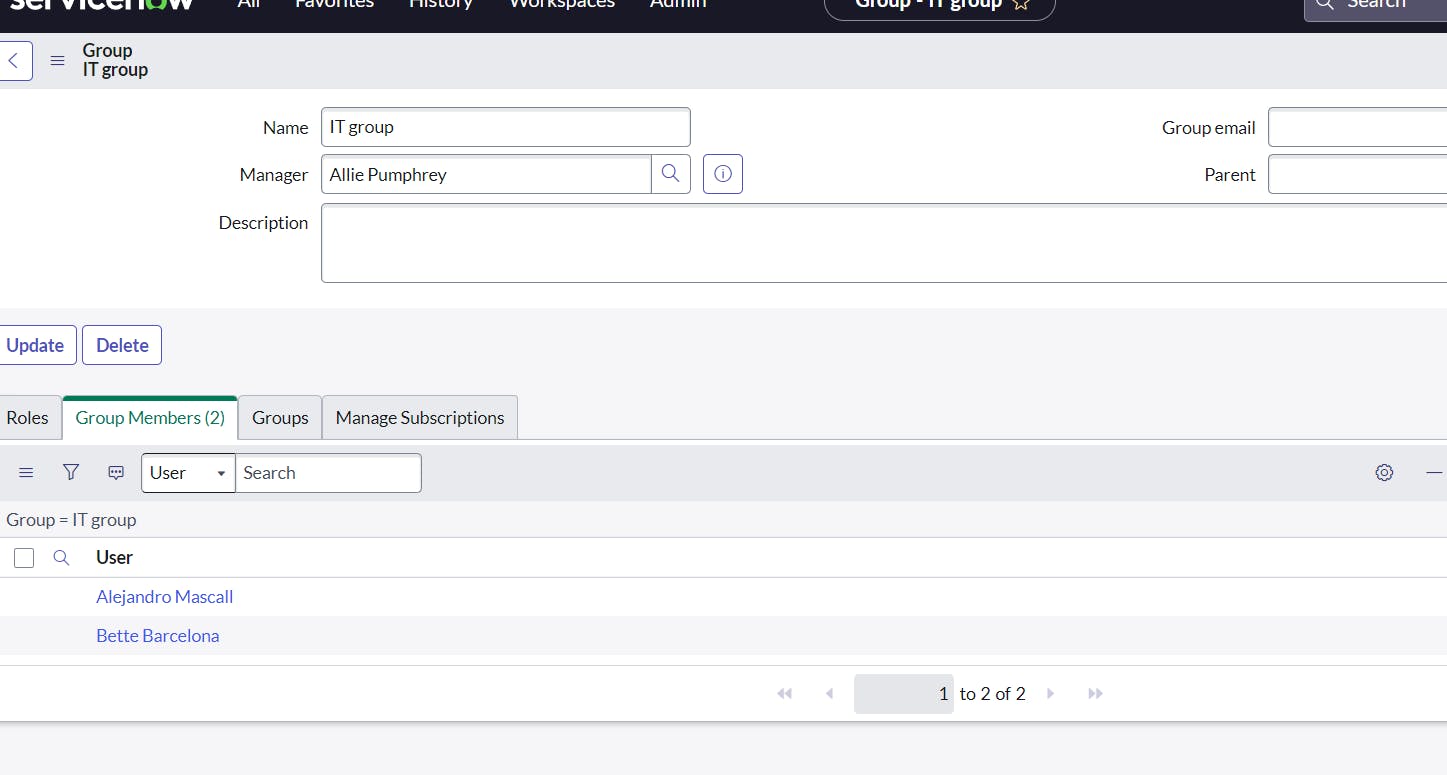

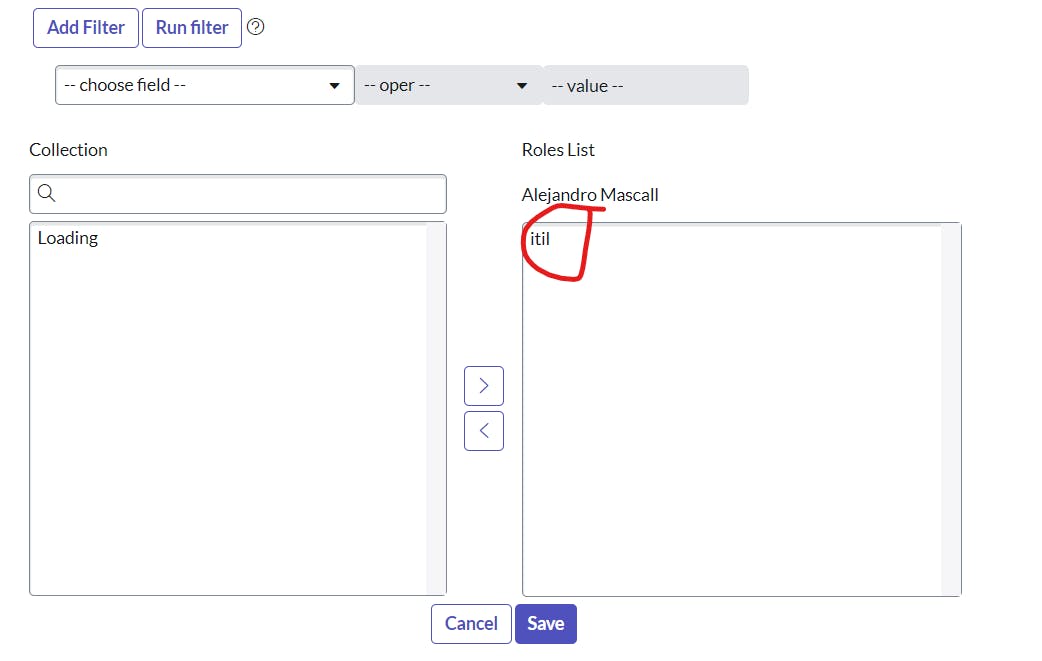
now all the itil role is assigned to user and itil roles contains some extra roles too and they will be assigned to the user we have selected
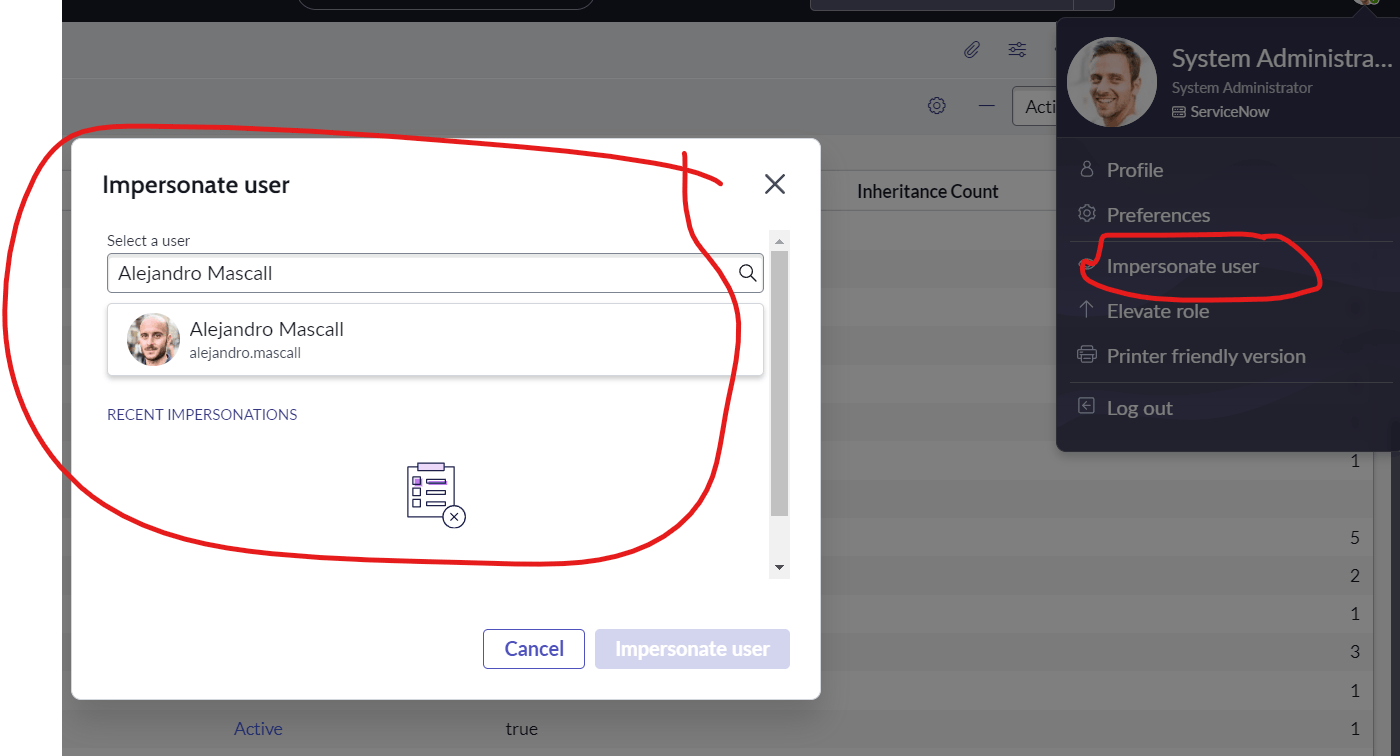
now all these roles are assigned to the user
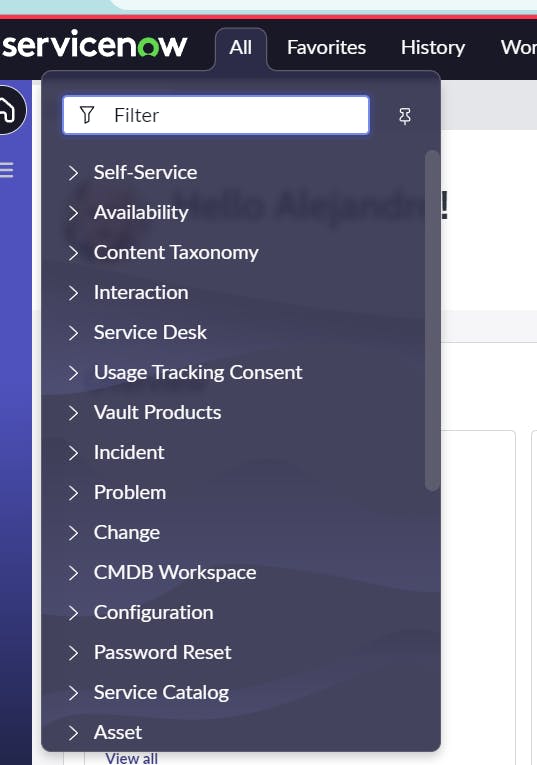
click end impersonate to end it

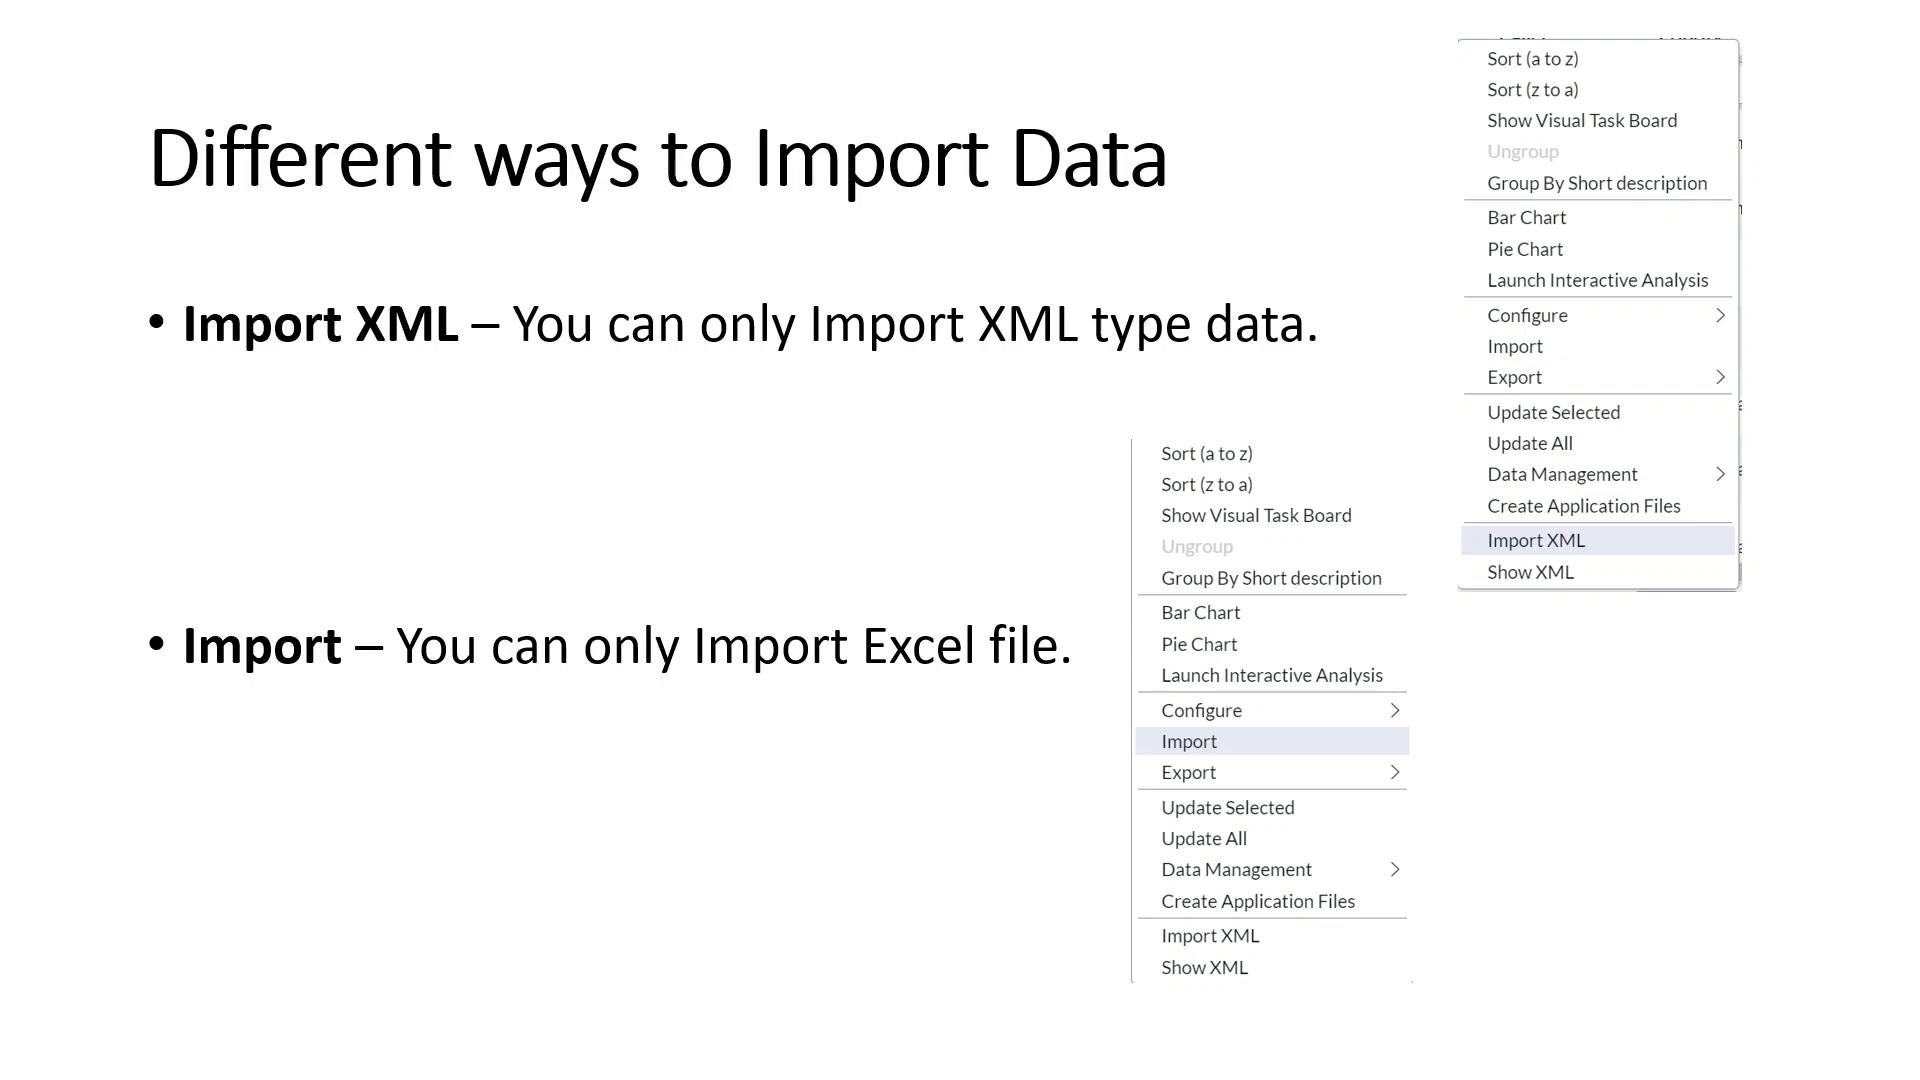
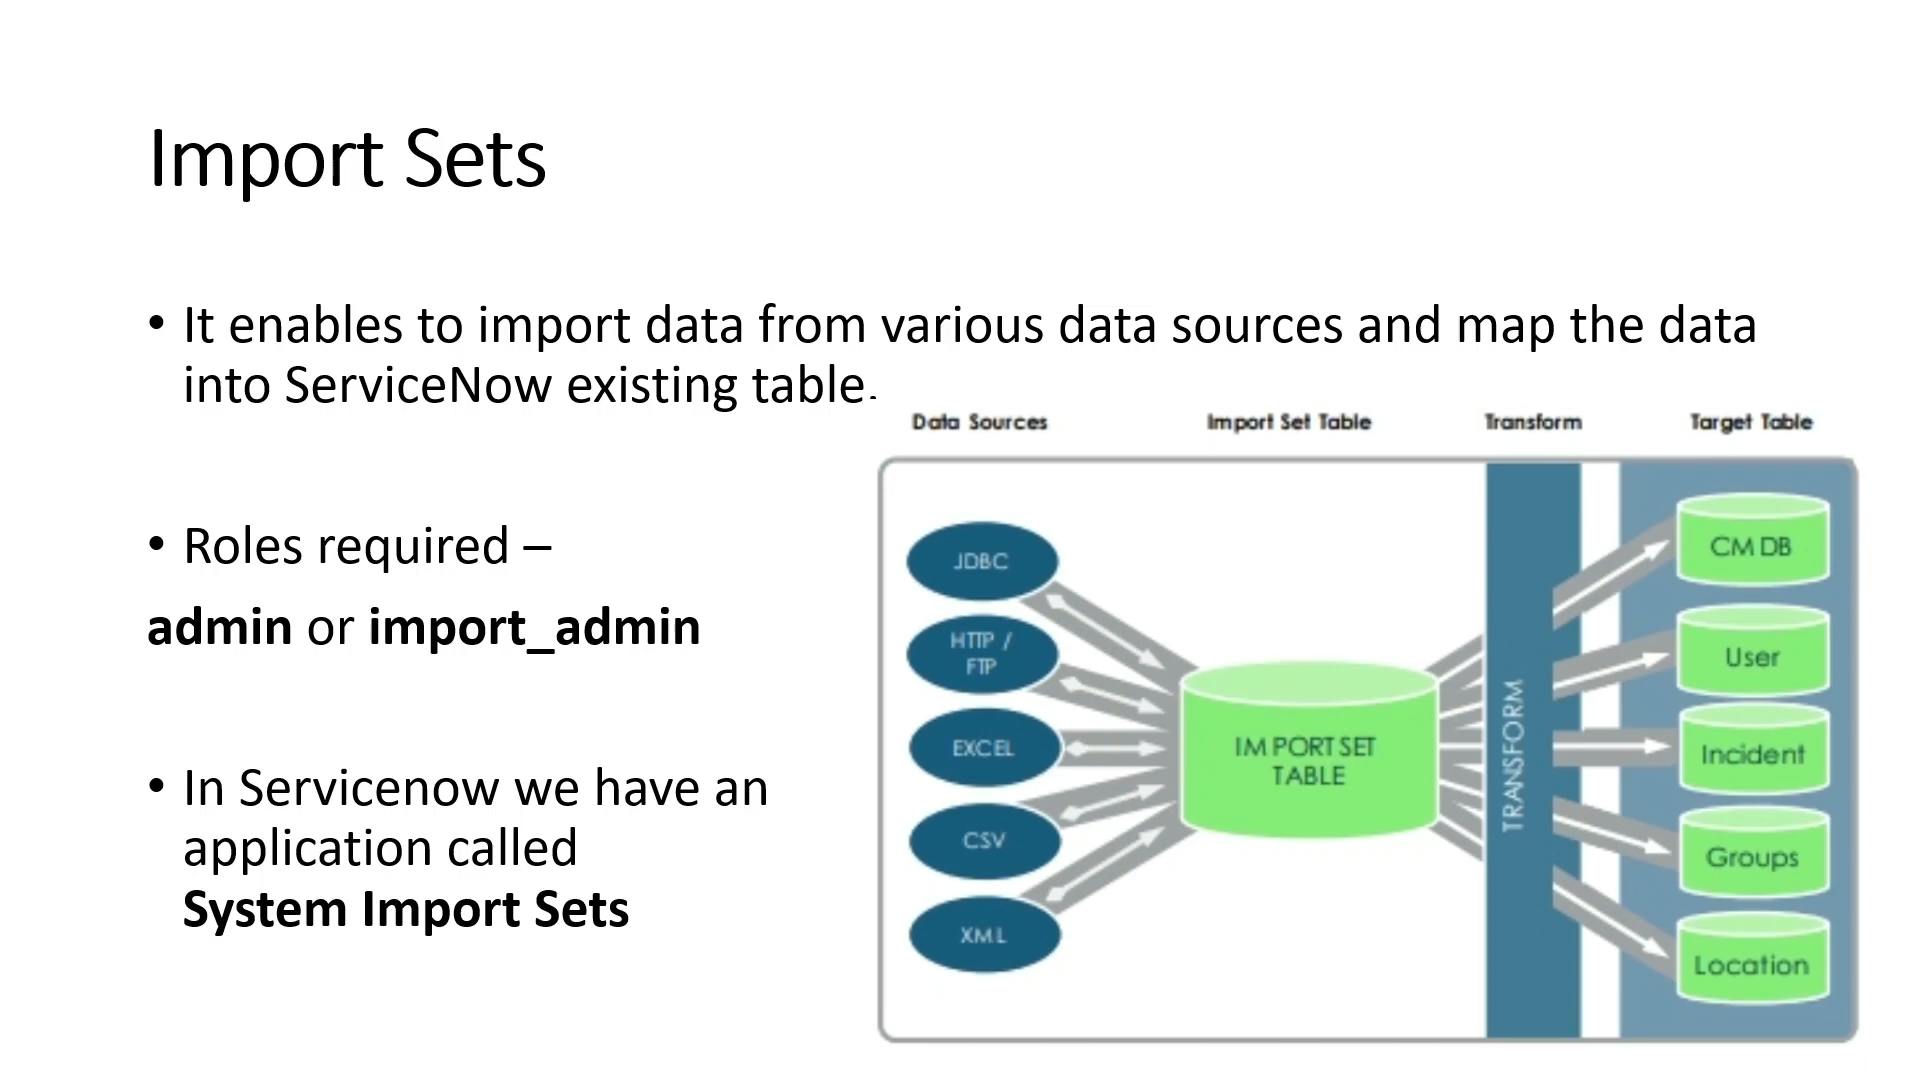
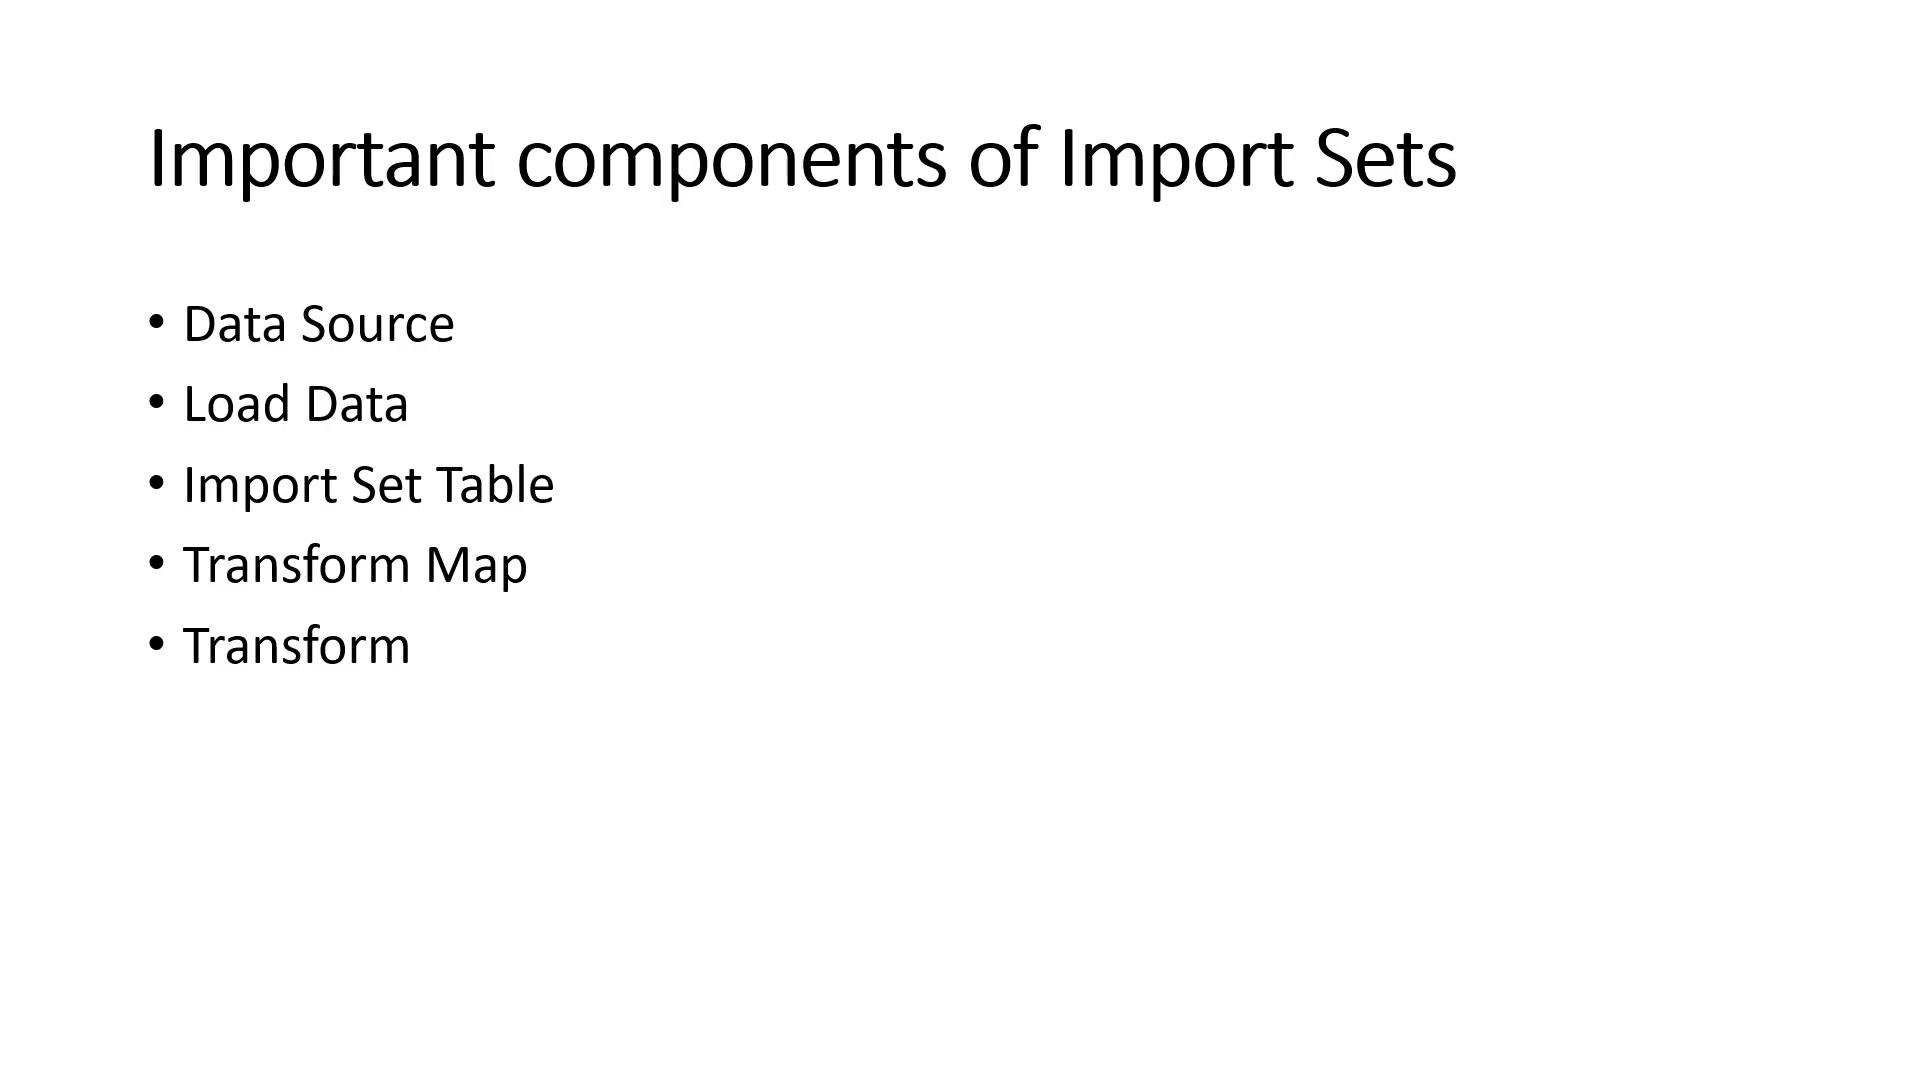
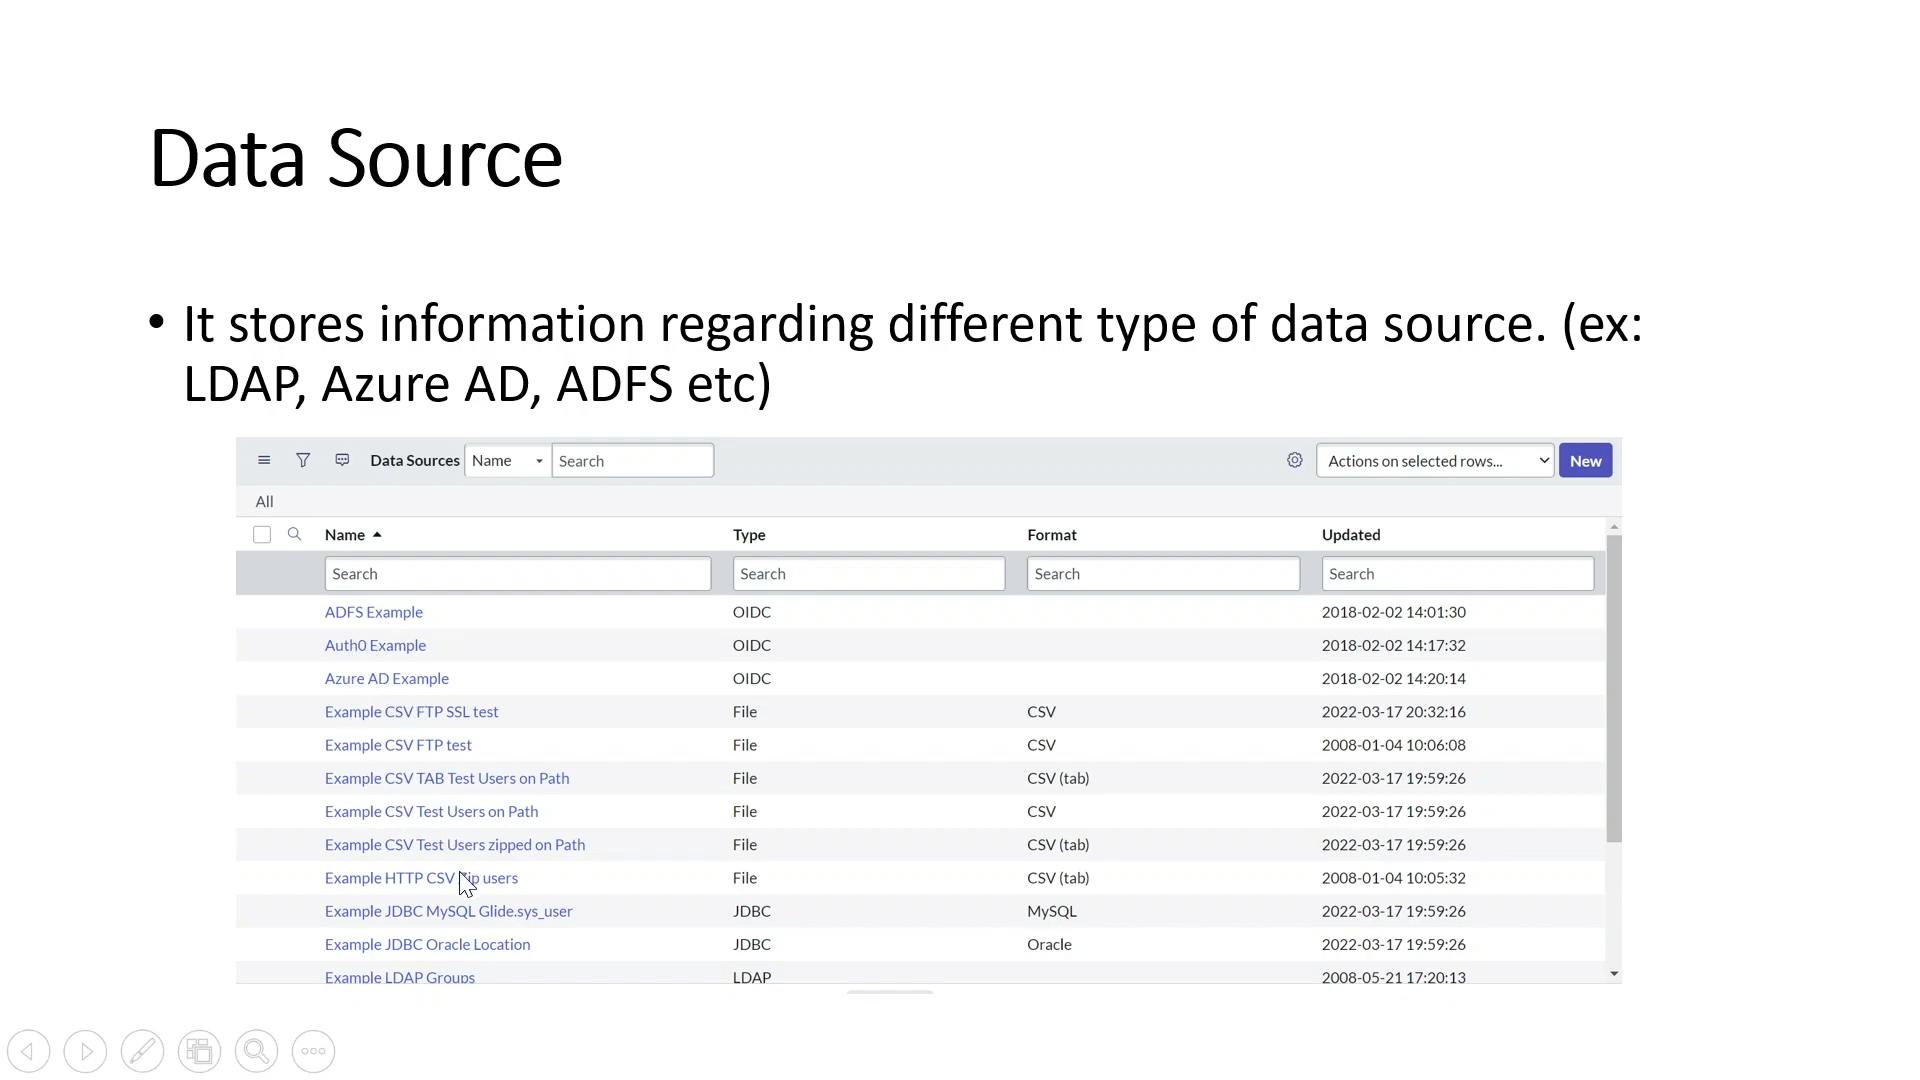
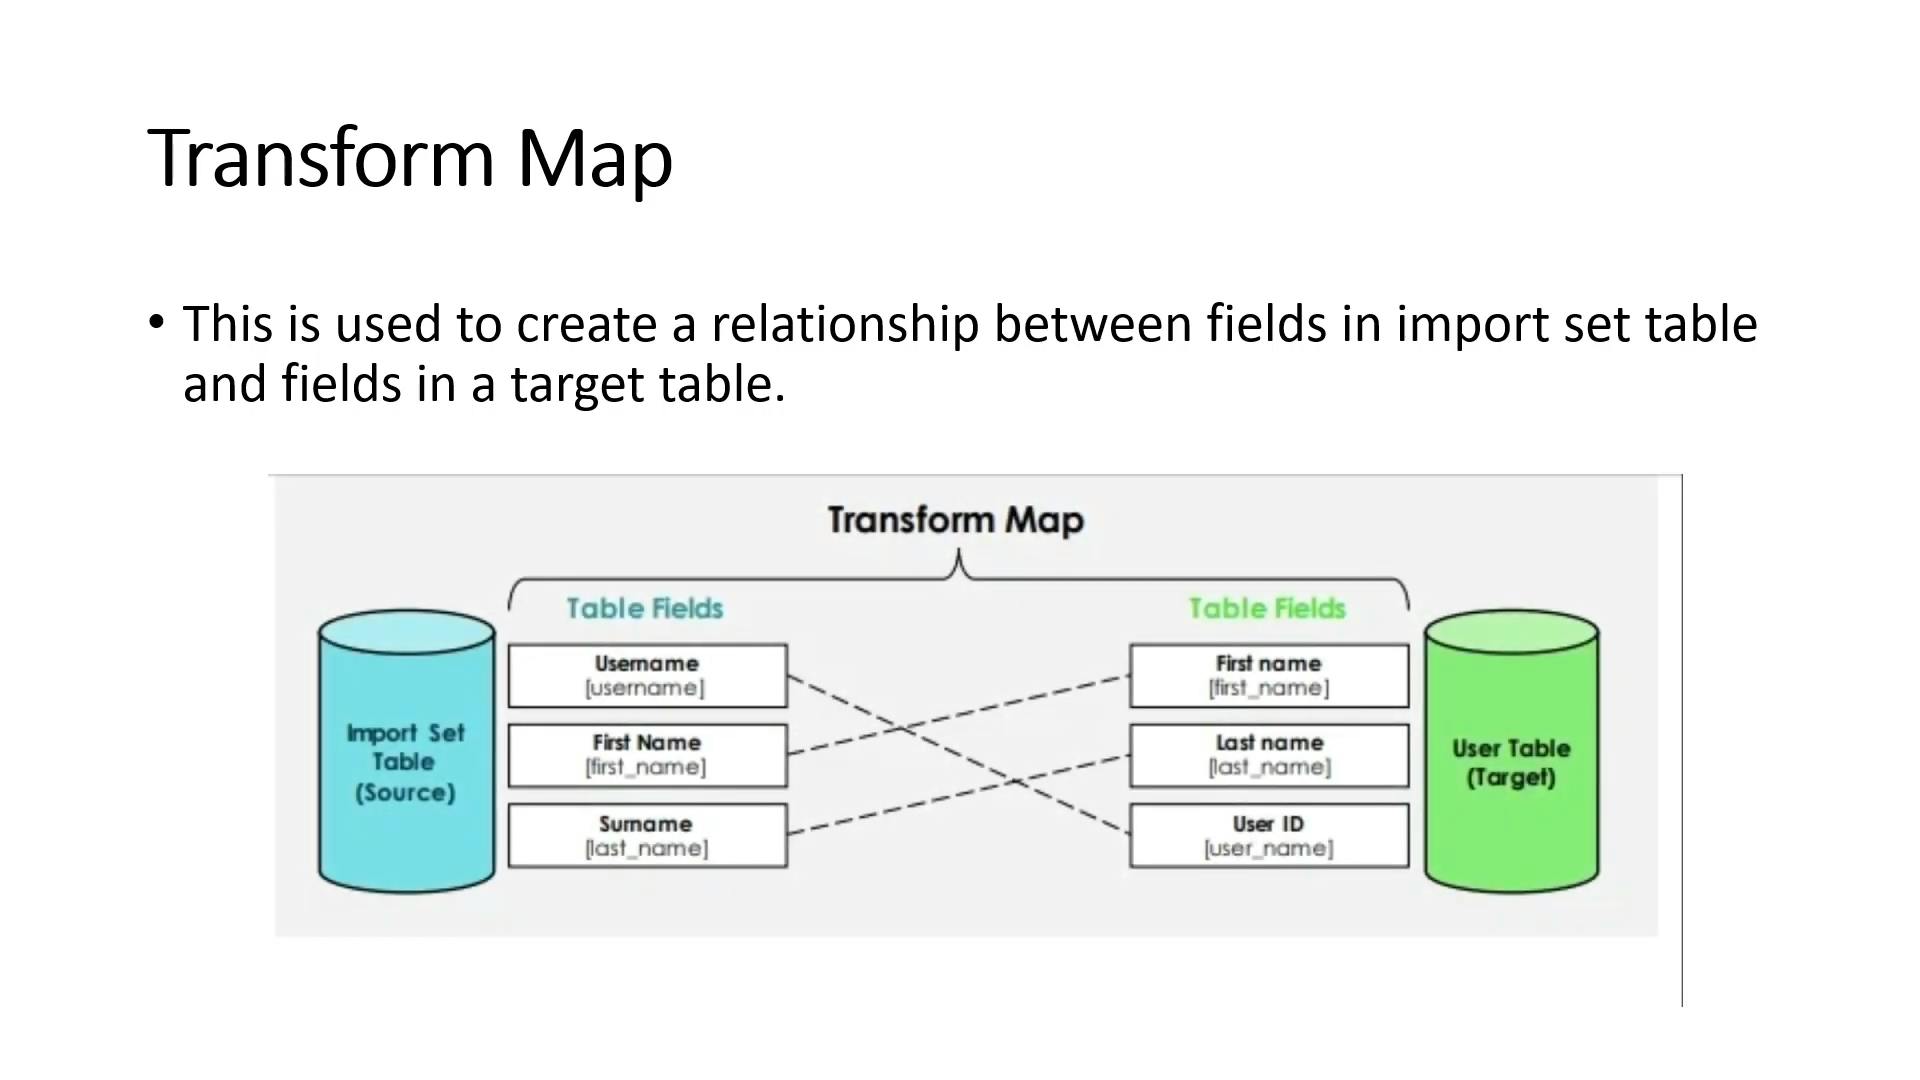
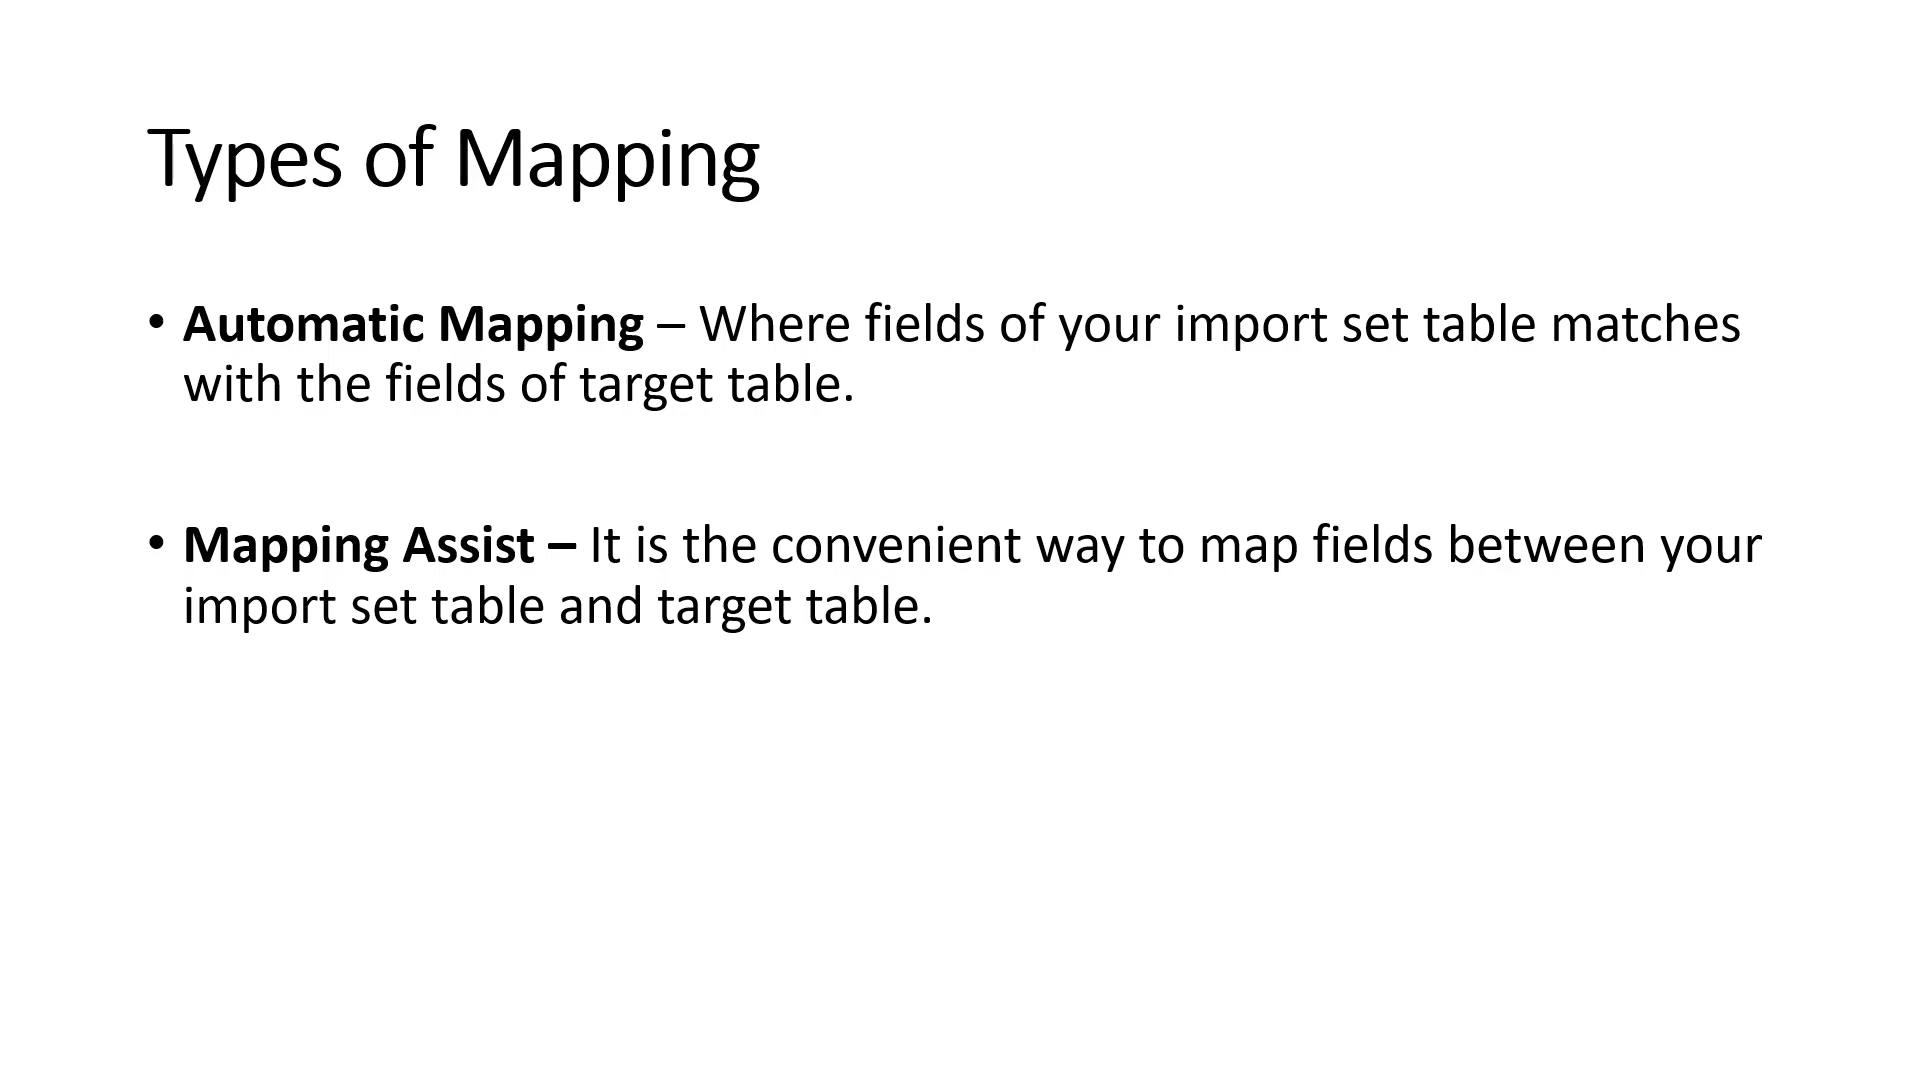
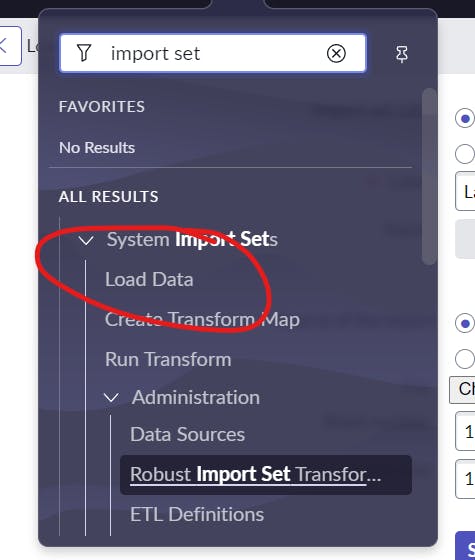
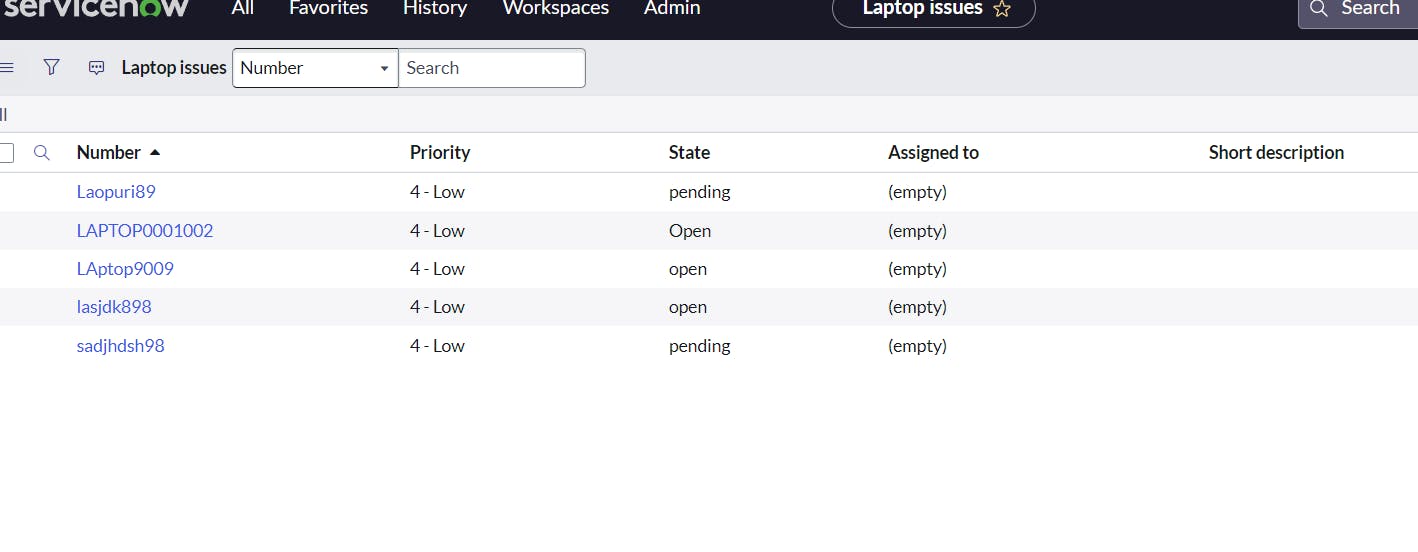
PermalinkImport Sets


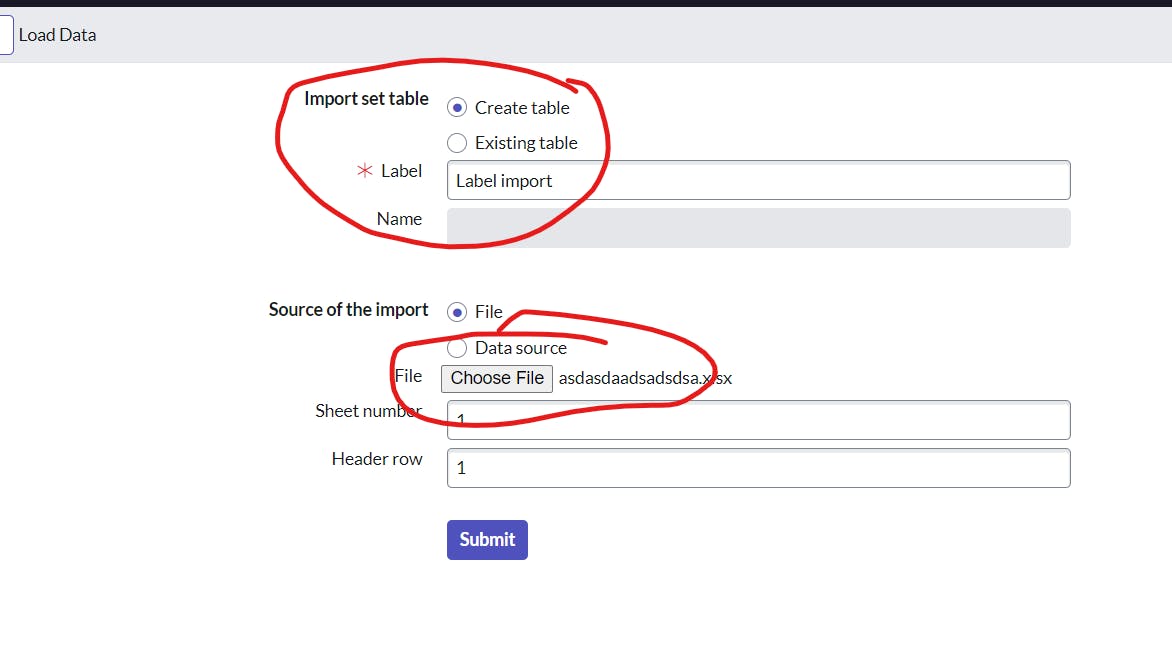
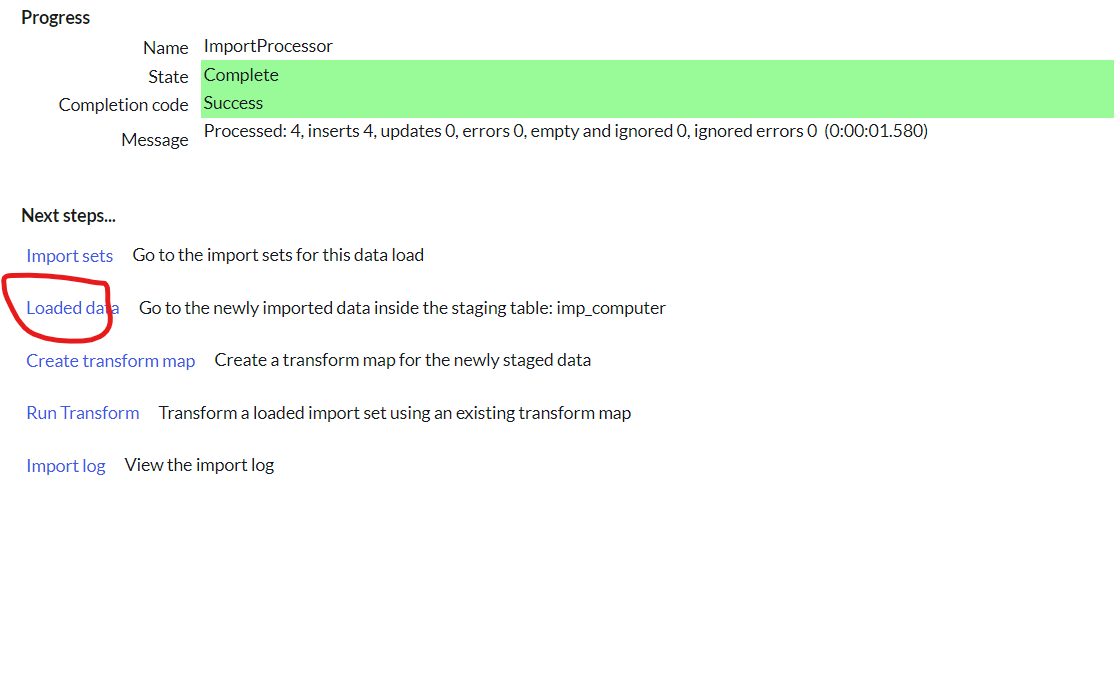

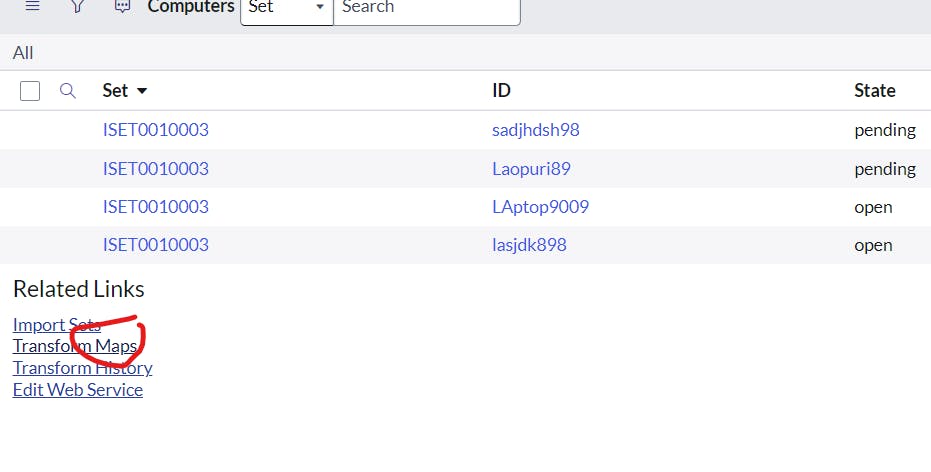
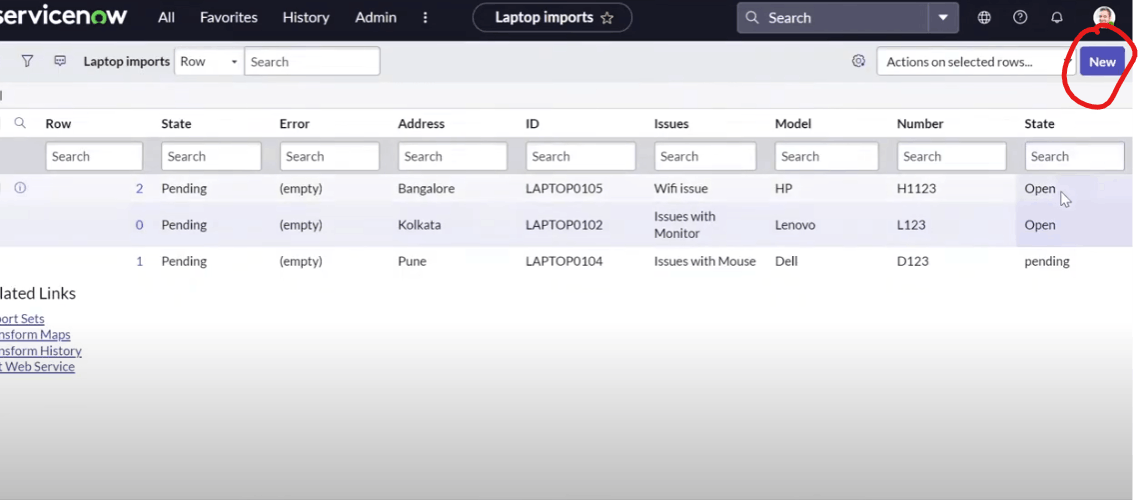
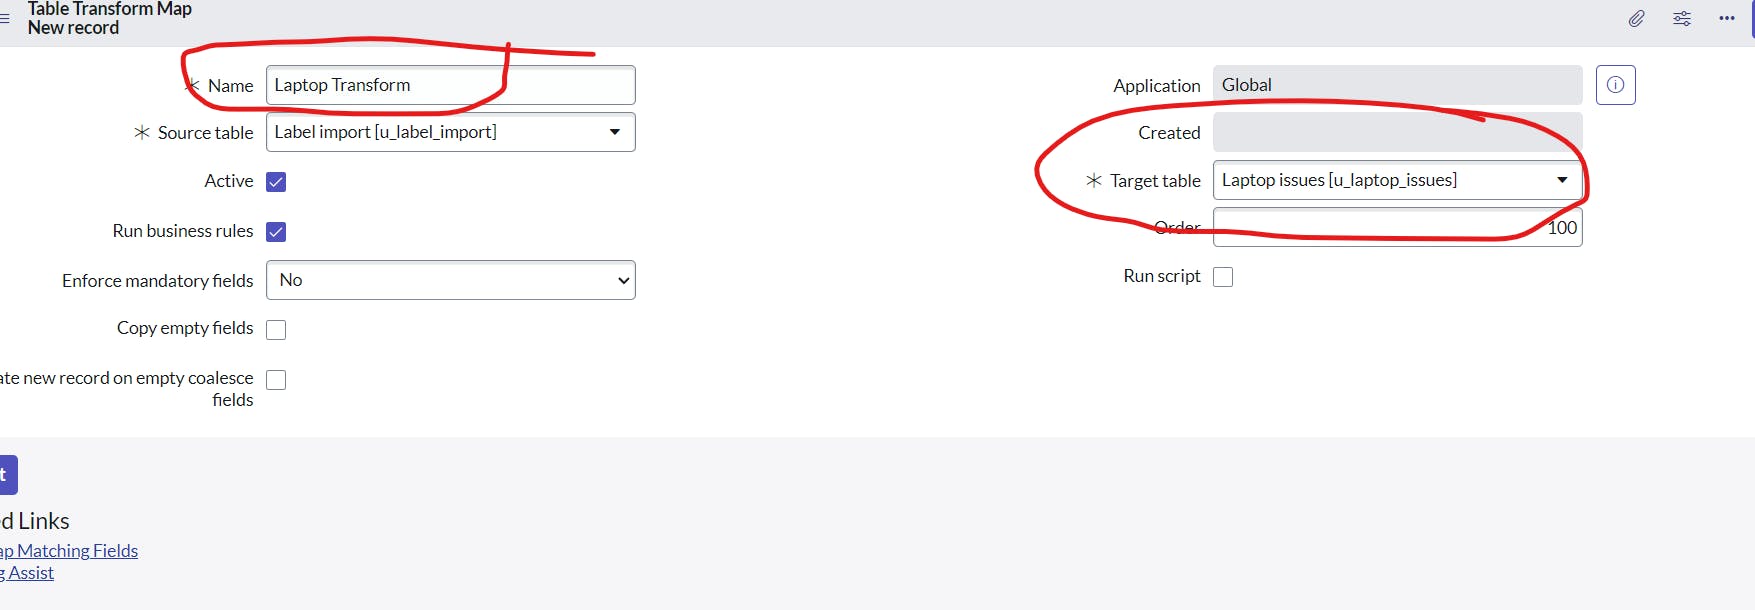
after clicking save
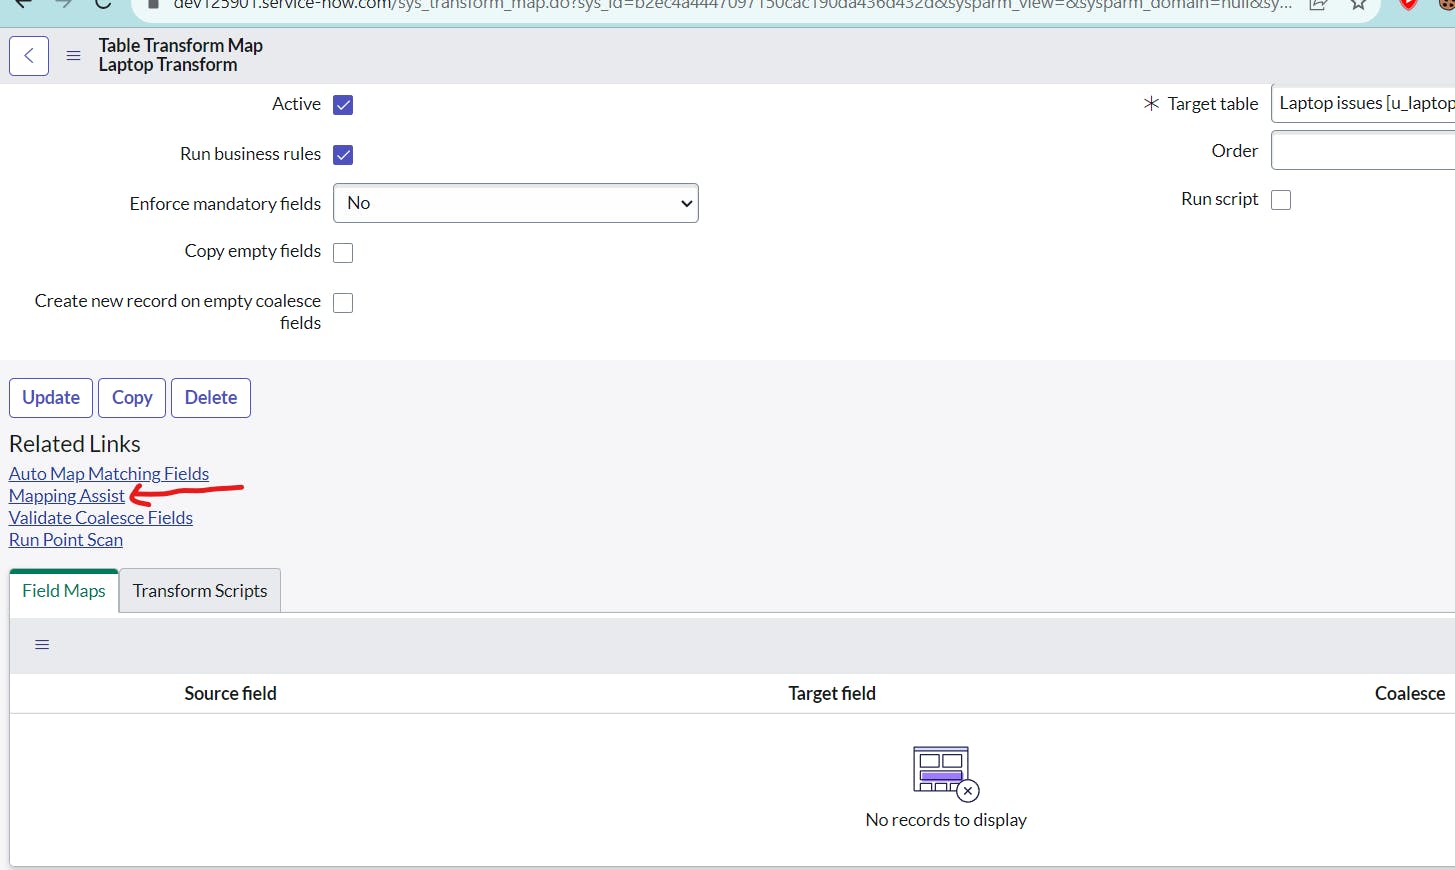
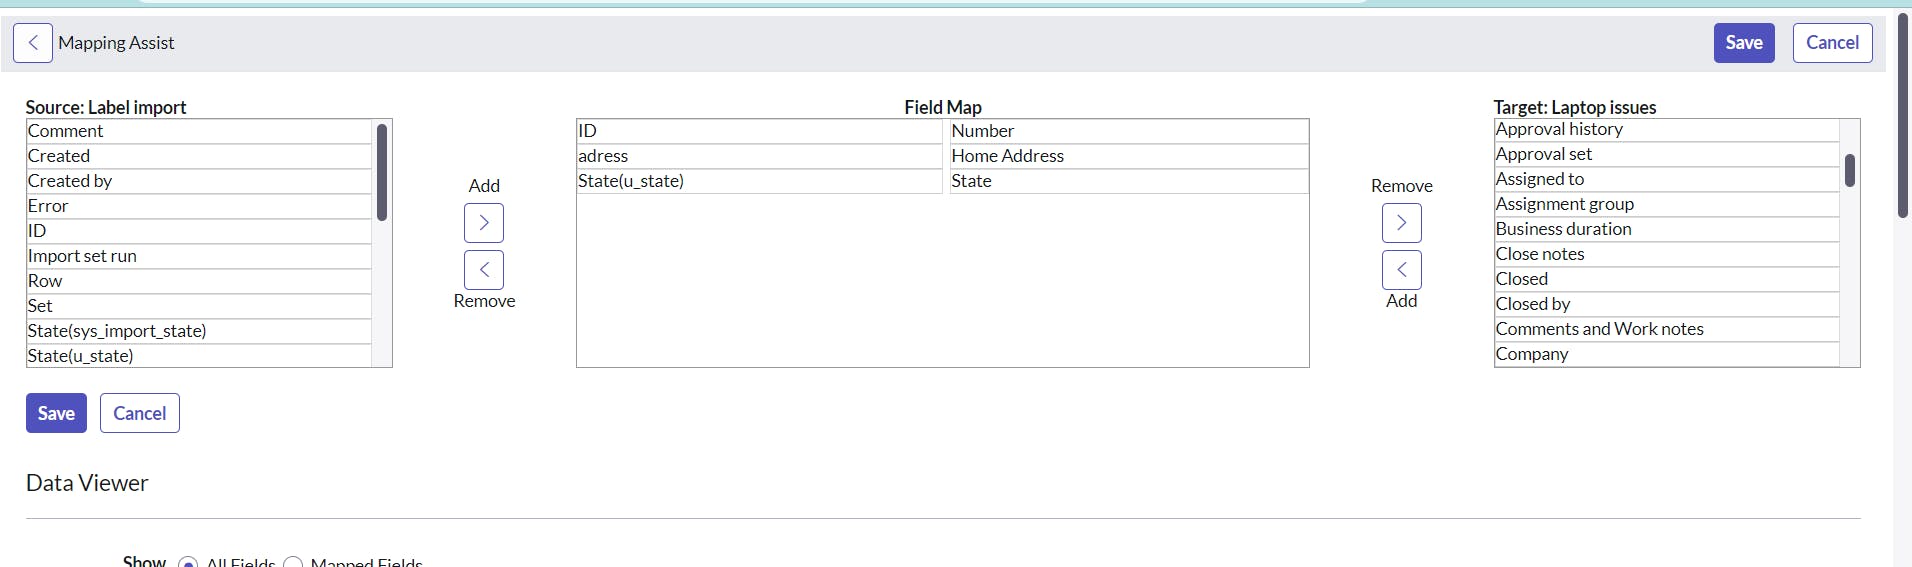
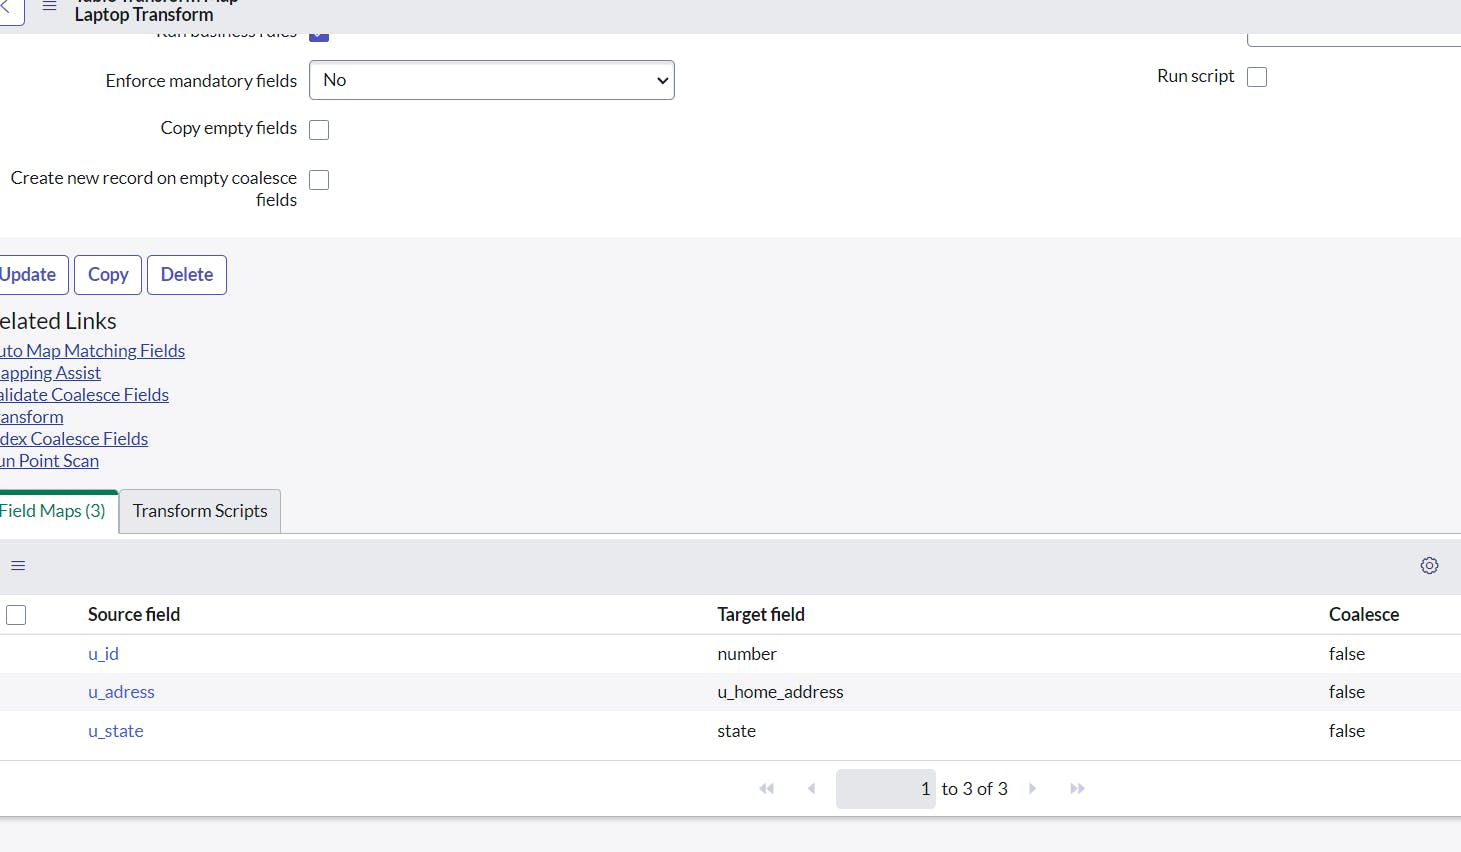
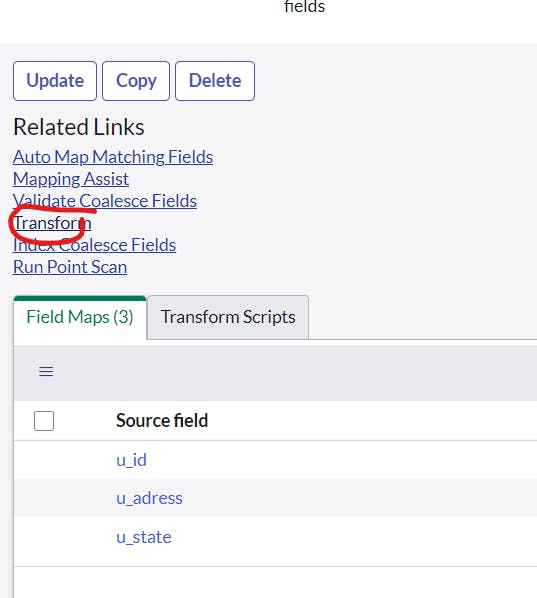
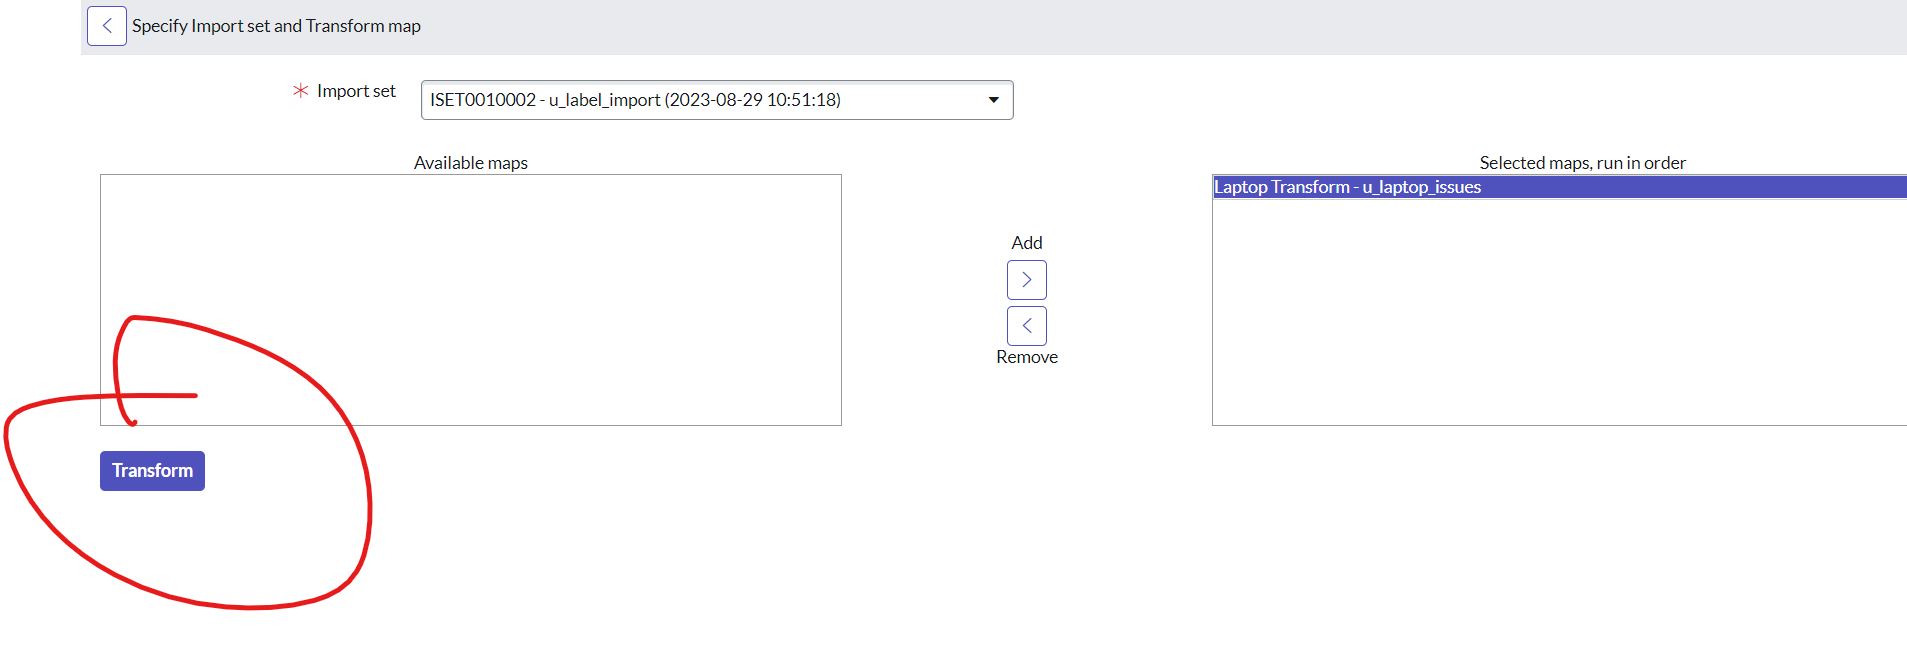
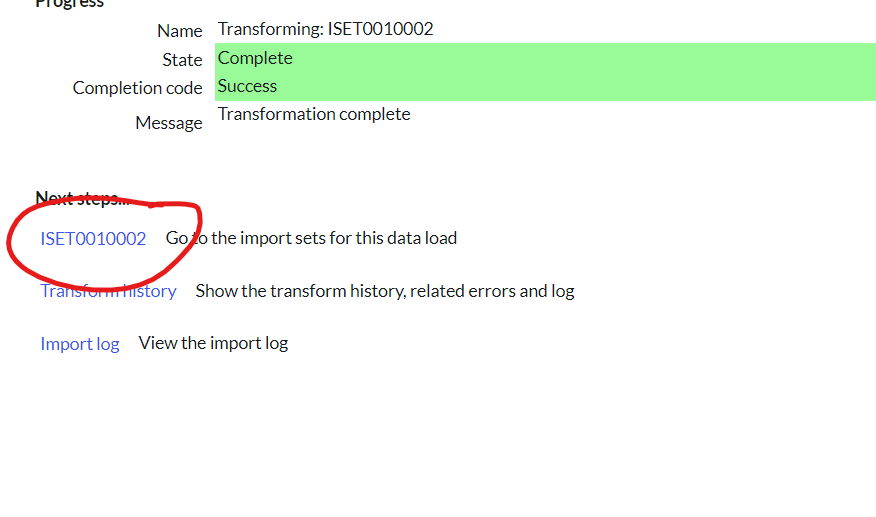
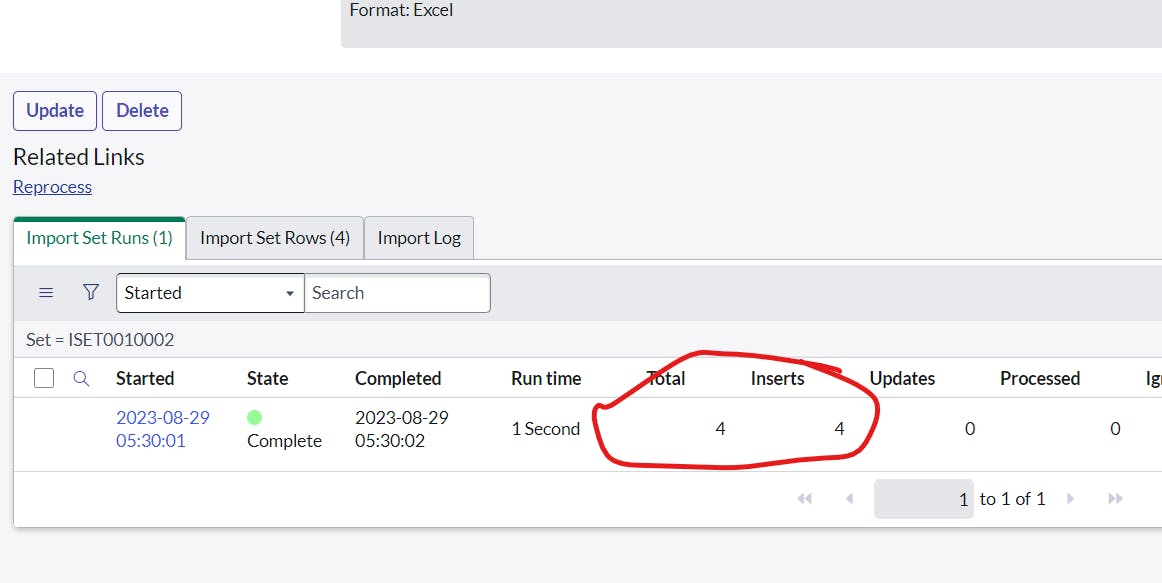
in laptop issues table
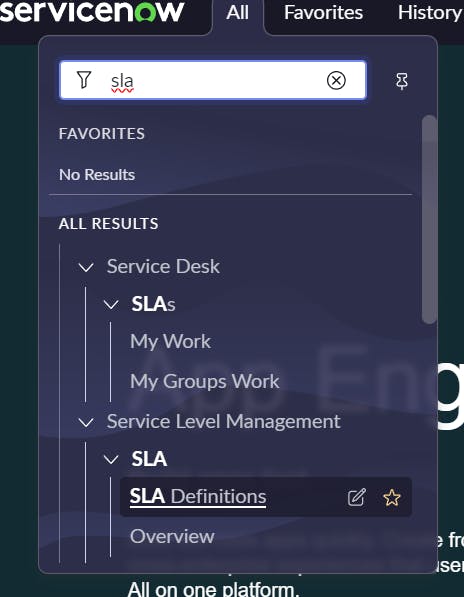
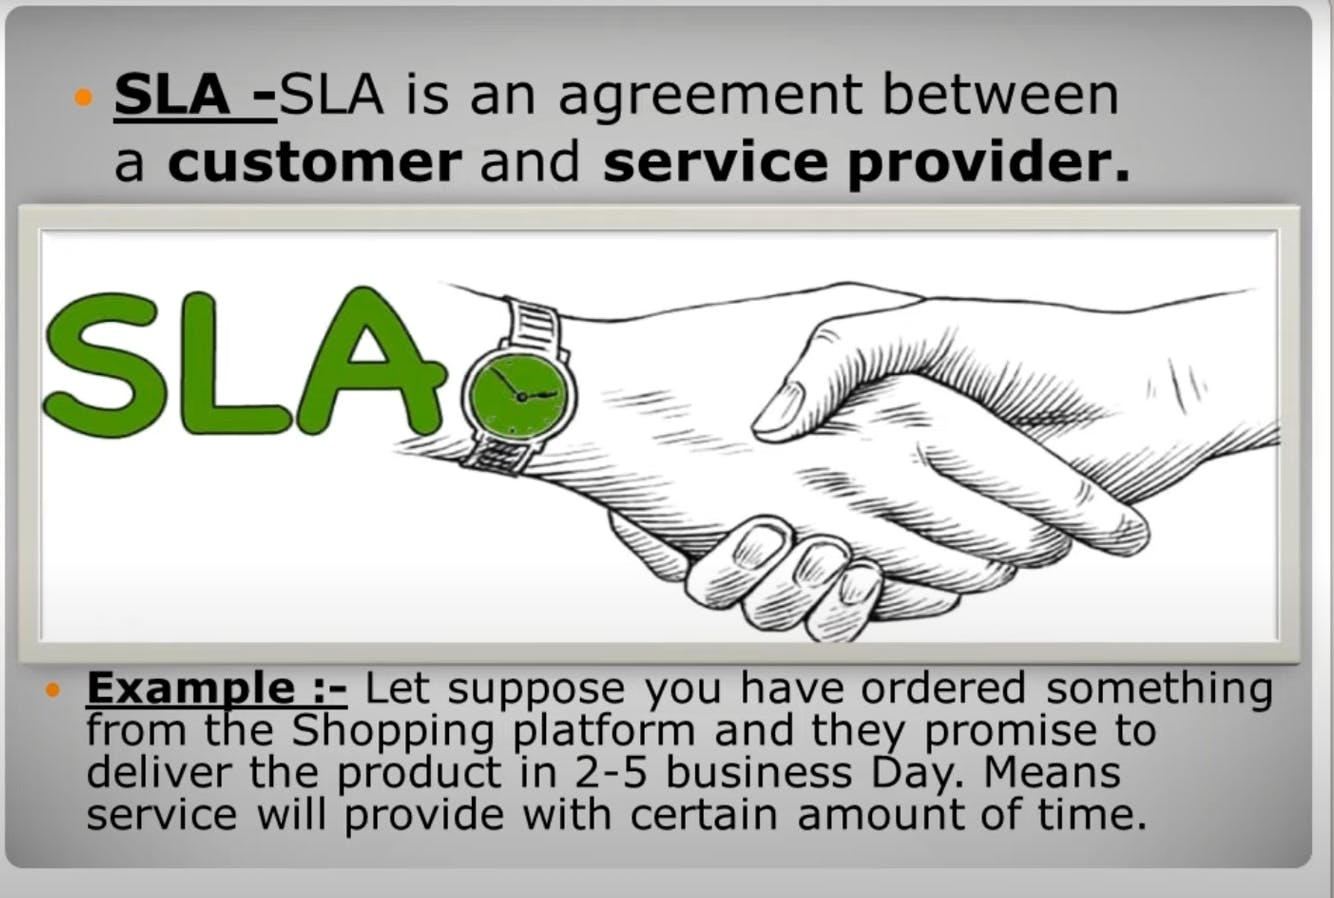
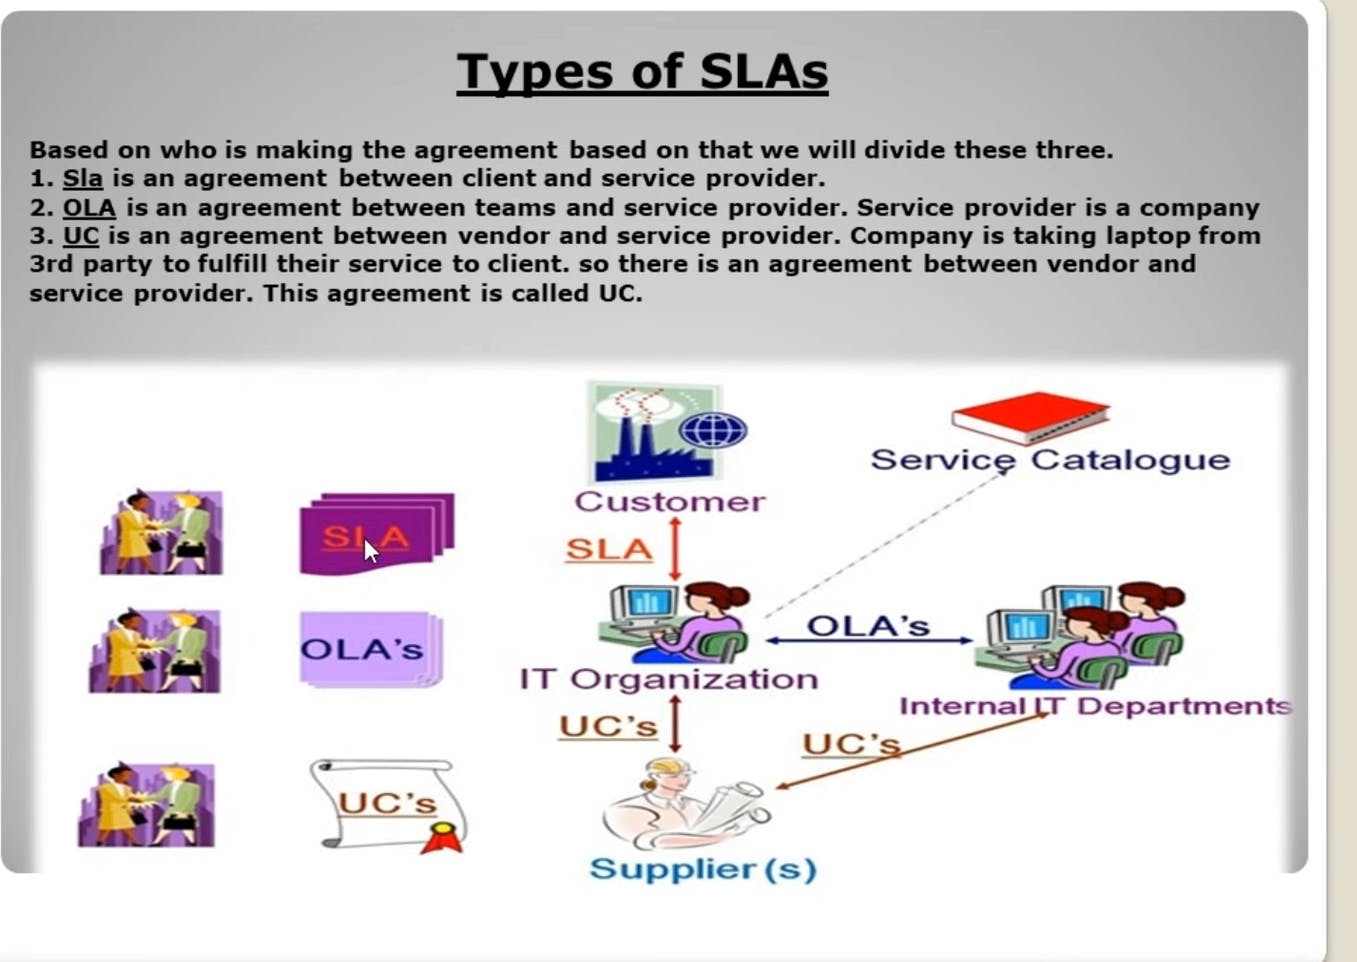
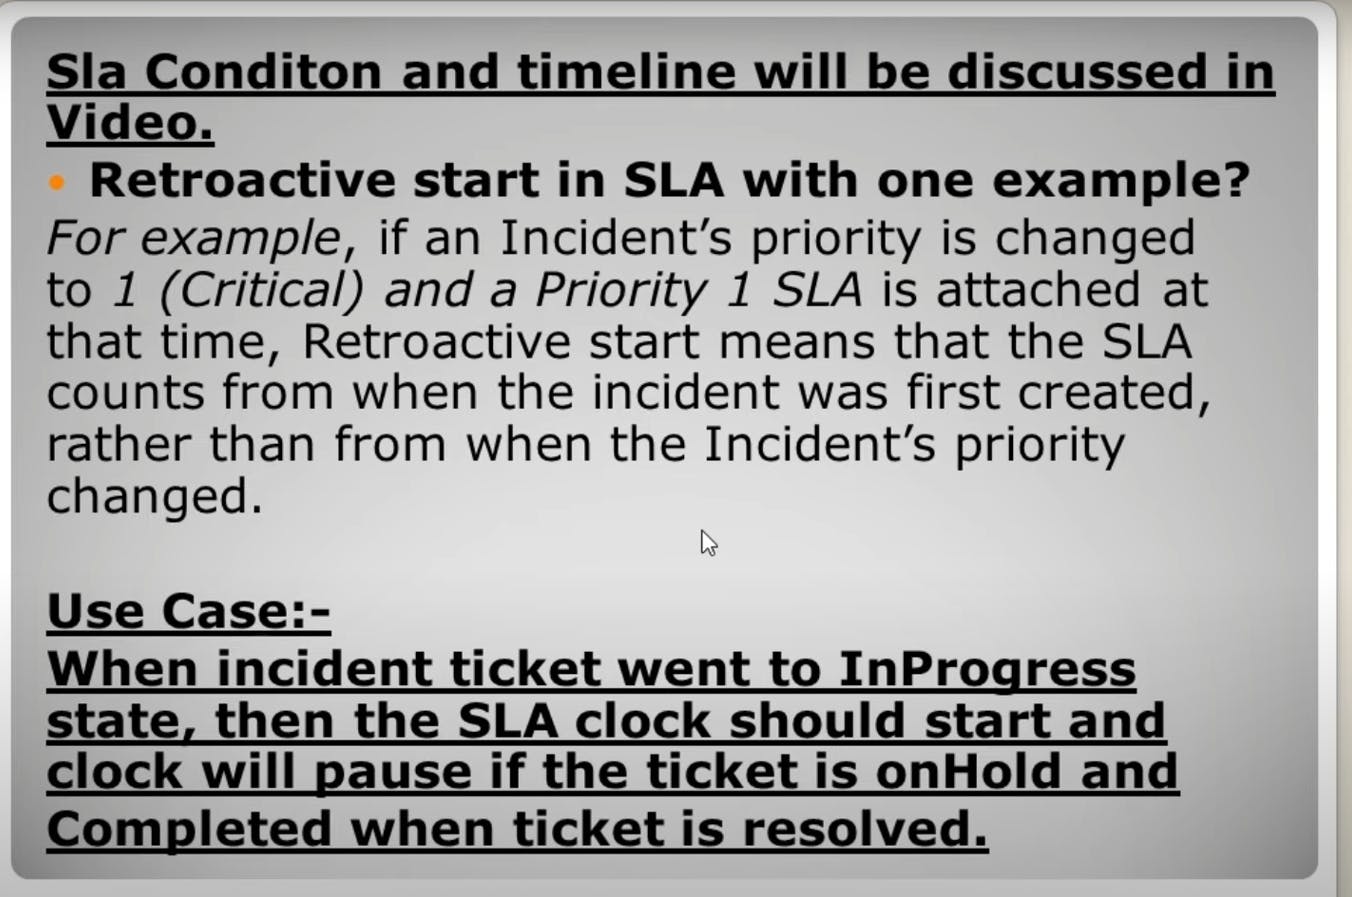
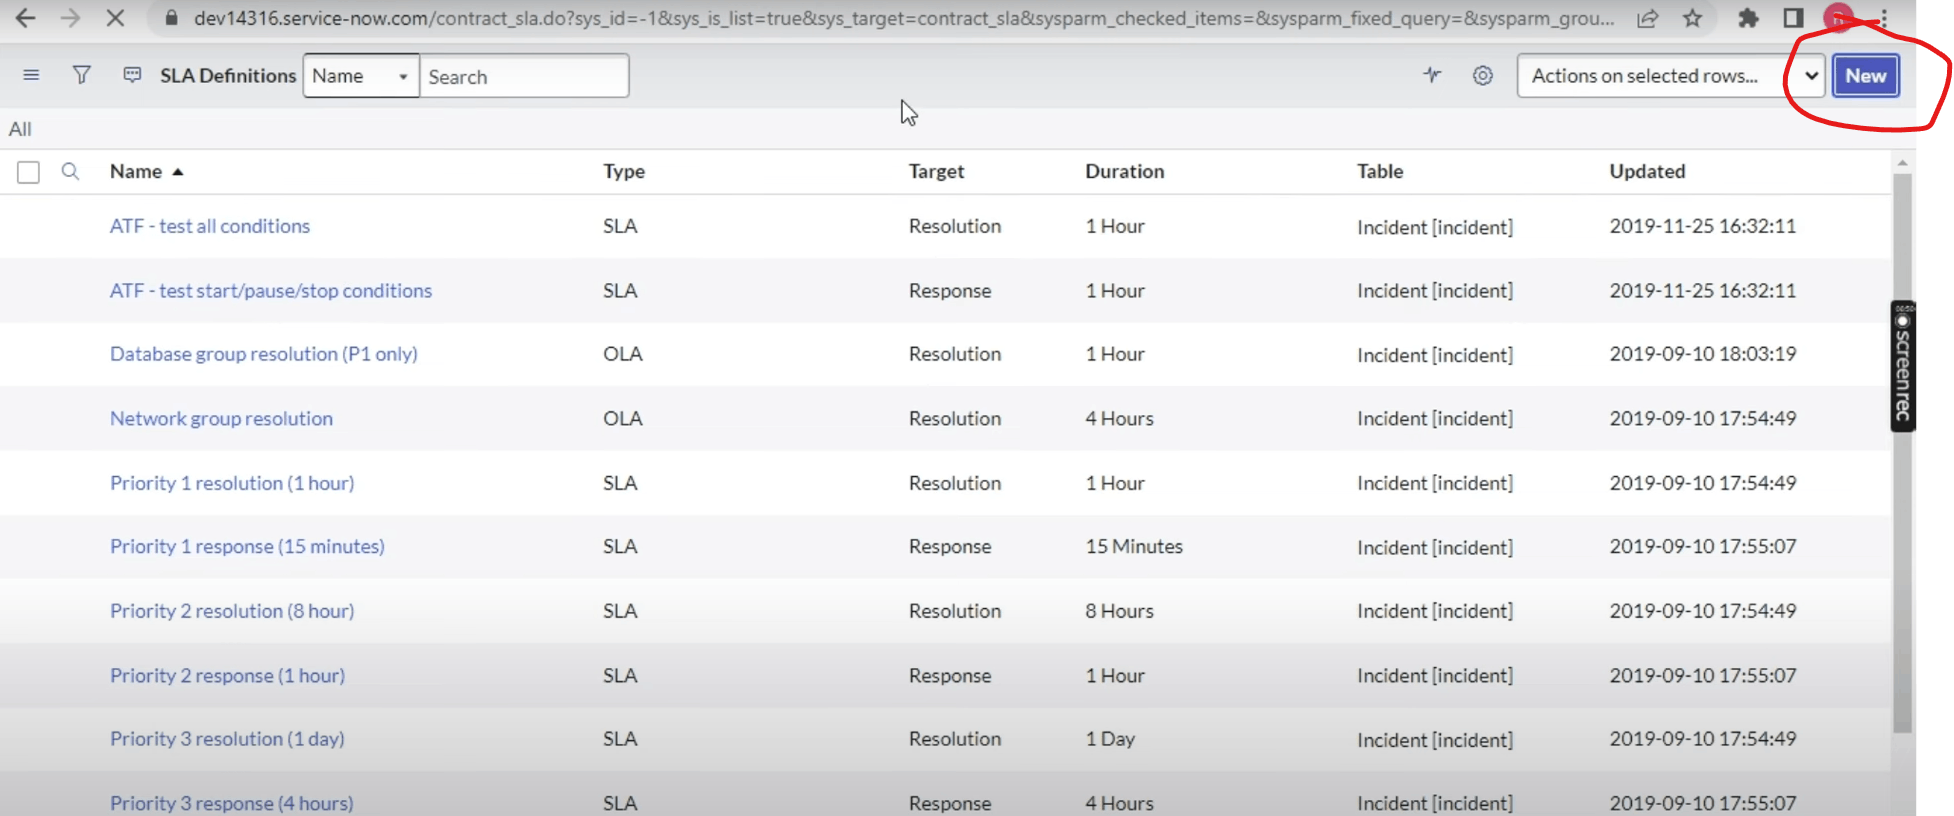
PermalinkService Level Agreement

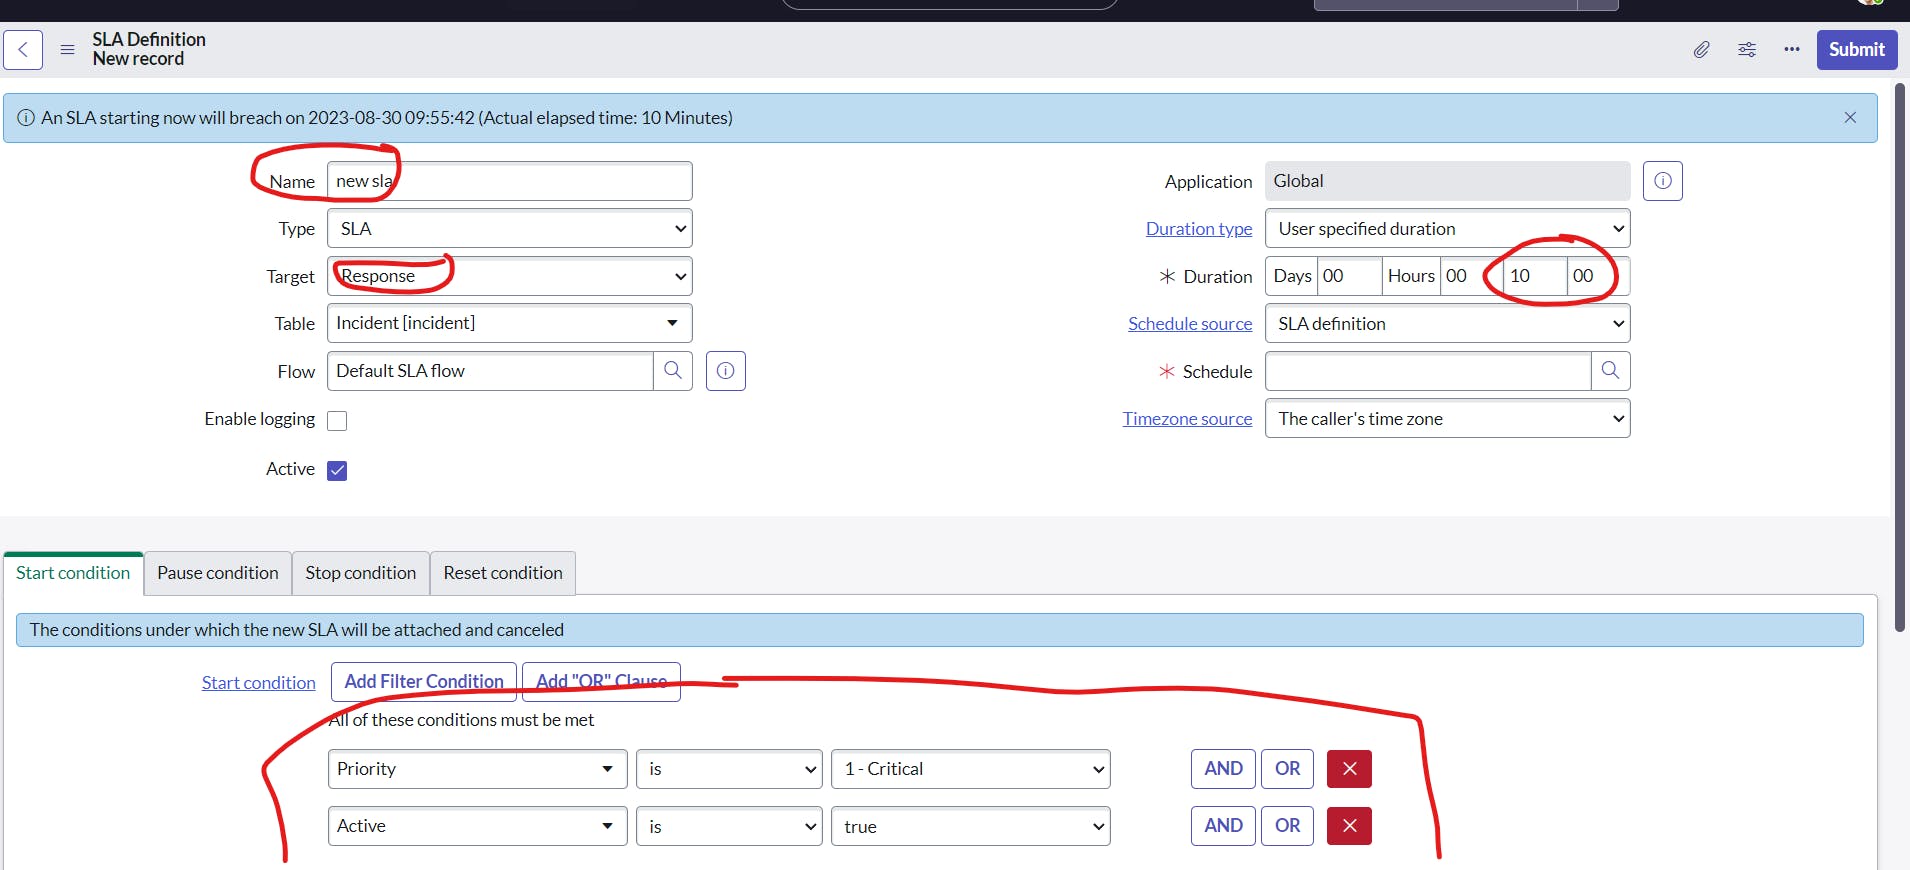
schedule: no schedule
now if priority is critical
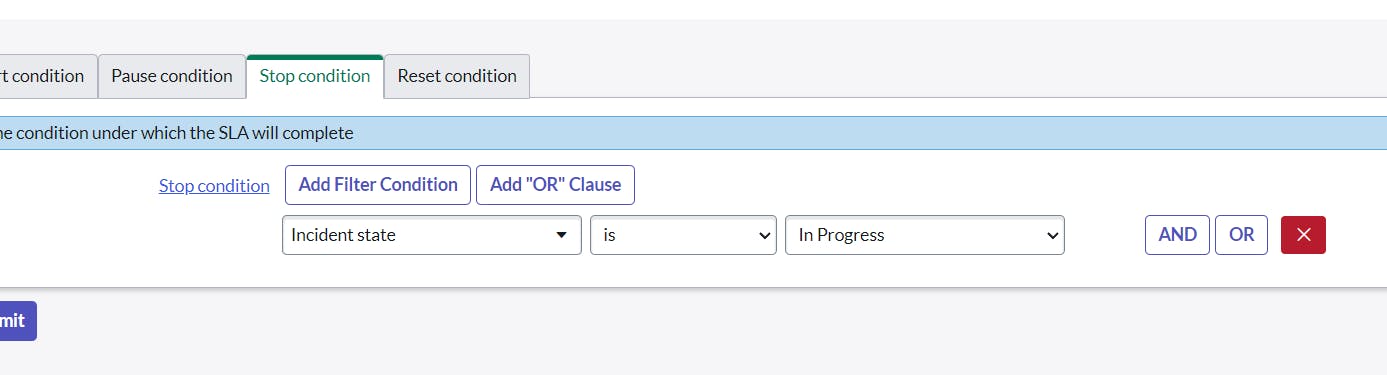
response runs until we stop it by making state in progress

now if we keep state in progress now it is completed

when a state changes to in progress we have to trigger a timer
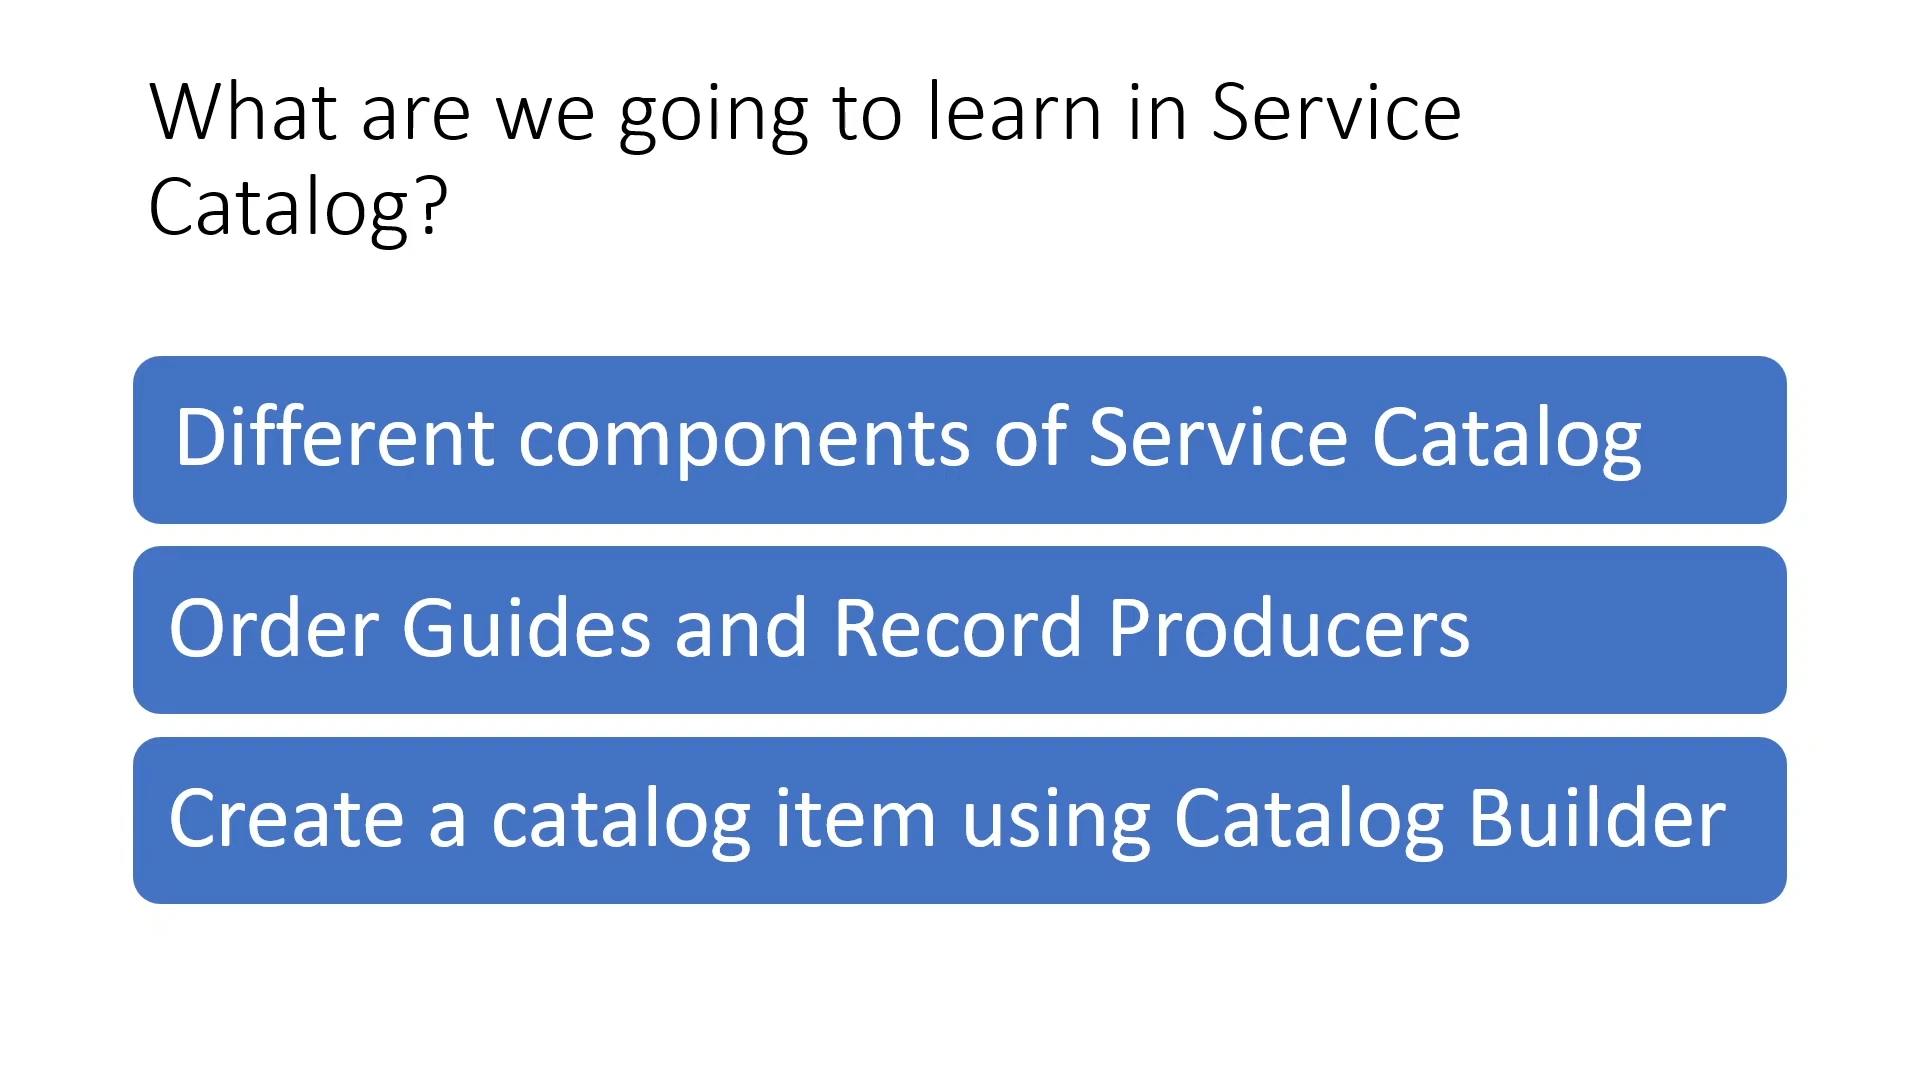
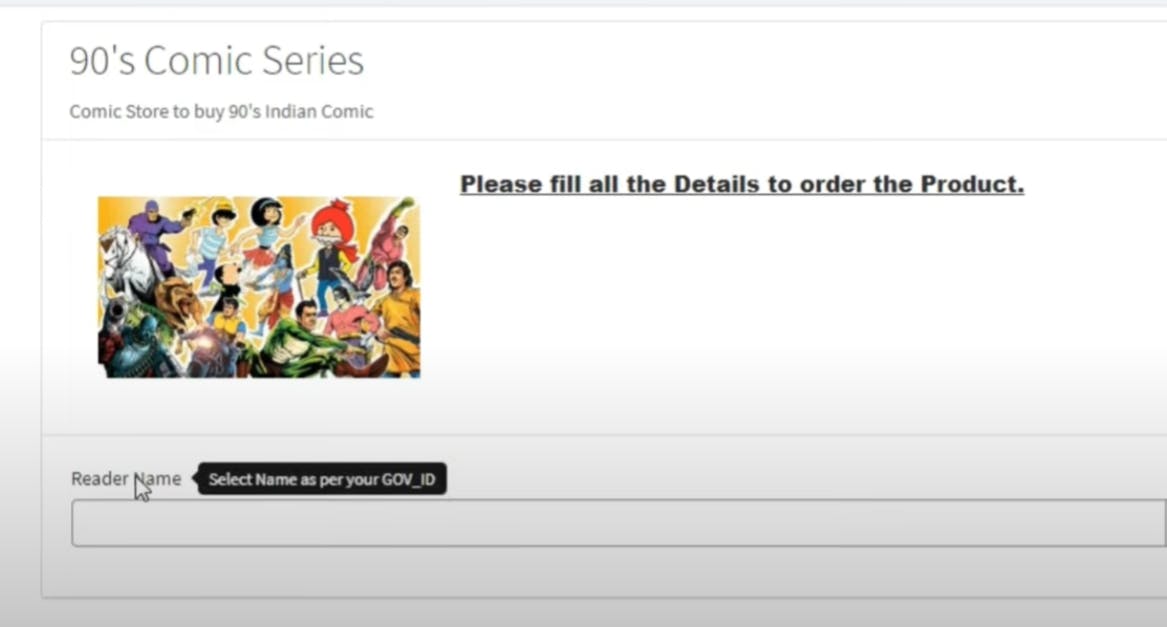
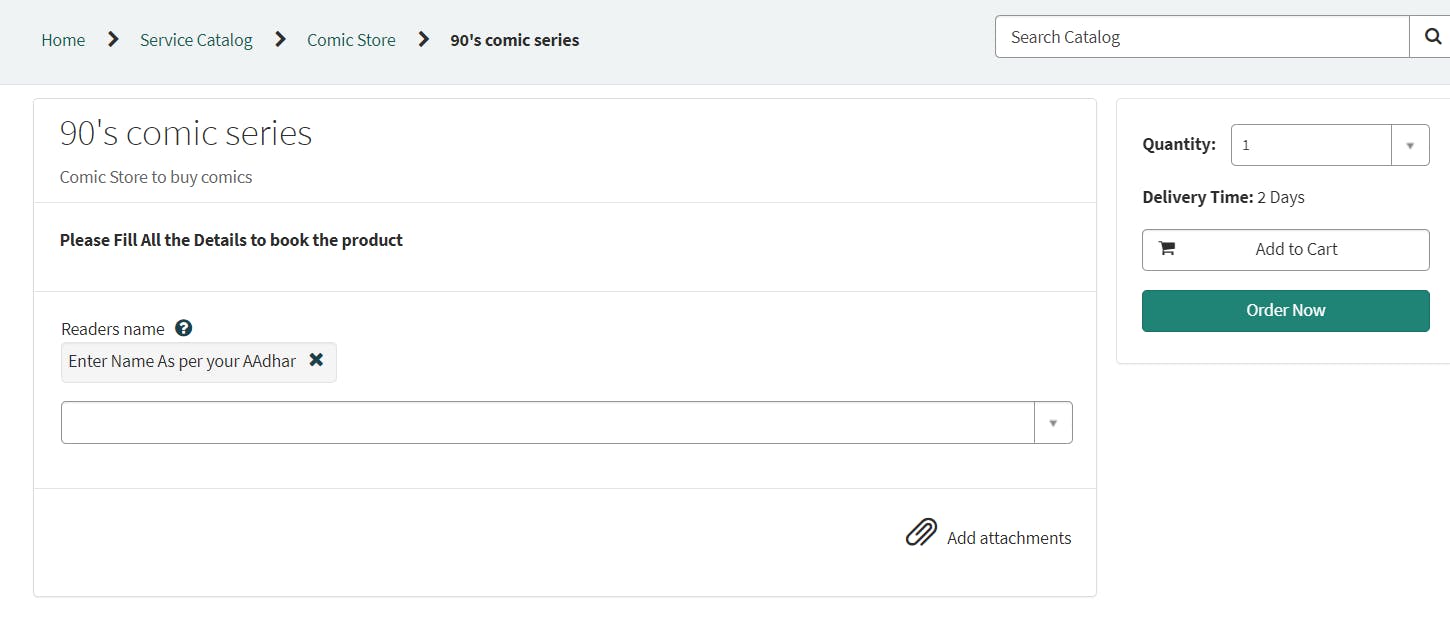
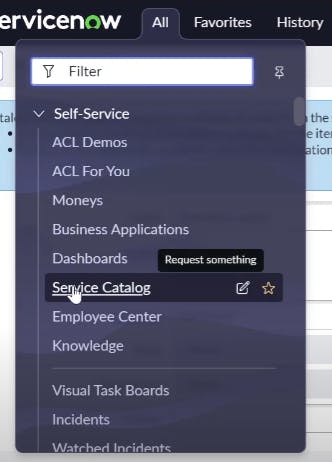
PermalinkDifferent components of Service Catalog
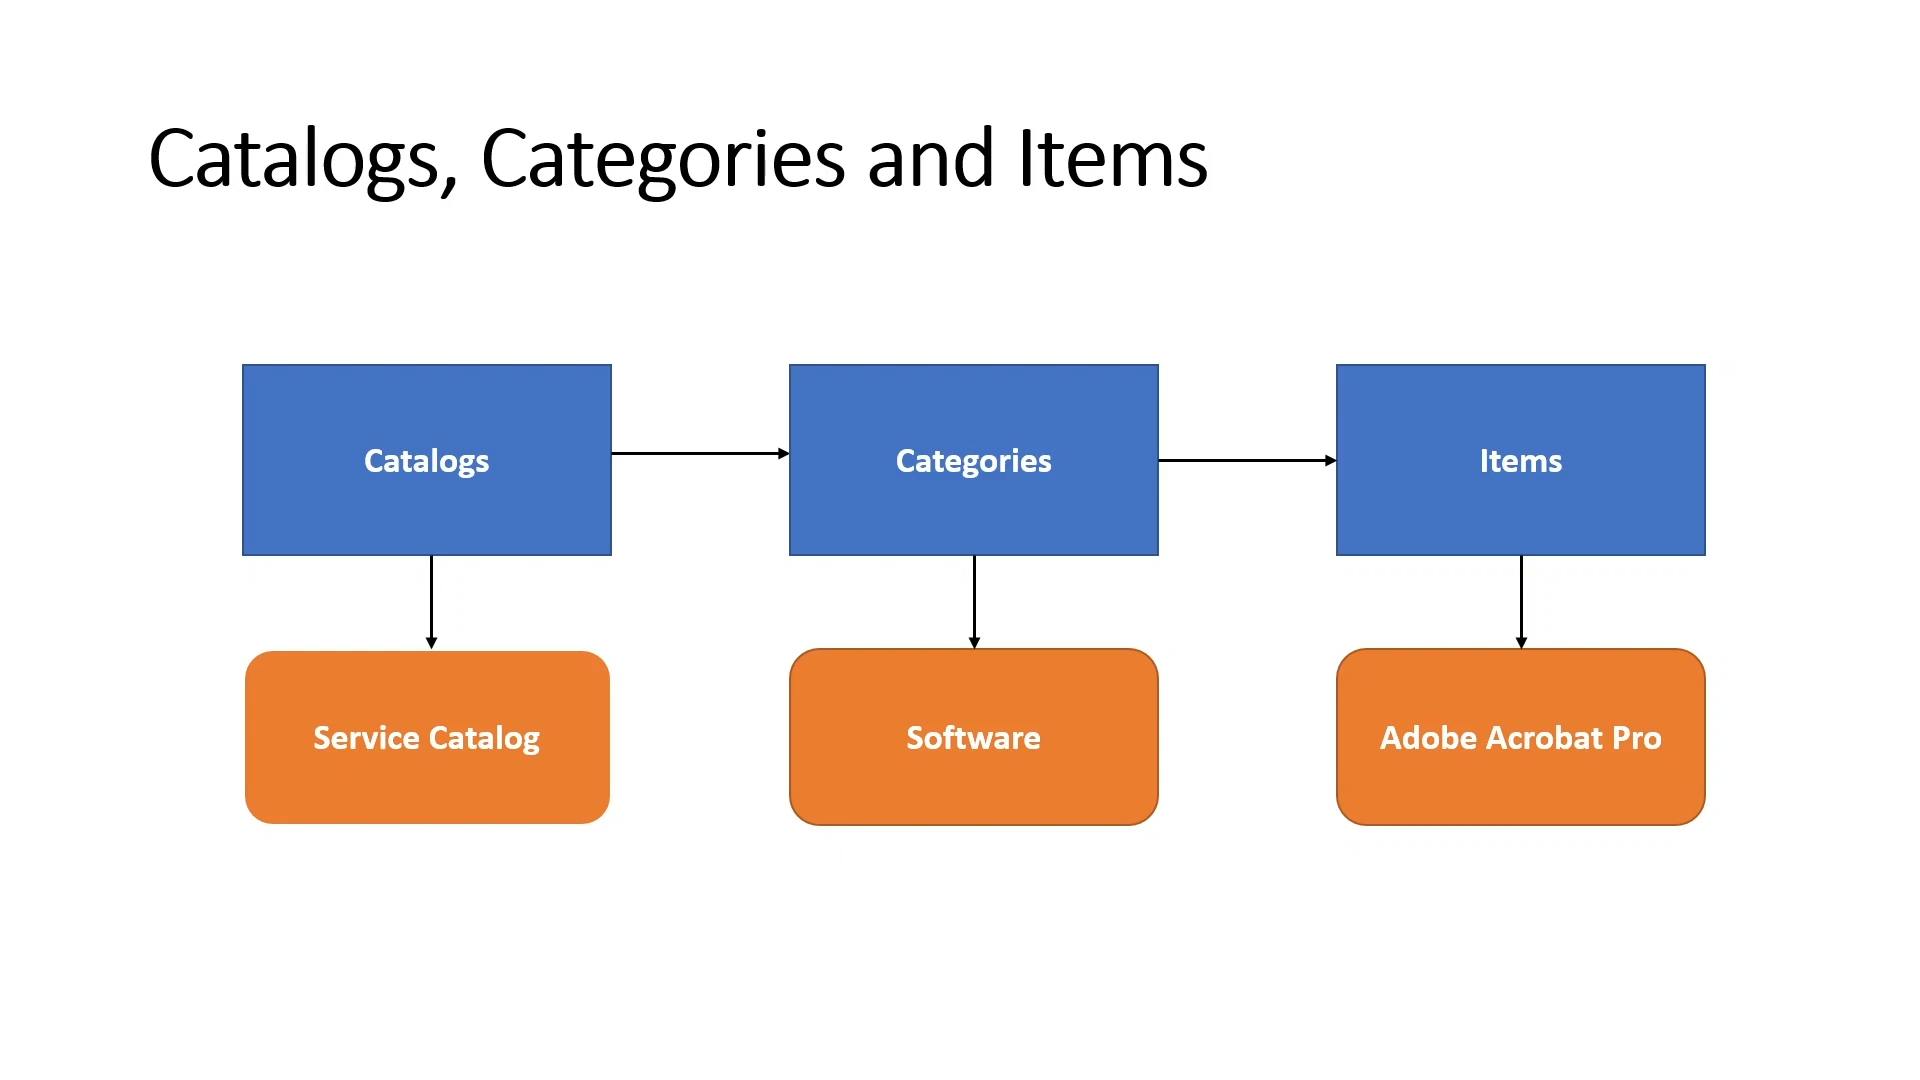


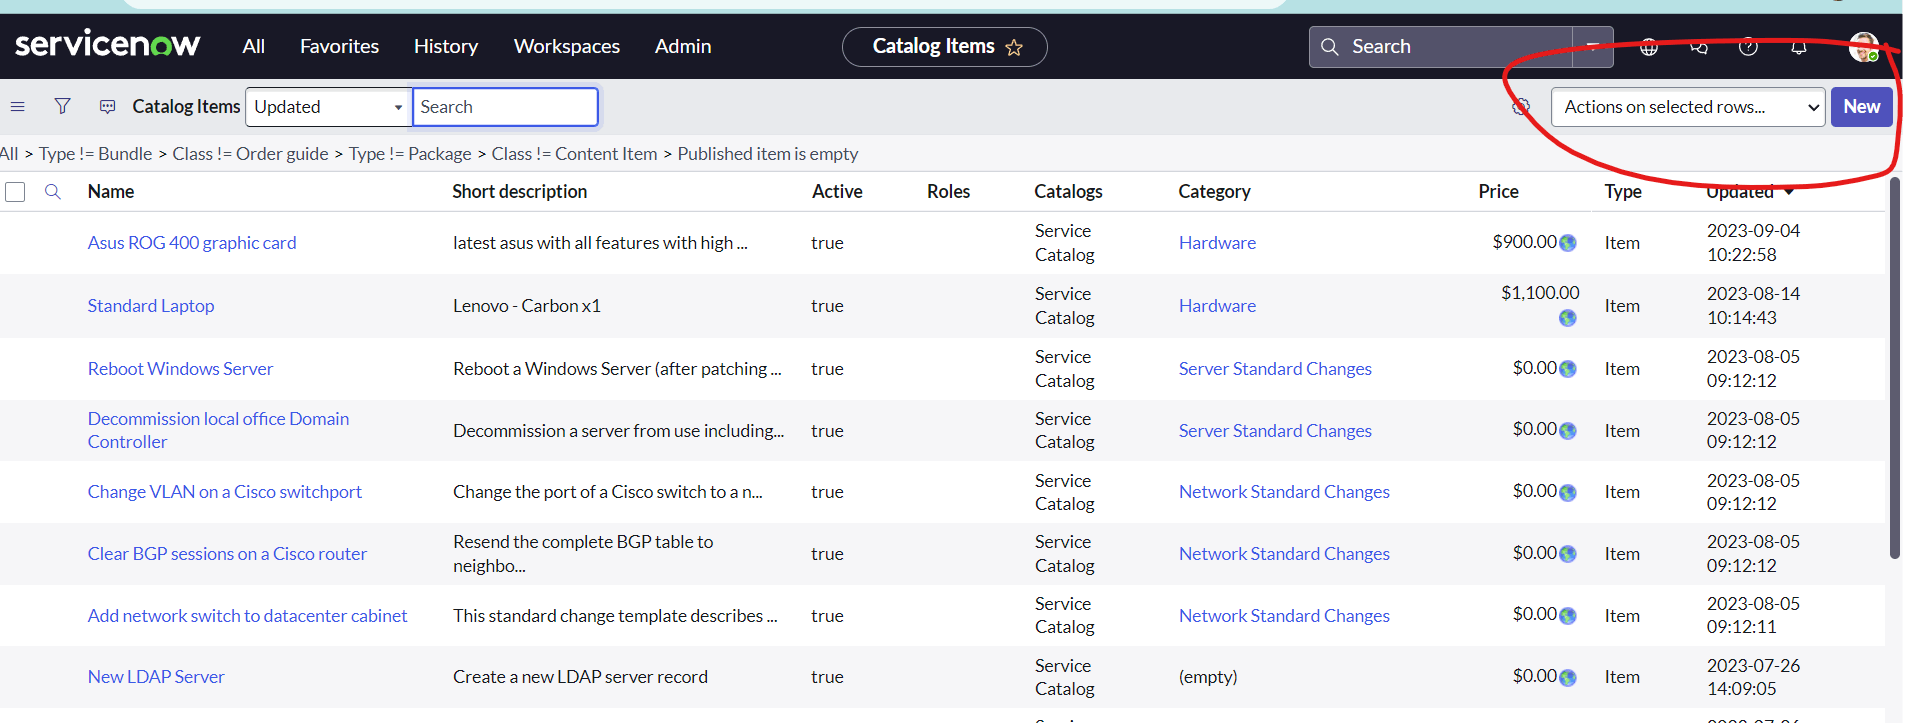
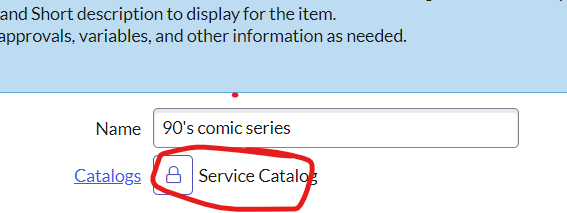
Create a new category if needed

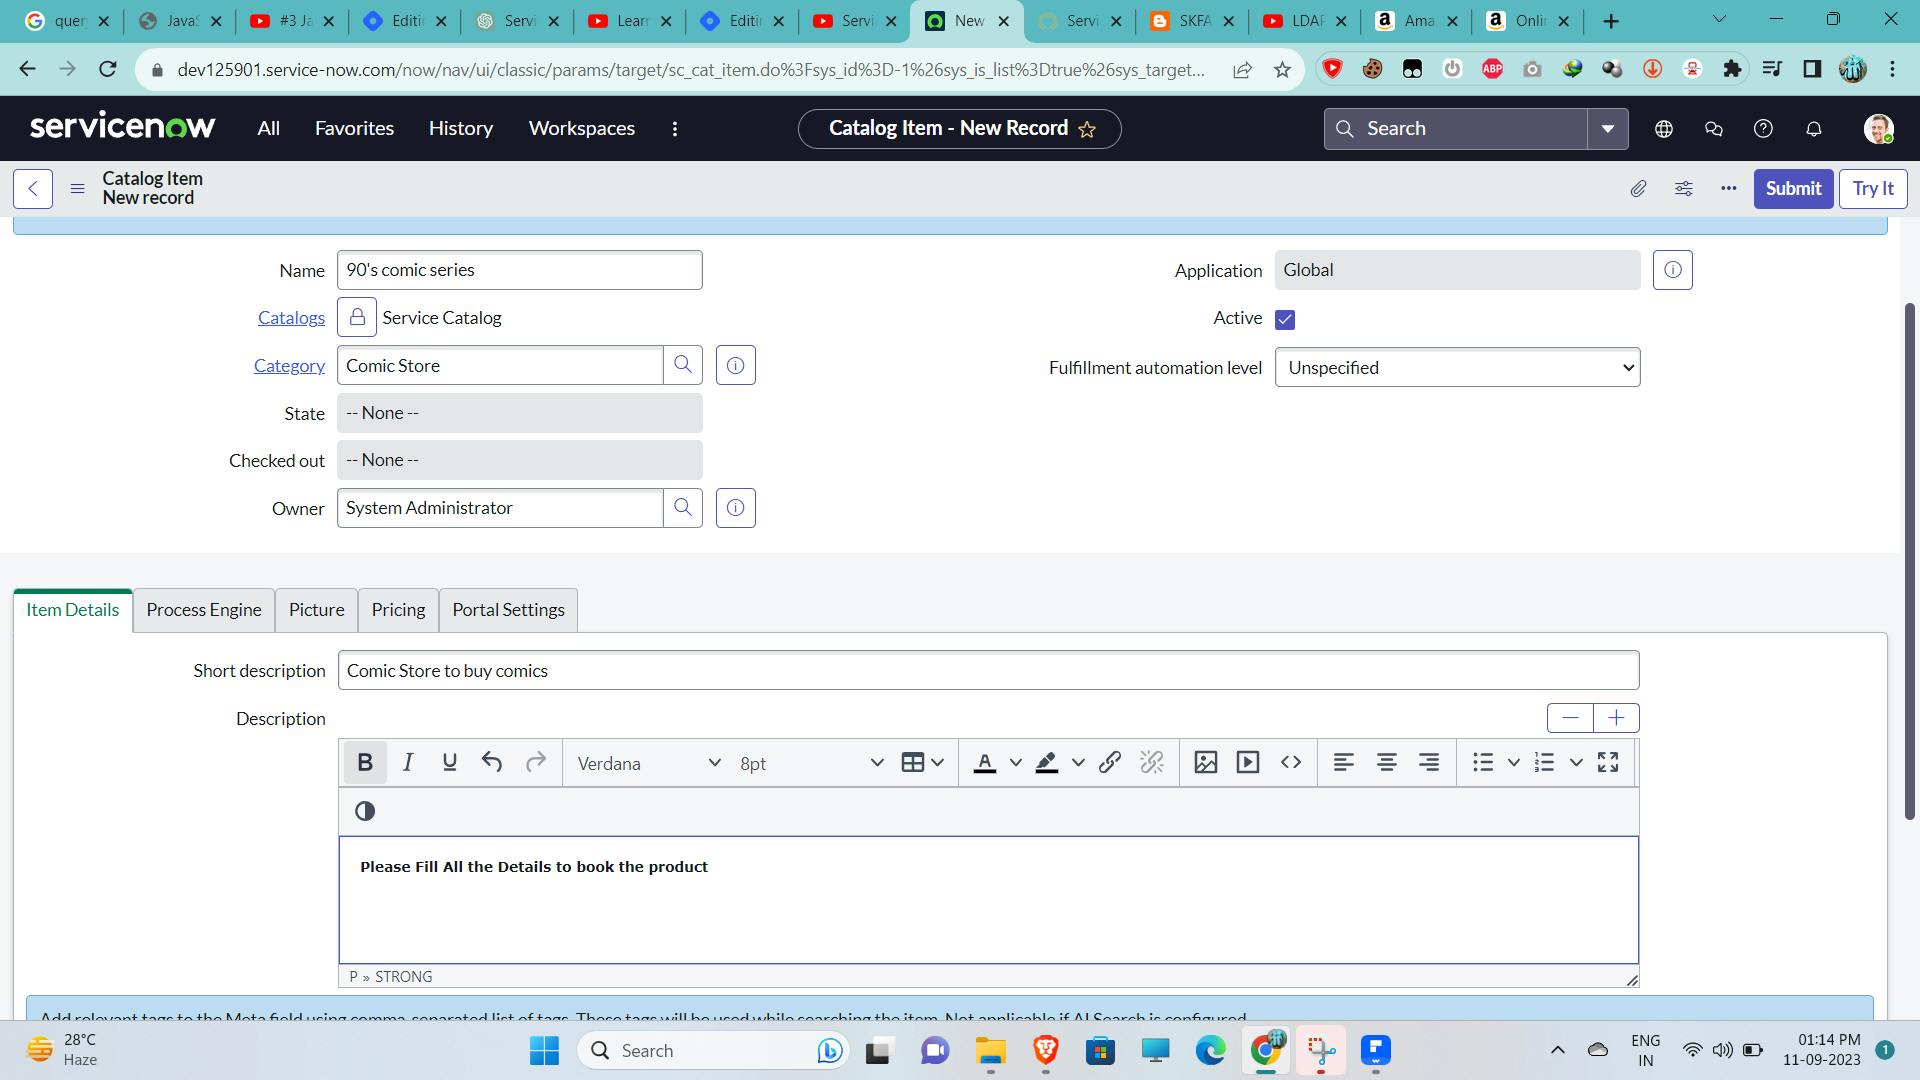
save it and check in
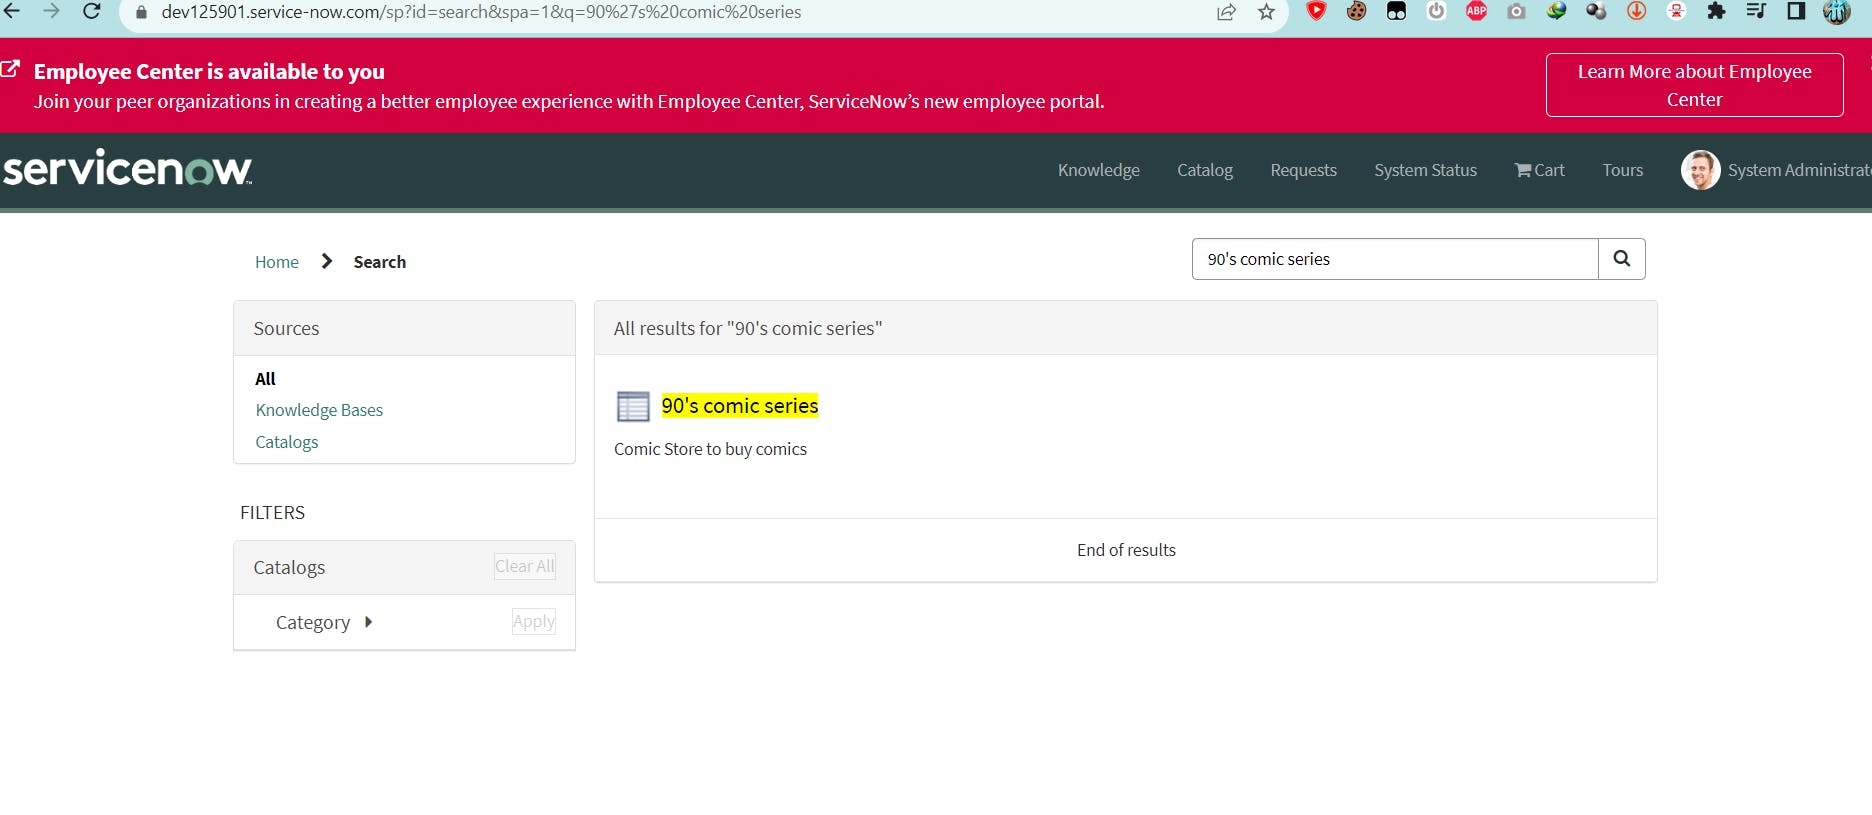
now if you type any of this in search they will be displayed too as u typed them in meta
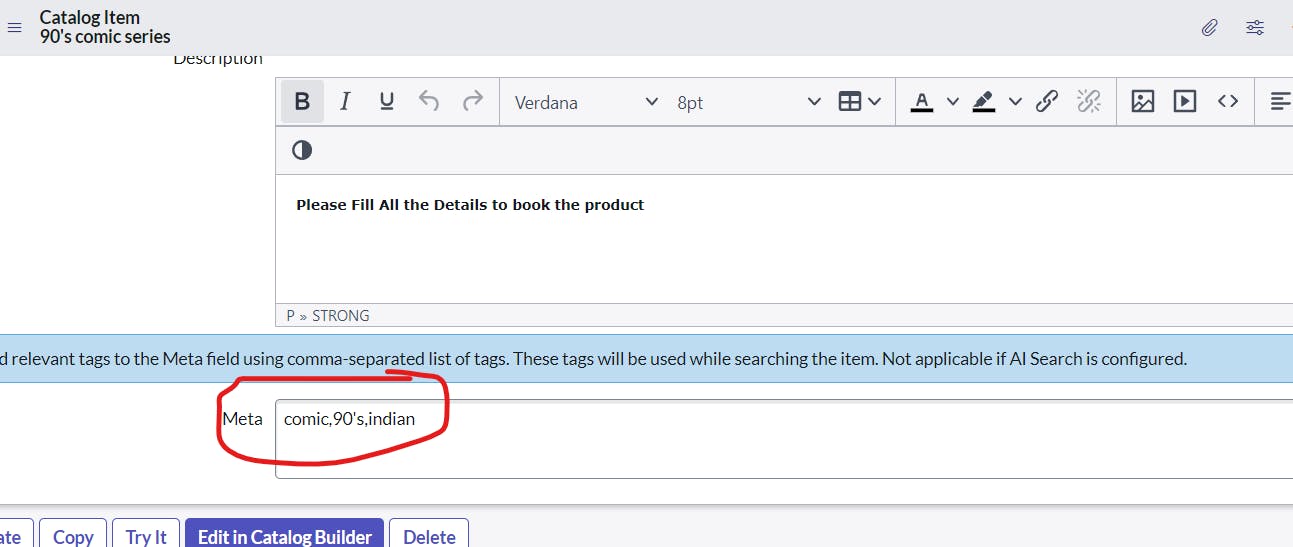
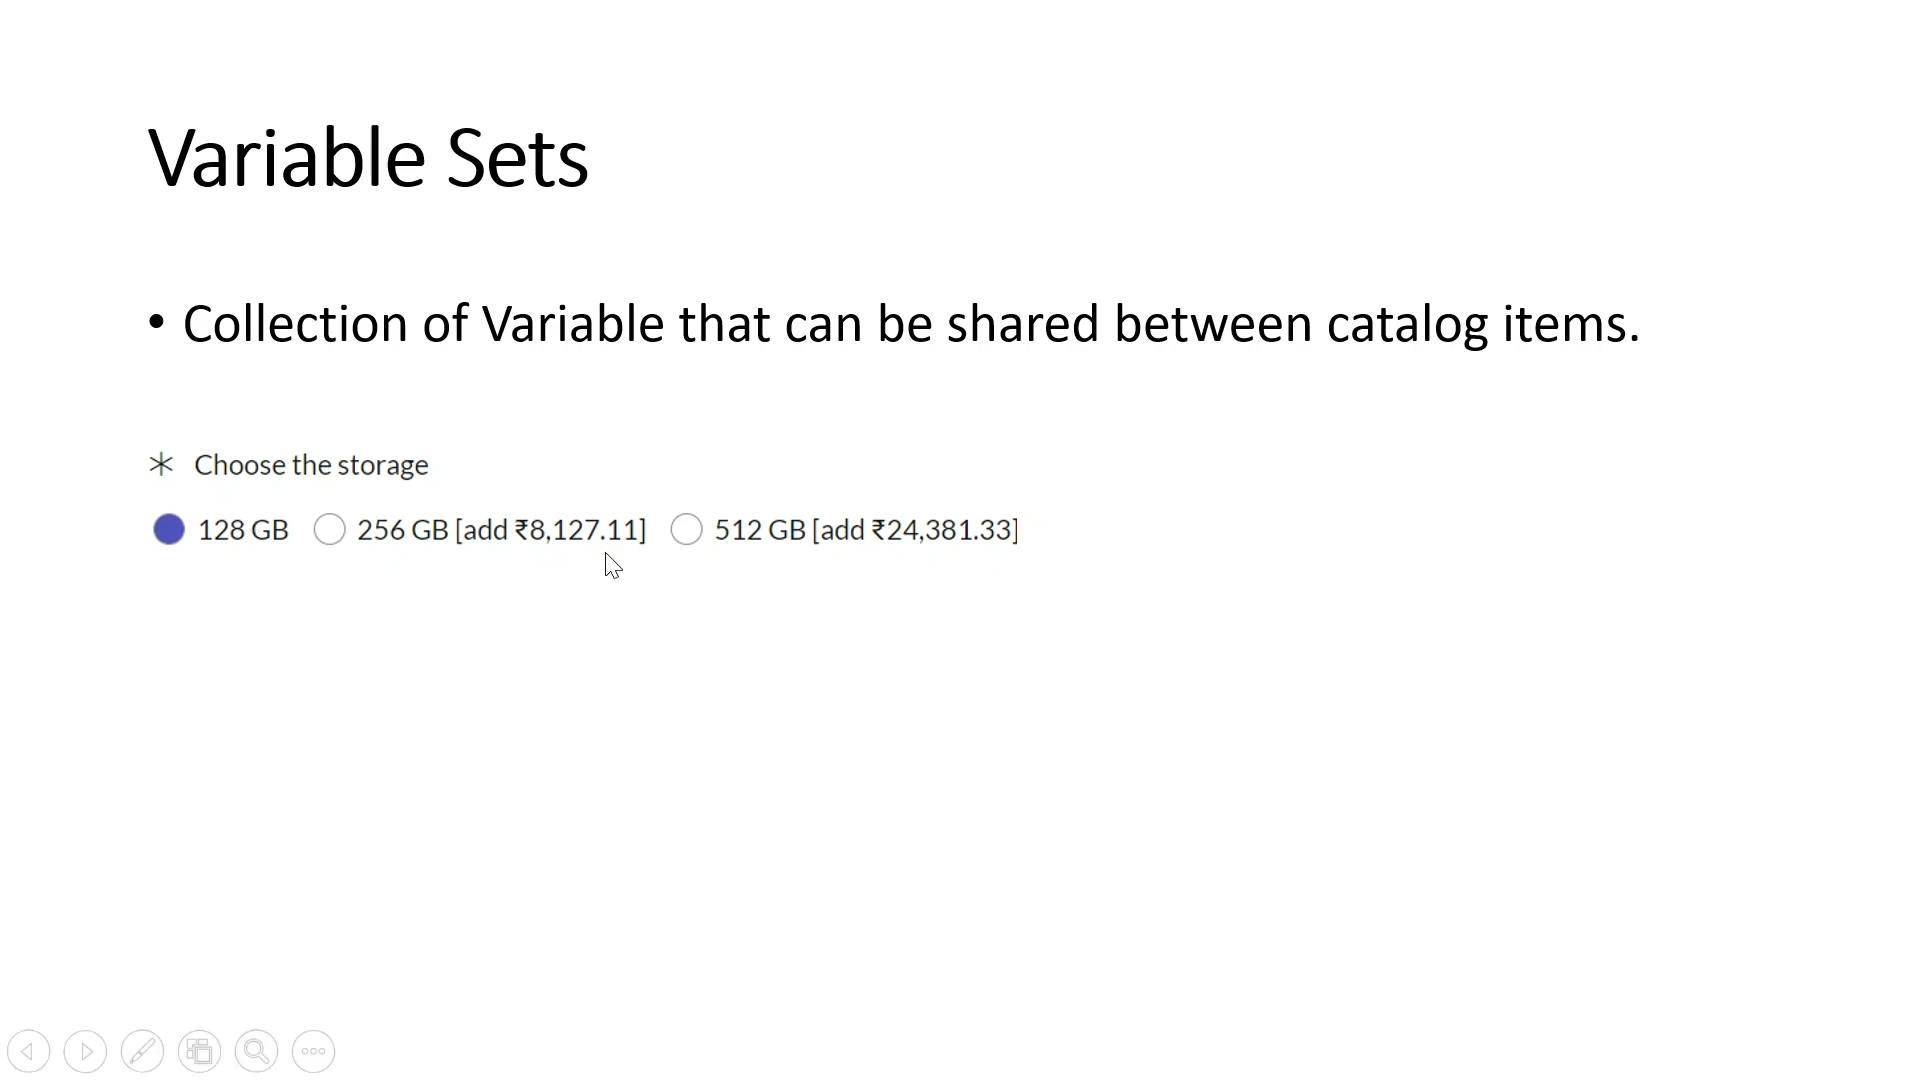
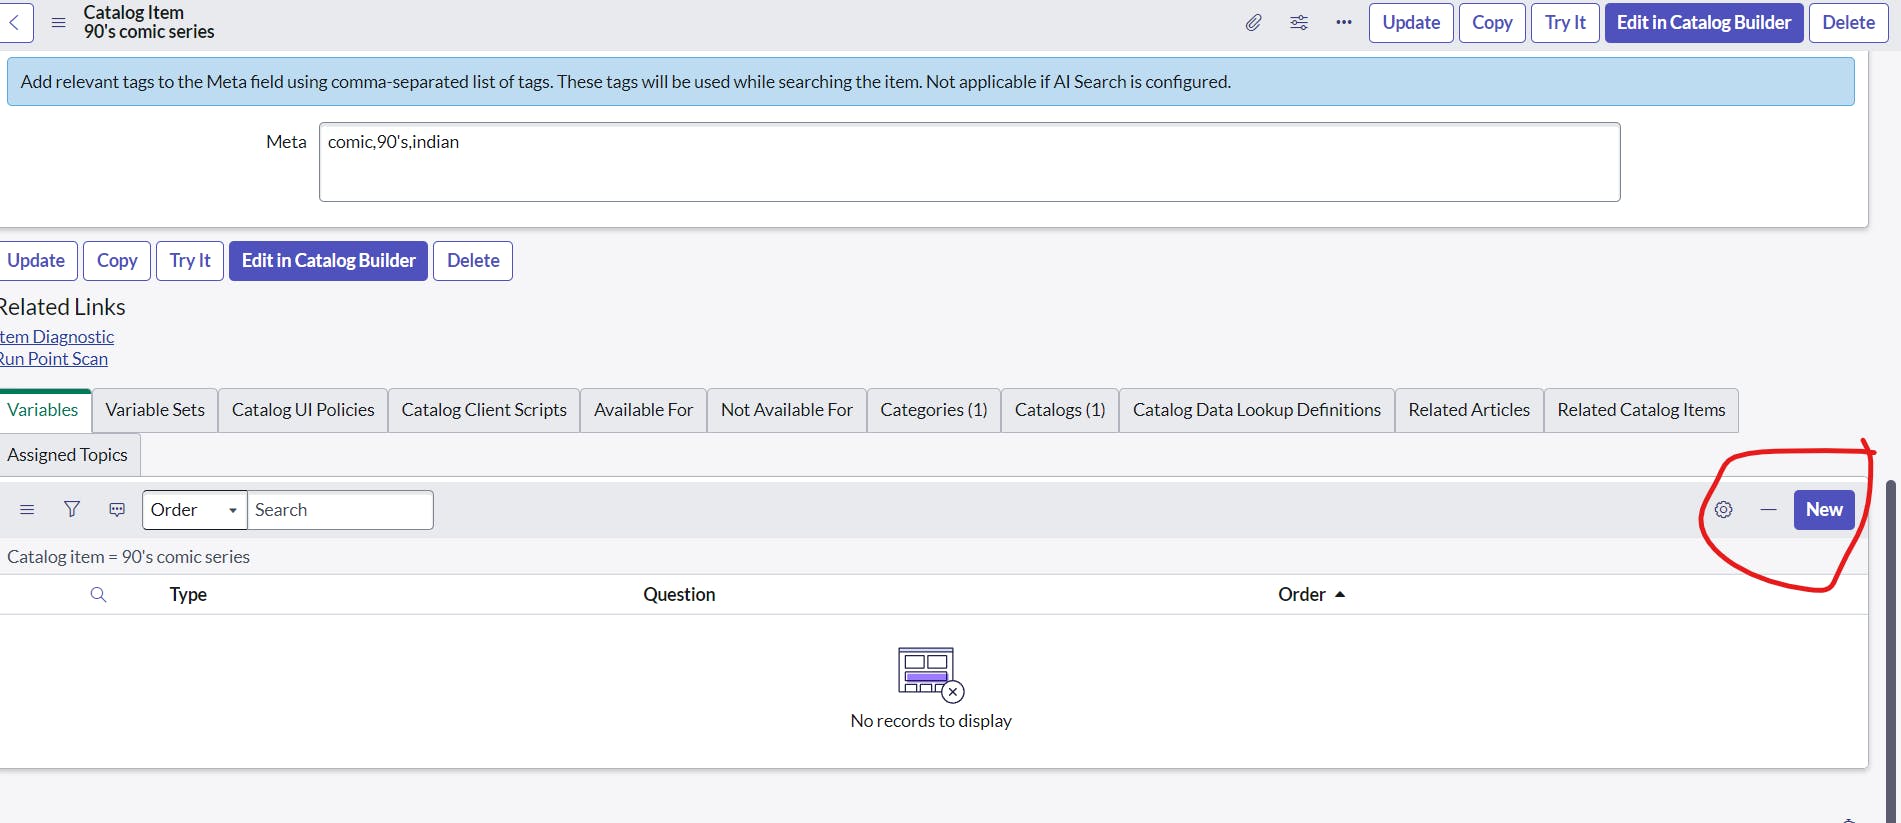
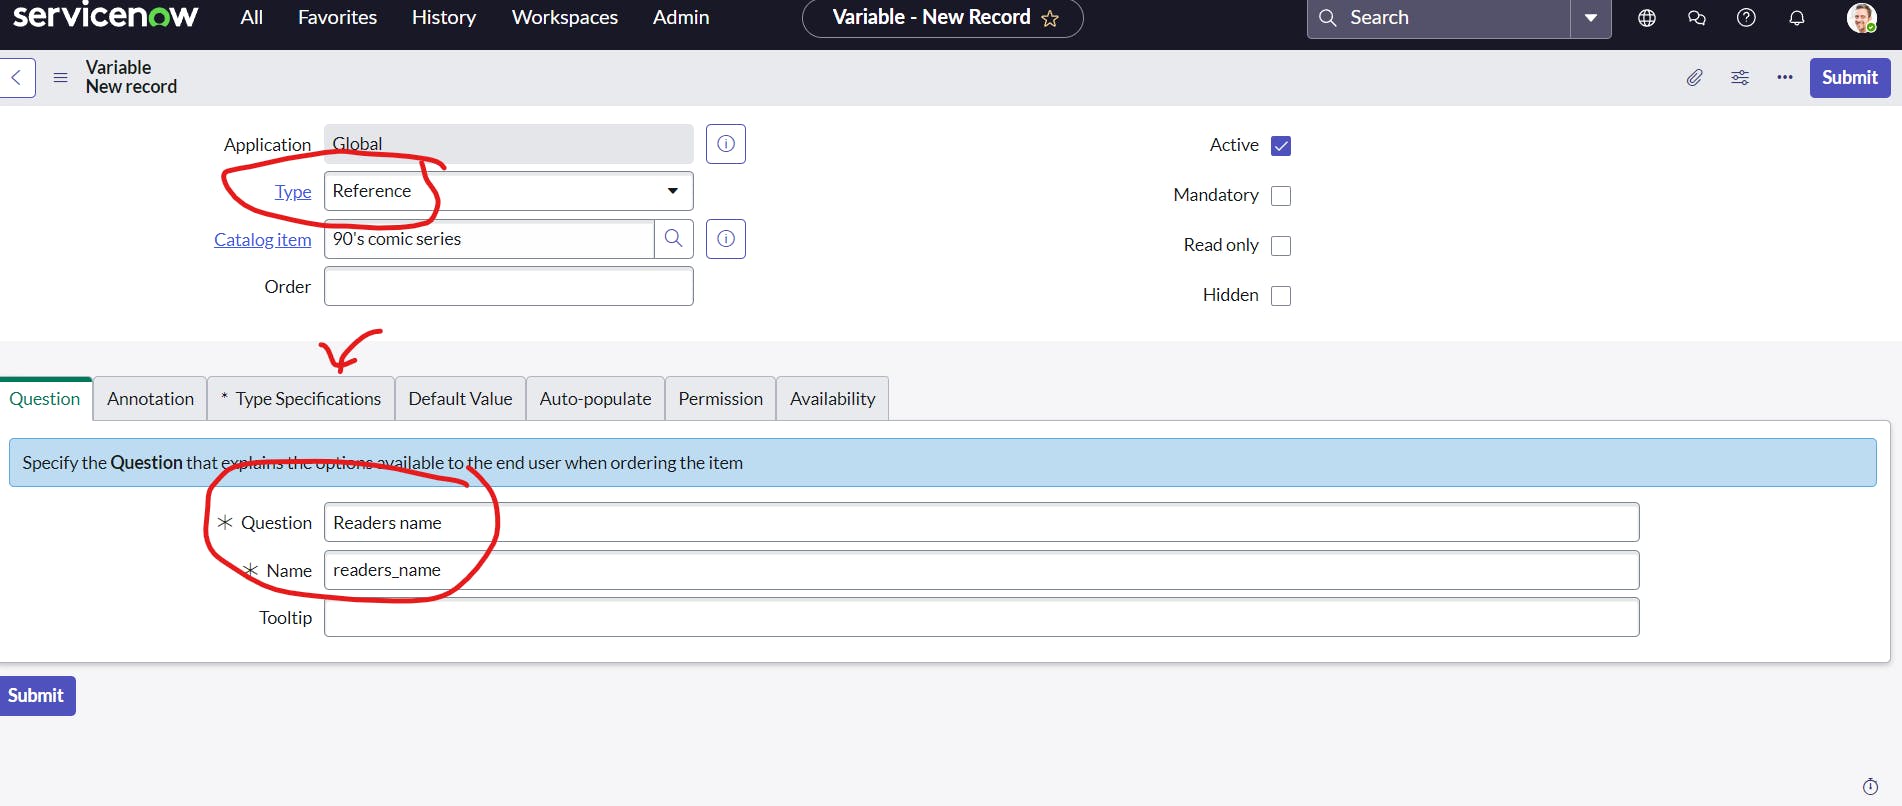
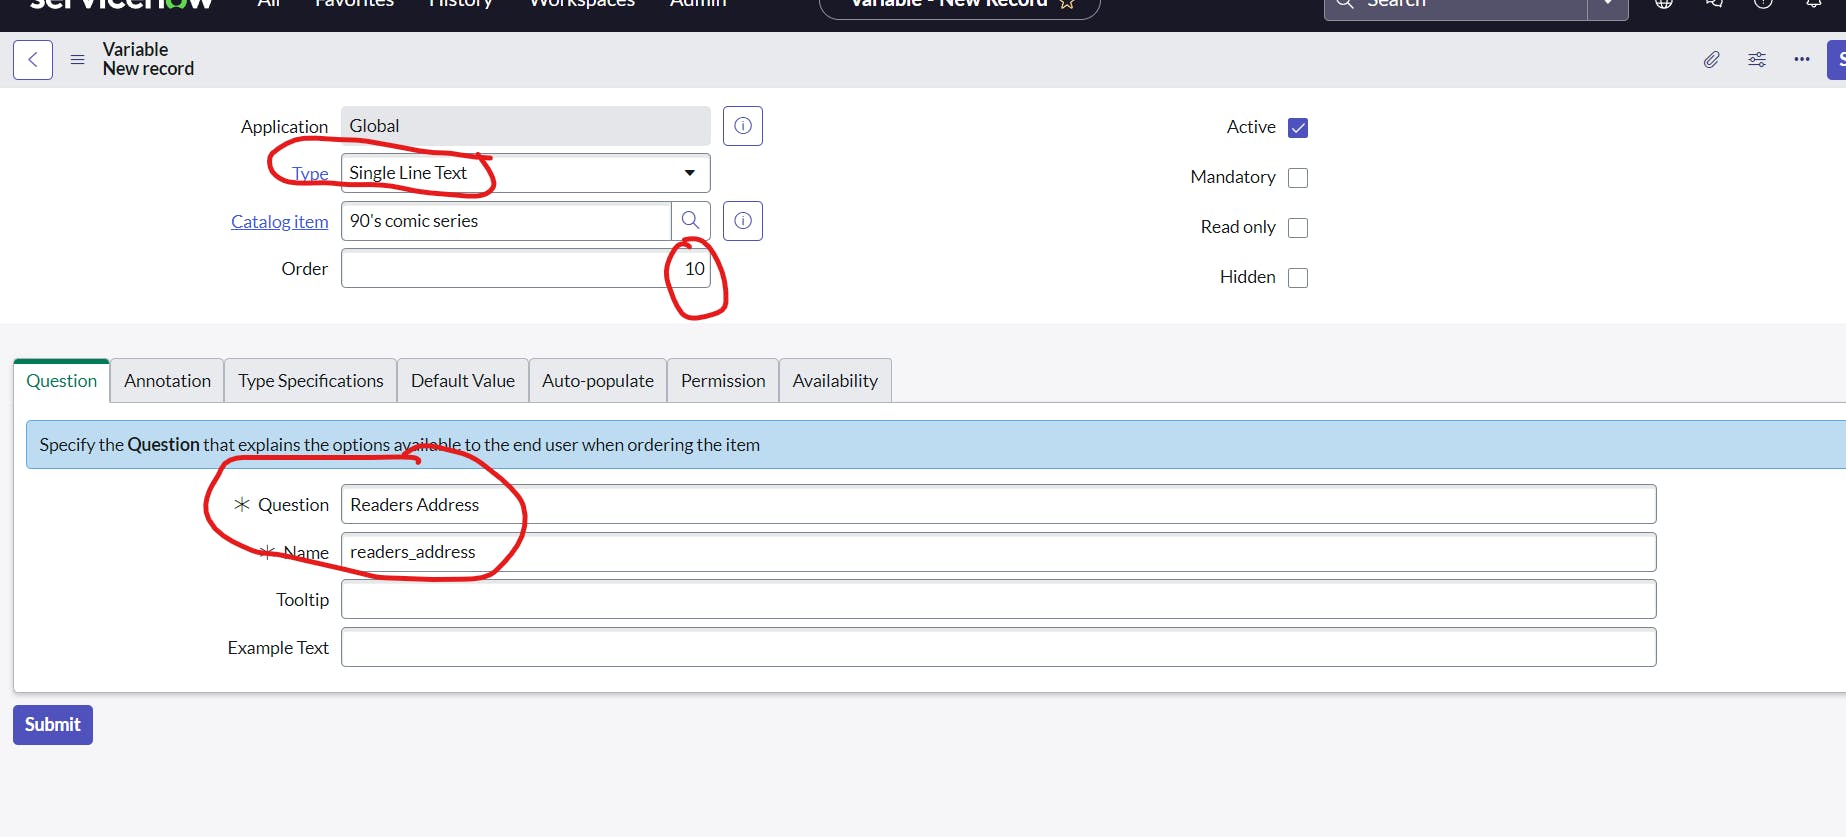
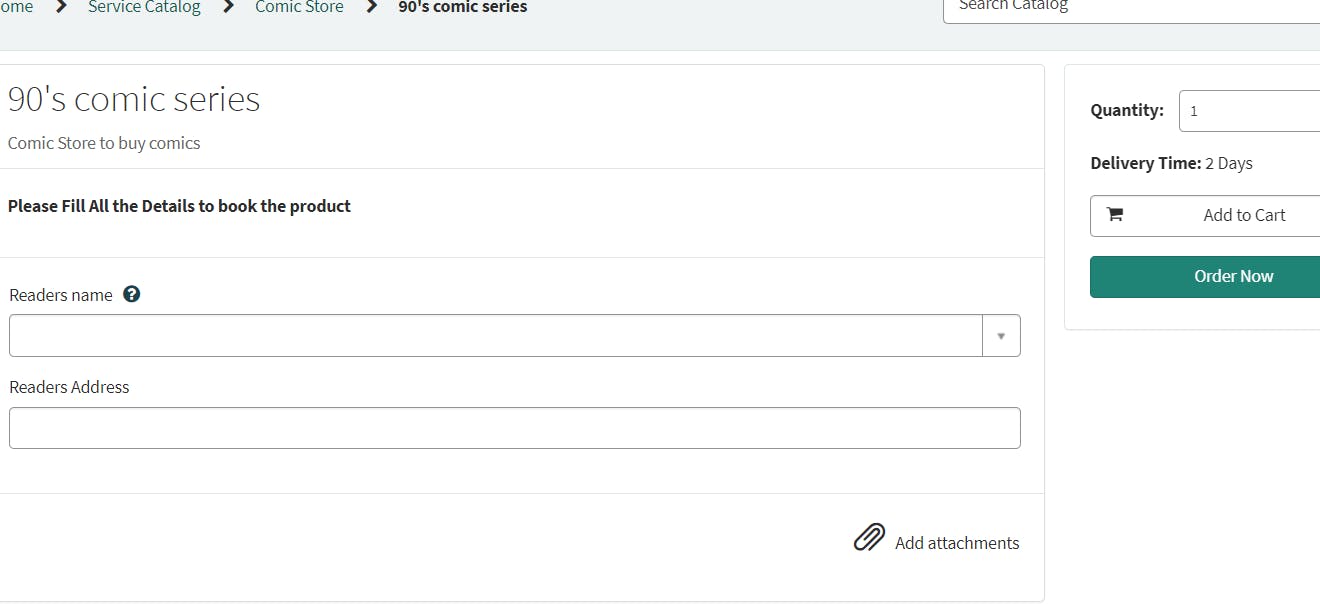
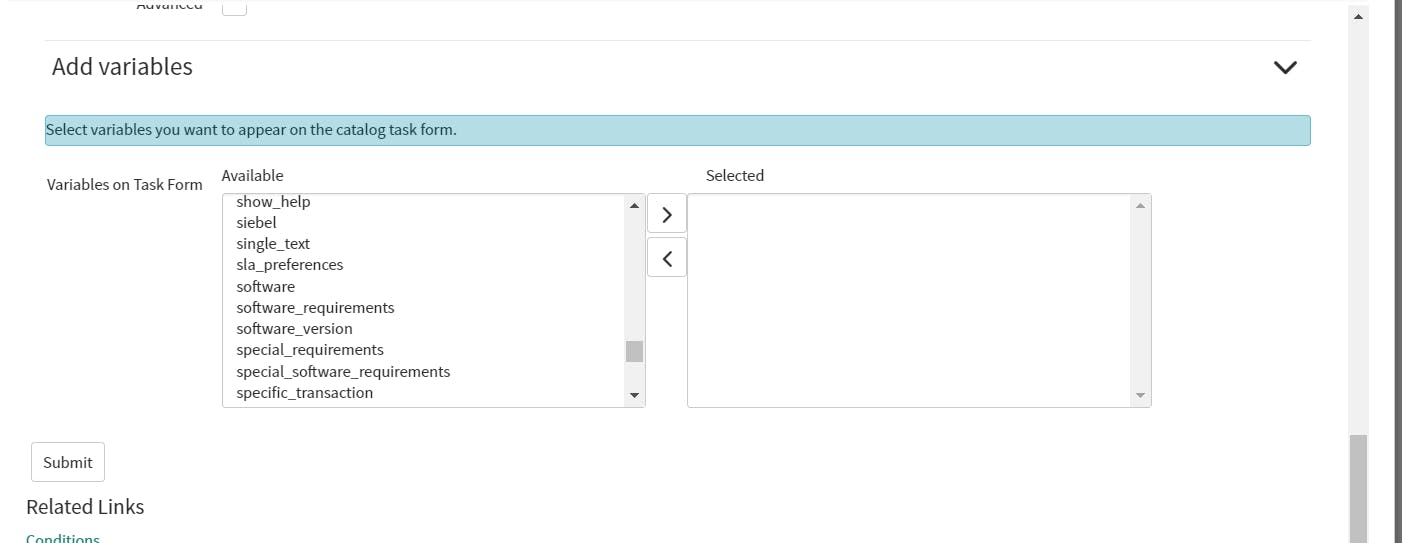
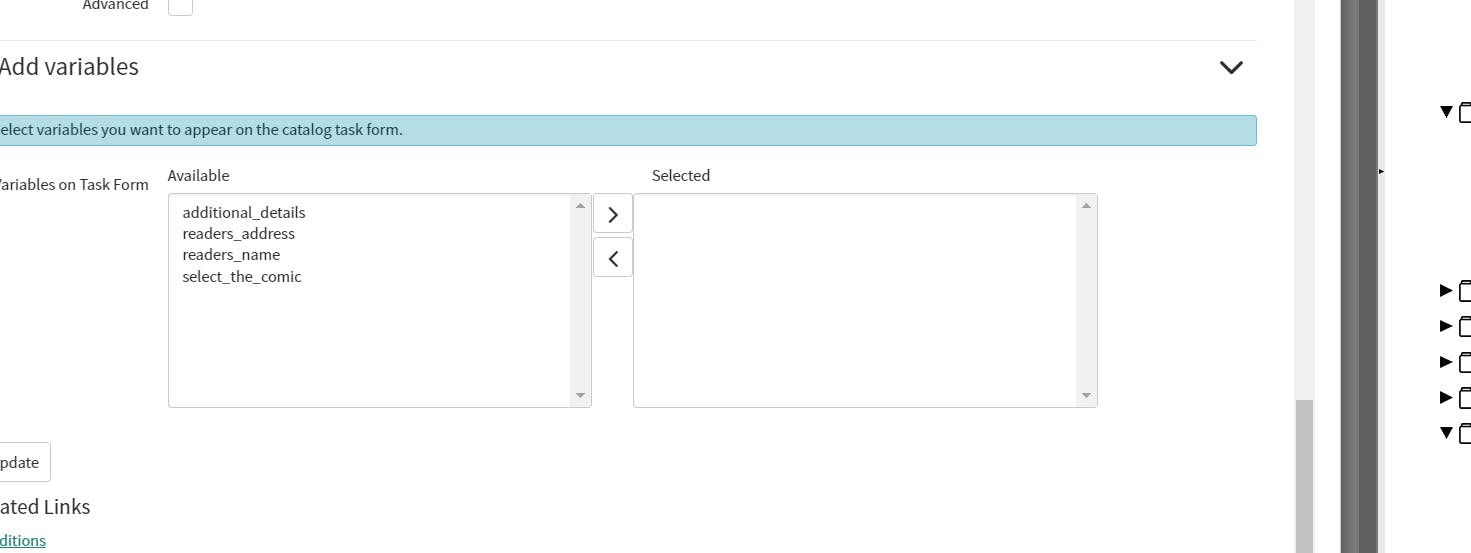
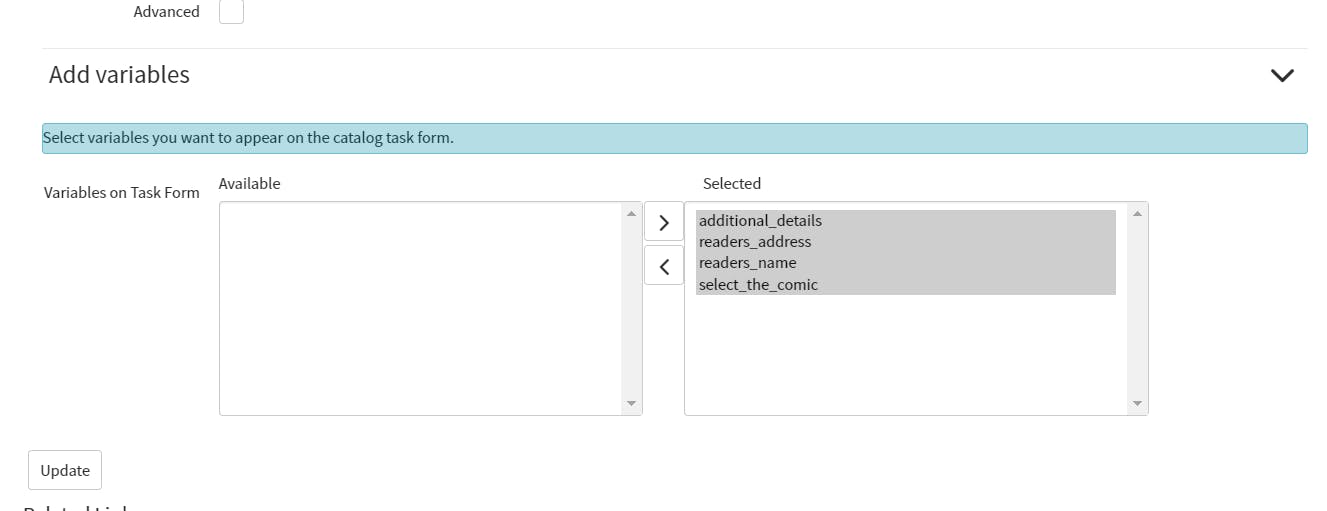
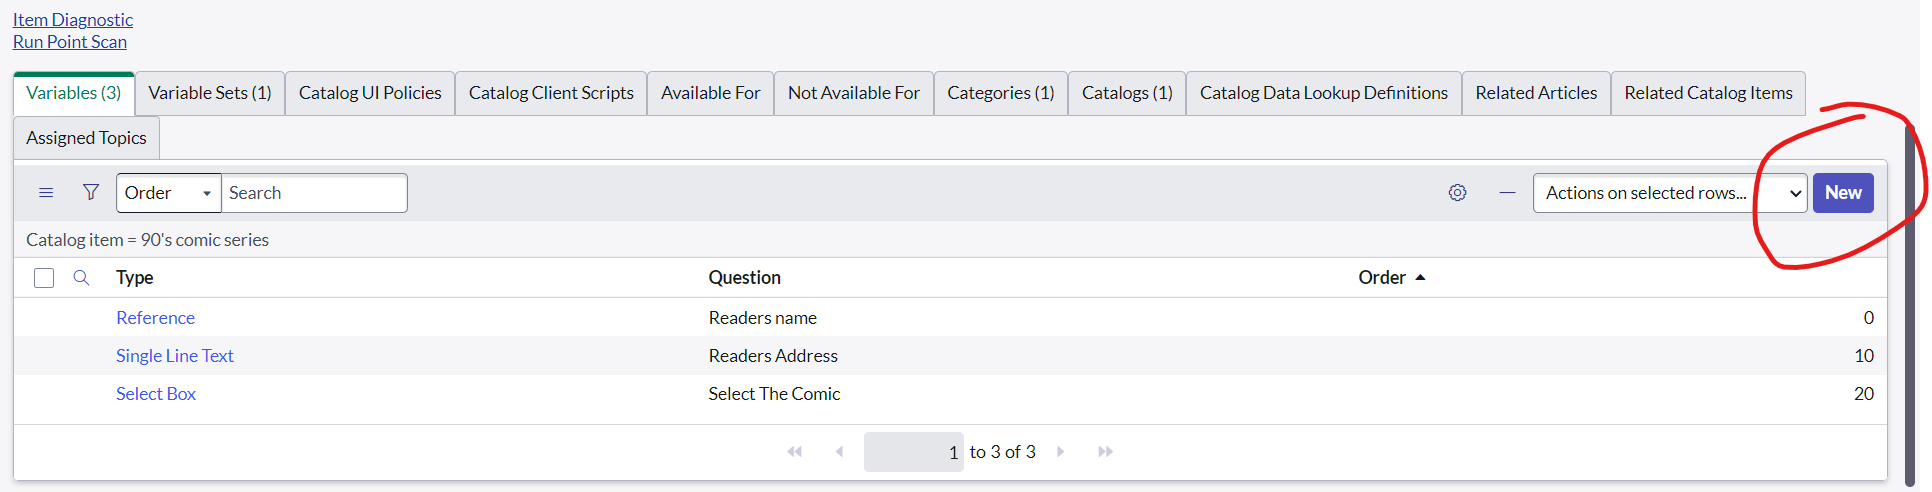
we have to create variables for this


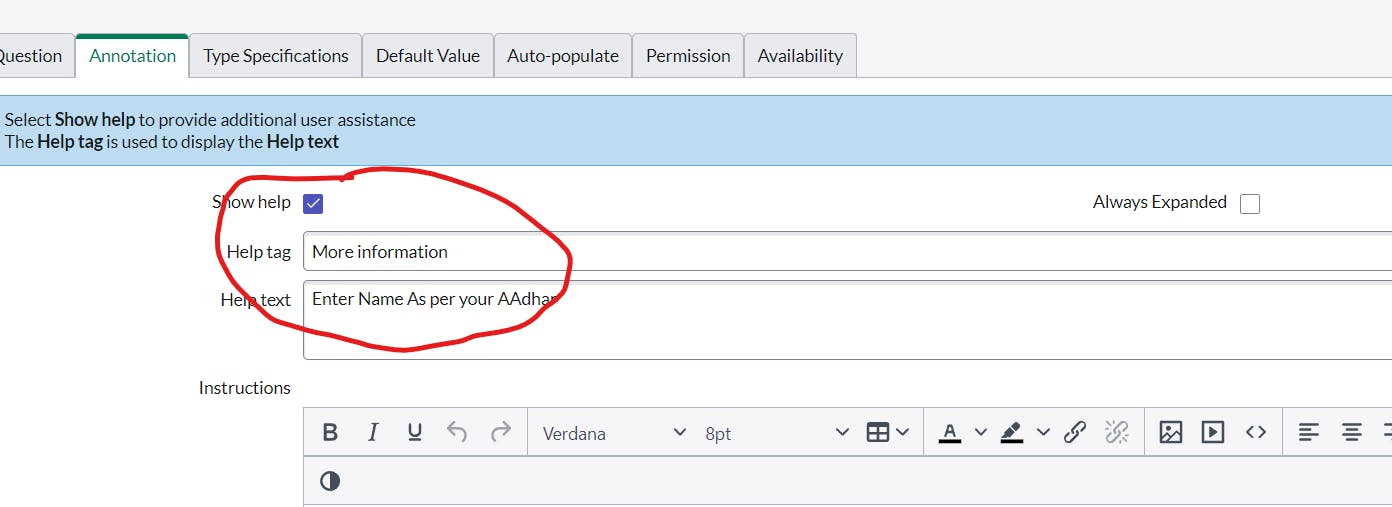
tooltip

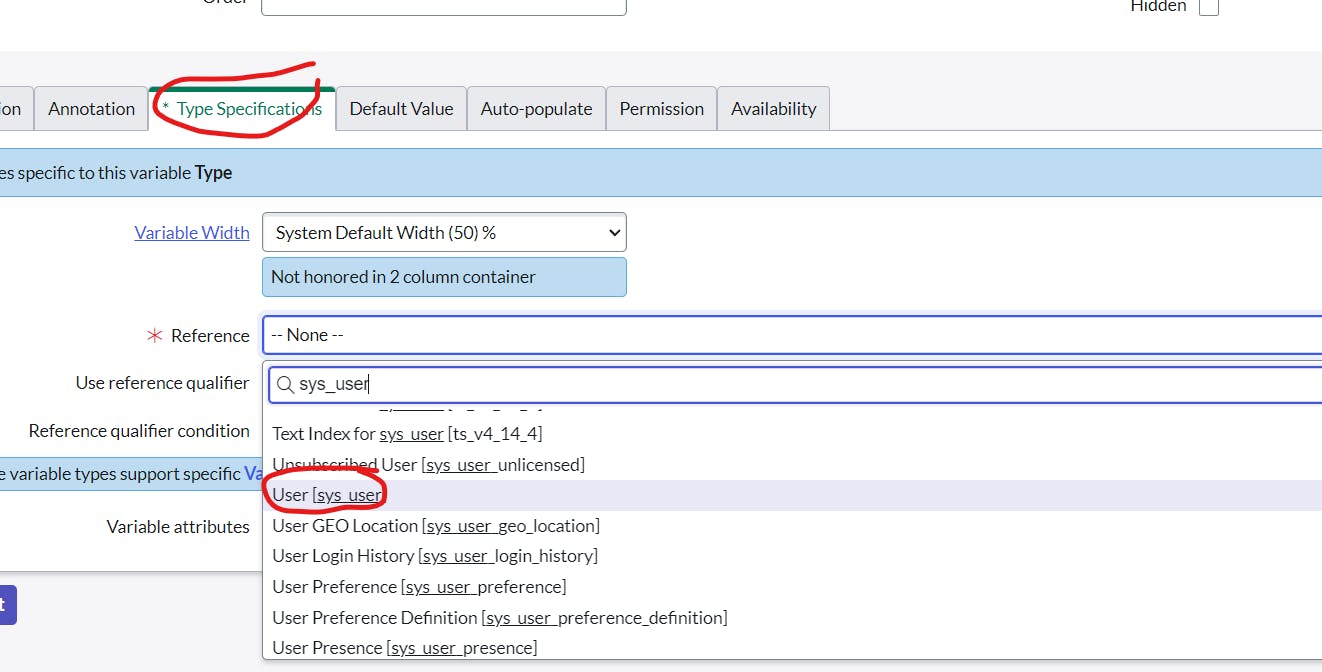
Reference Qualifier
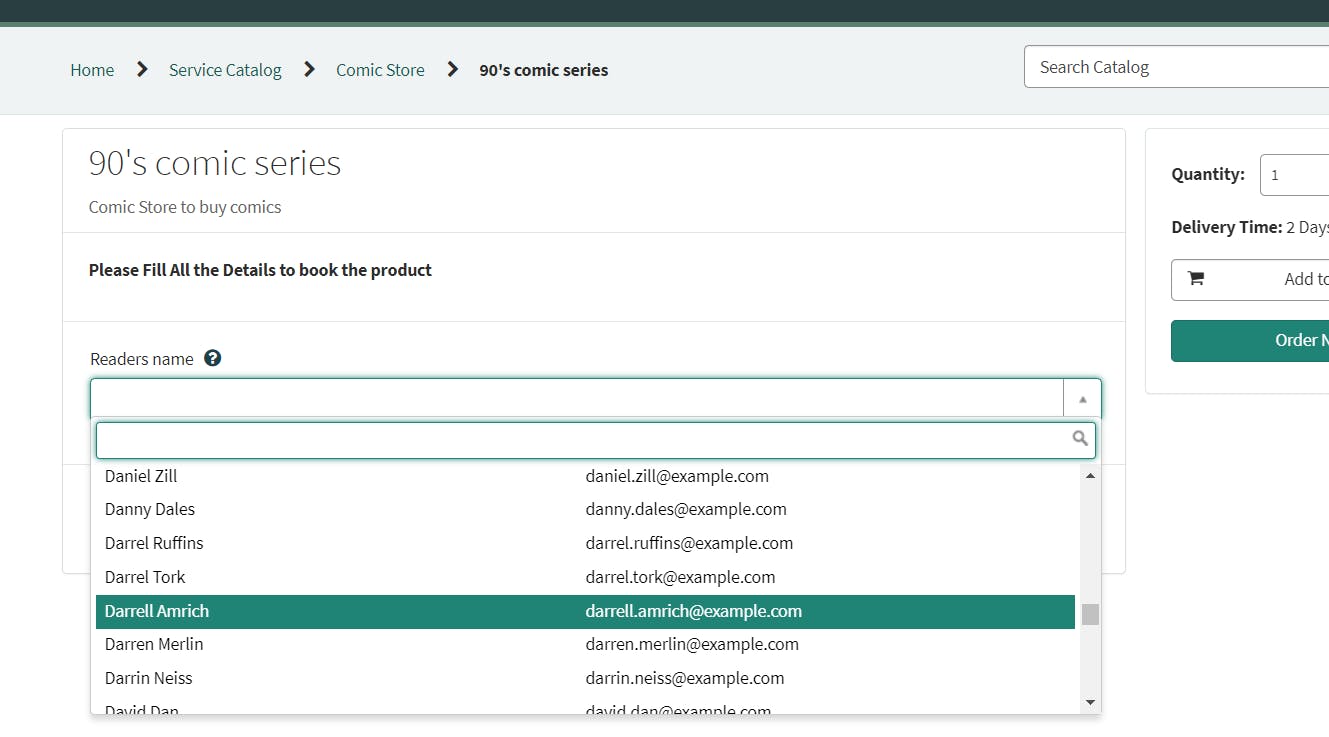
if we want to specify users whose email is not empty we have to specify it in reference qualifier
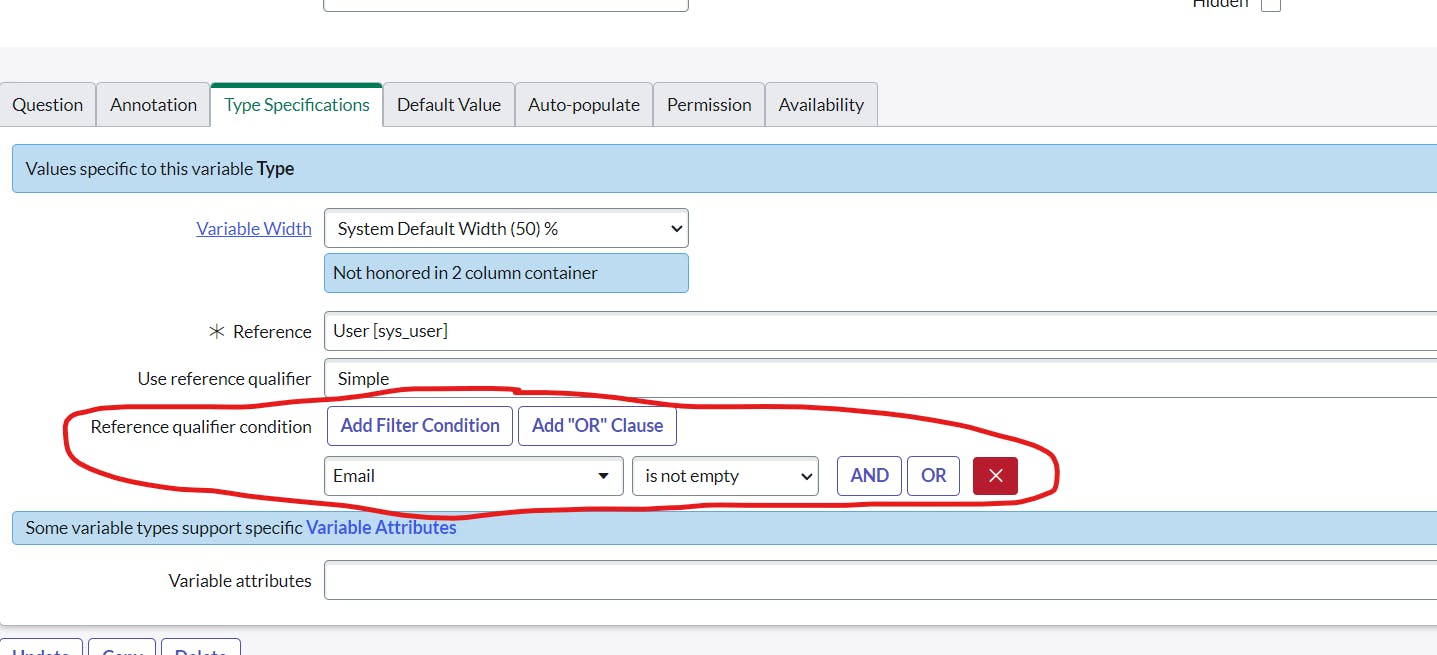
now it will select the users whose email is not empty
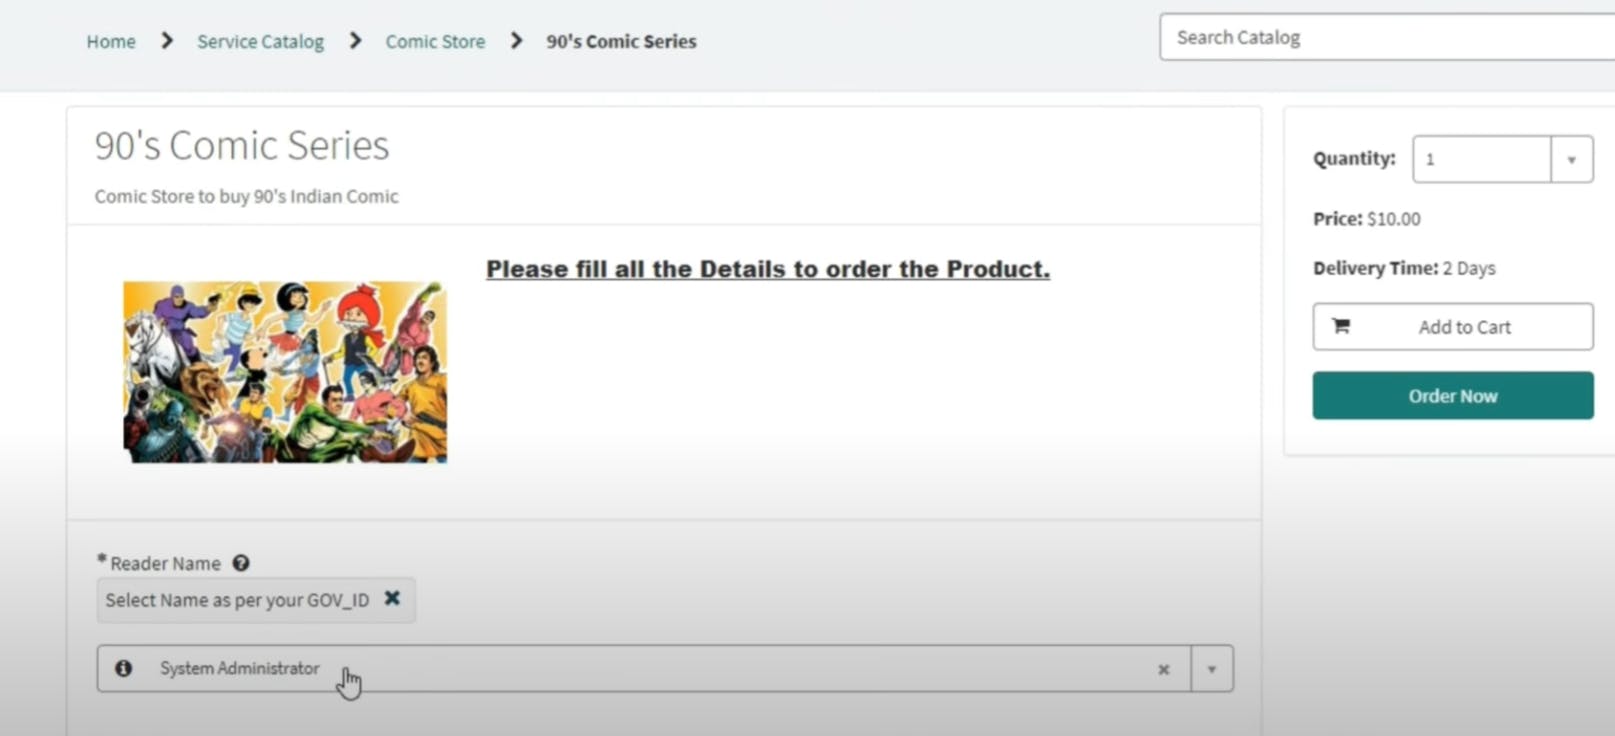
Default Value
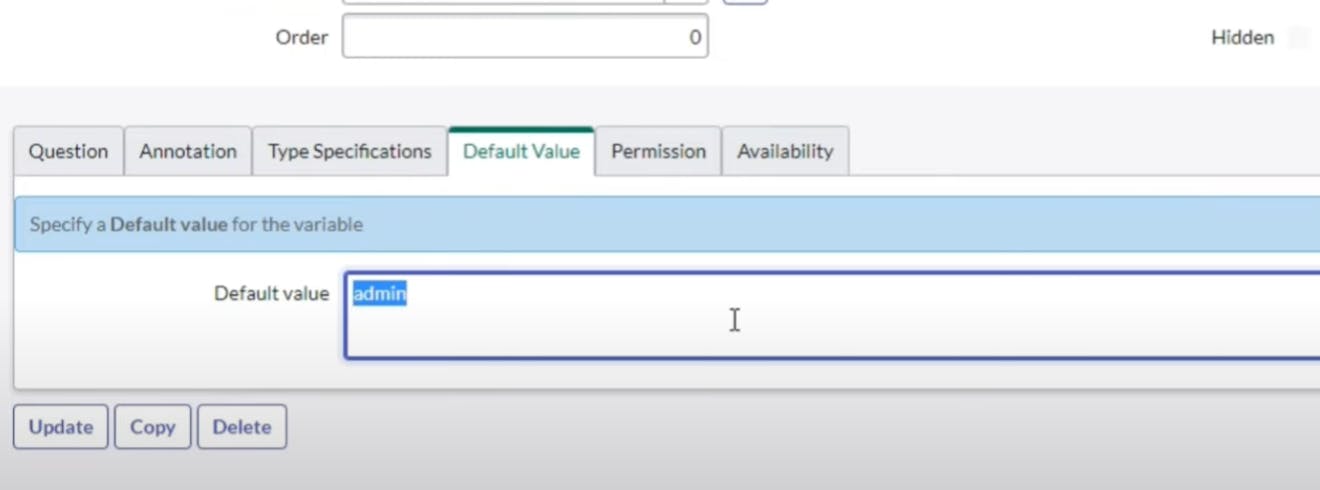
after u have to create another variable by clicking new or update information and click insert and stay
you can write a placeholder on example text
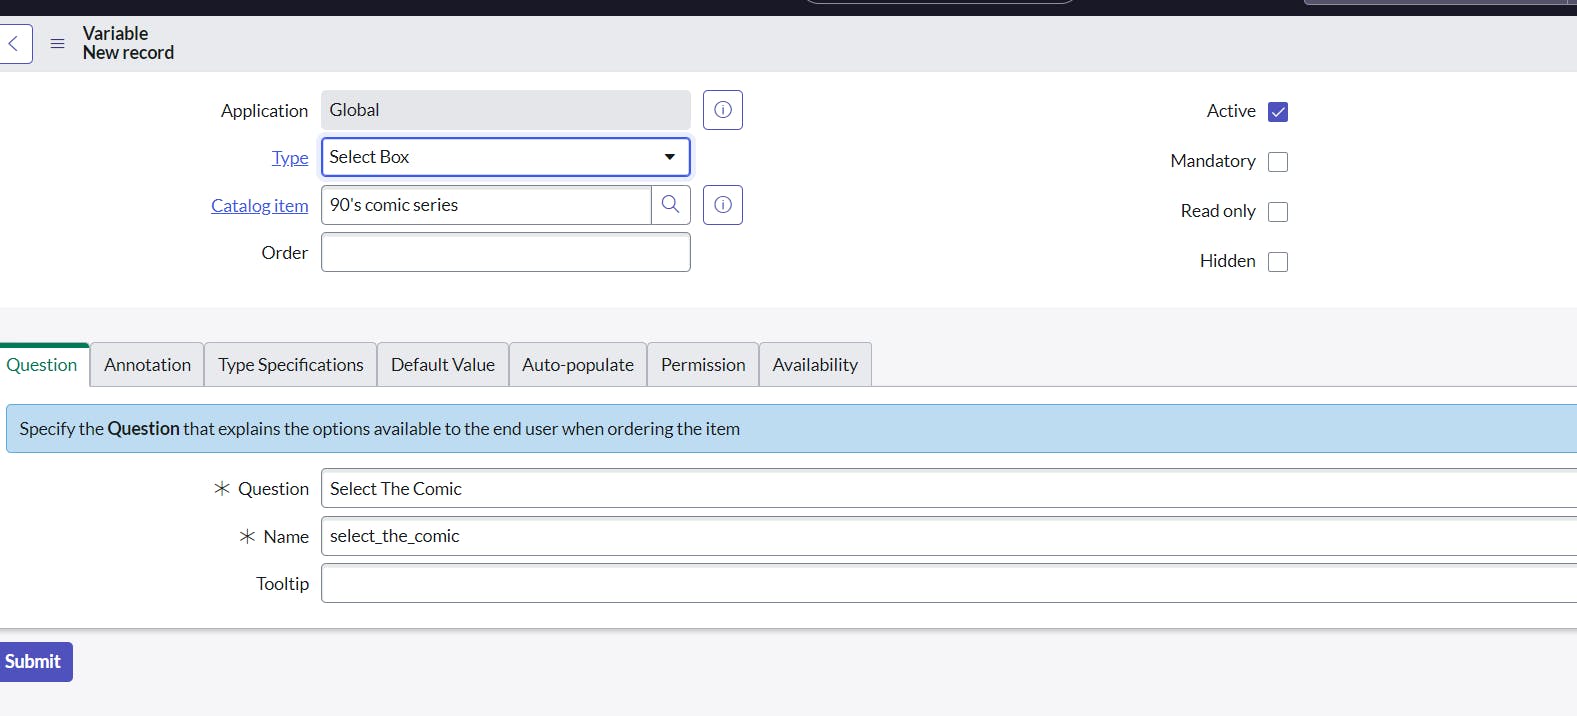
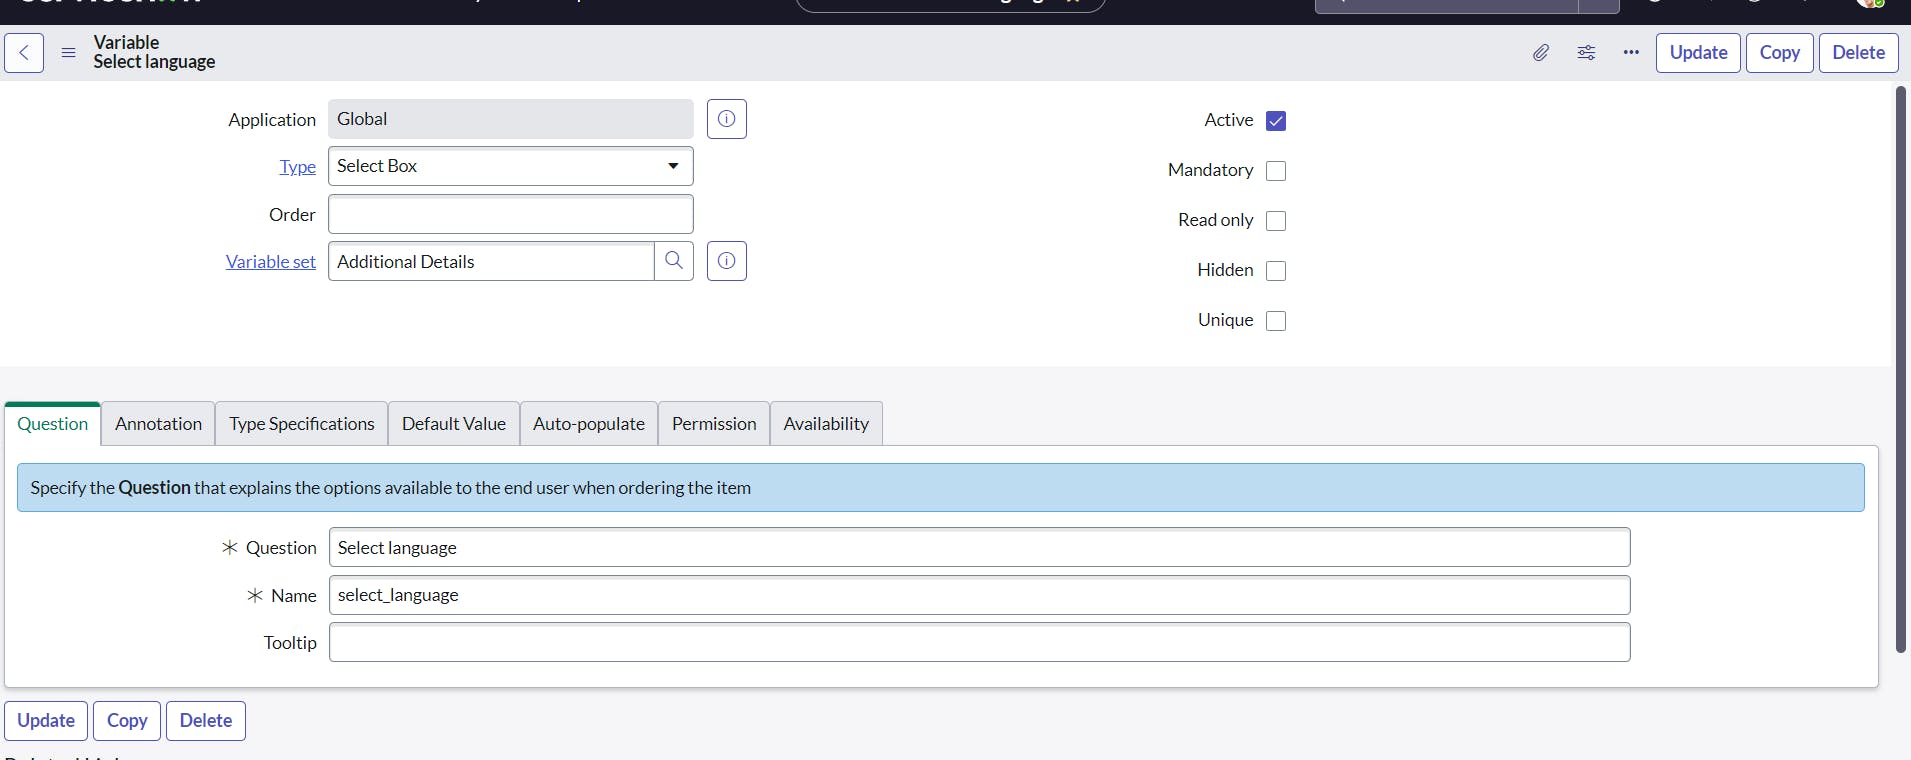
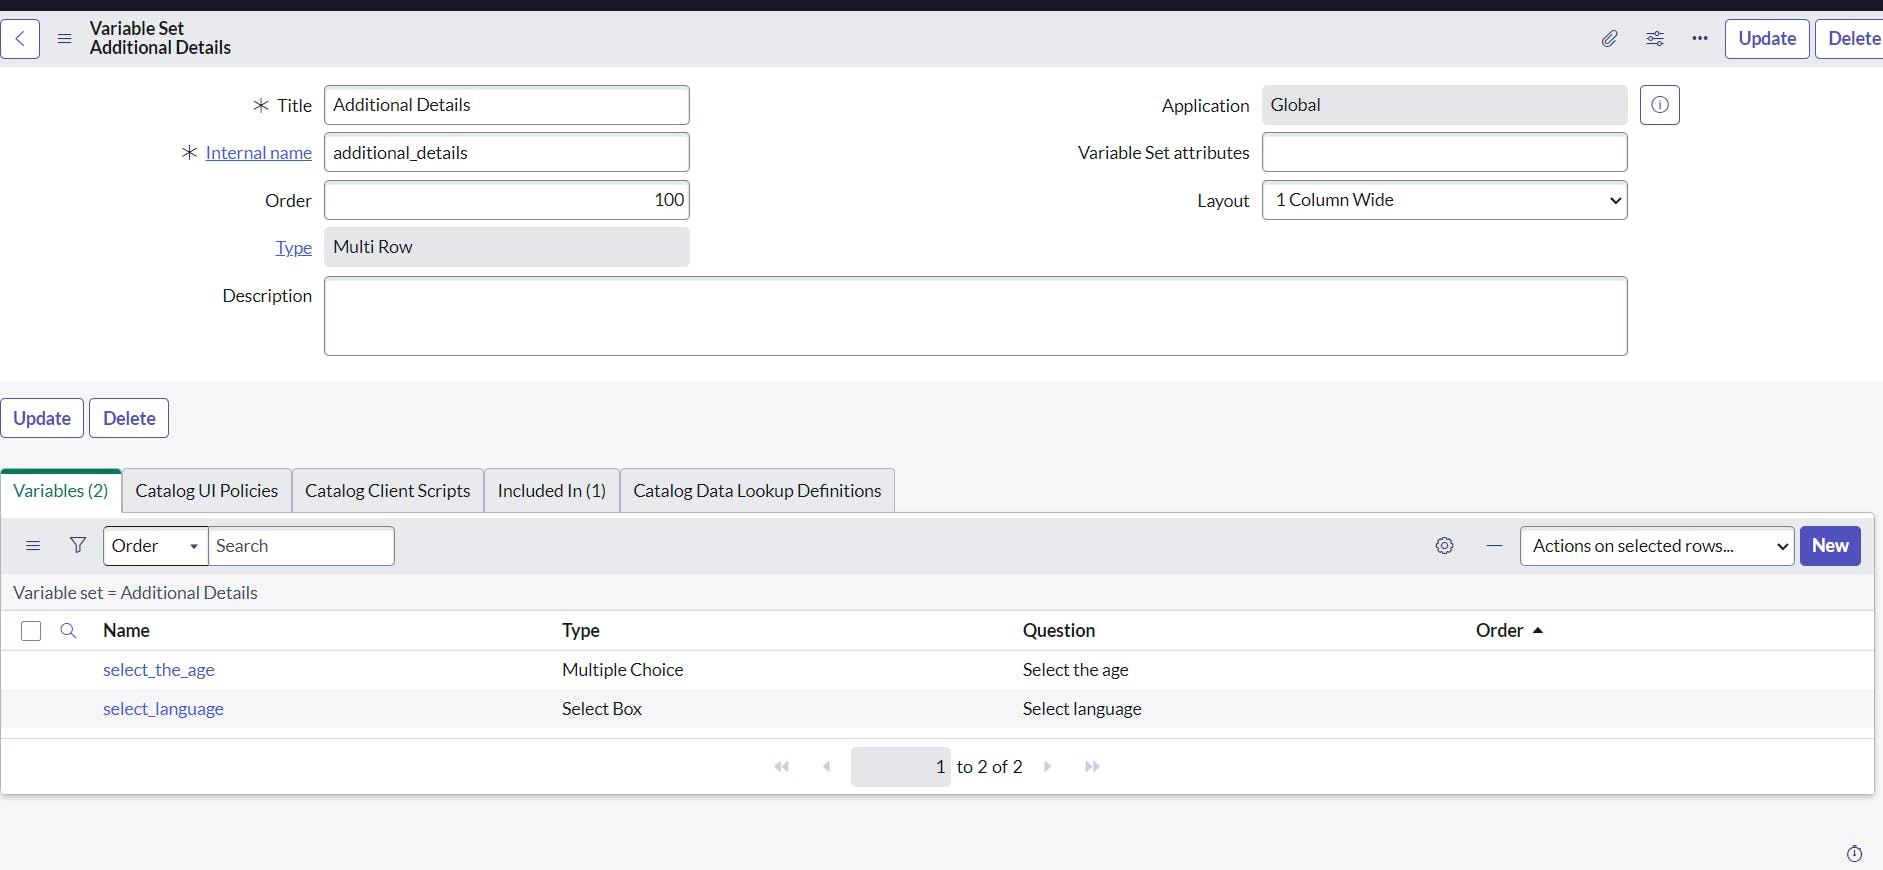
now keep select box choice
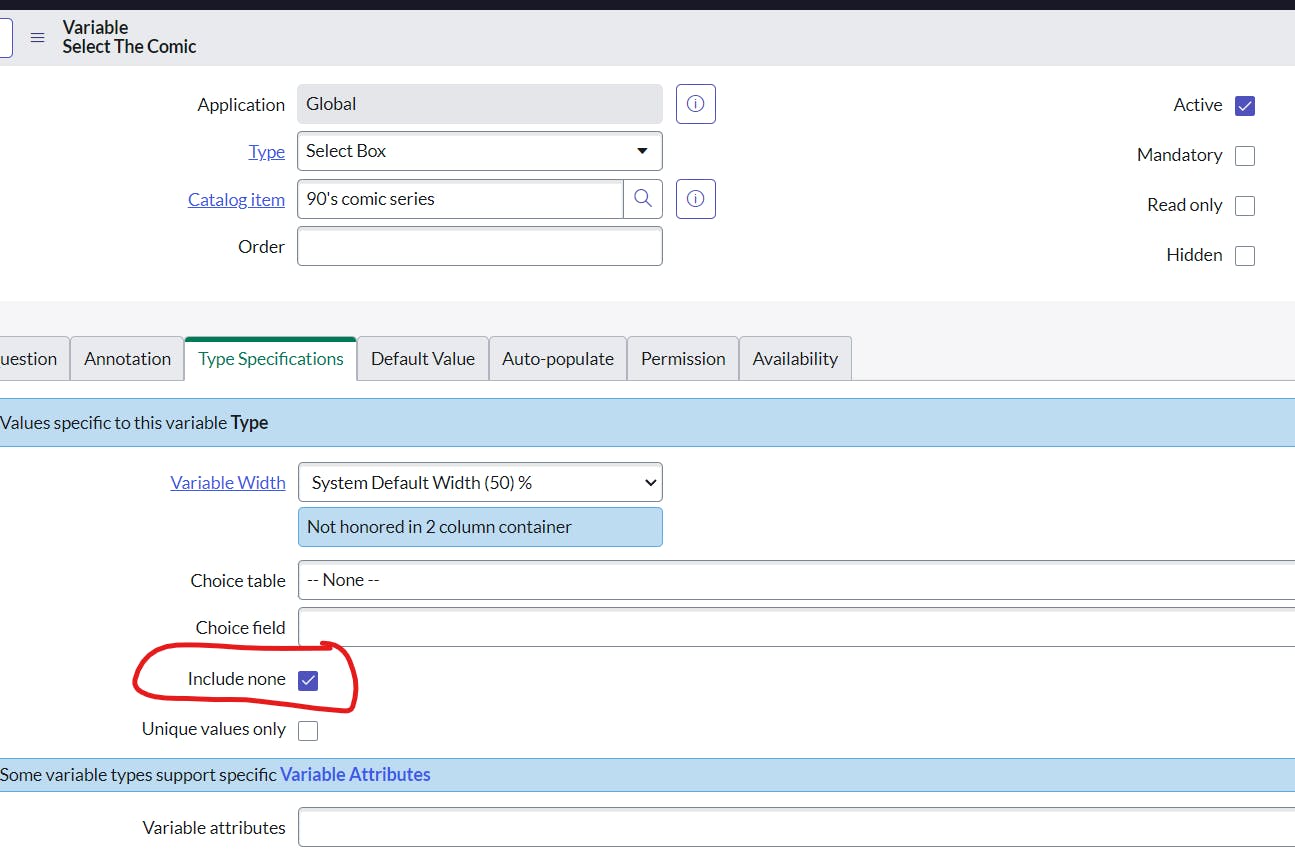
variable sets for multiple choice
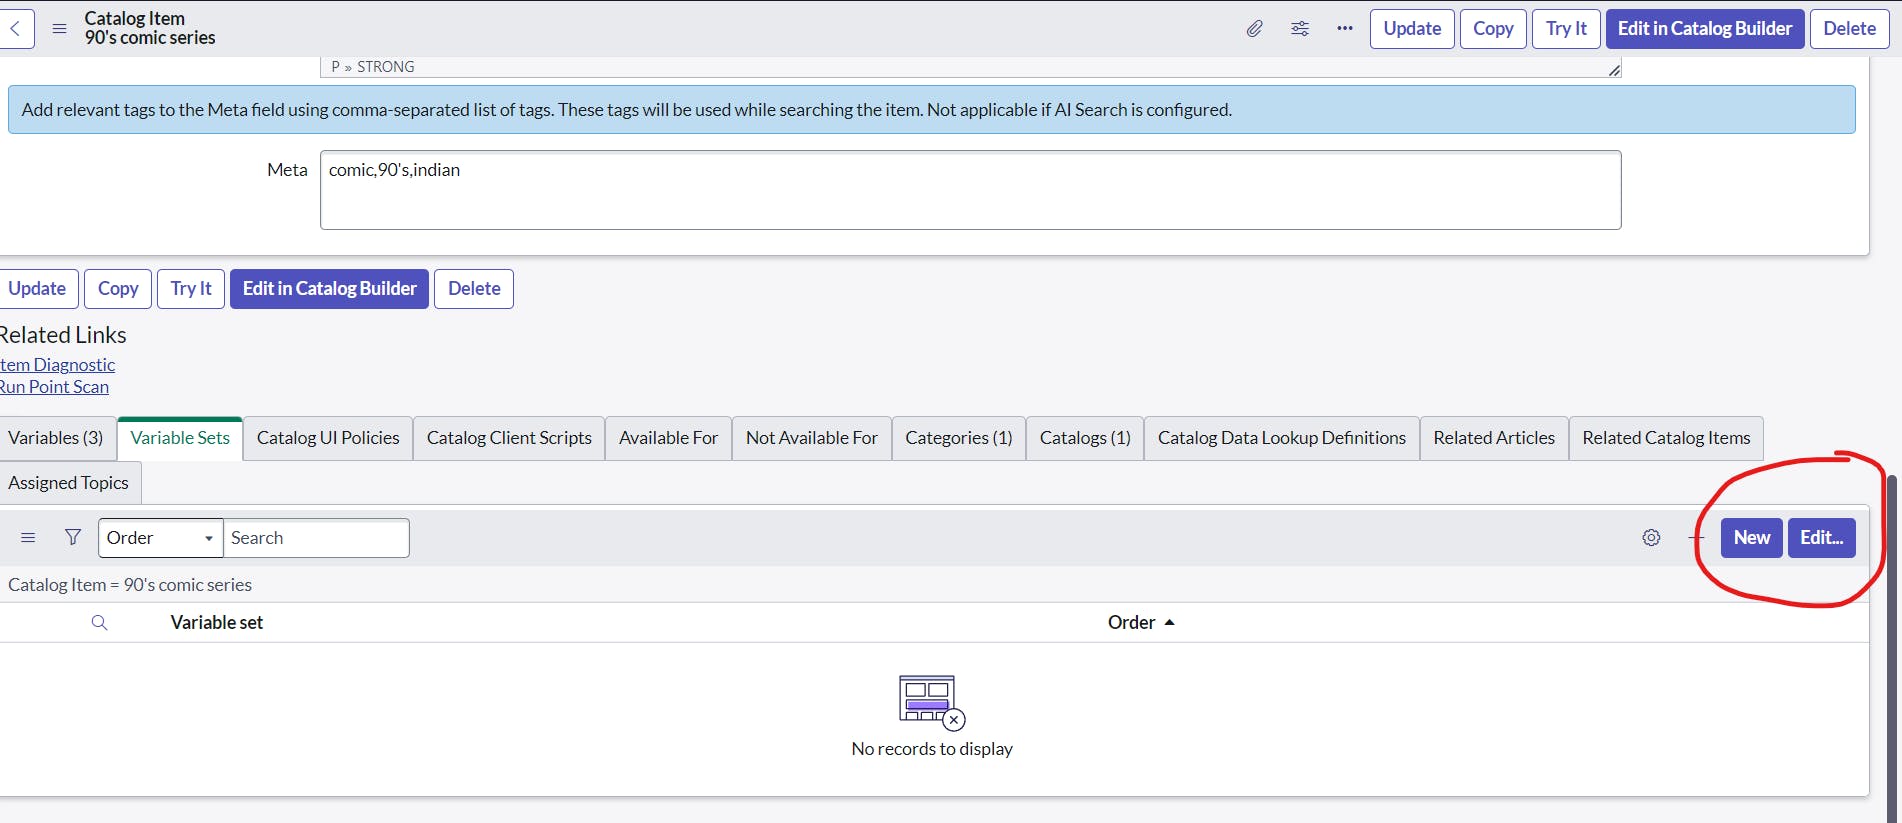
select multi-row
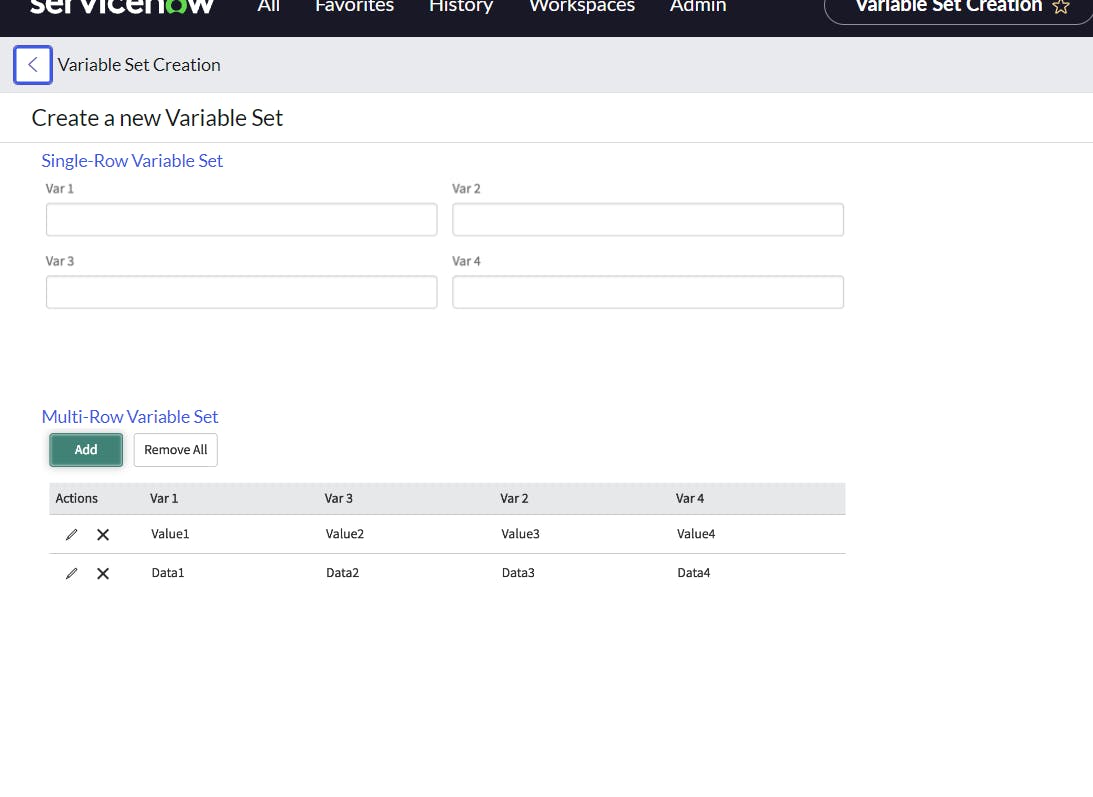
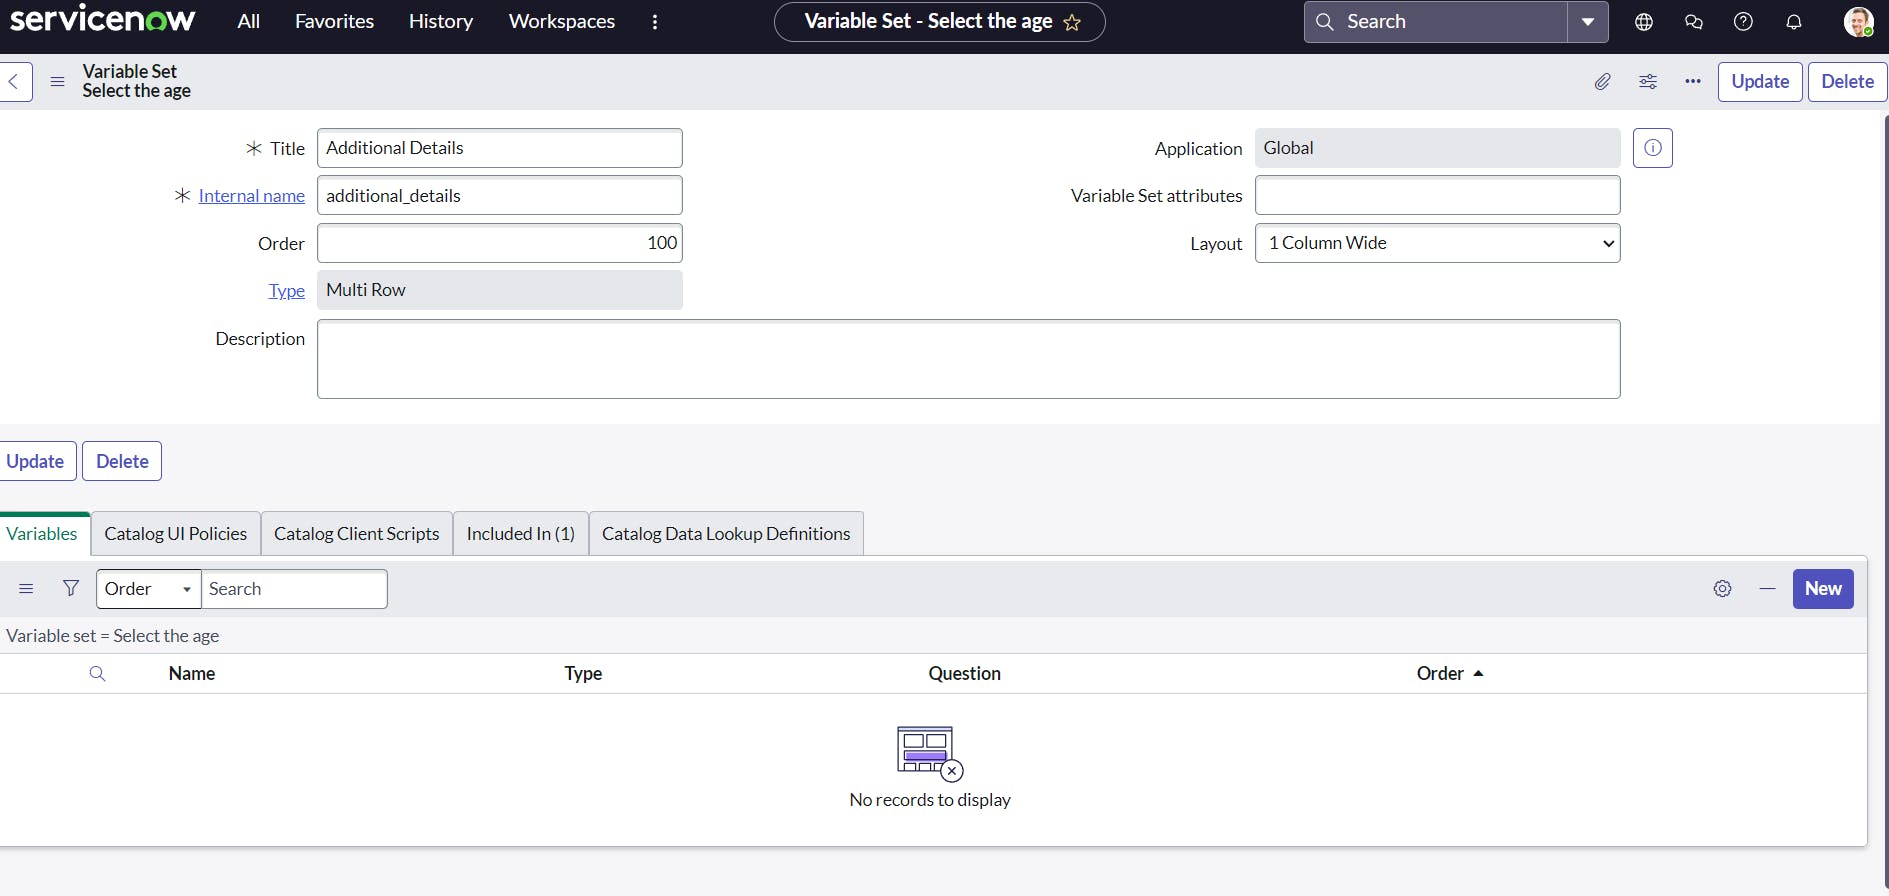
and select variables for it
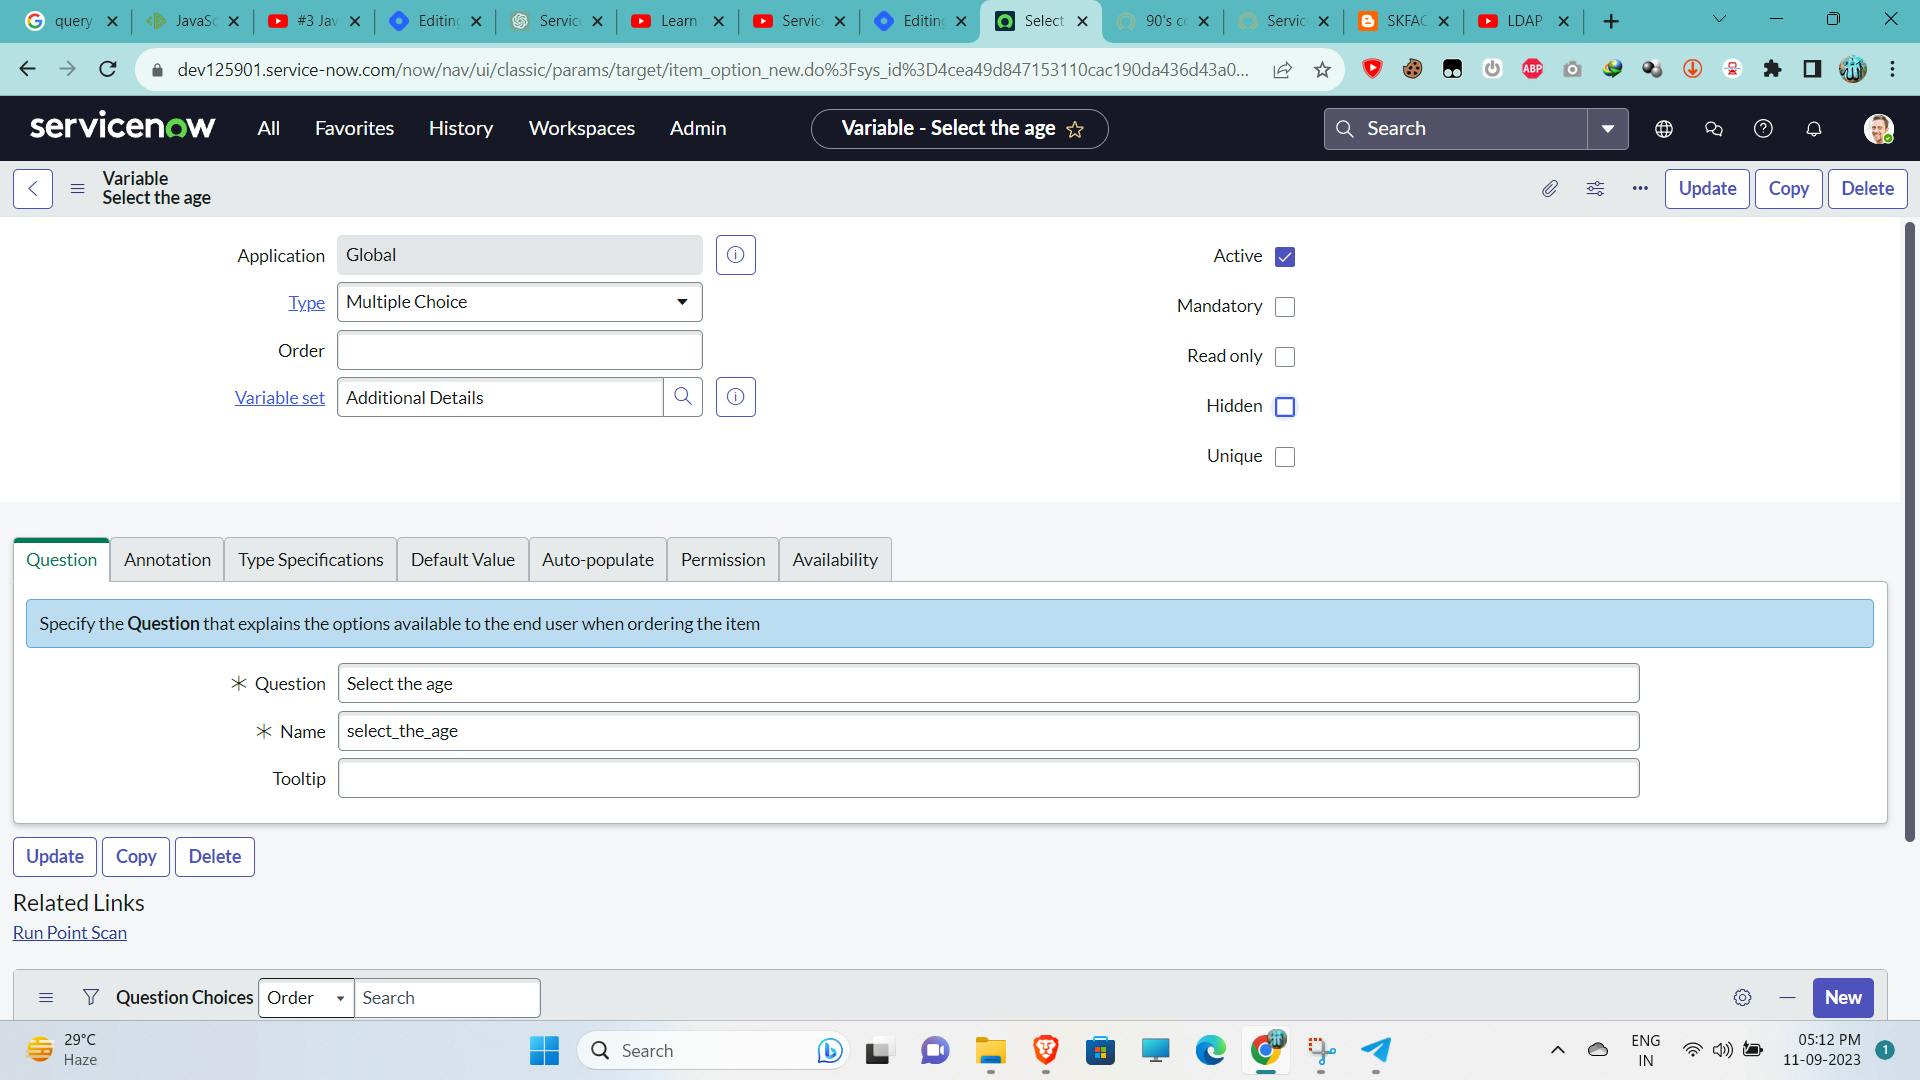
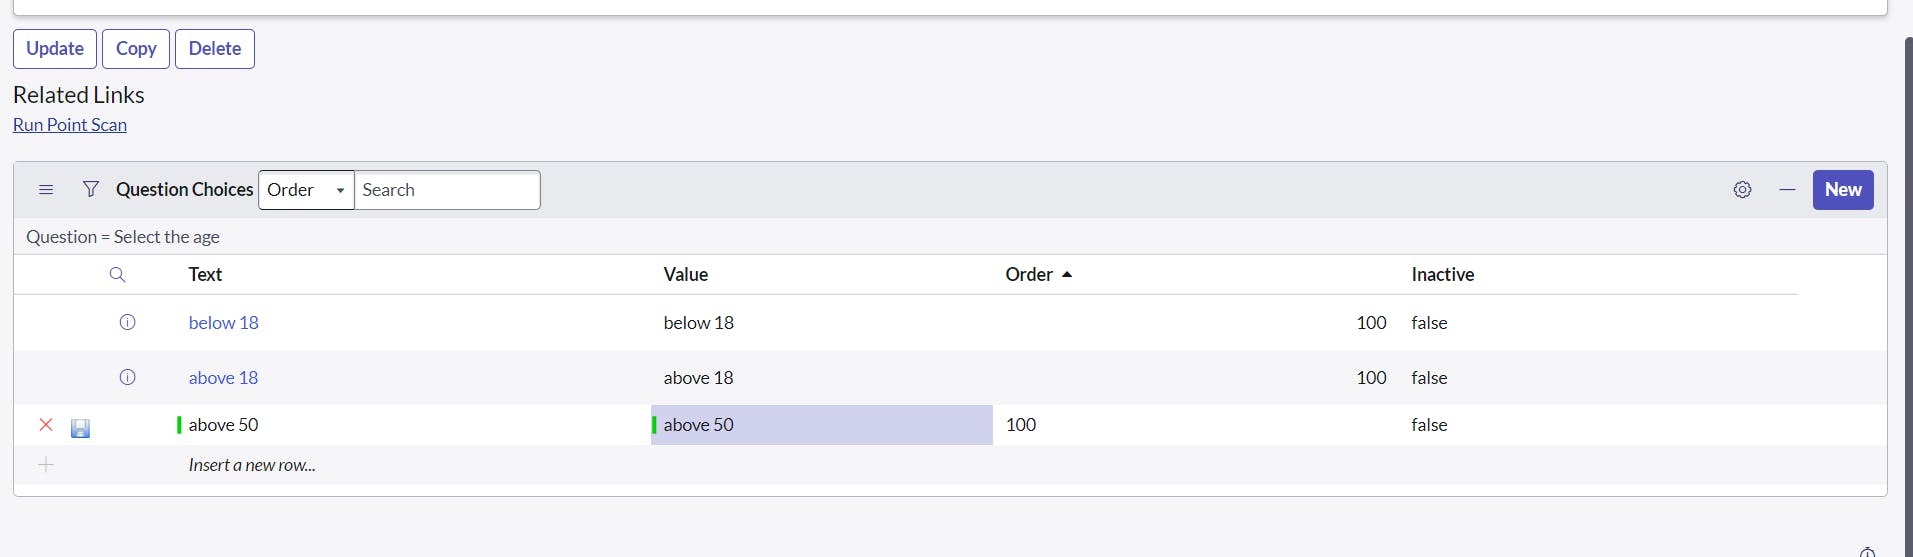

now select language

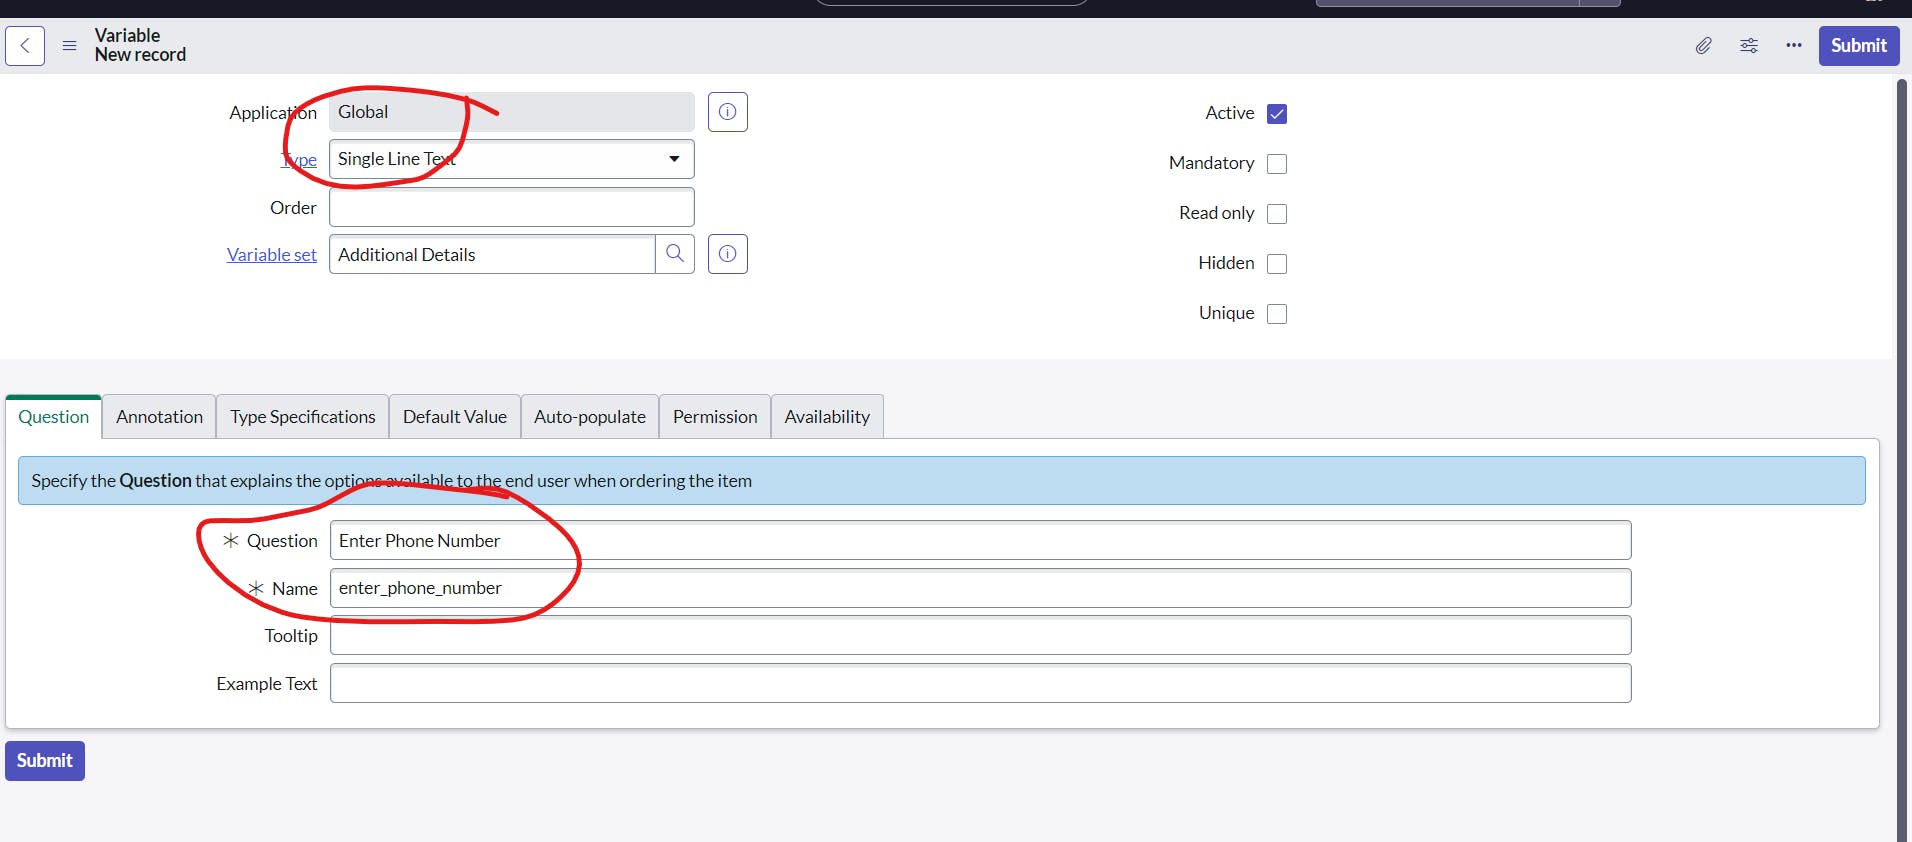
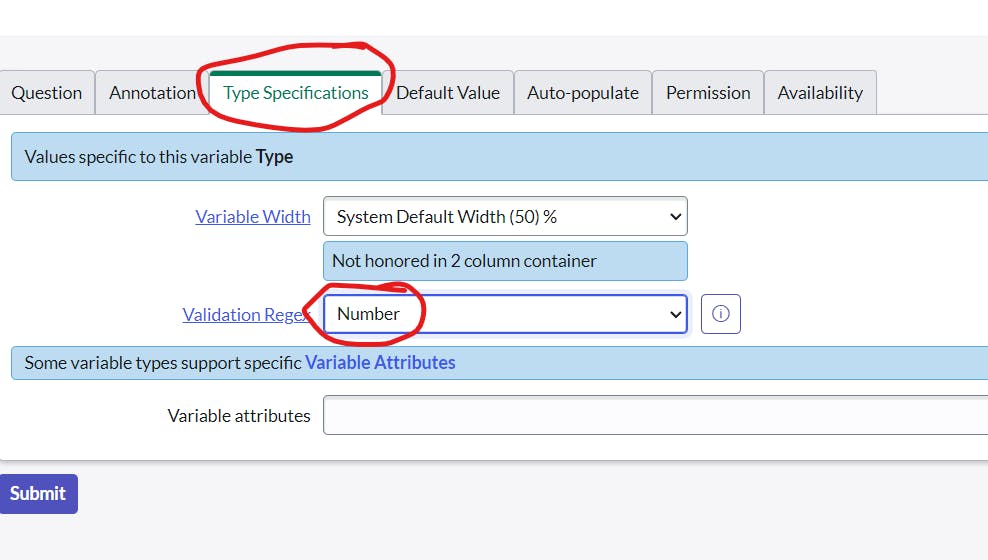
now we have to enter phone number
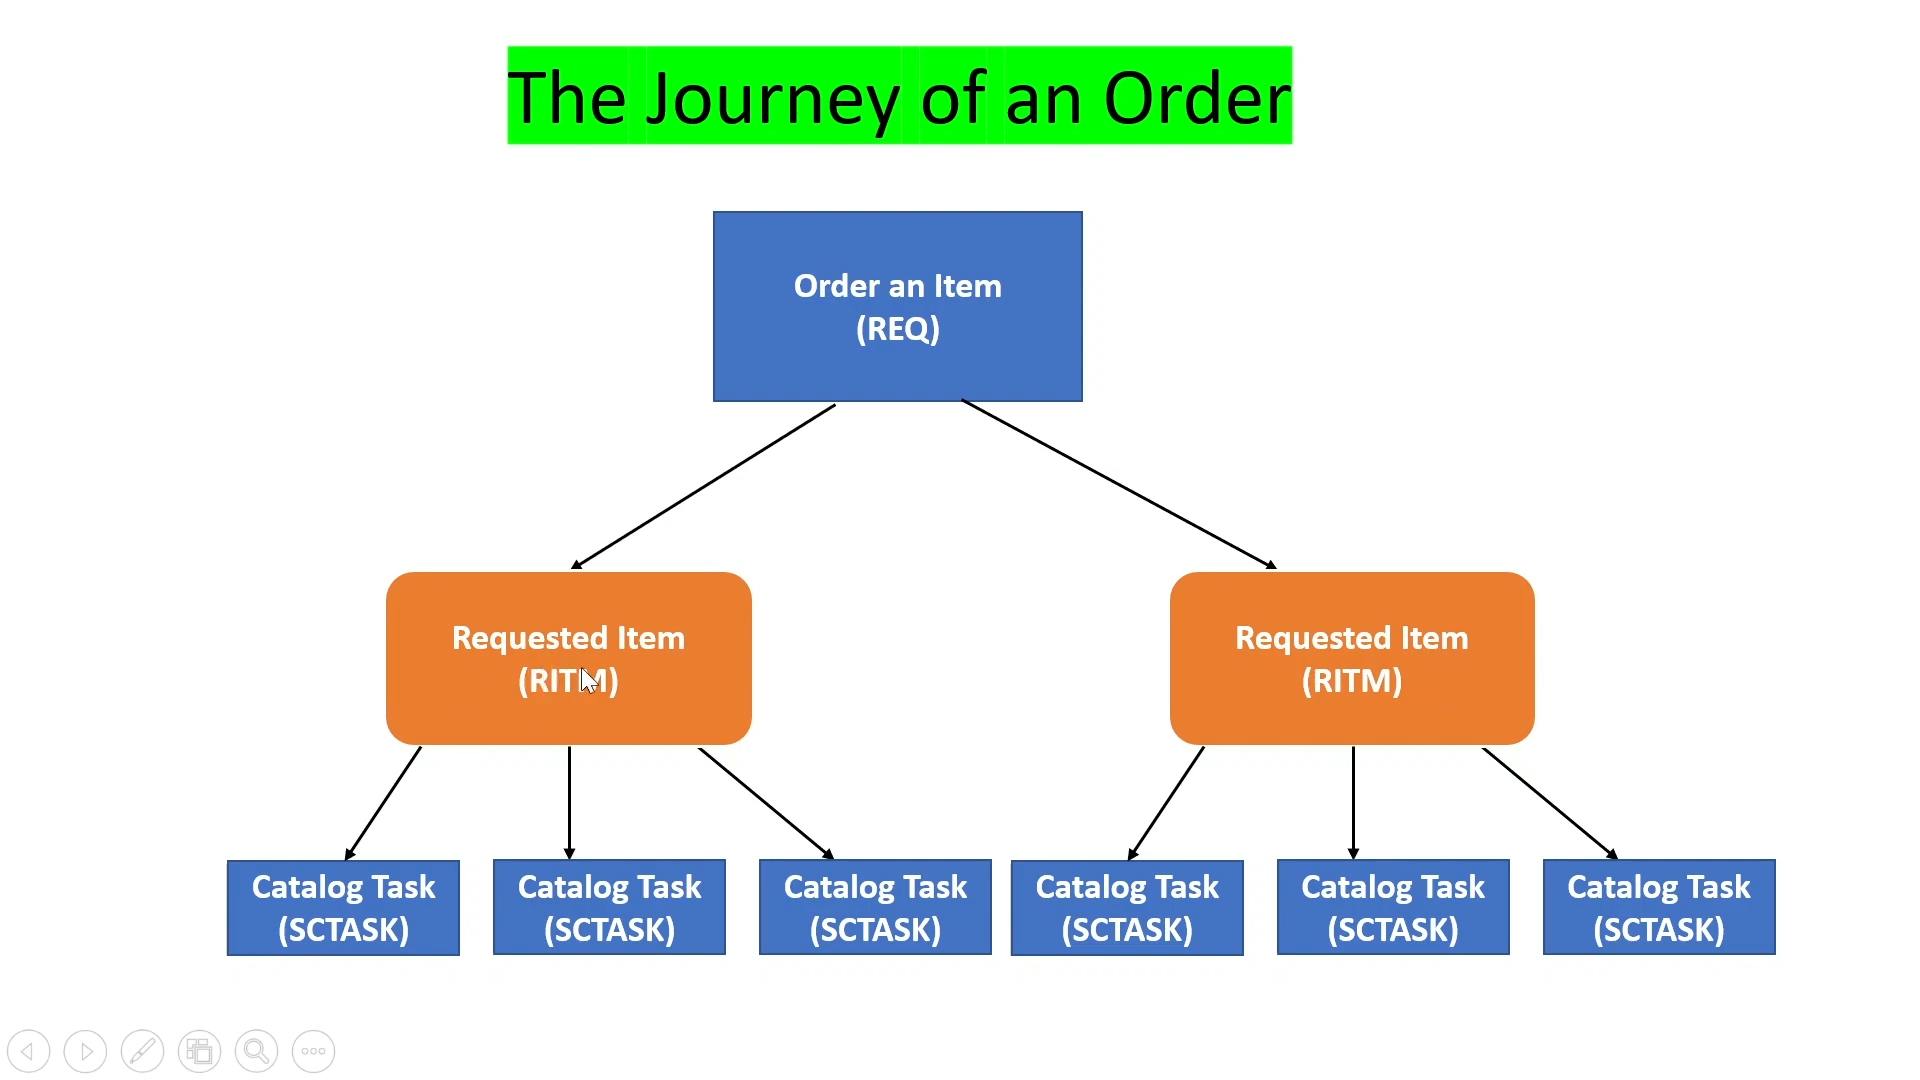
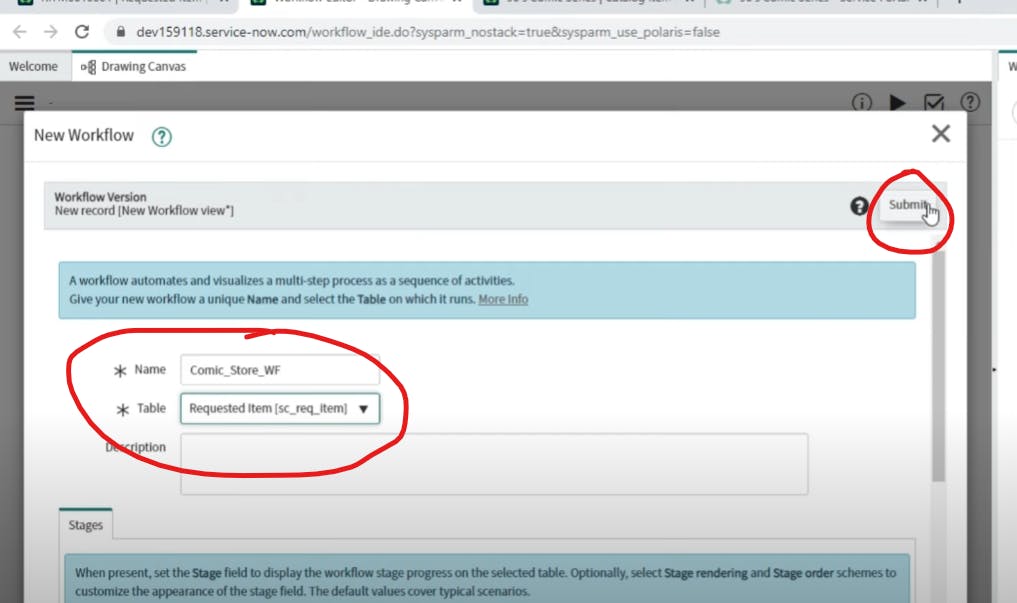
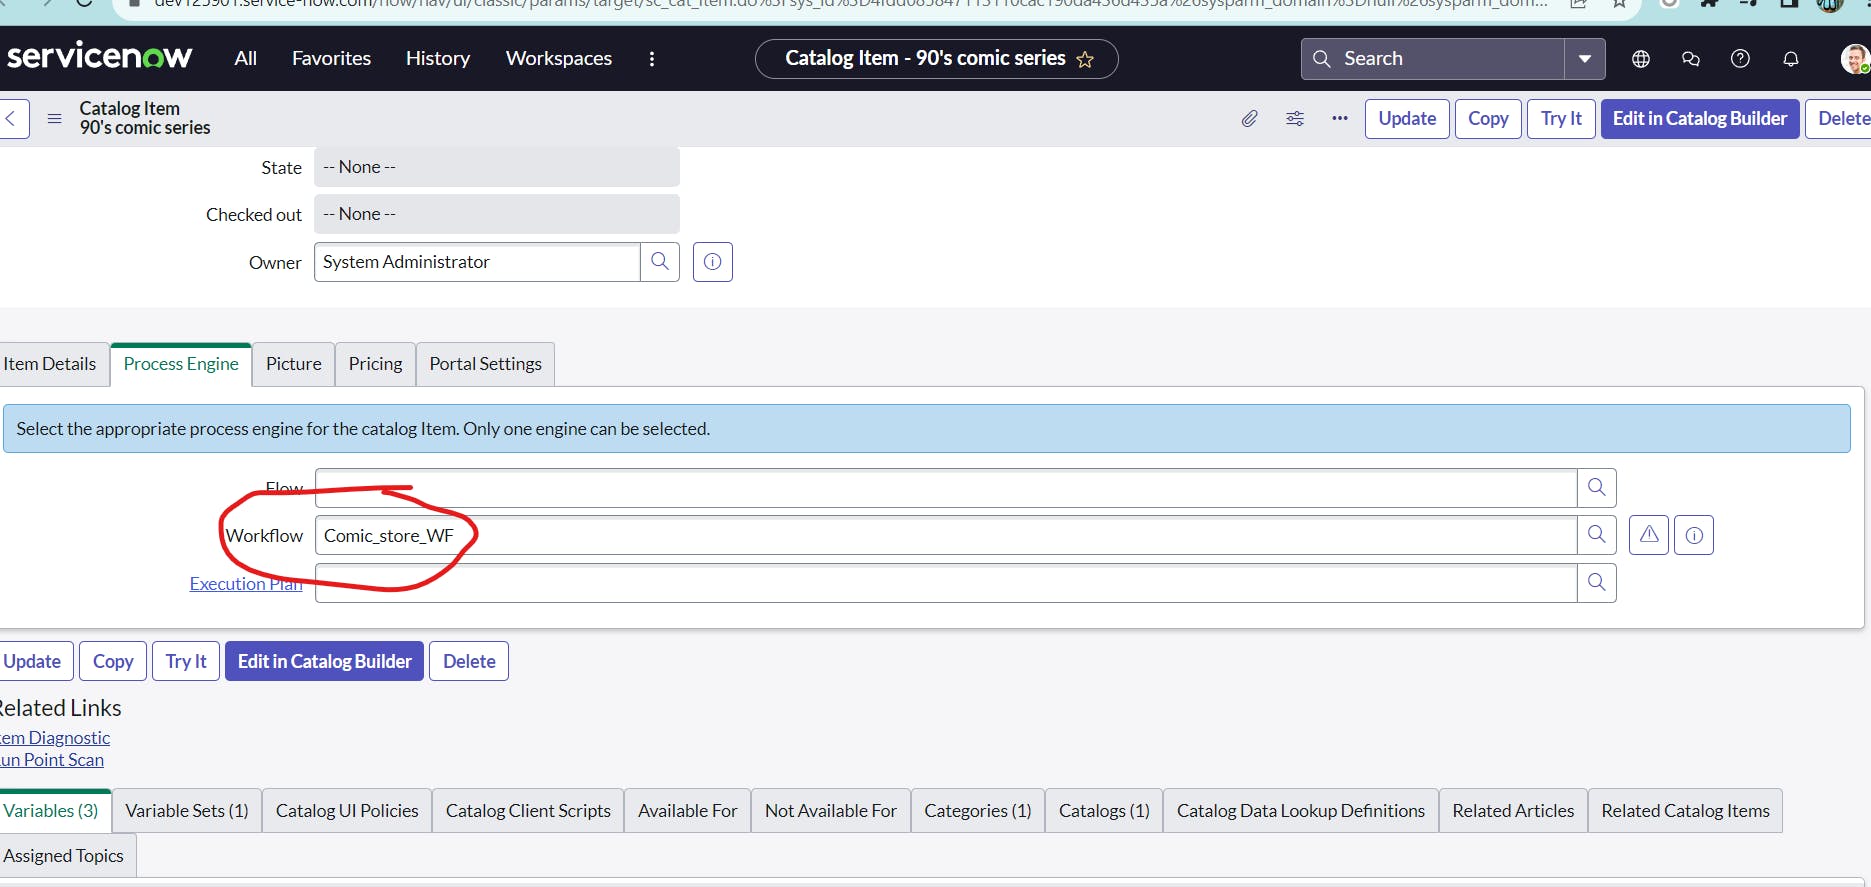
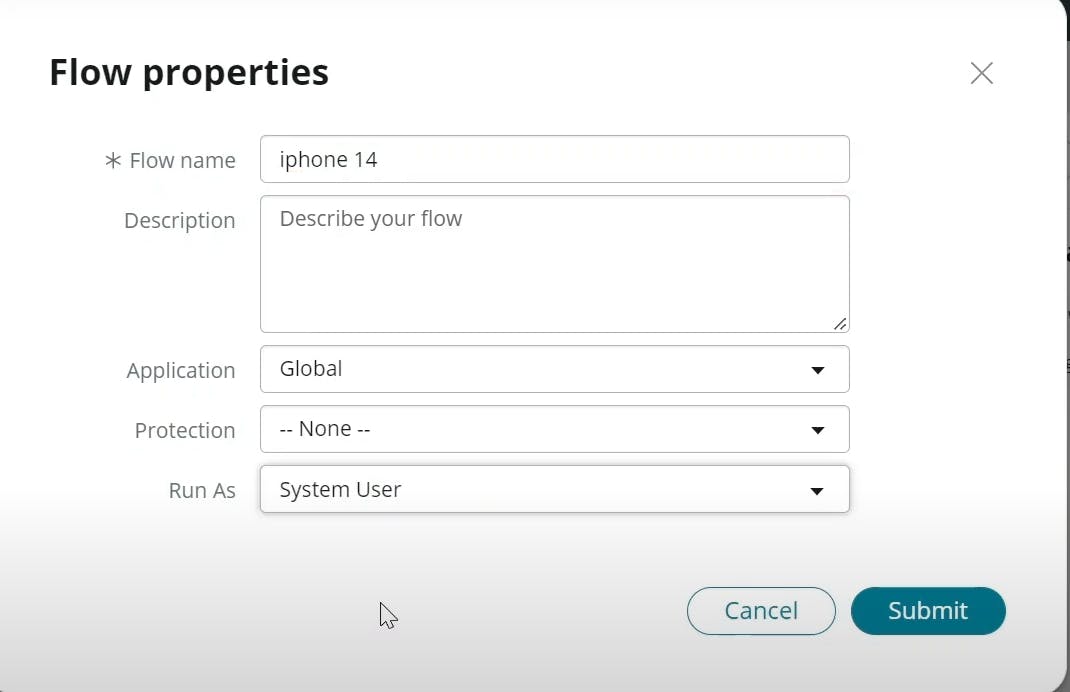
Now We have to create workflow
click new workflow
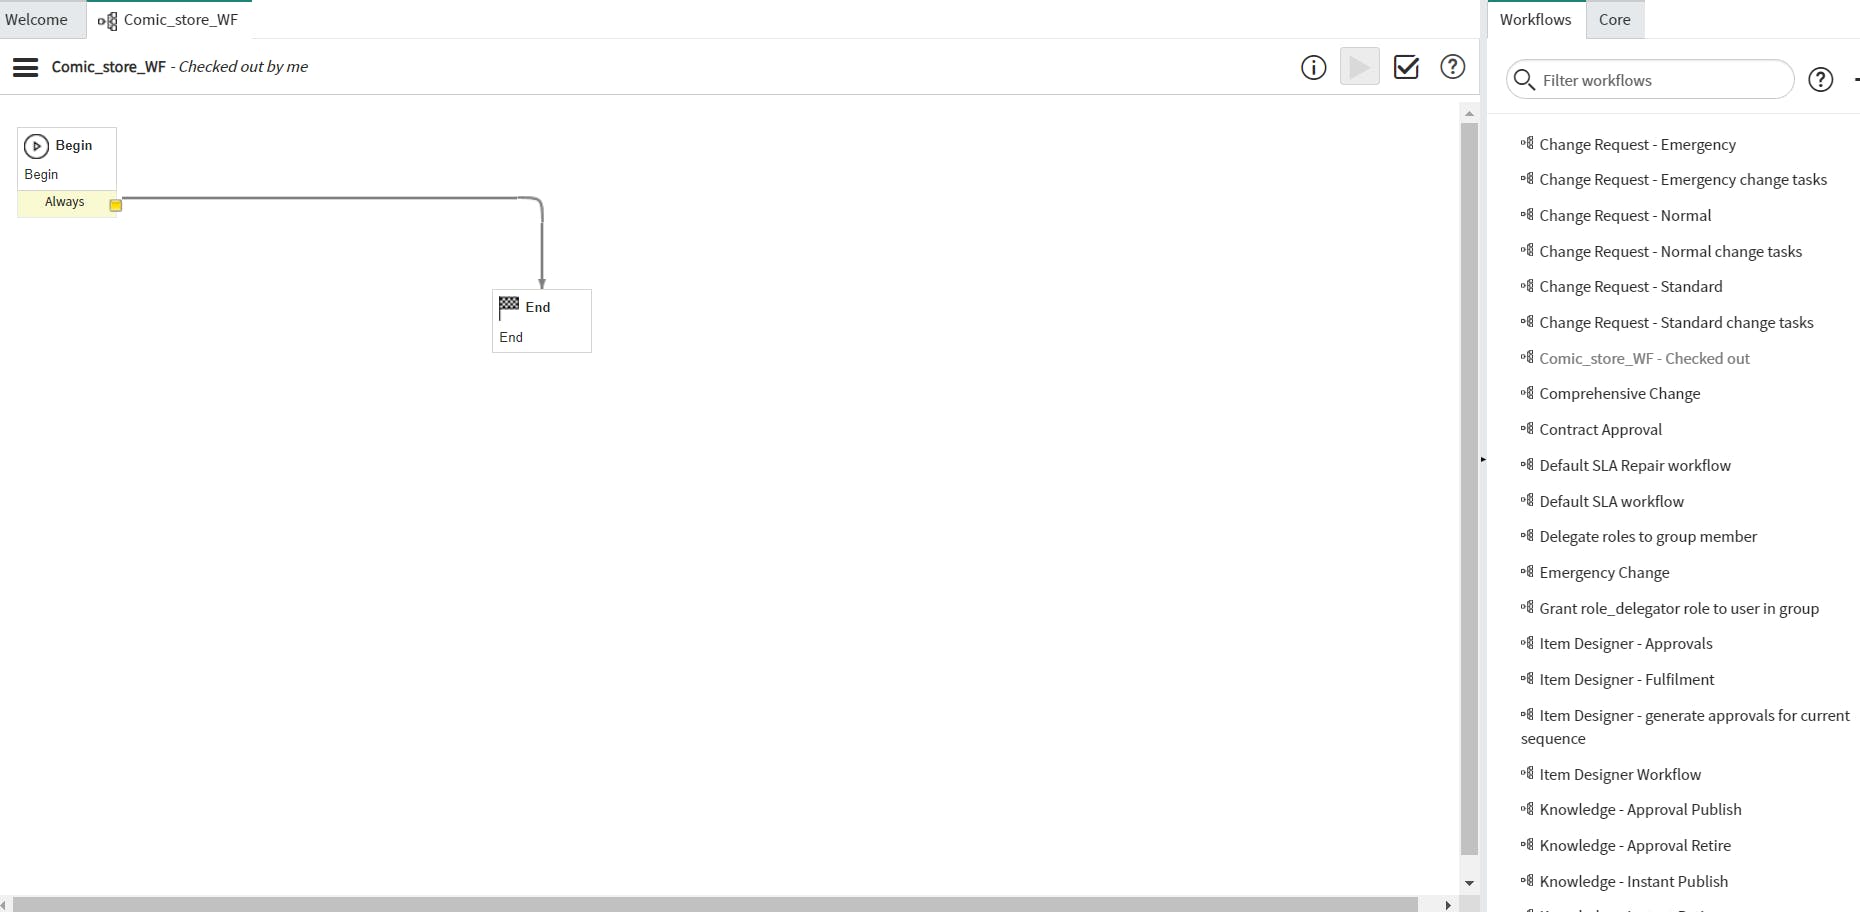
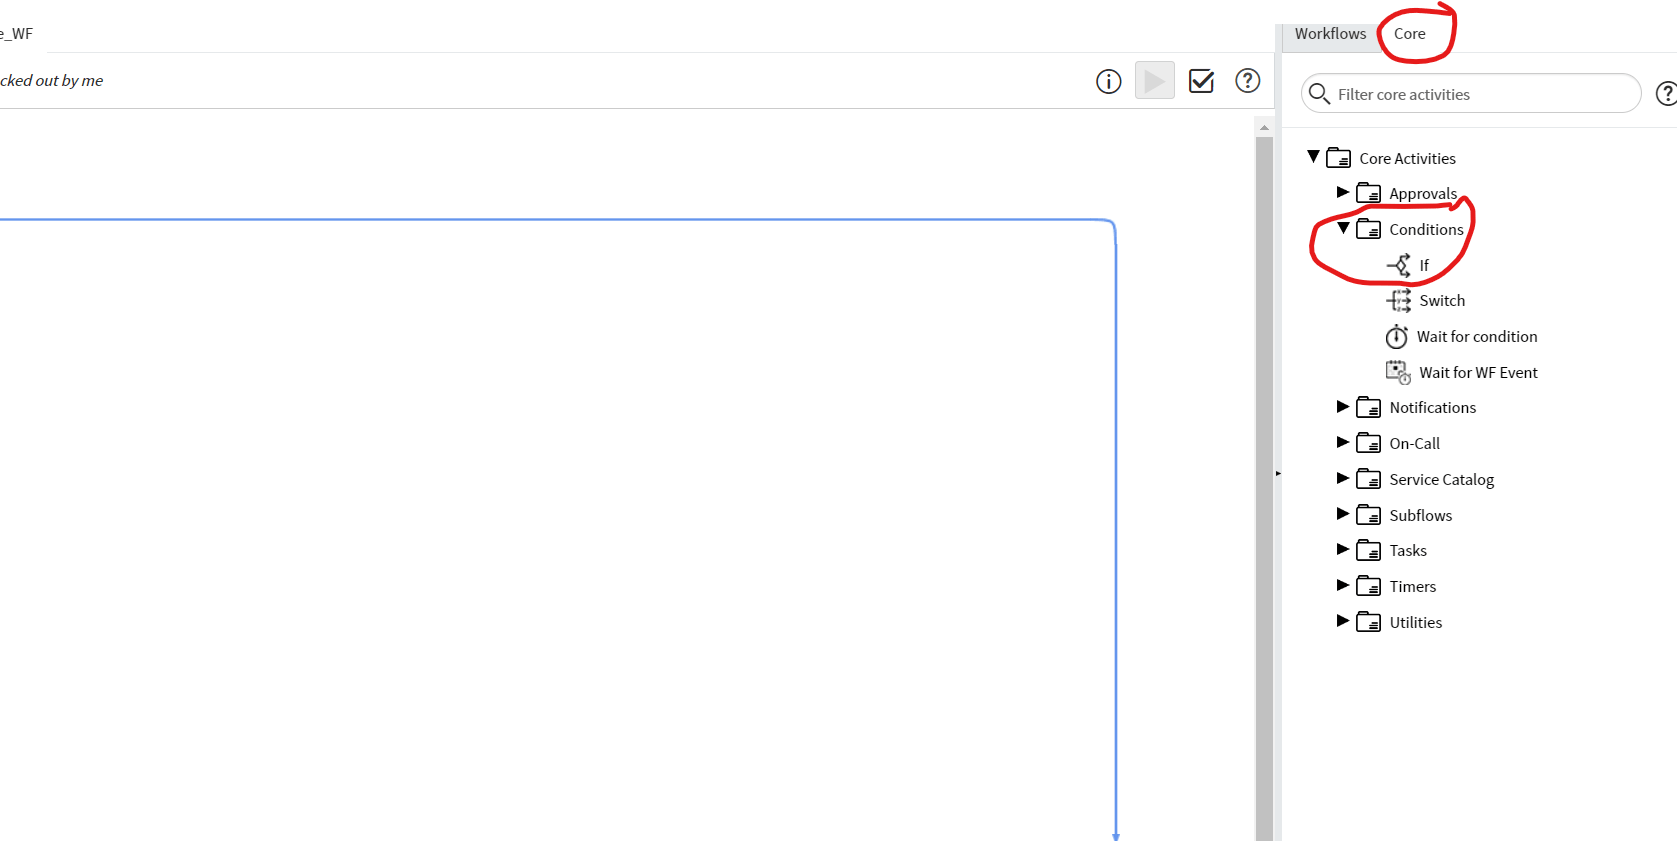
drag and drop if


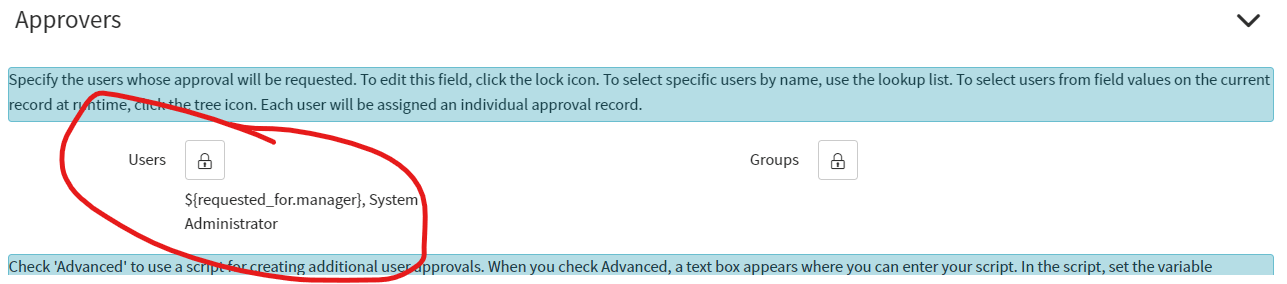
Drag and drop Approve user and select waiting for approval
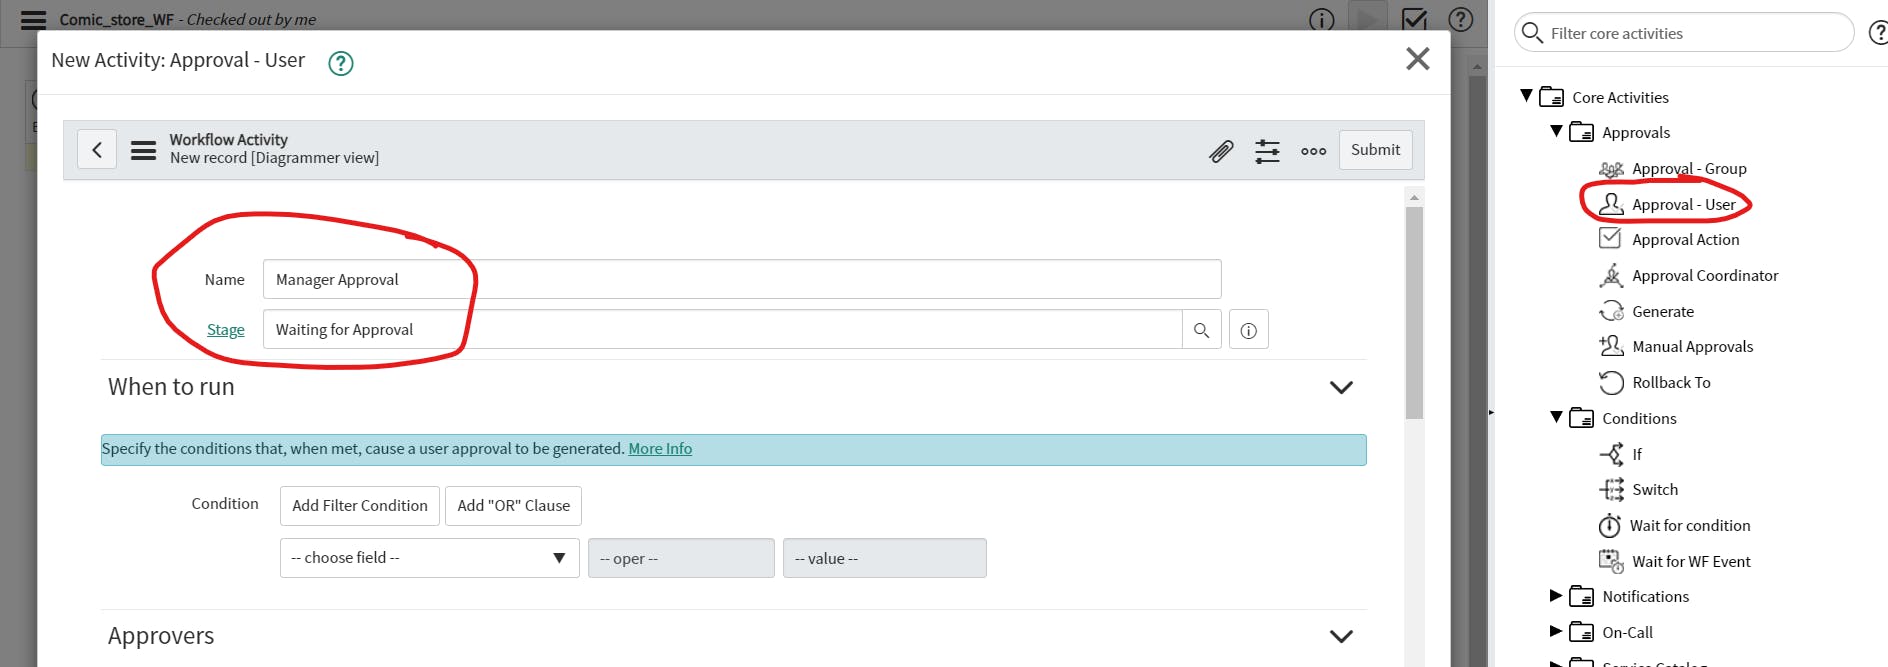
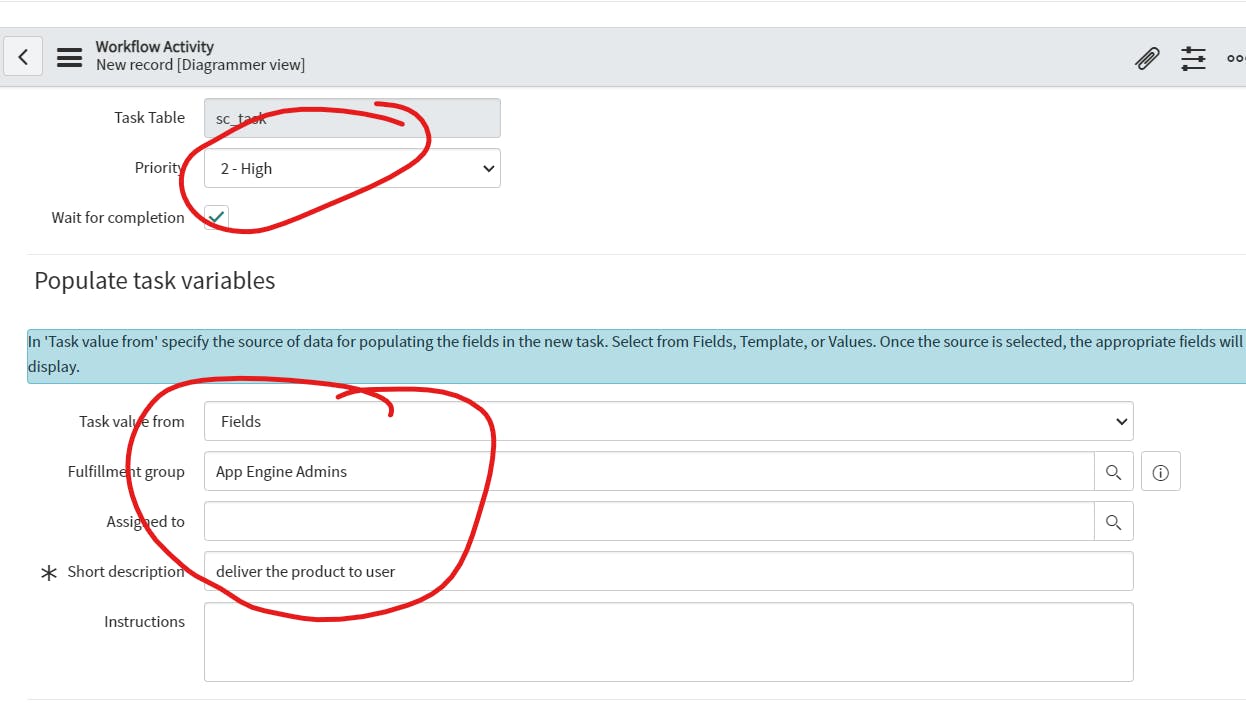
Assign to Task For Delivery Team

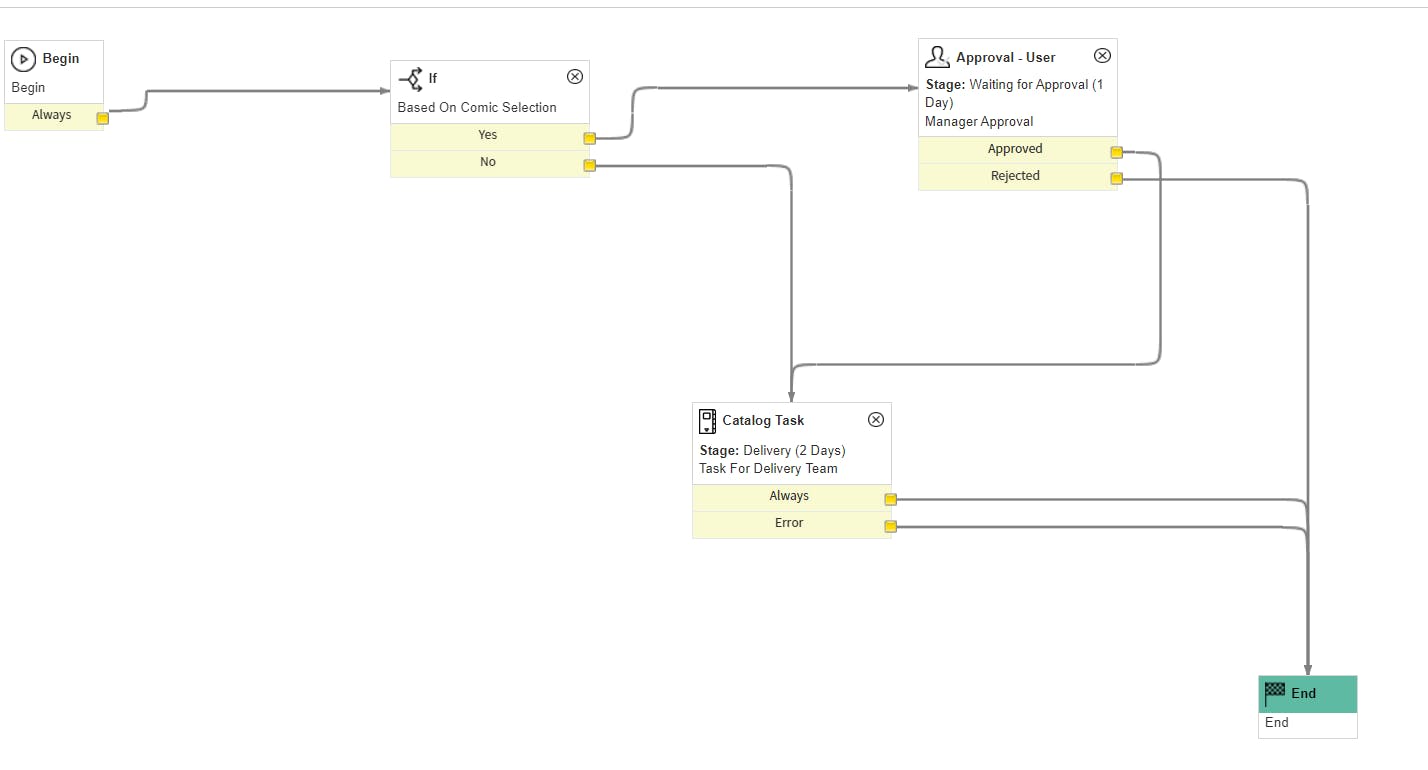
and publish it if we want to change it we have to click checkout
we have to check it now

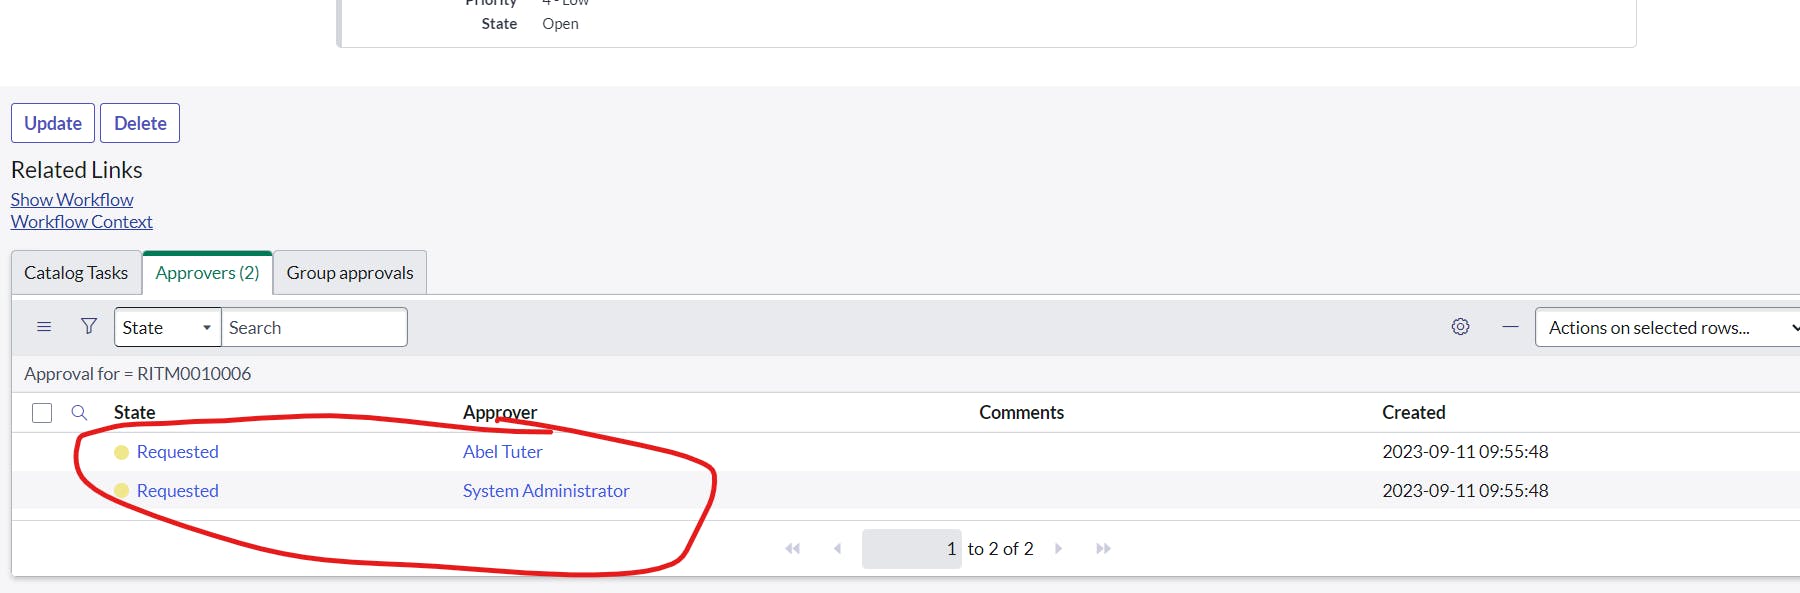
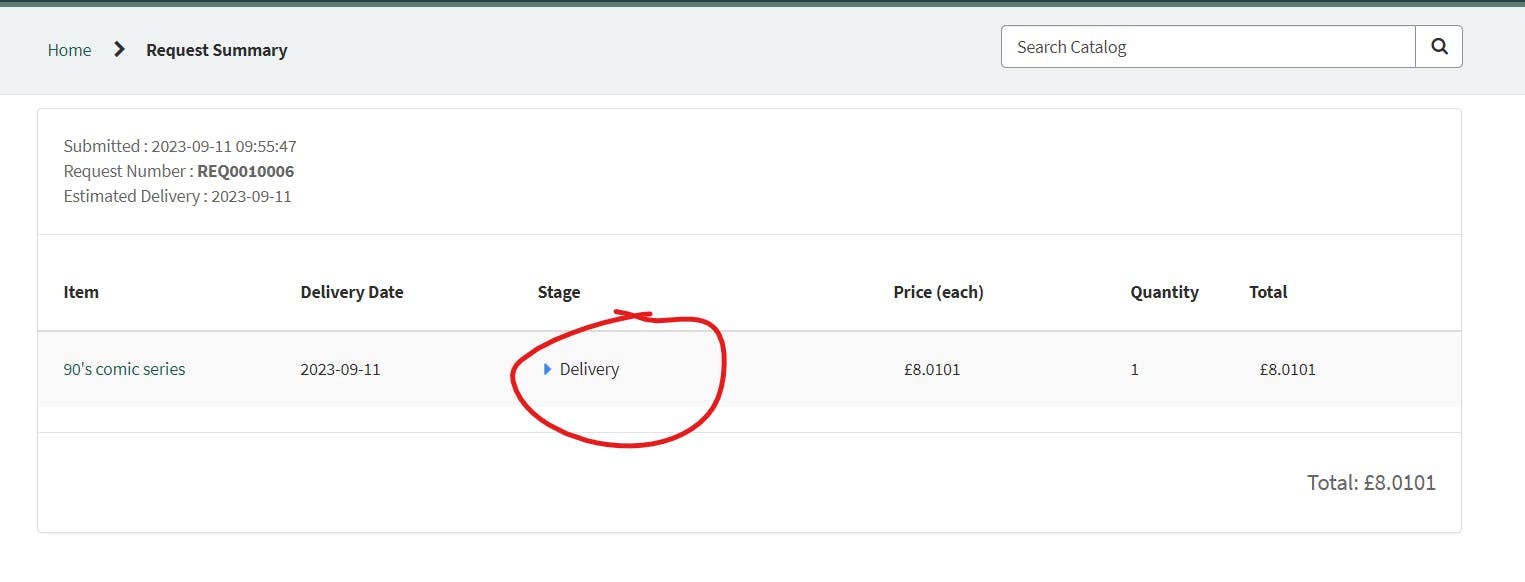
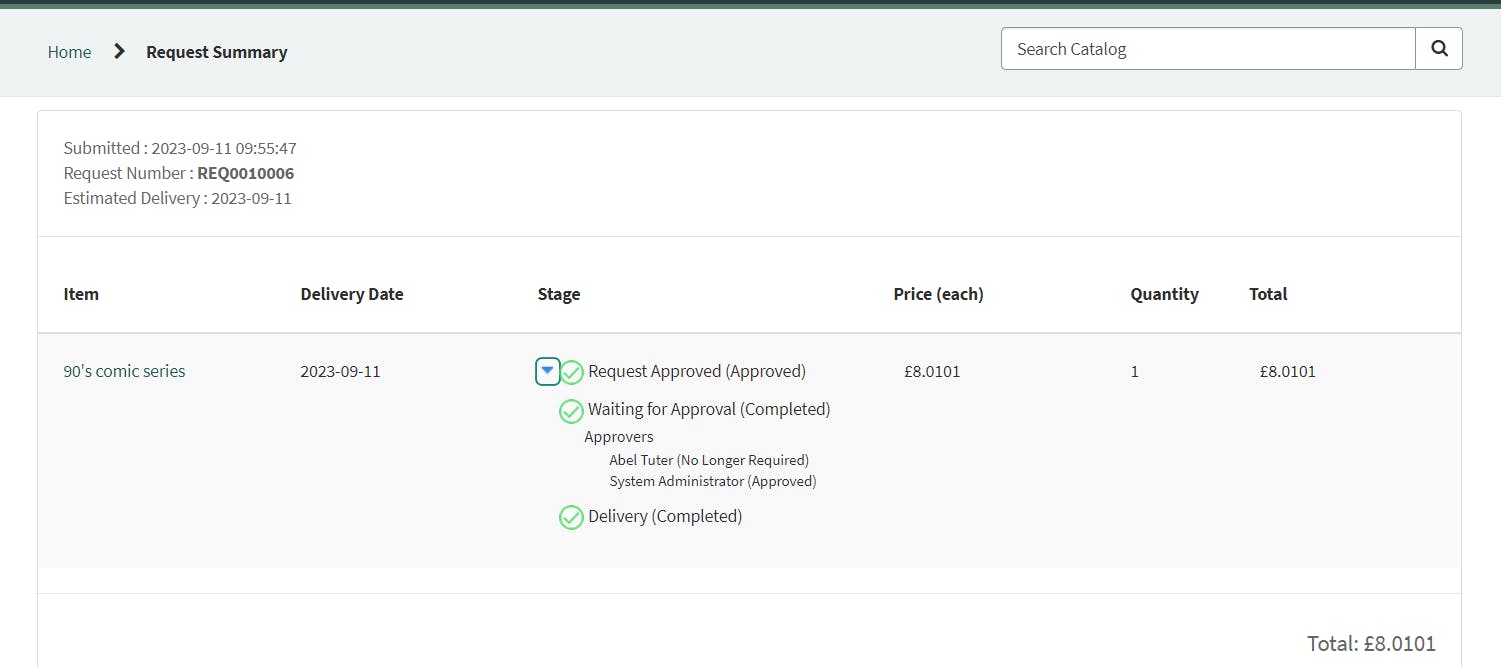
search for that after request number is generated
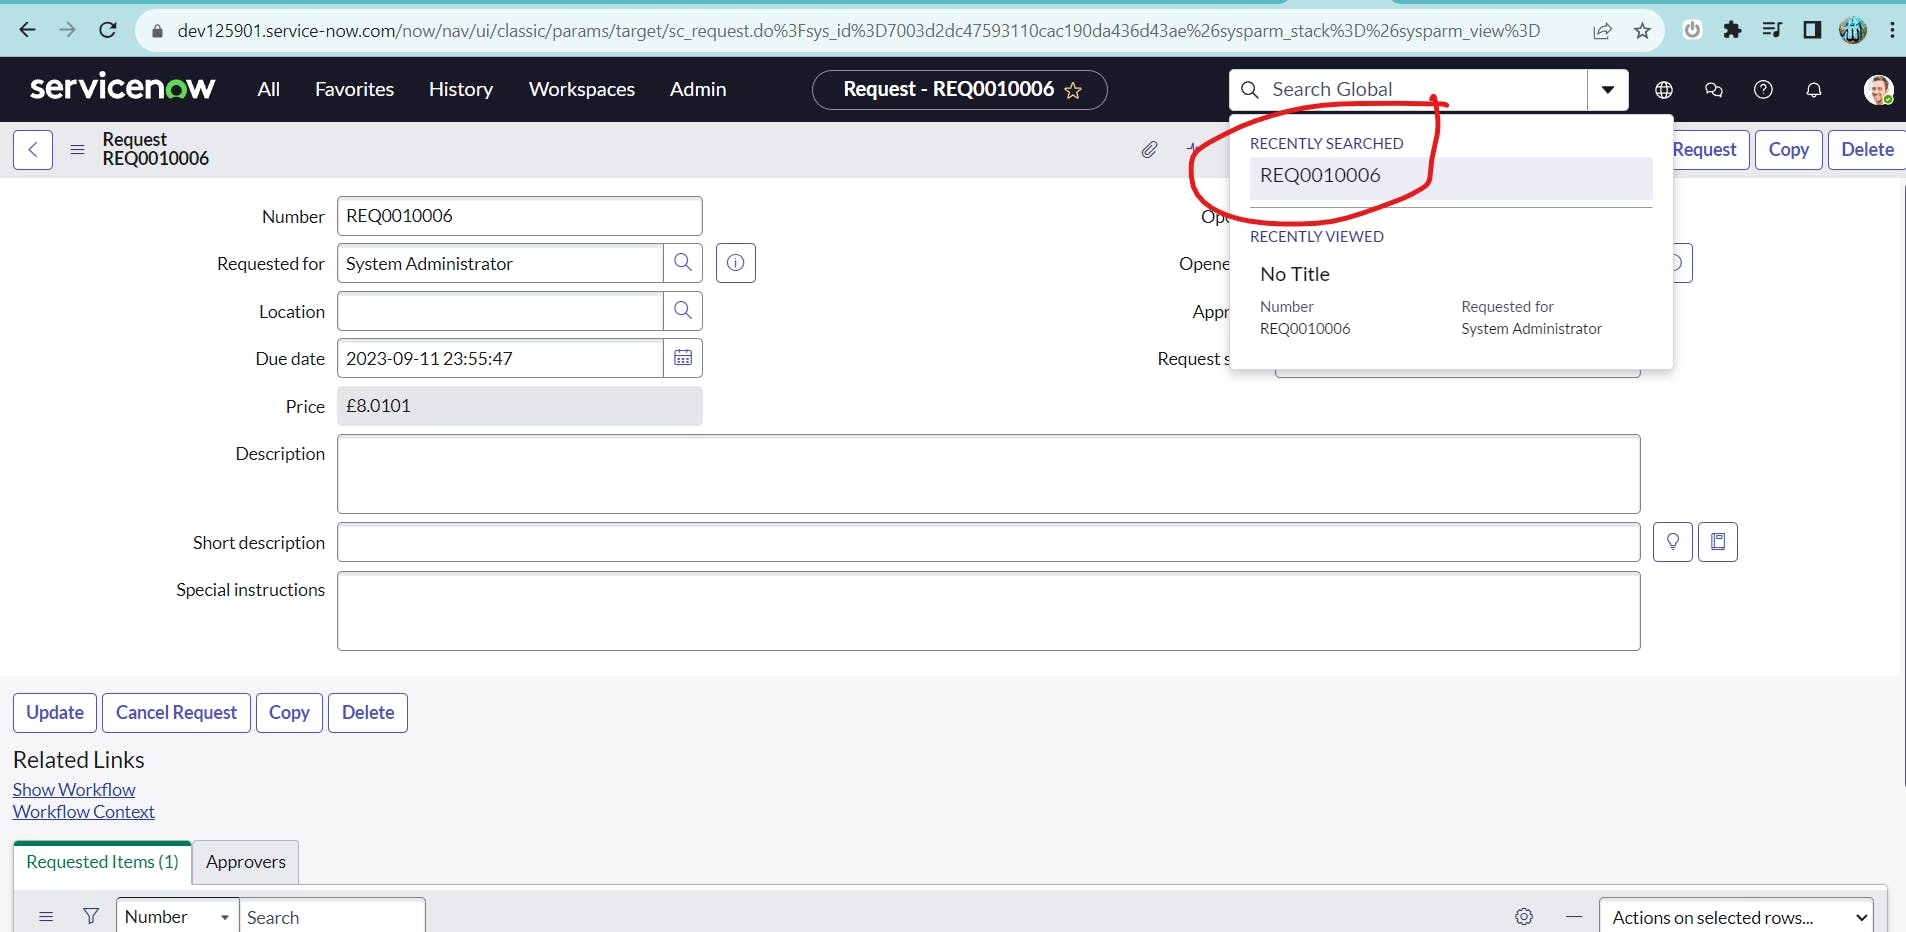
click on request number and approve it
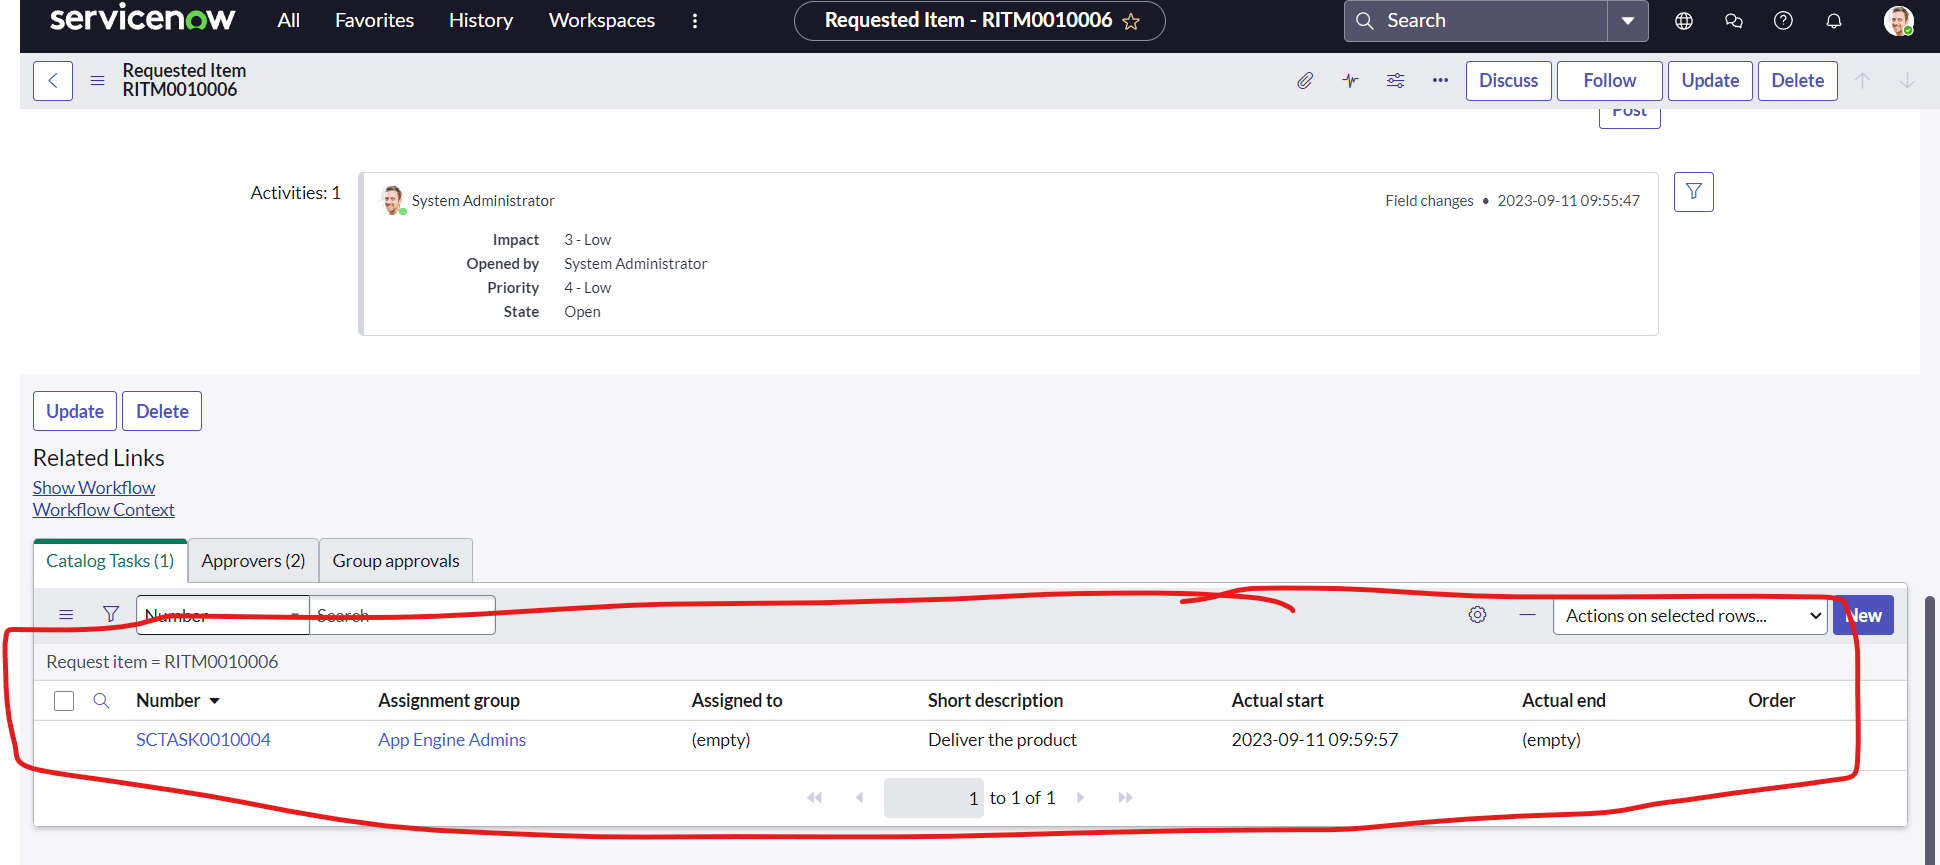
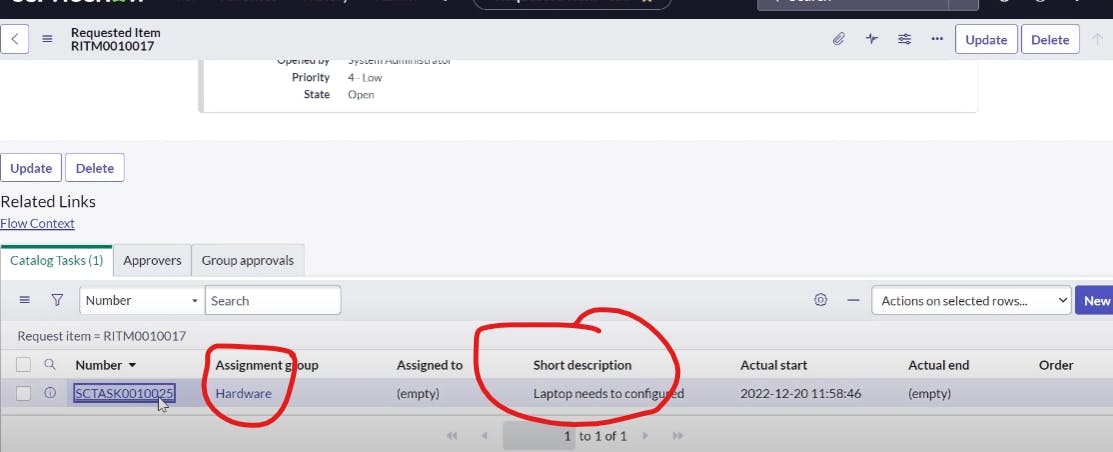
click on sctask0010004
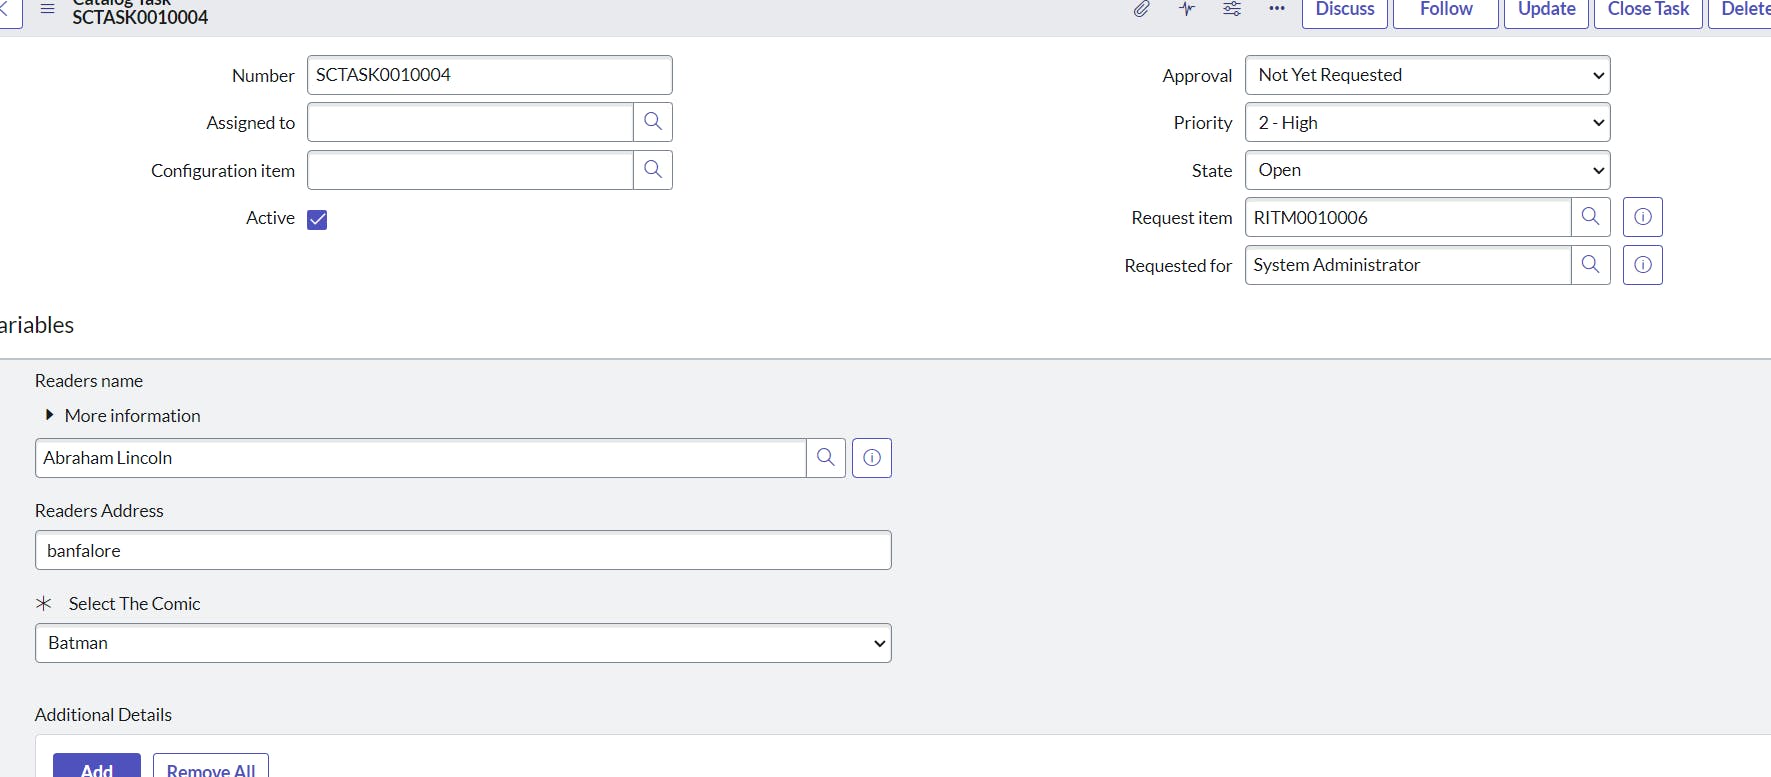
we can see priority is high and click close task
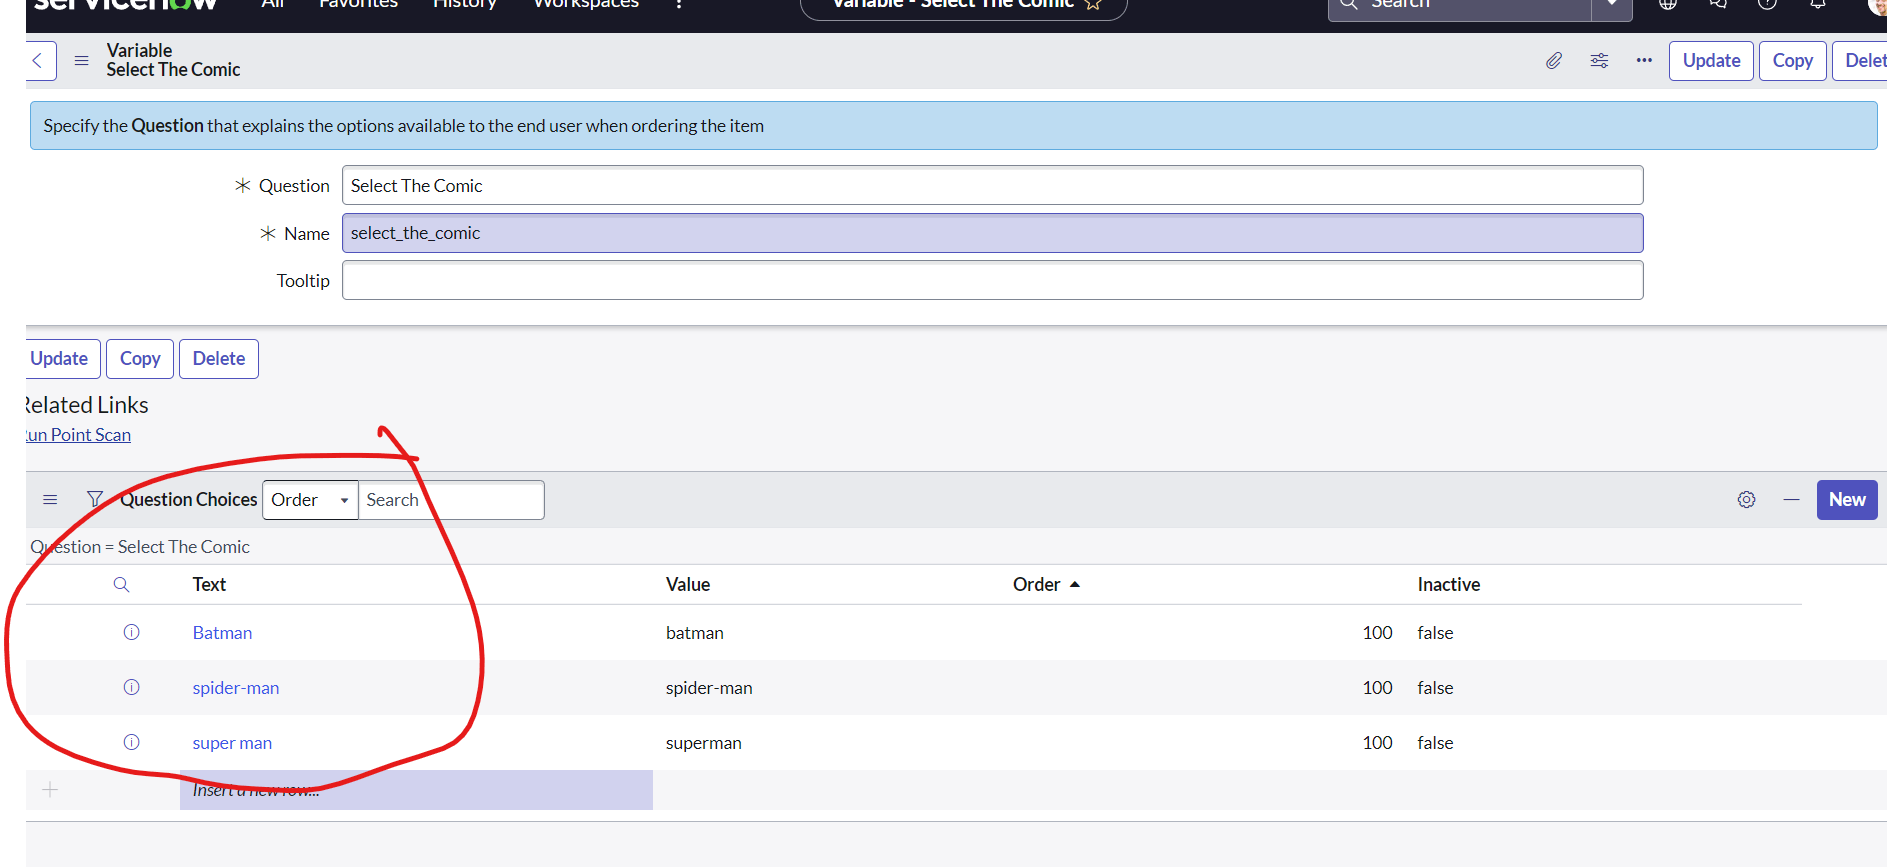
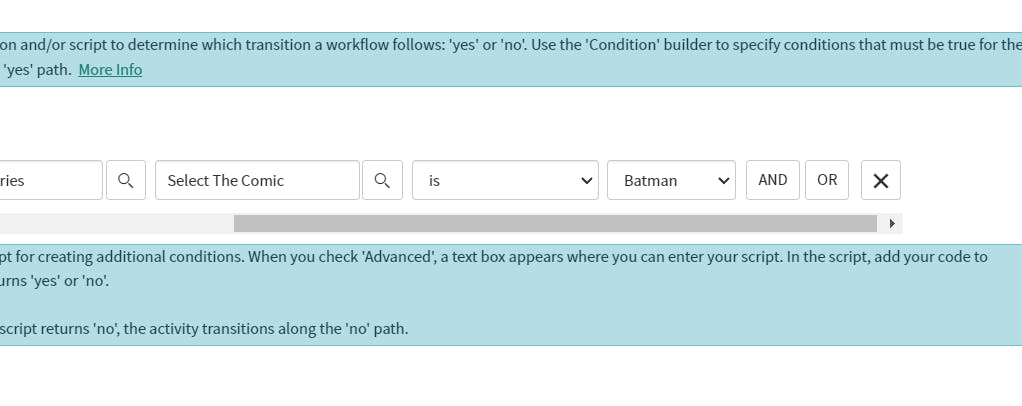
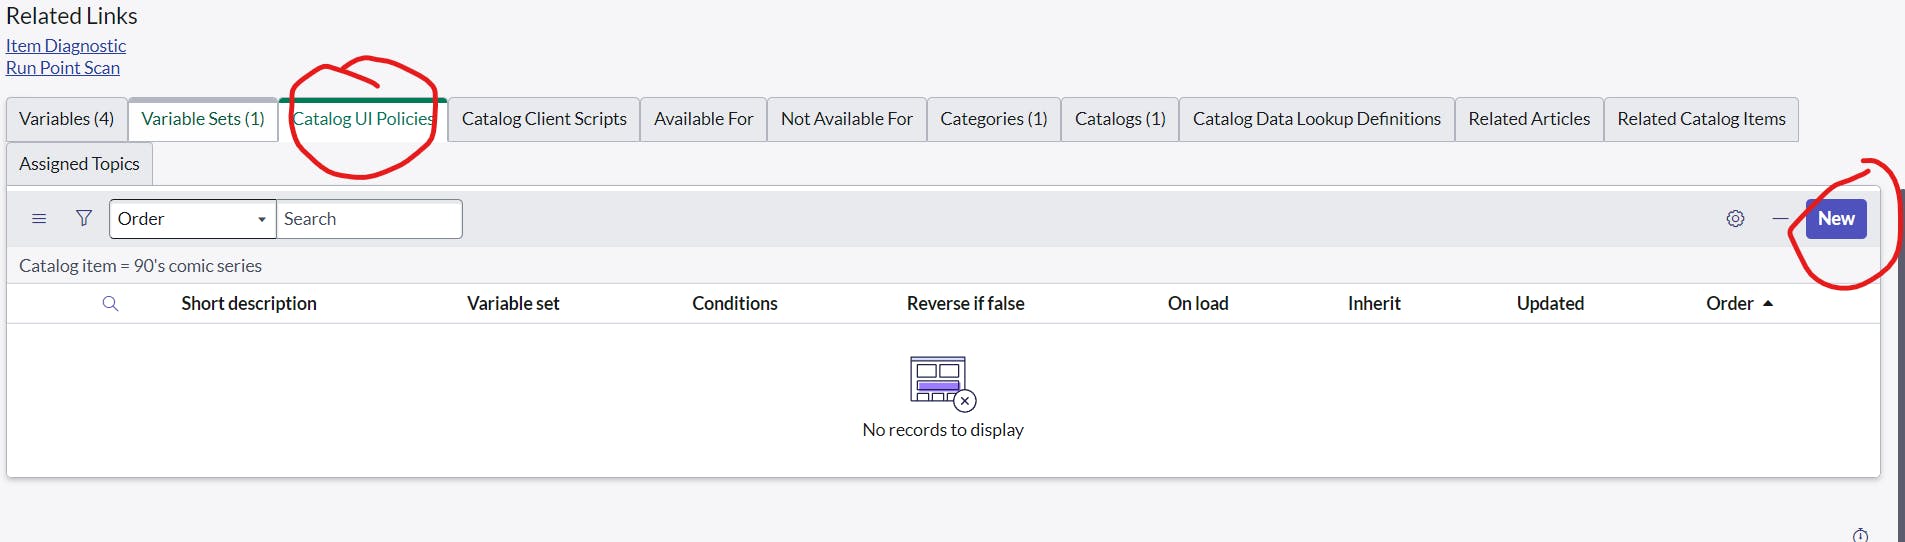
lets create another variable to select the version of comic
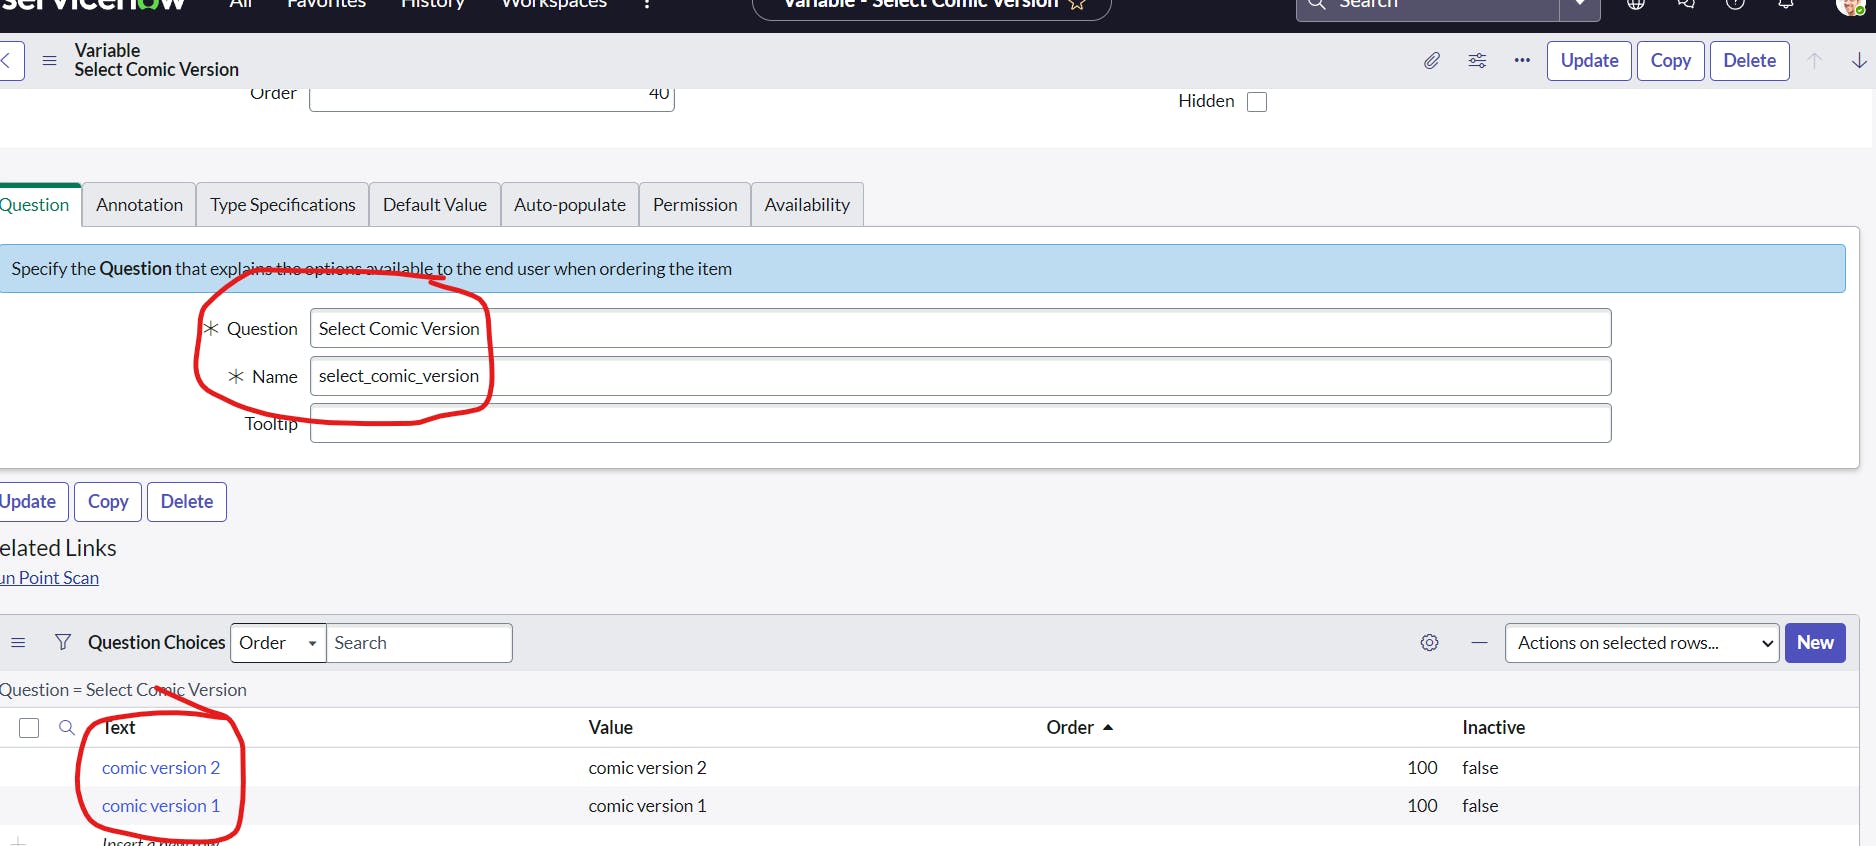
now lets write a ui policies to only display version of comic based on condition
we have to write a condition that when an user selects comic as batman then field should be set to mandatory
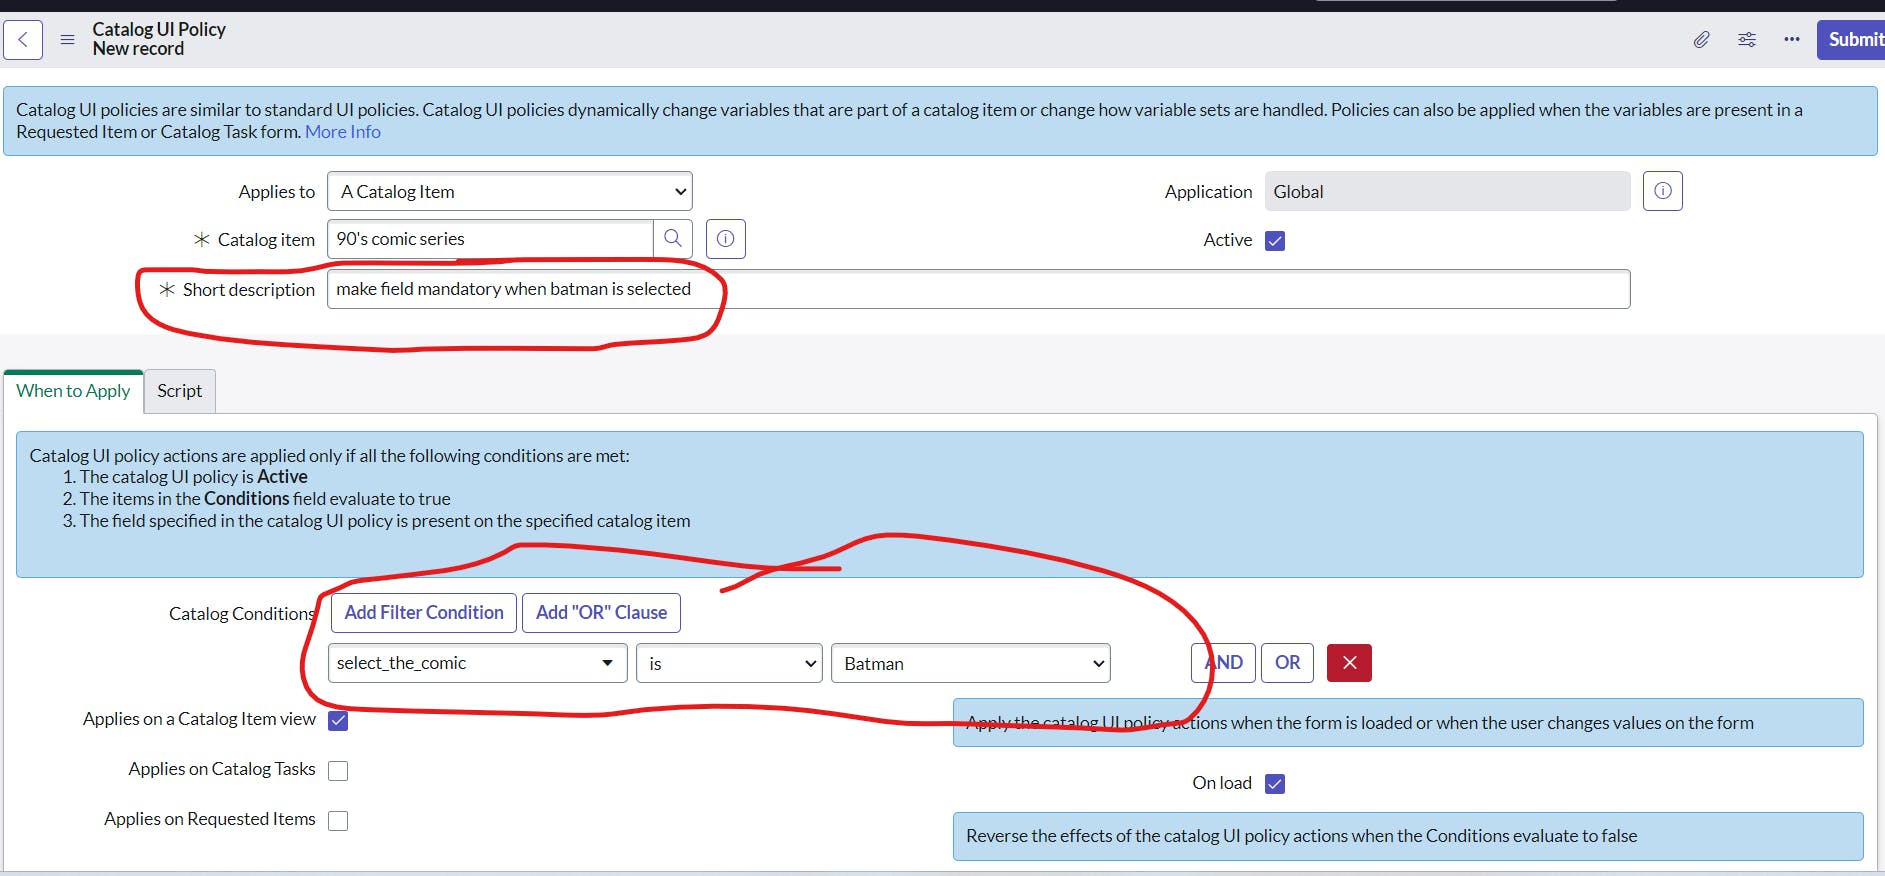
now set actions for that condition
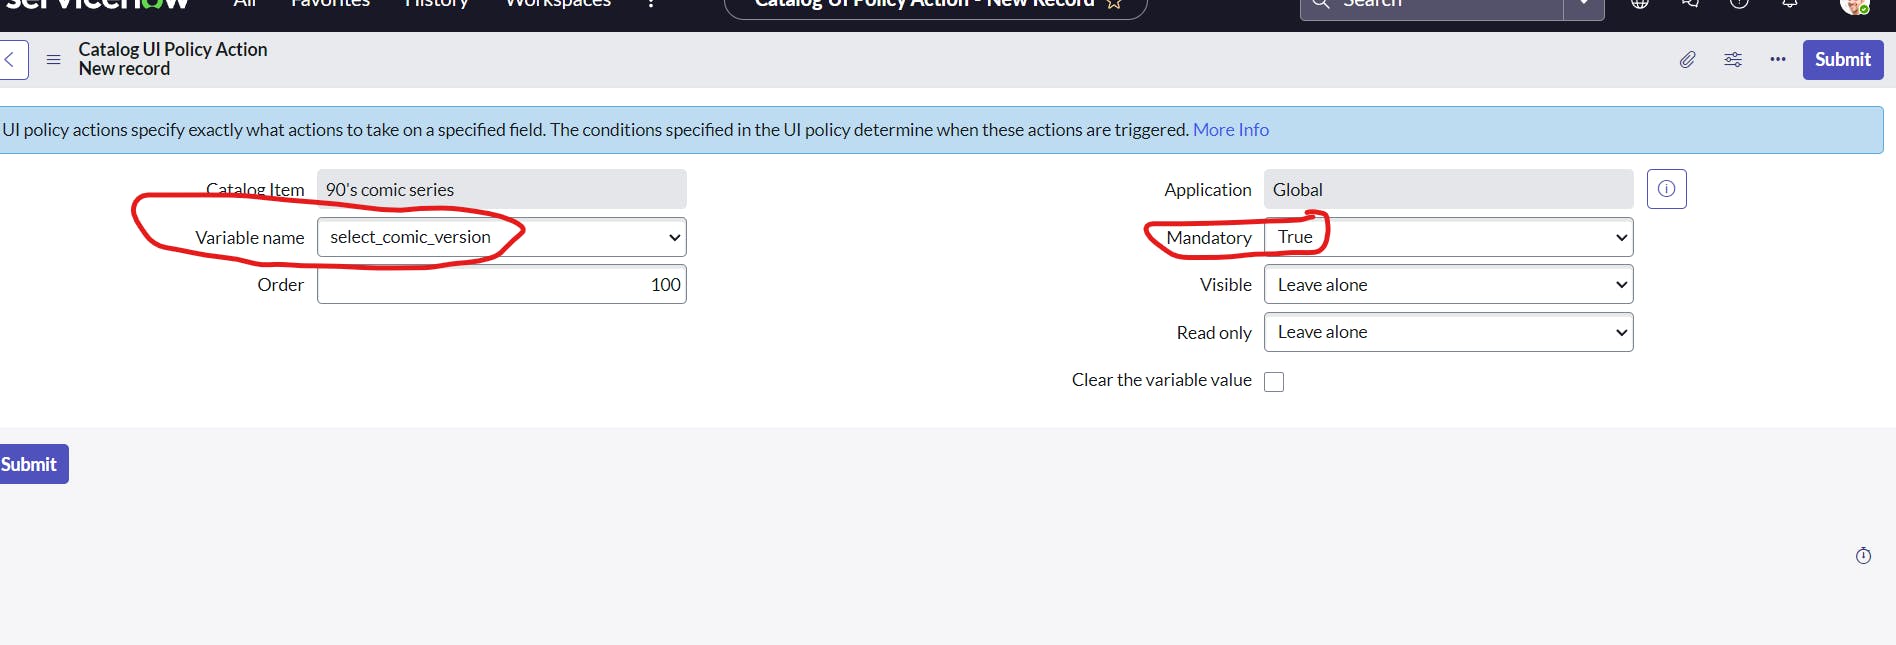
now when we select batman field became mandatory


setting workflow for closing state after request is finished

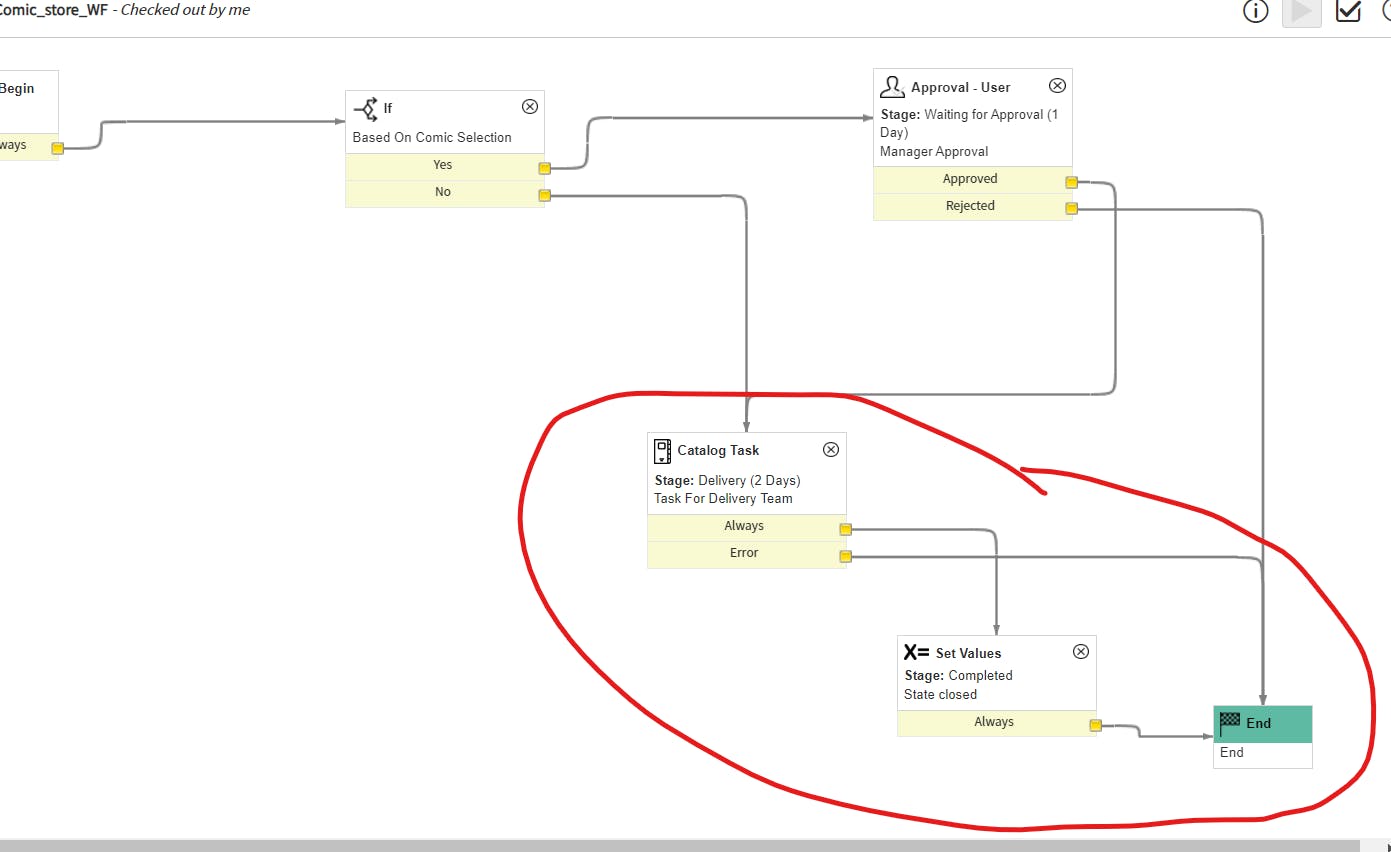
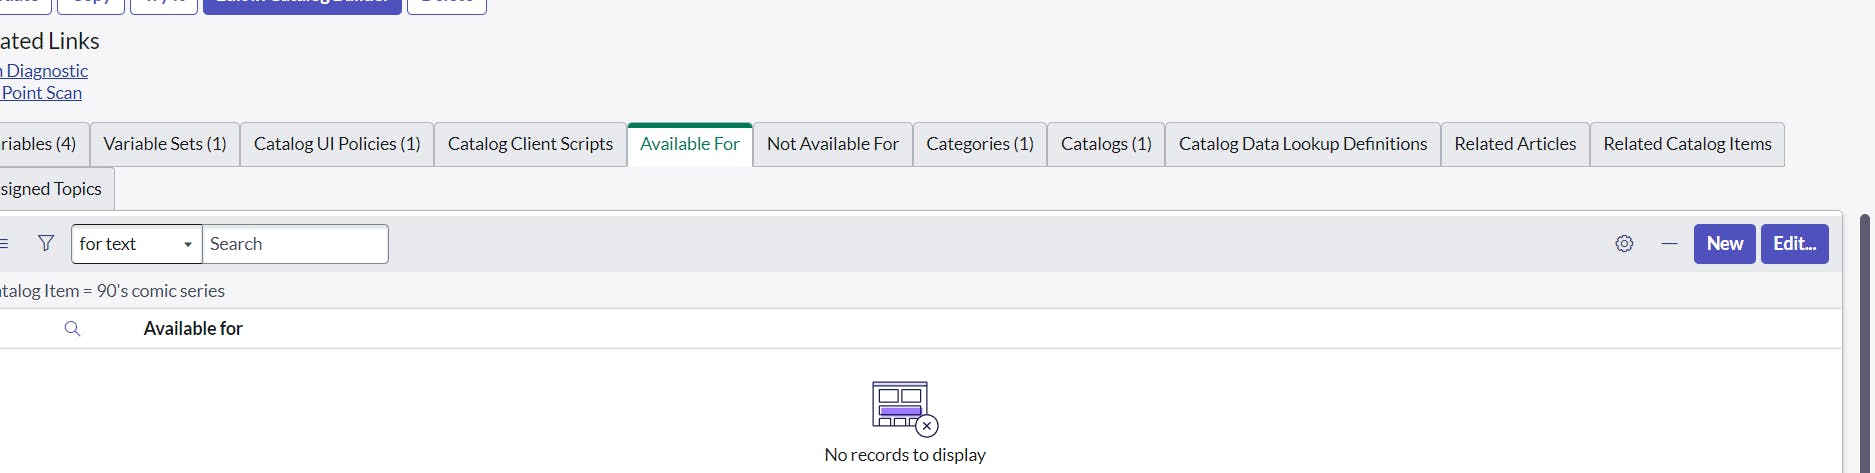
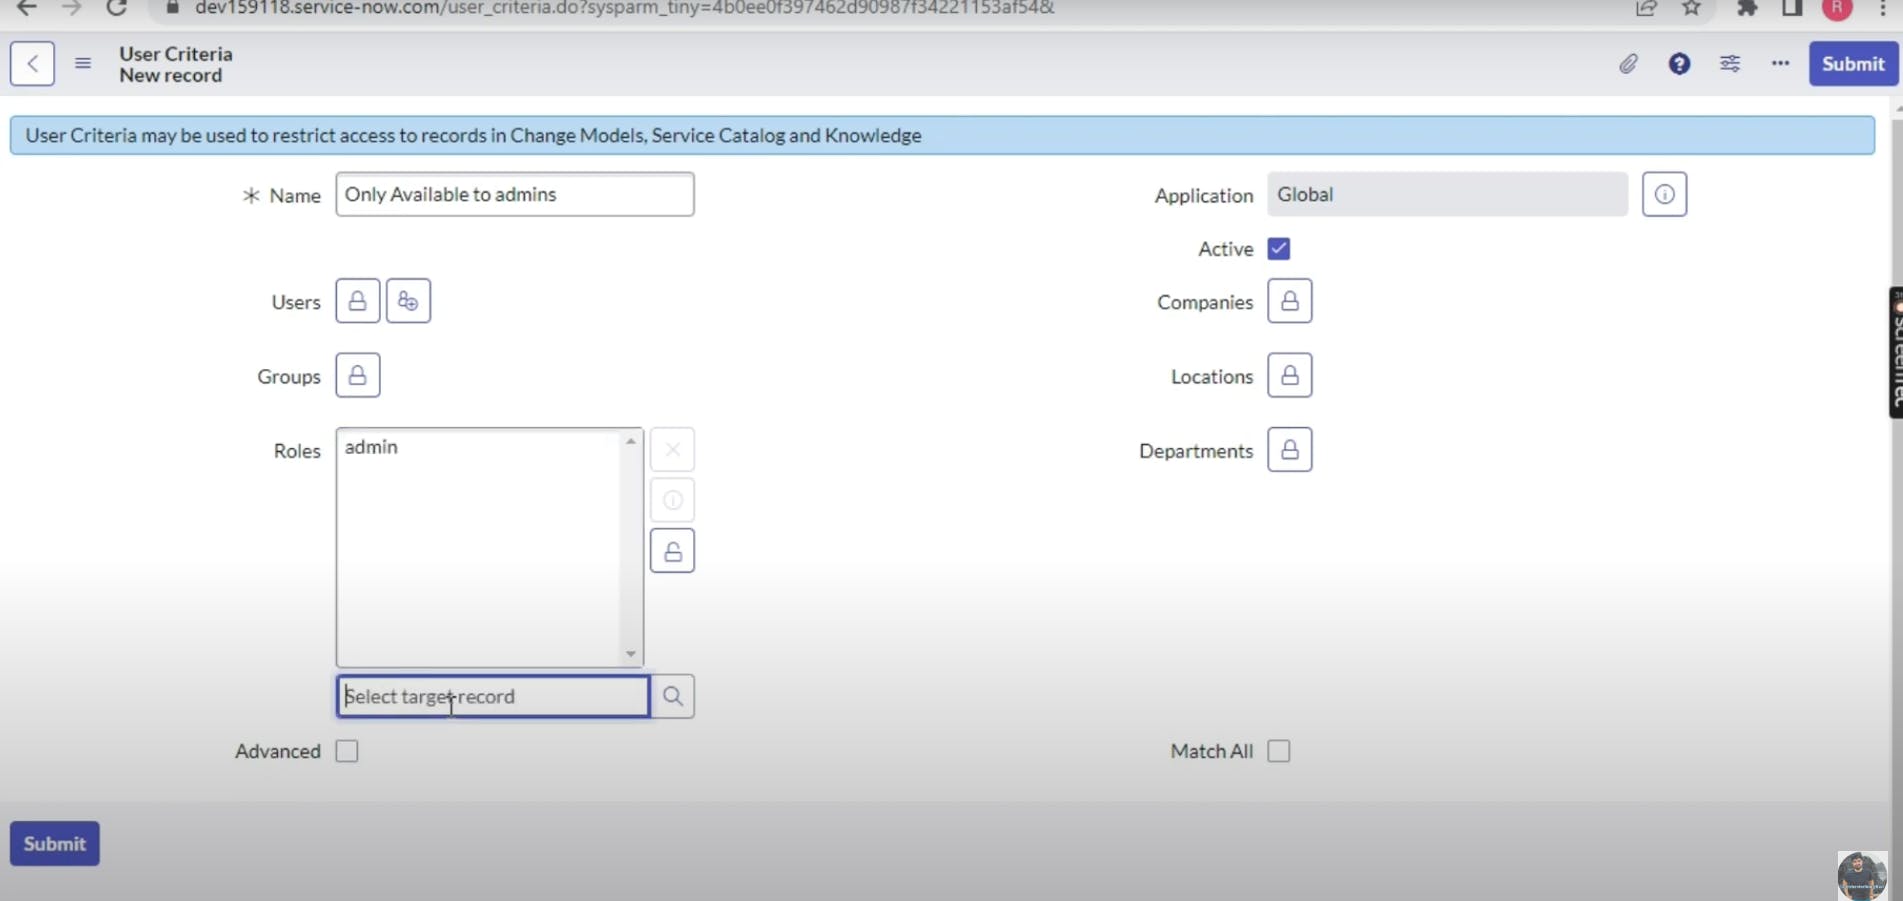
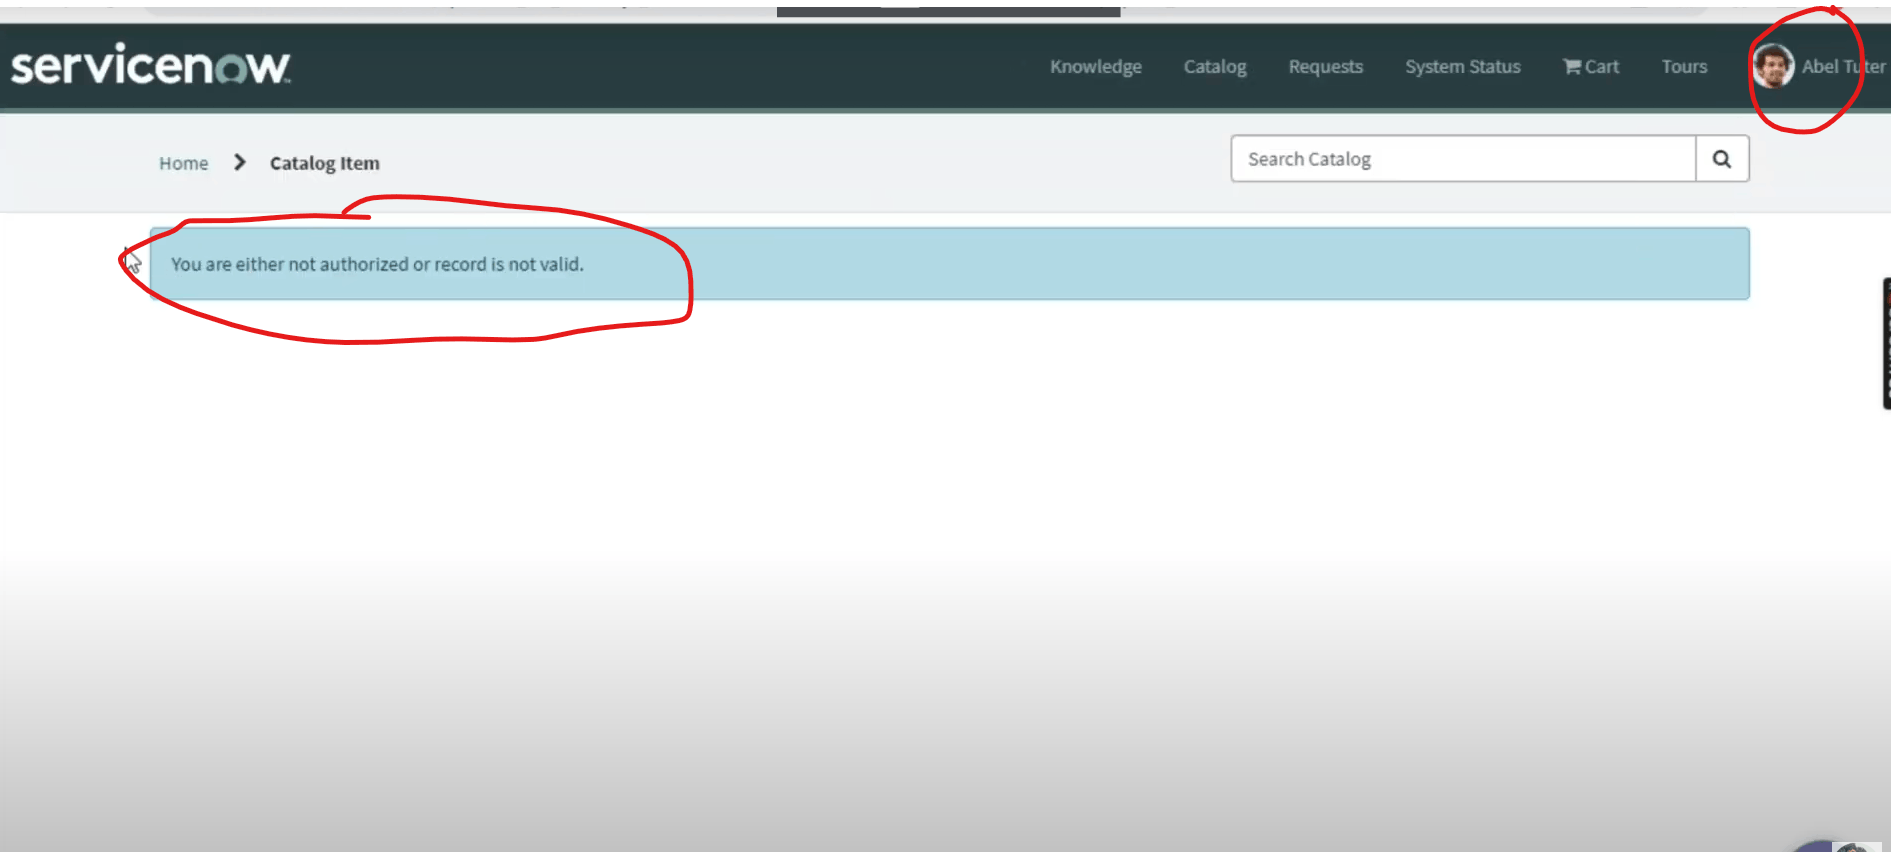
if we want to select the users who can view the 90's comics page only admin or any specific user we can set it by available for and set only view to admin
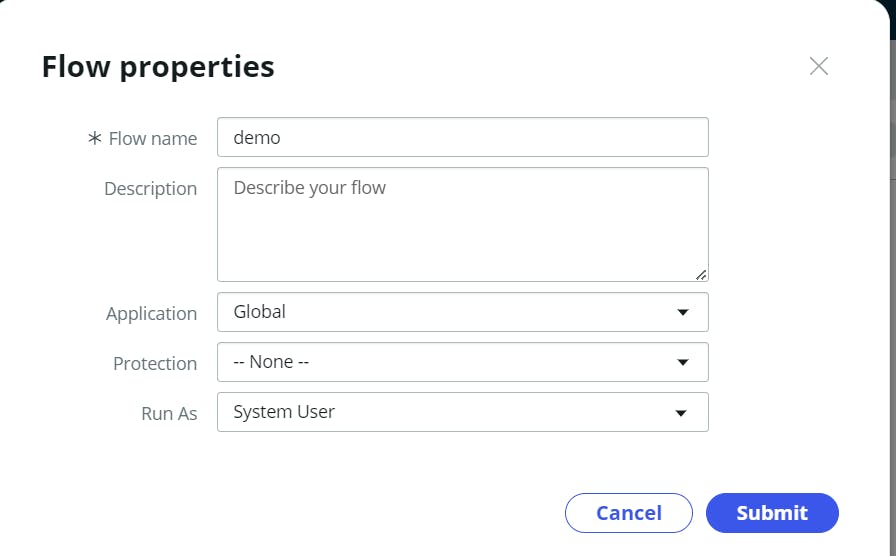
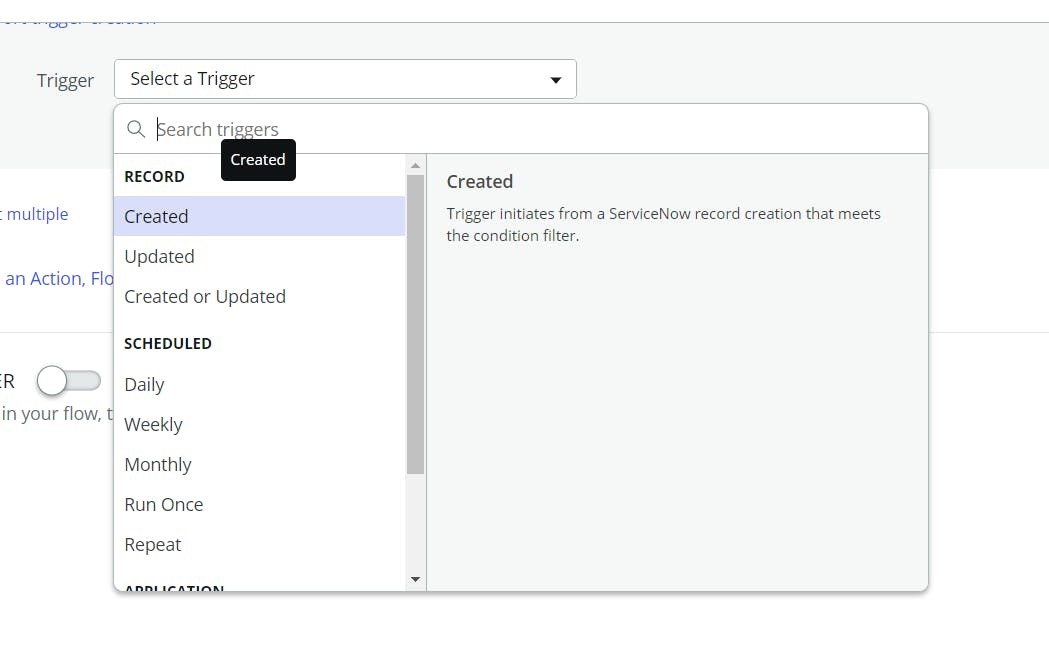
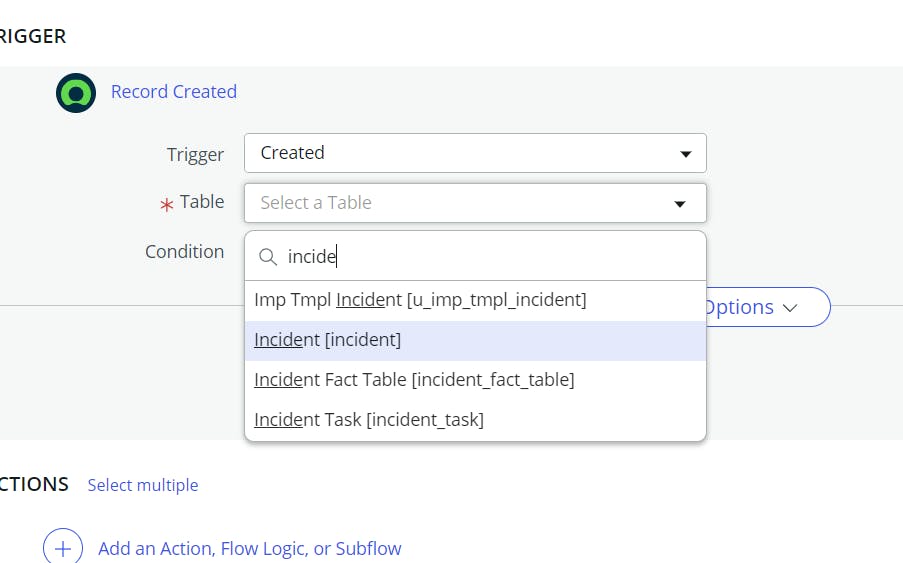
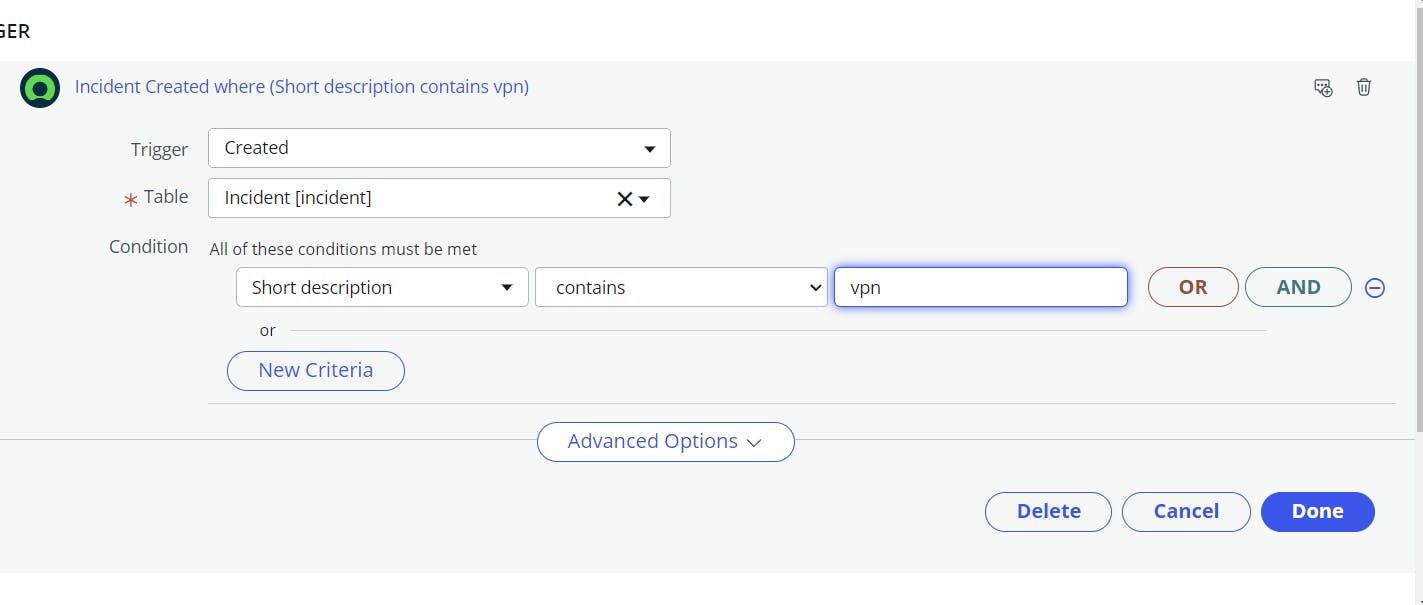
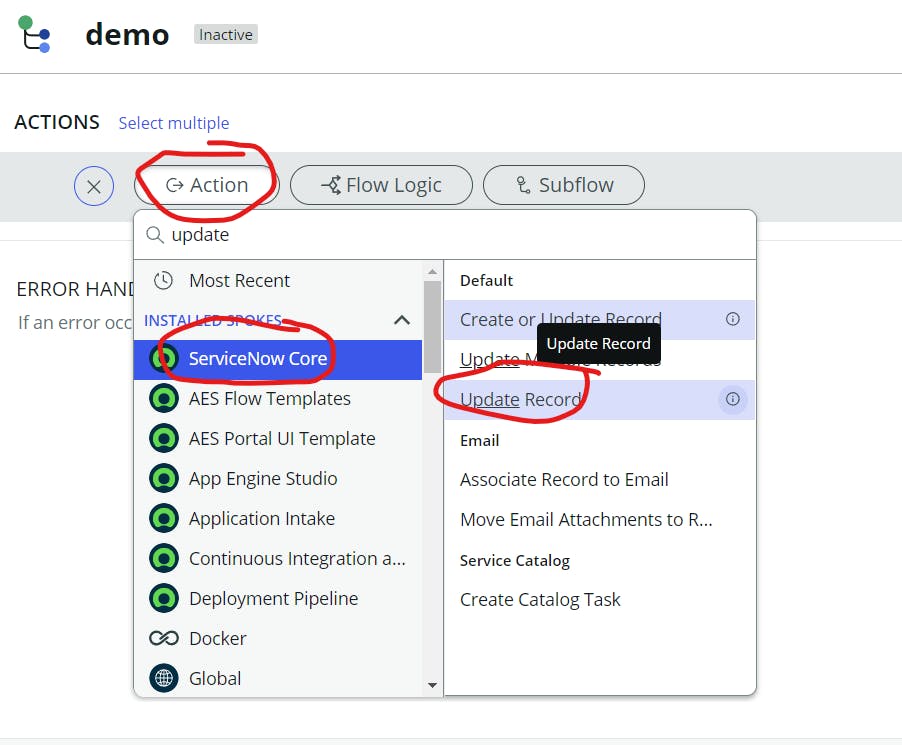
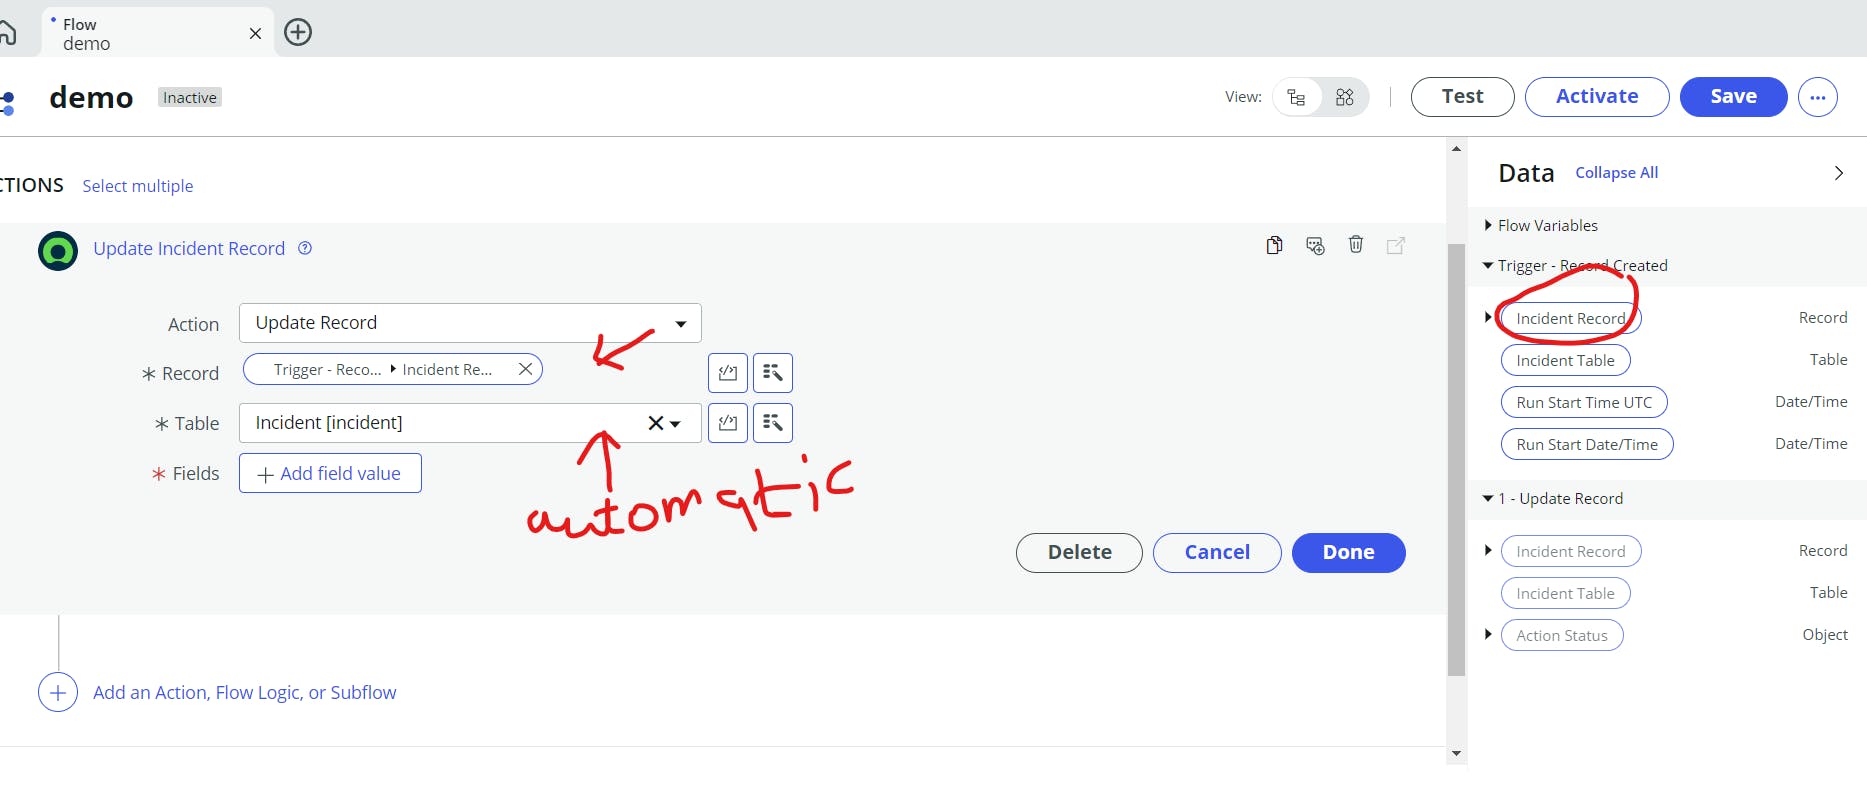
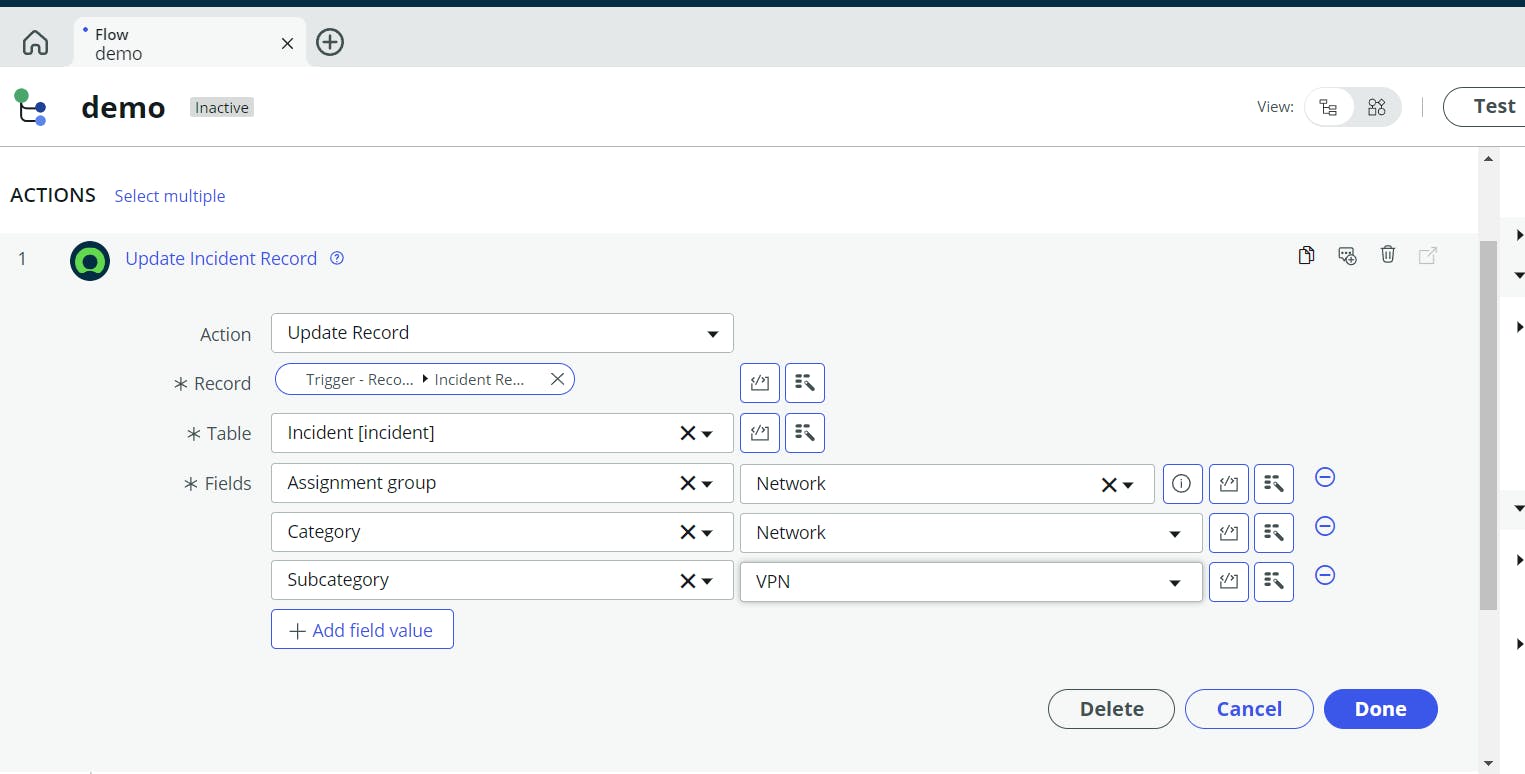
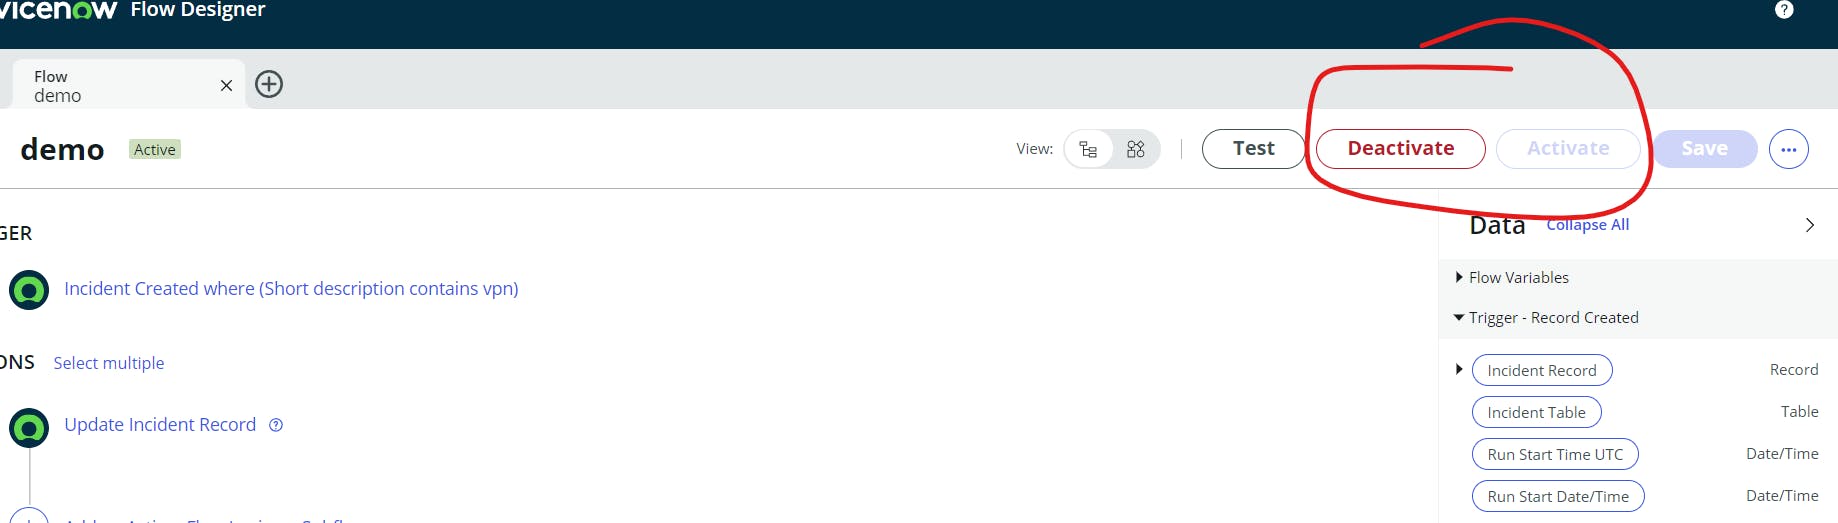
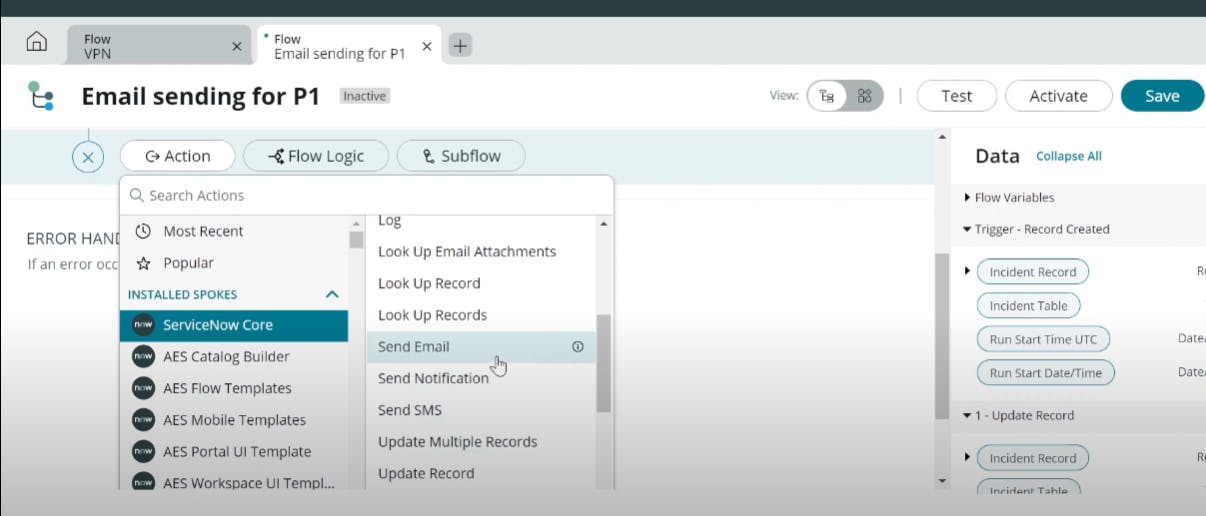
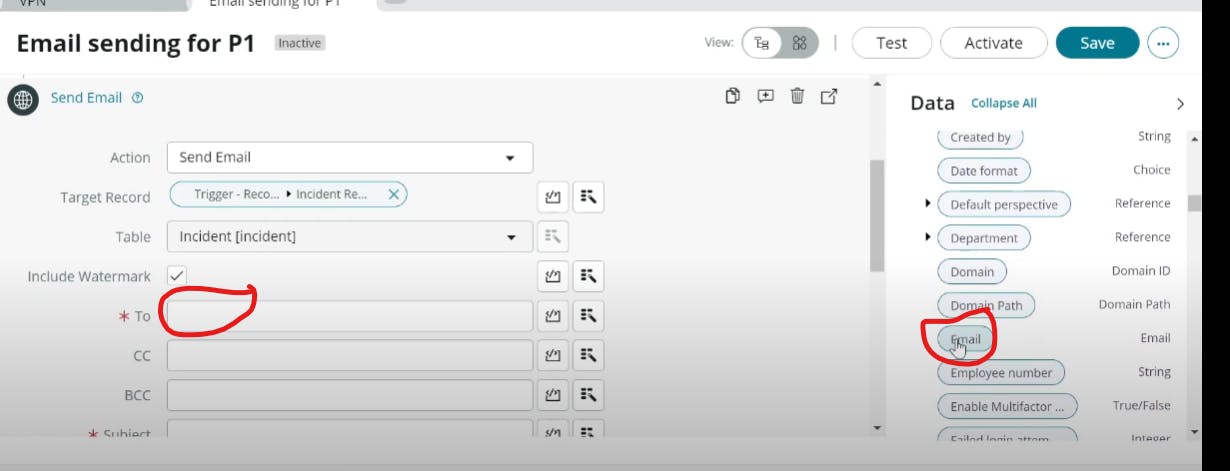
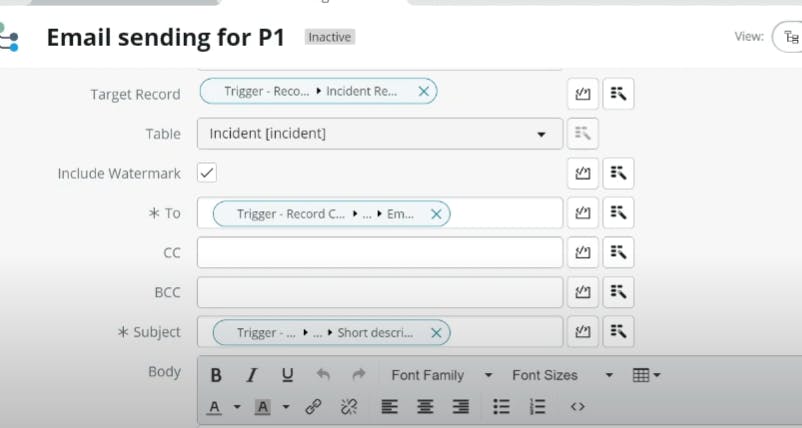
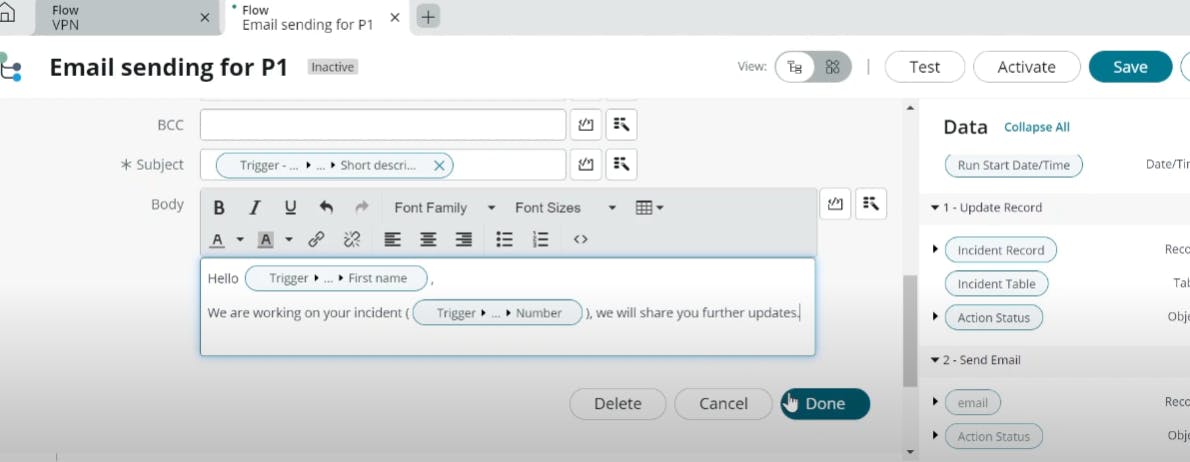
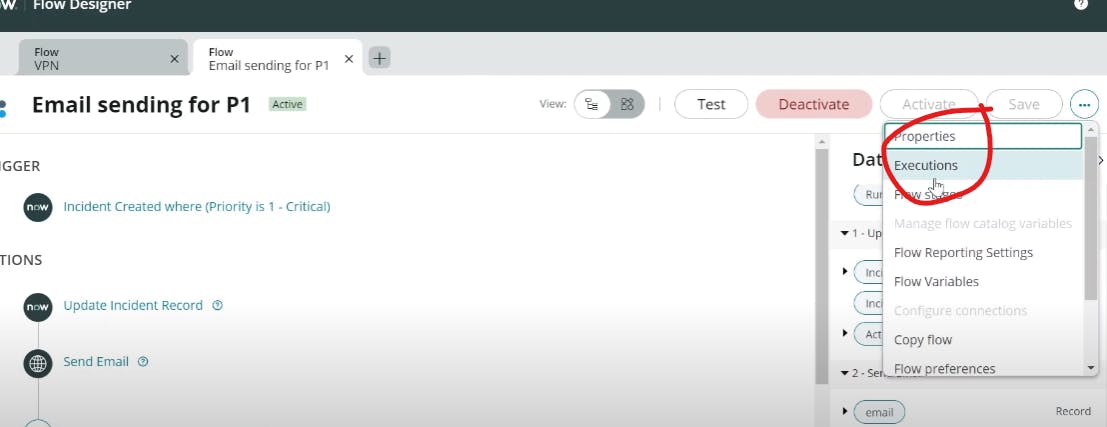
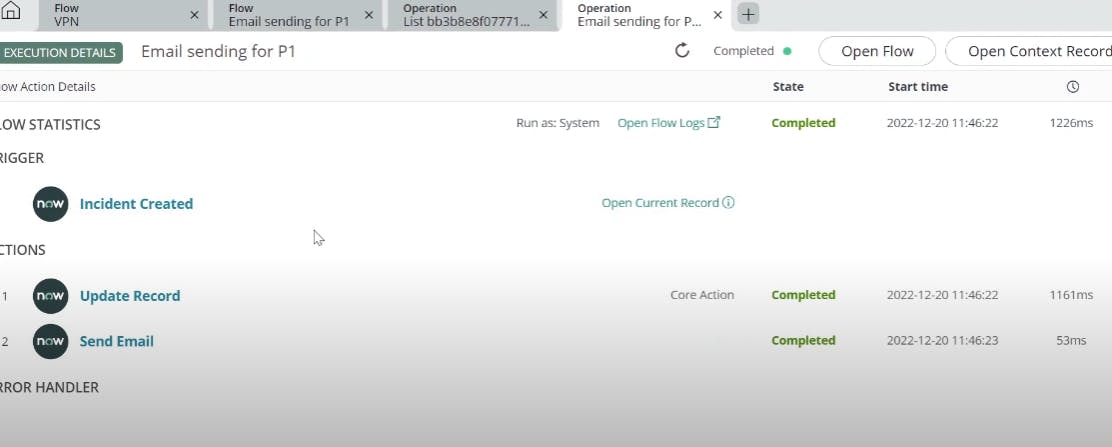
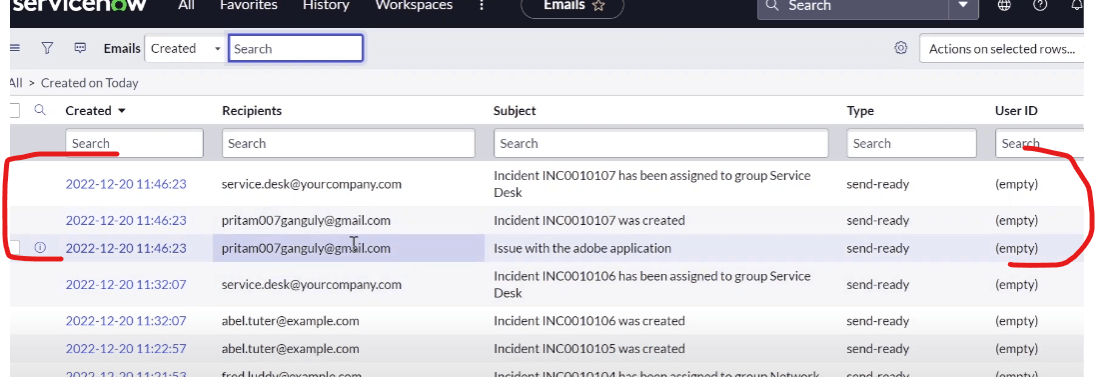
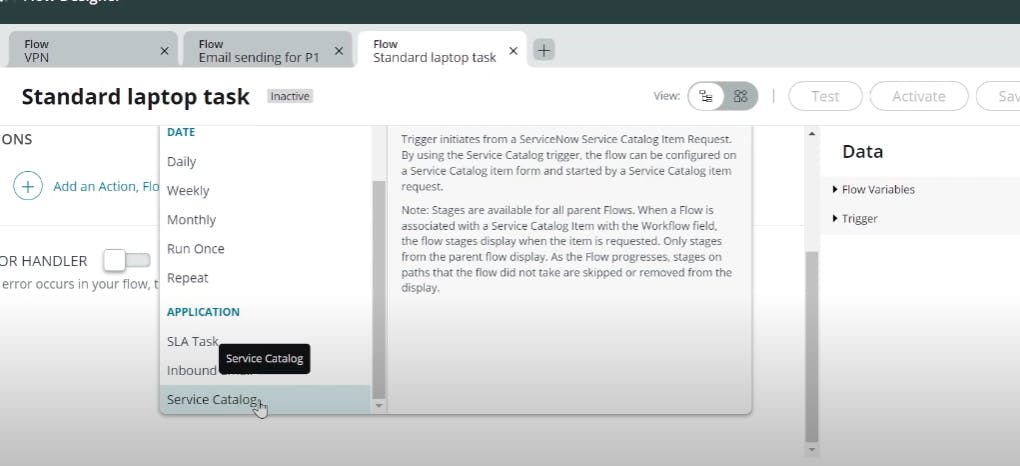
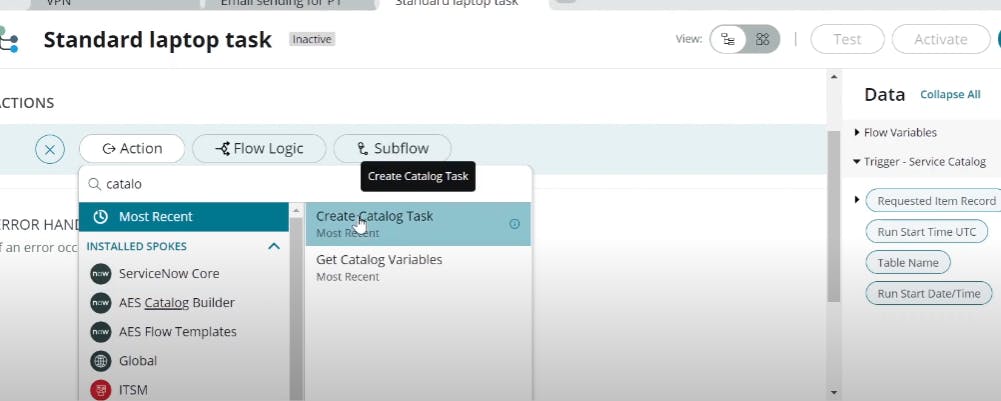
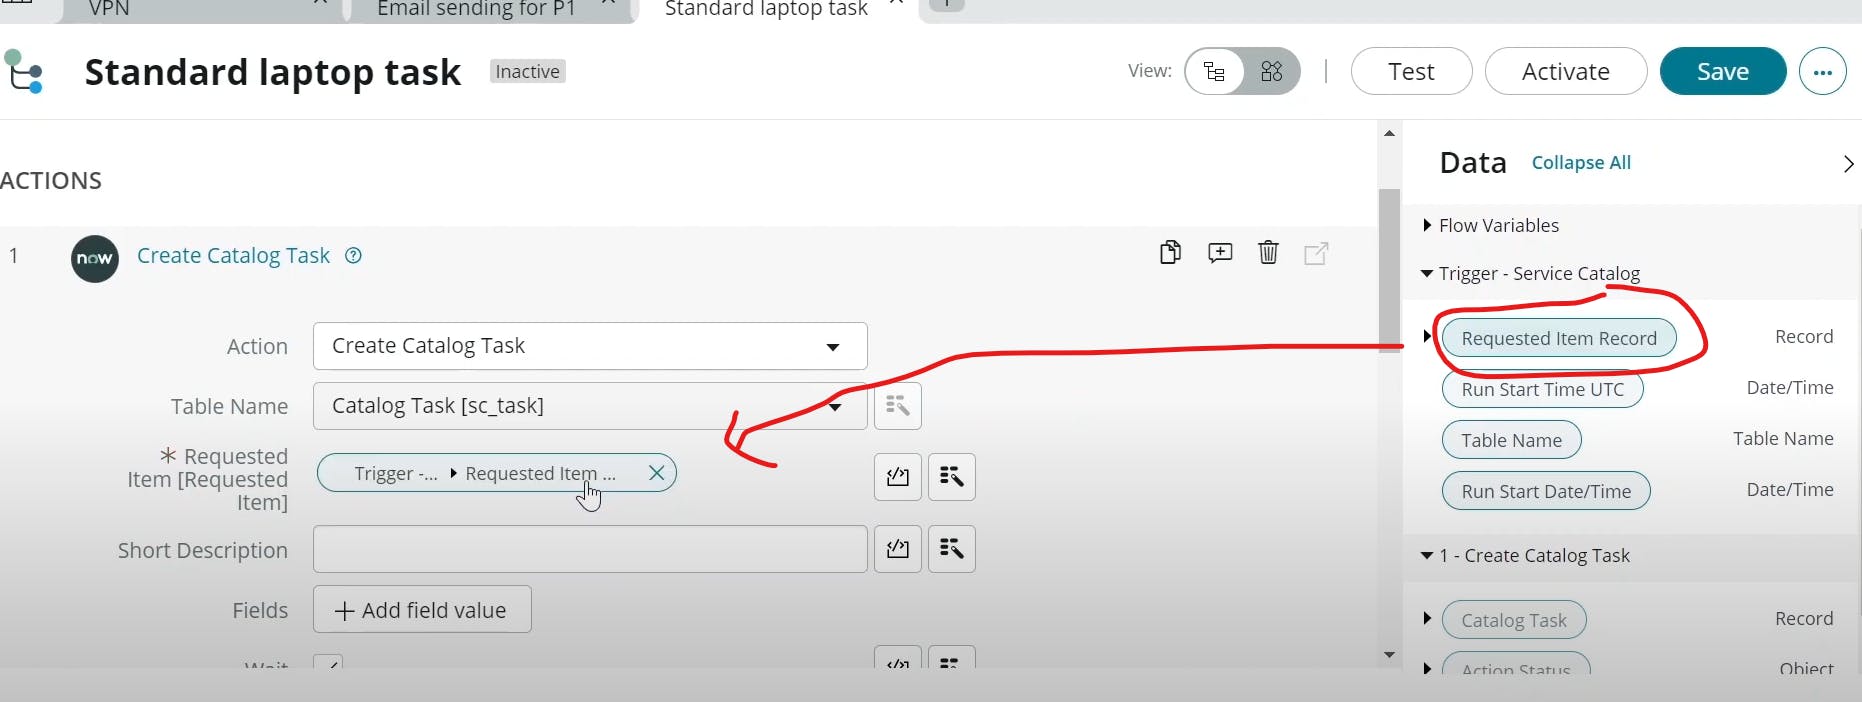
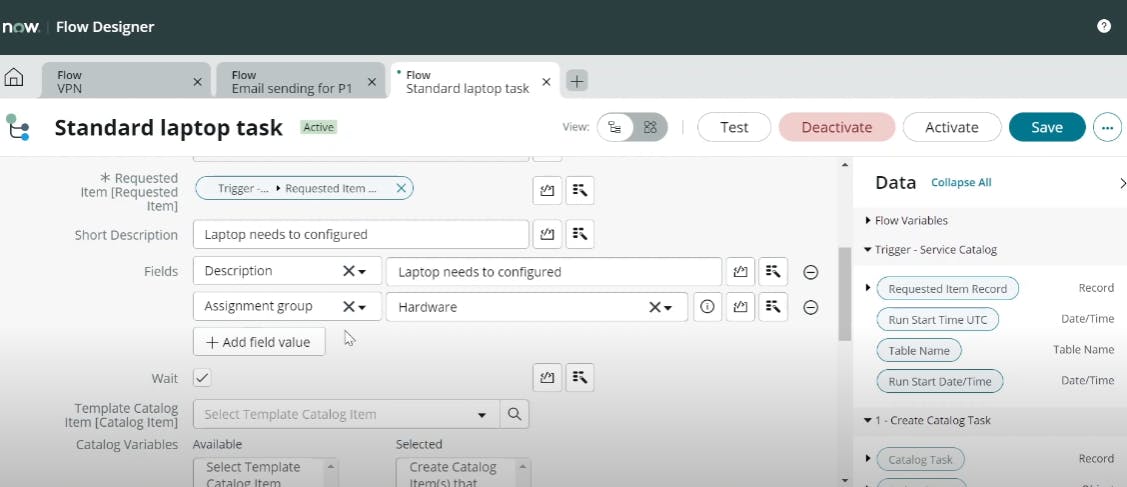
PermalinkFlow Designer


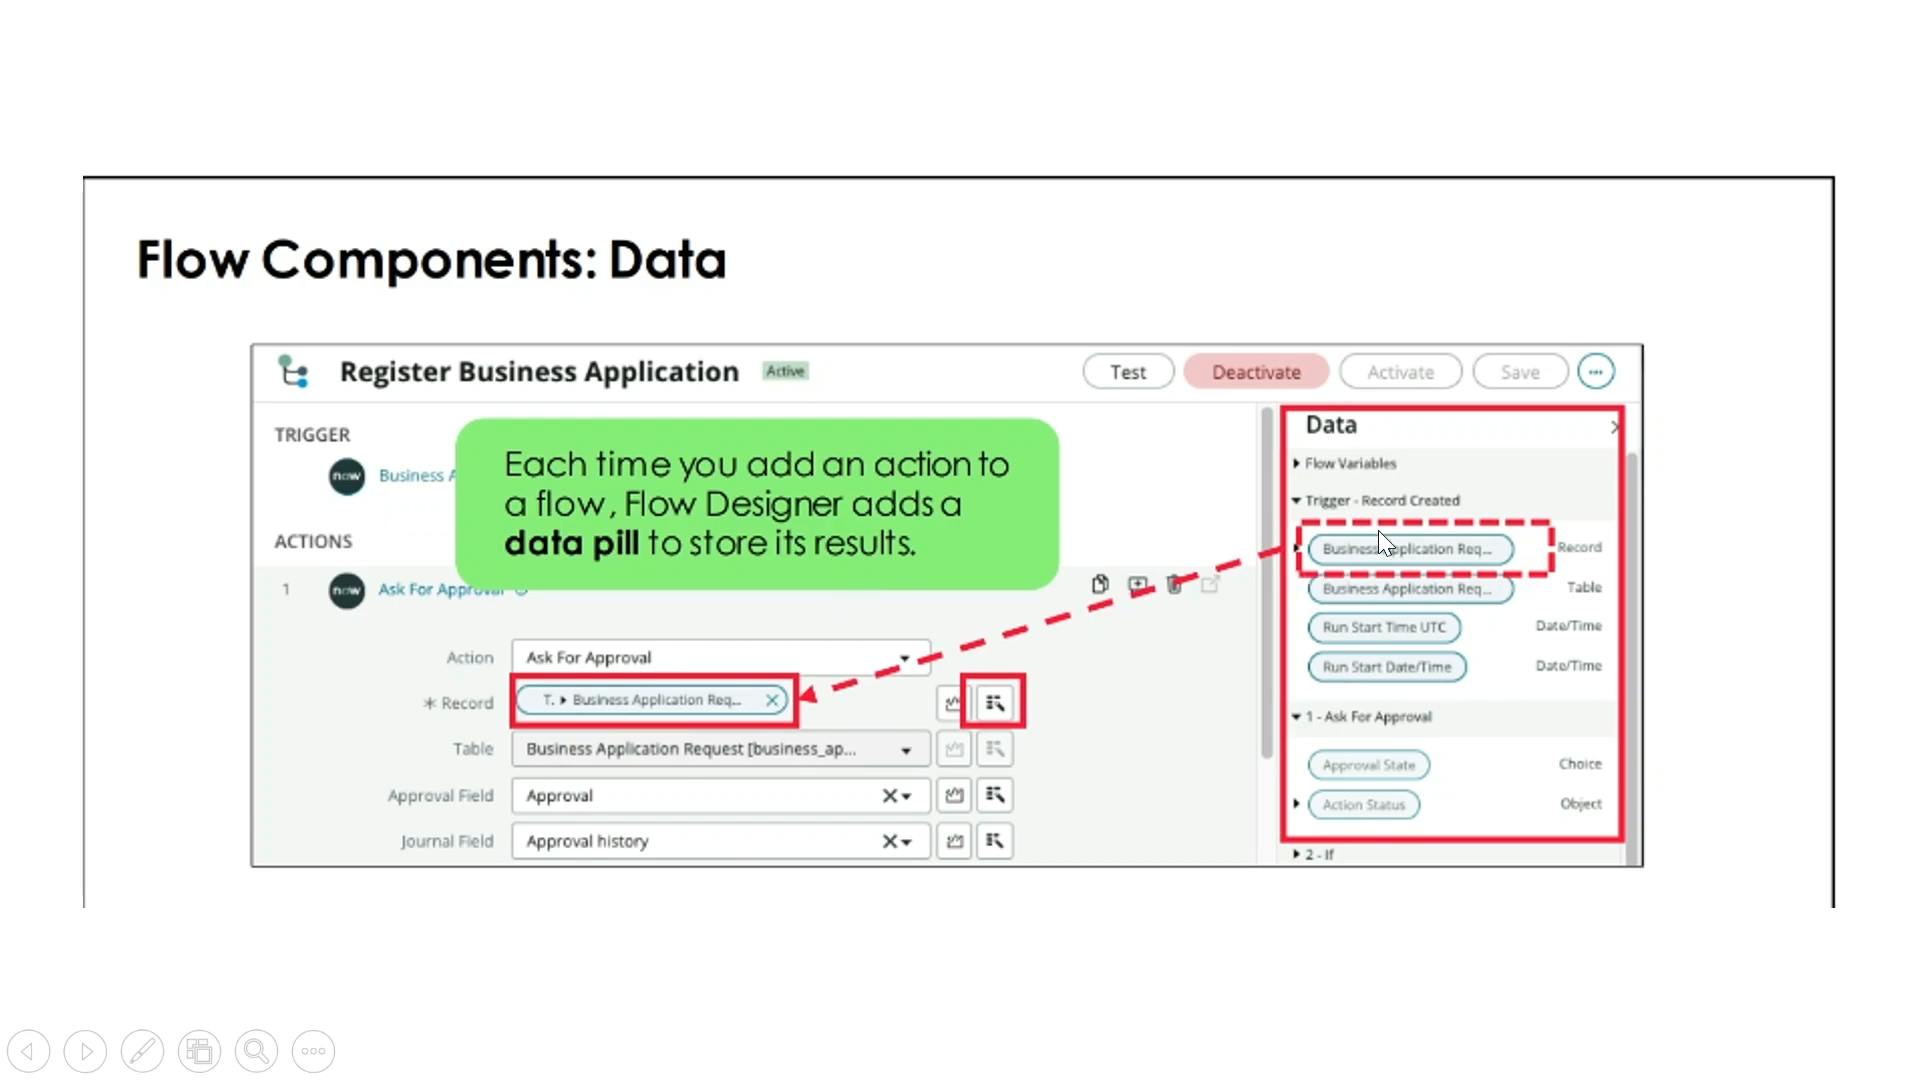
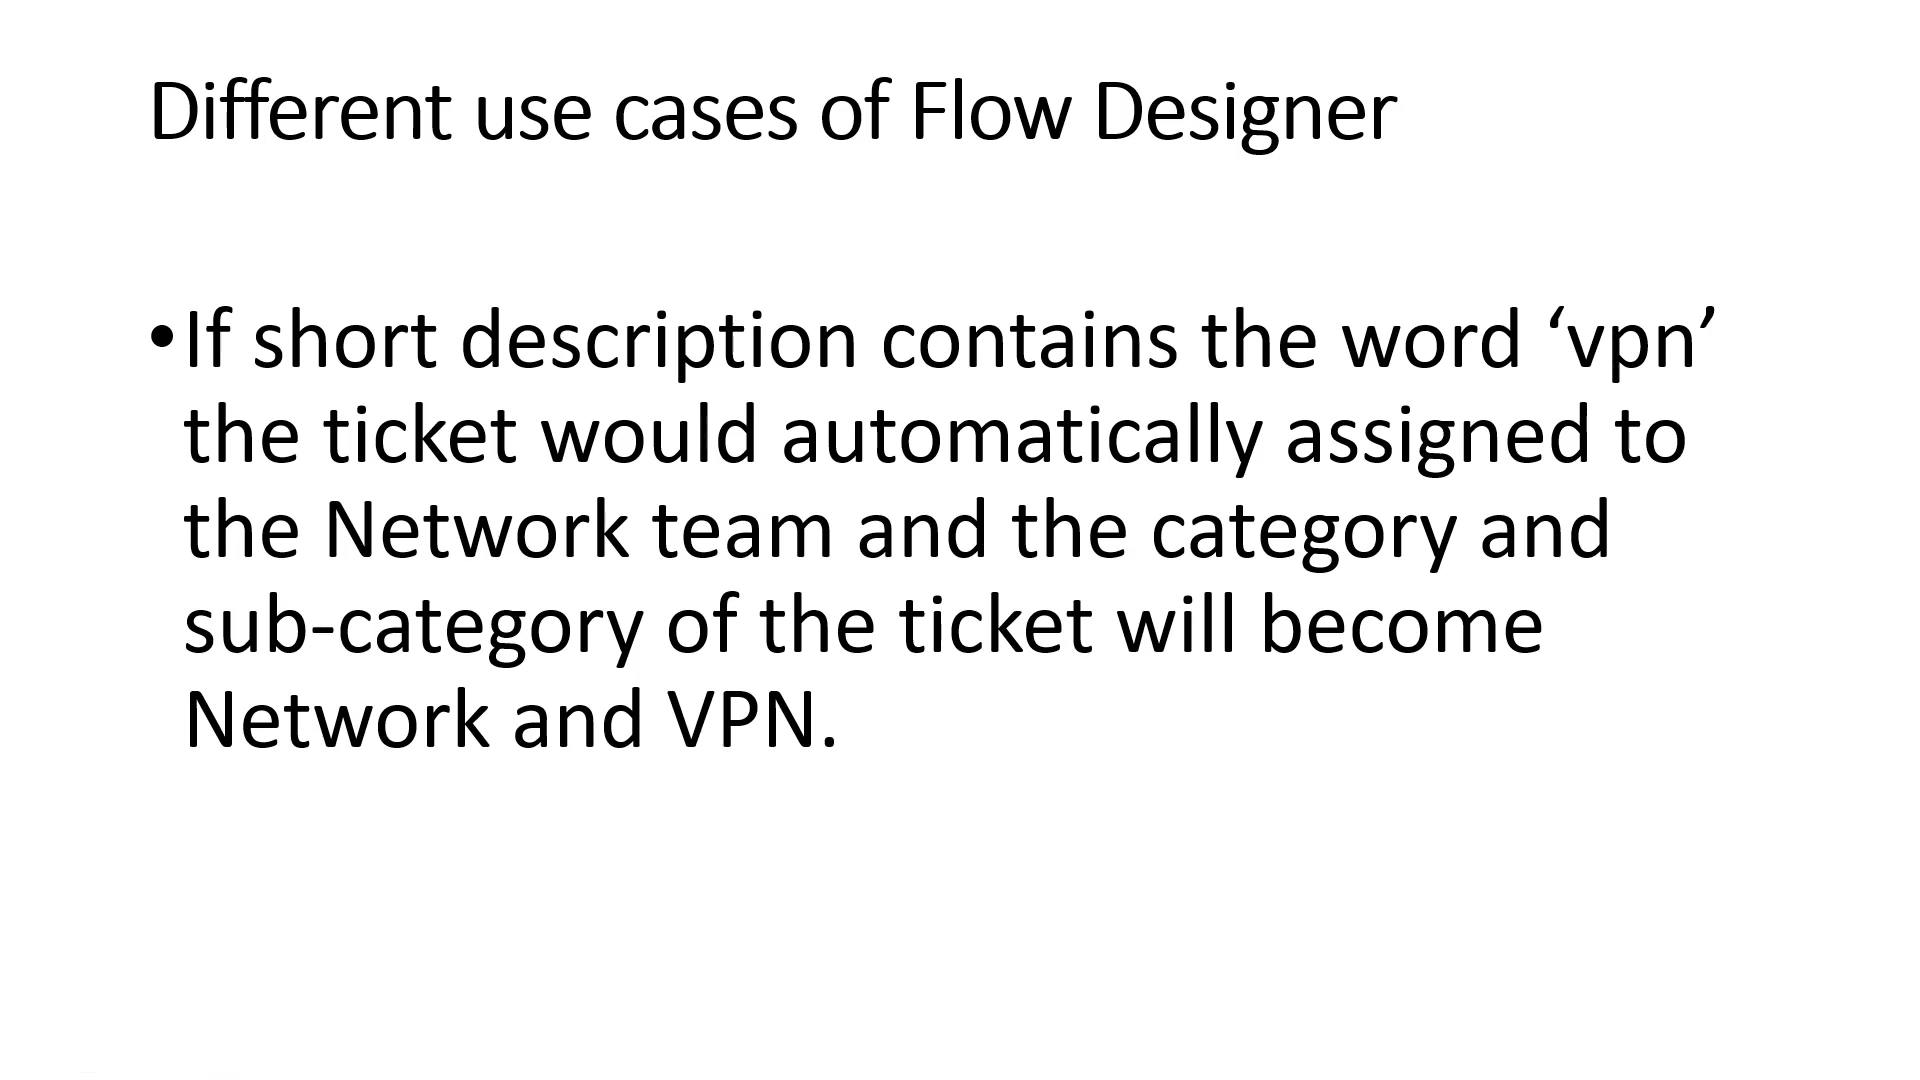
PermalinkDifferent use cases of Flow Designer
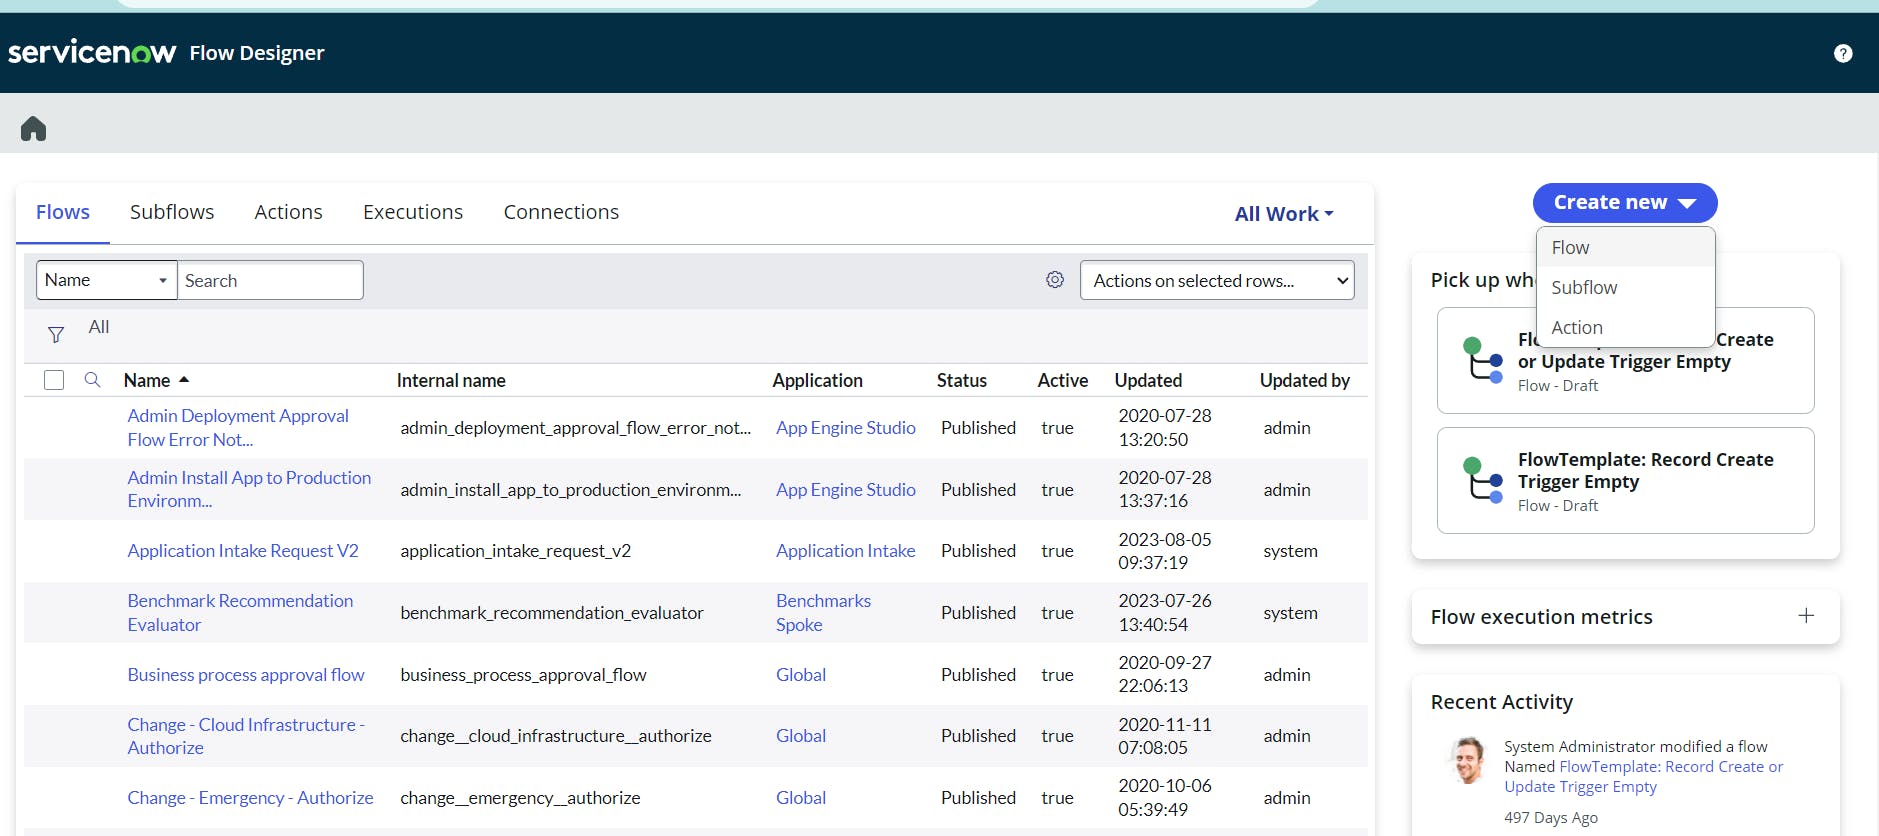


you can check like this

activate it then

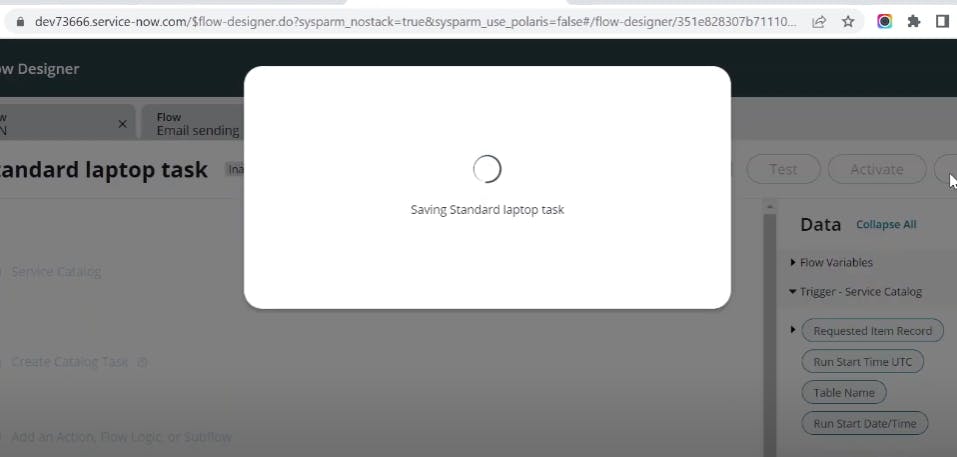
save it
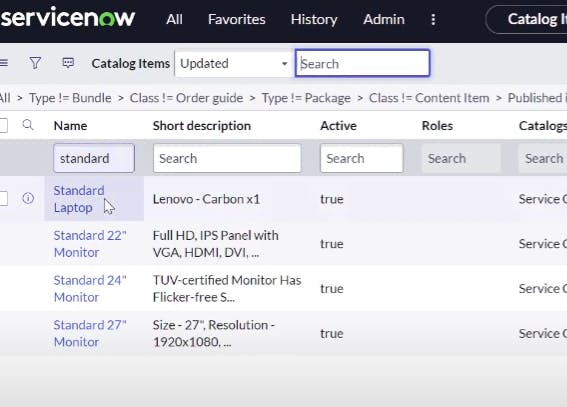
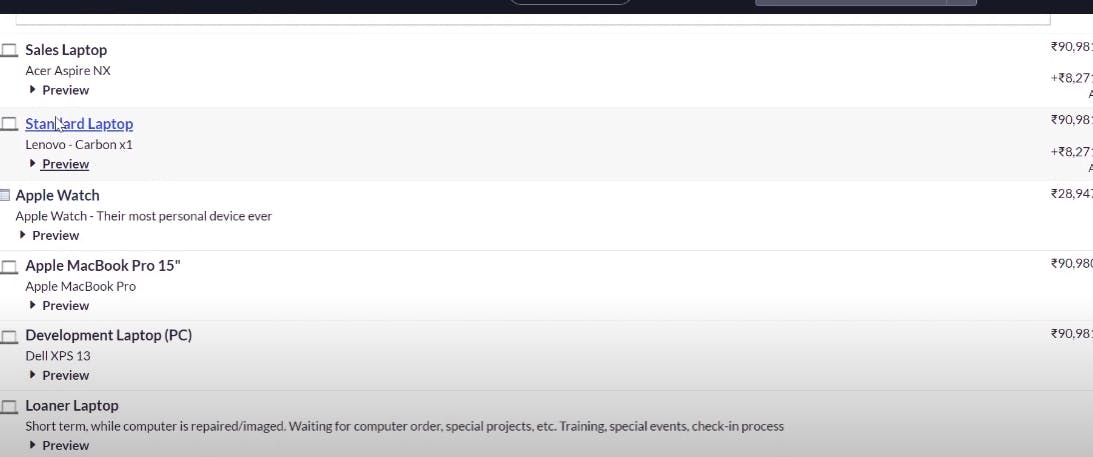
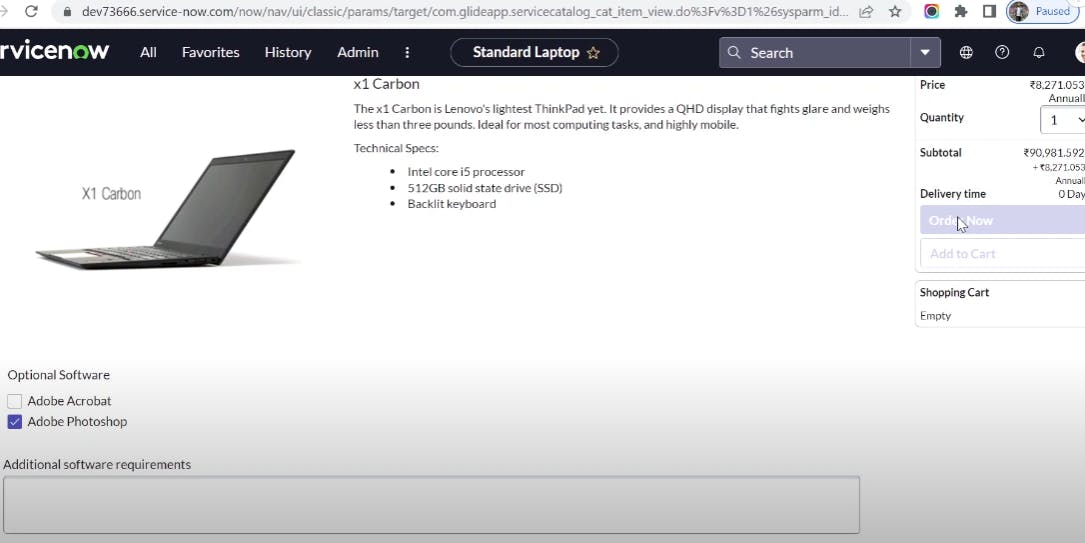
select hardware then select standard laptop
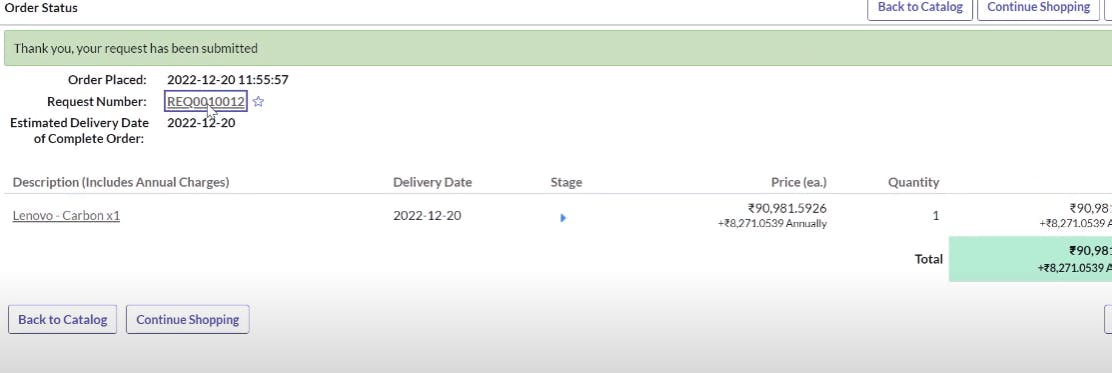
click approve and right click and approve

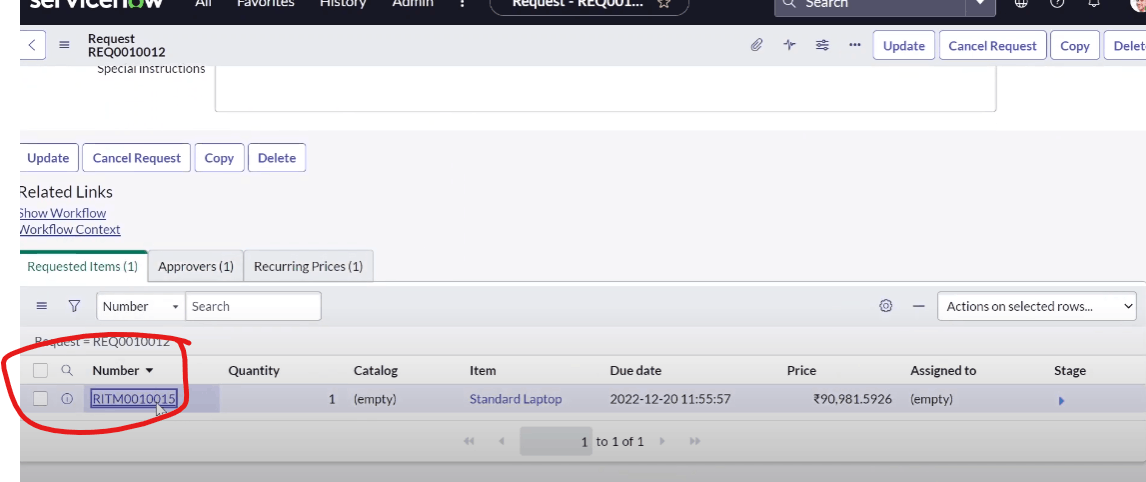
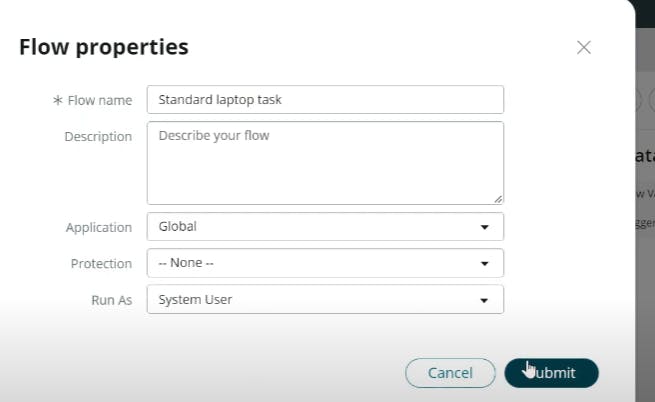
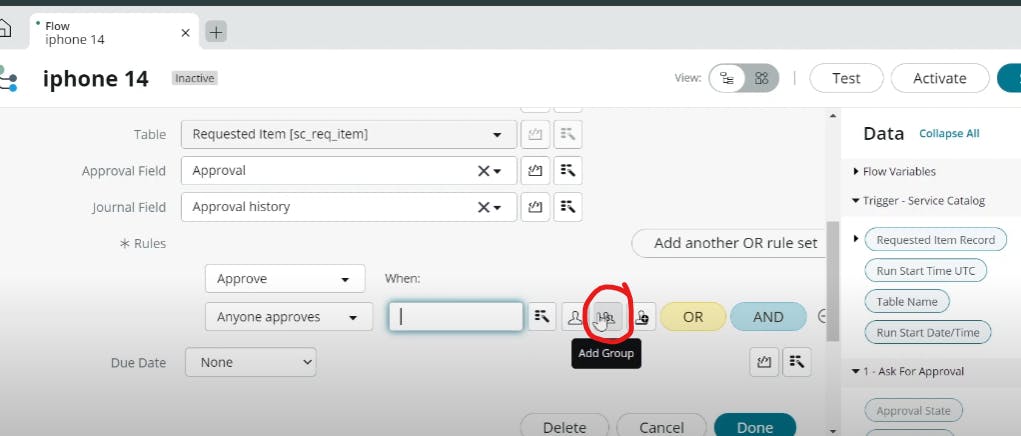
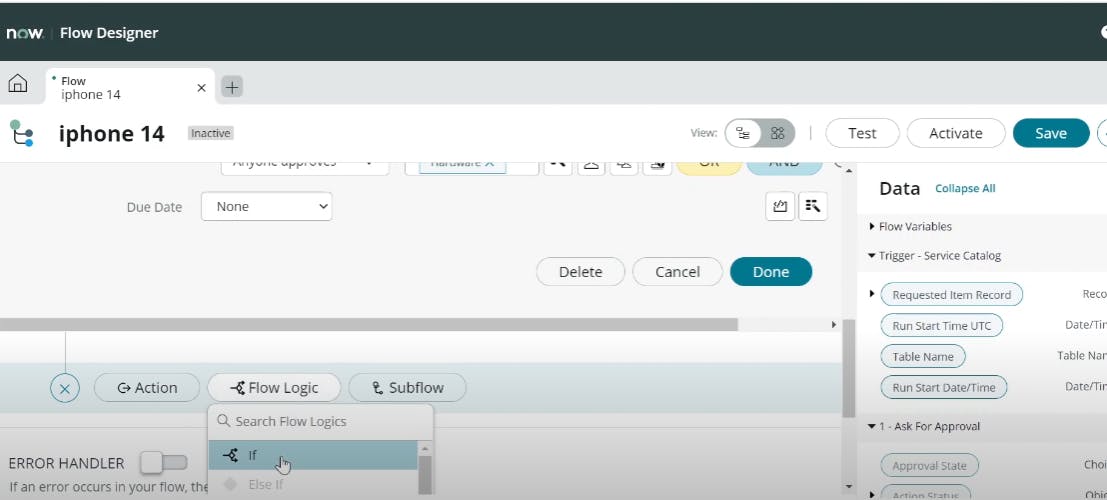
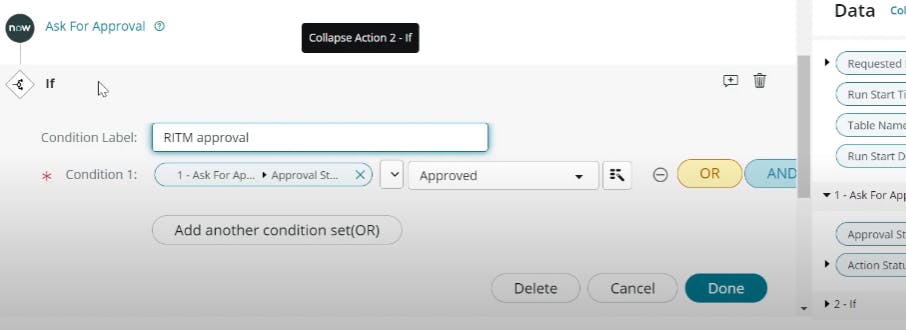
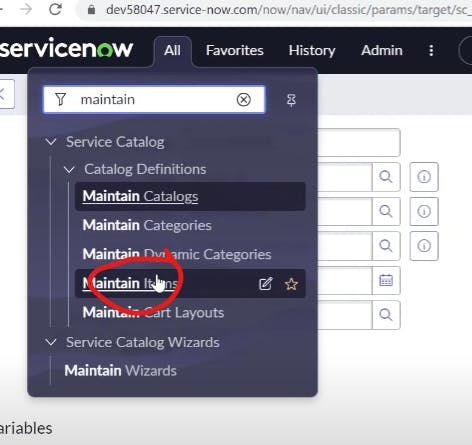
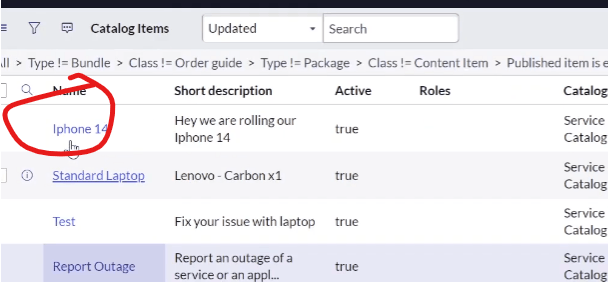
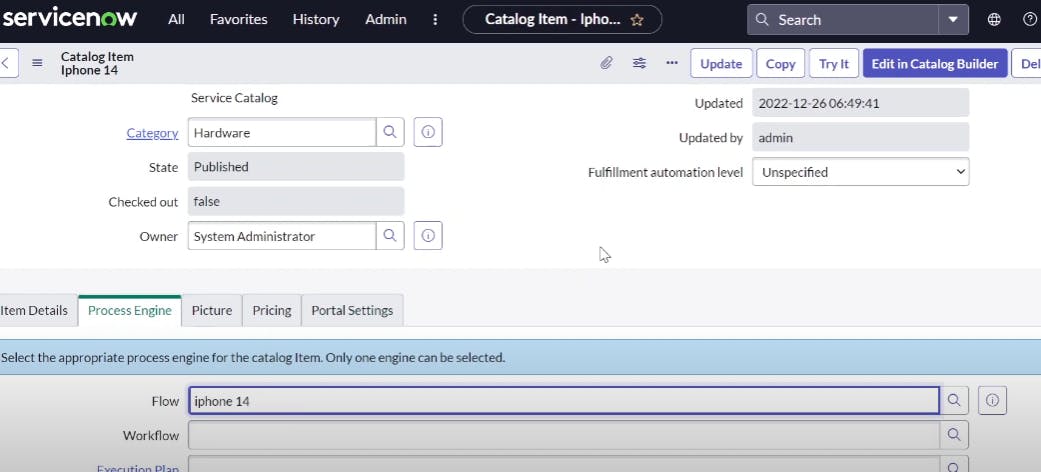
PermalinkCreate new Flow for Iphone 14 Catalog Item

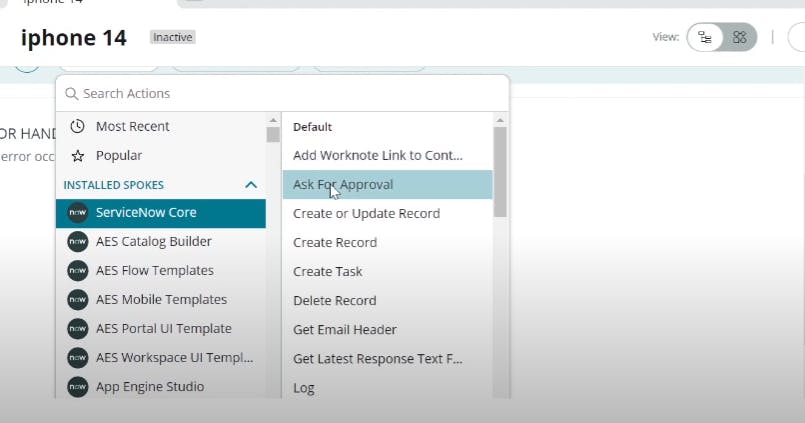
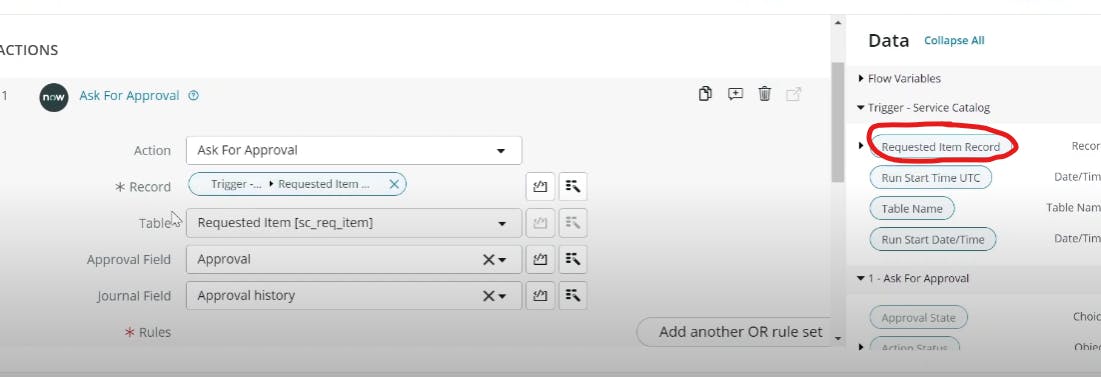
add hardware group (anyone approves from hardware team)
if approval state is approved then
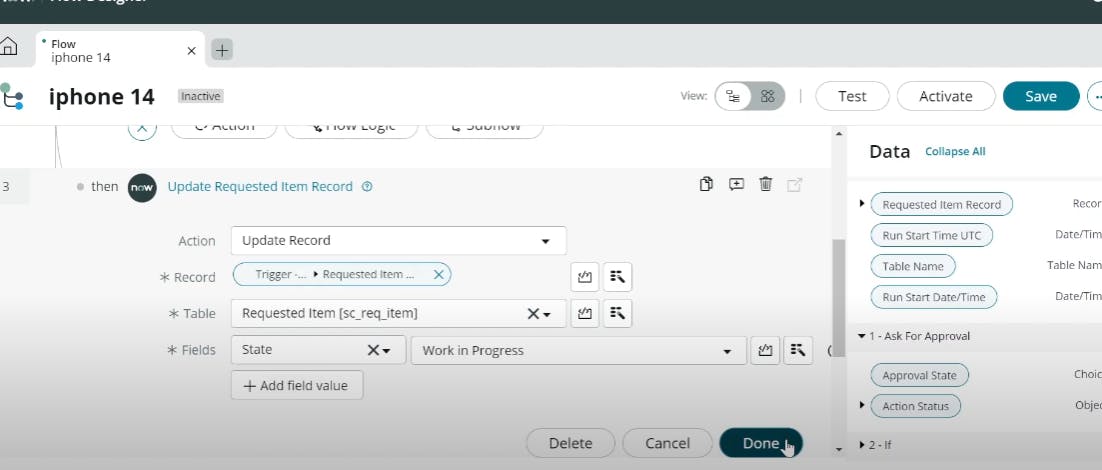


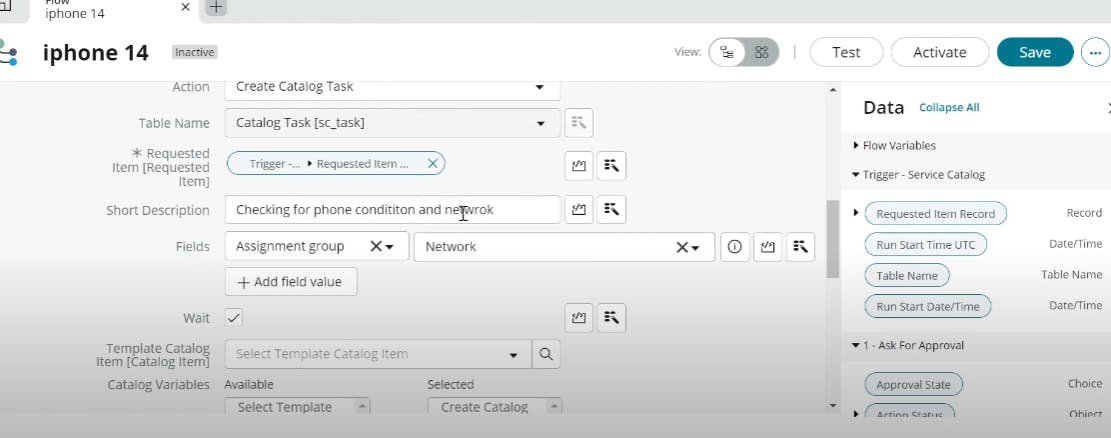
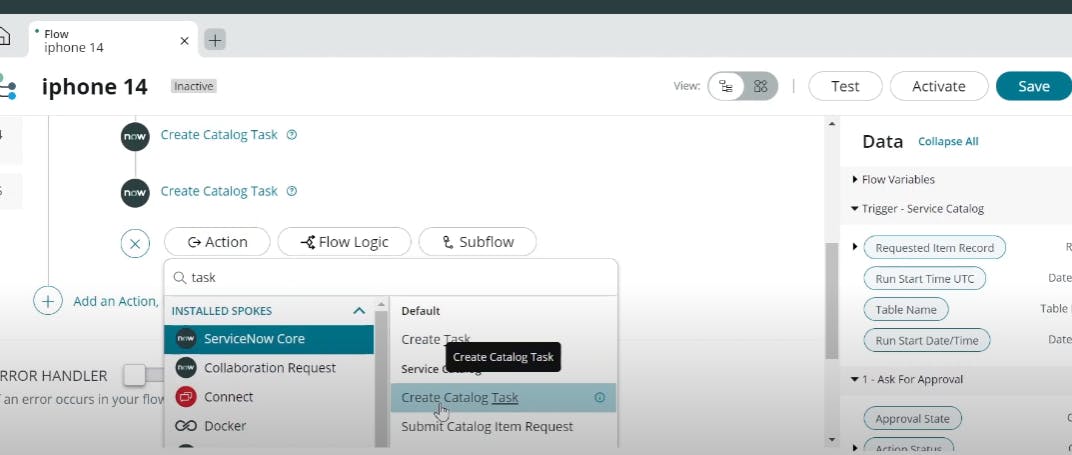
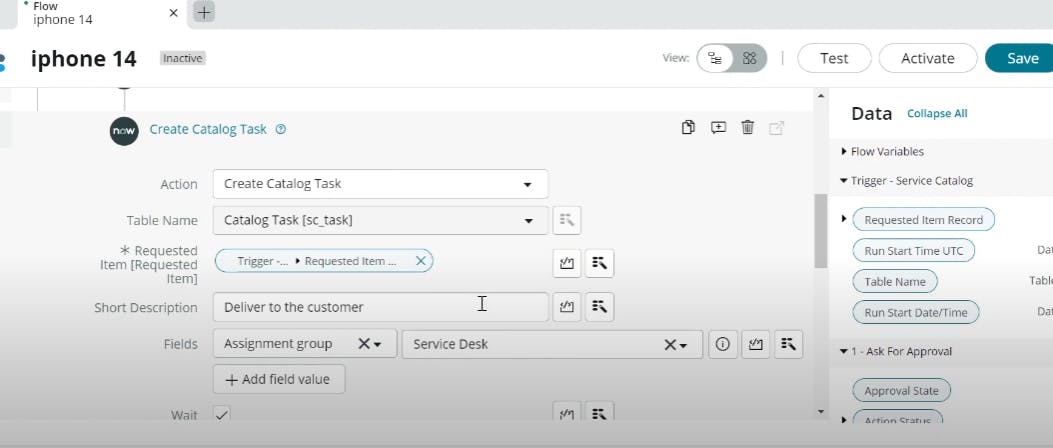
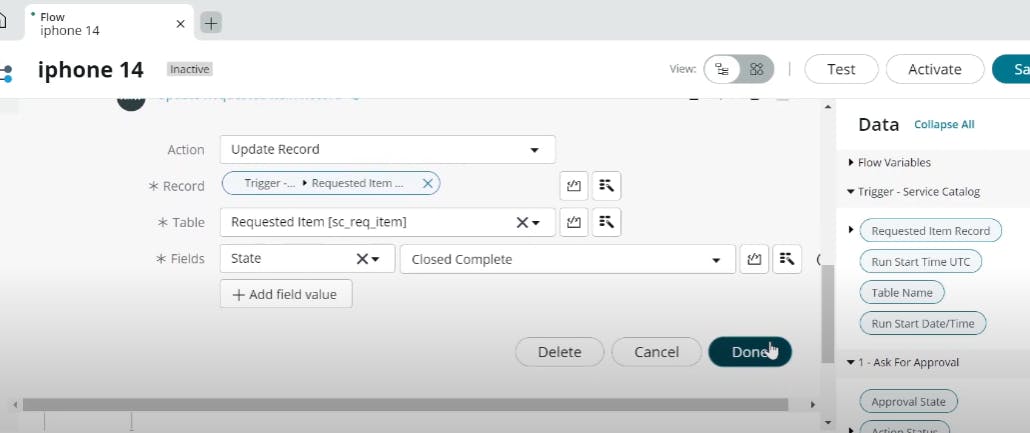
another
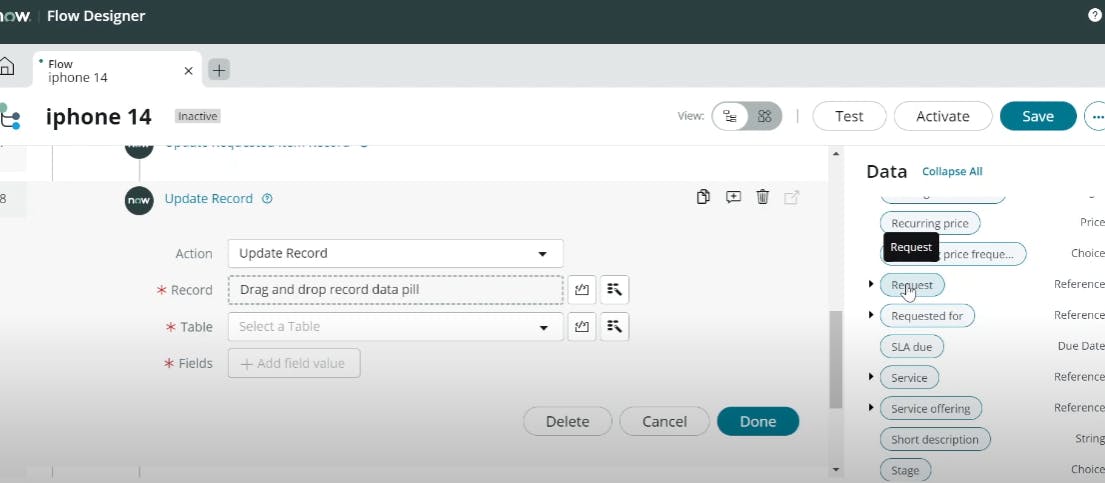

now test the flow
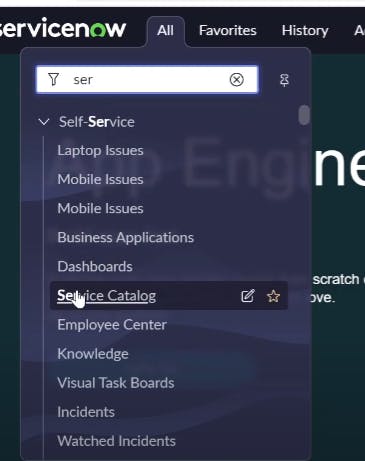
open service catalog
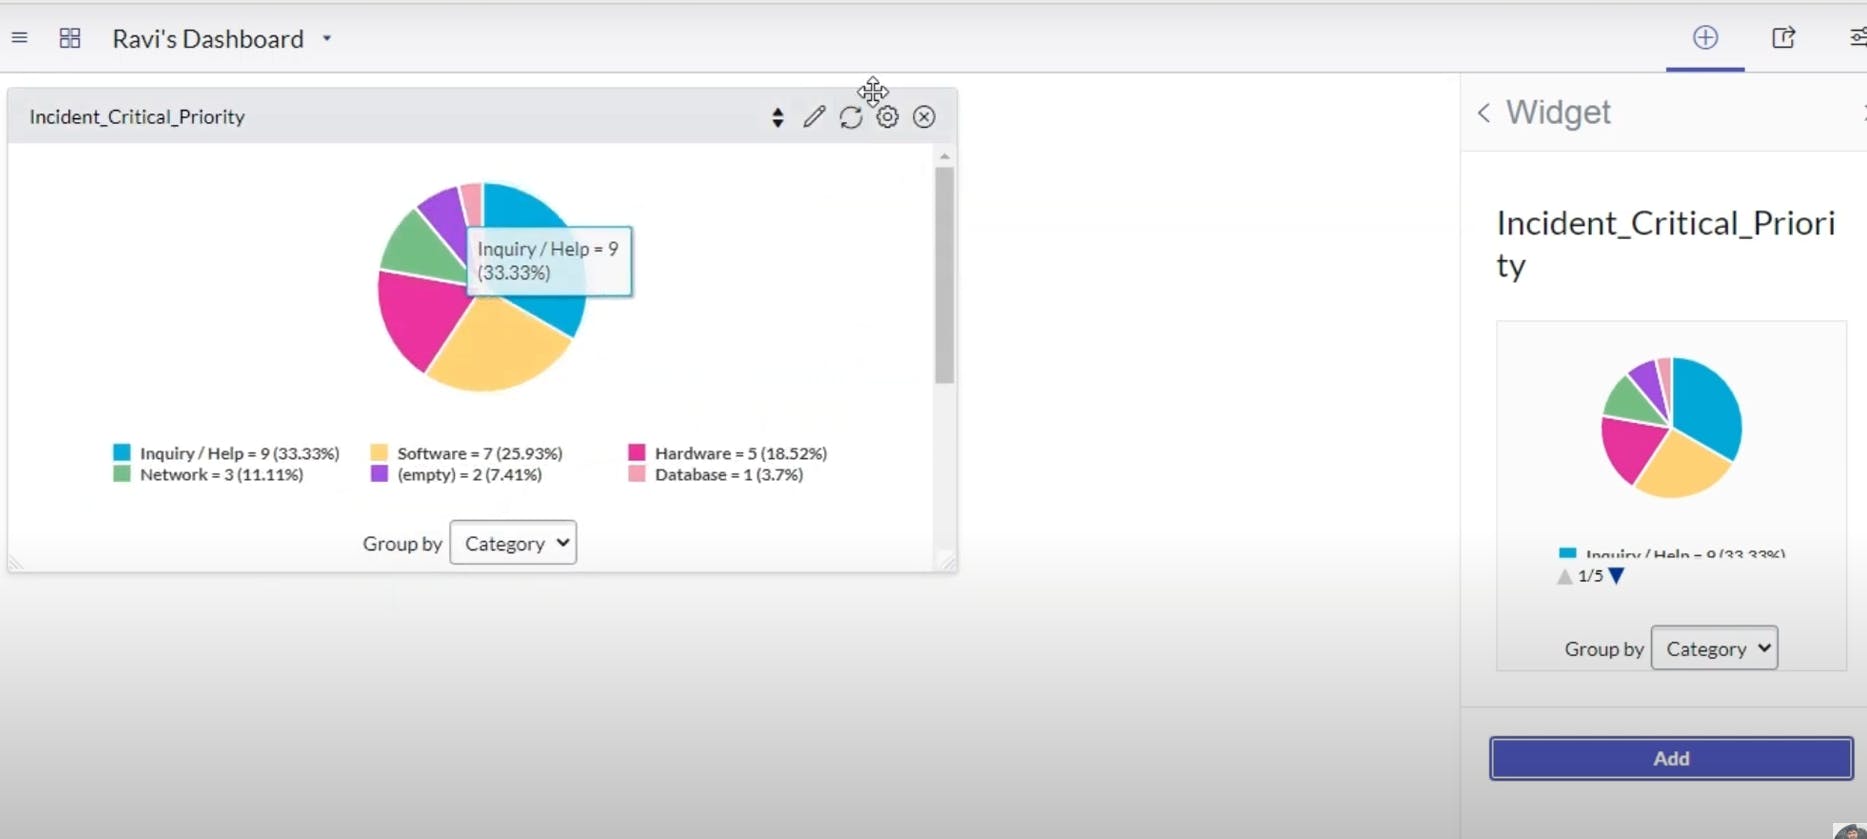
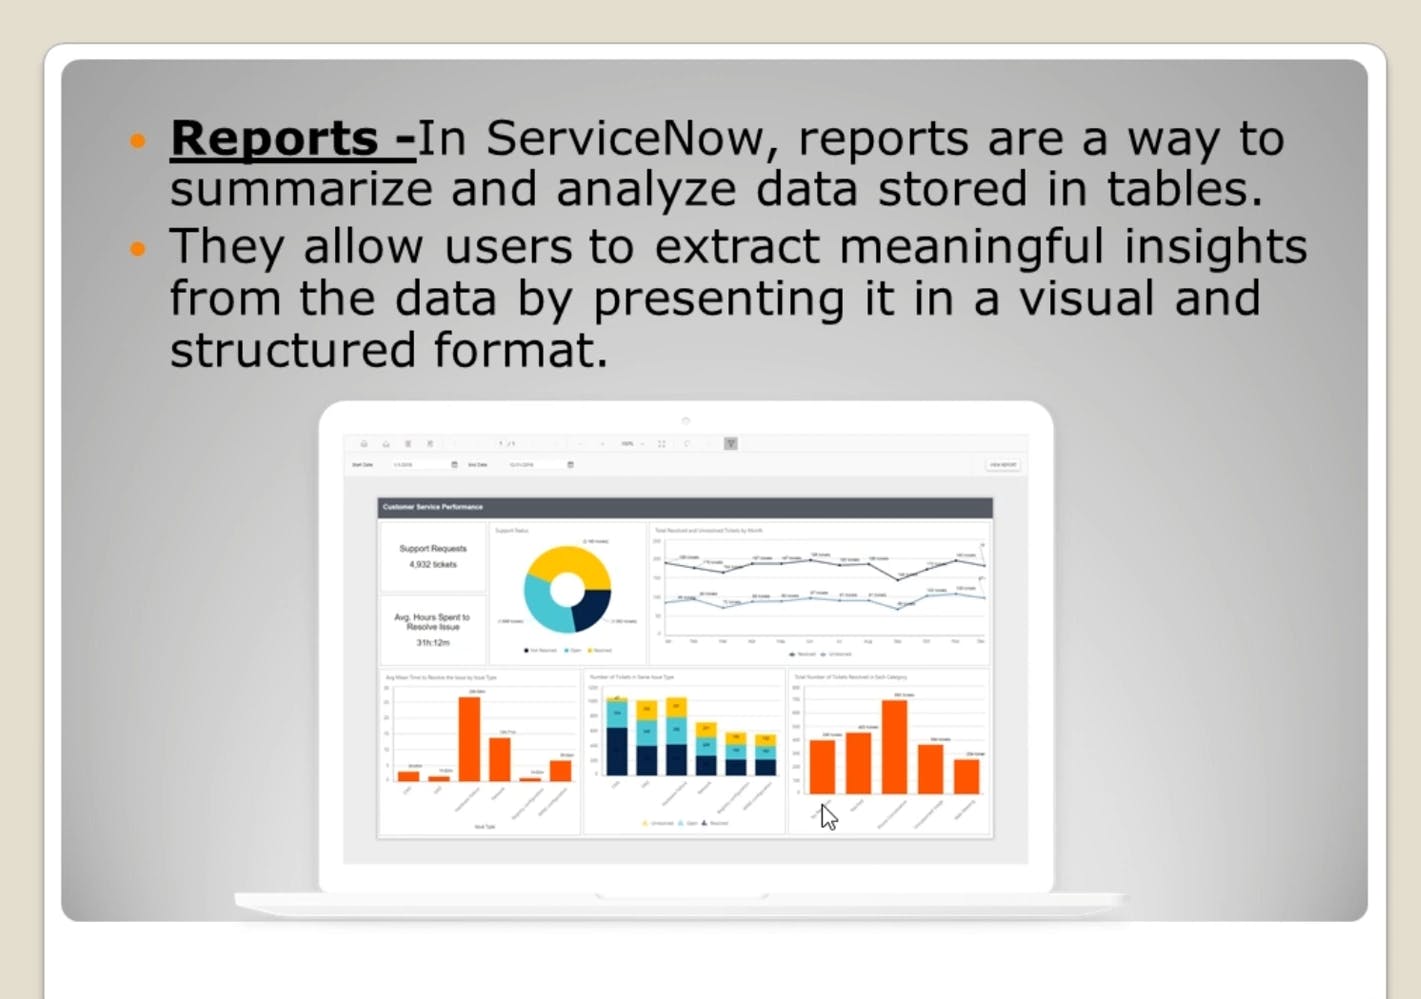
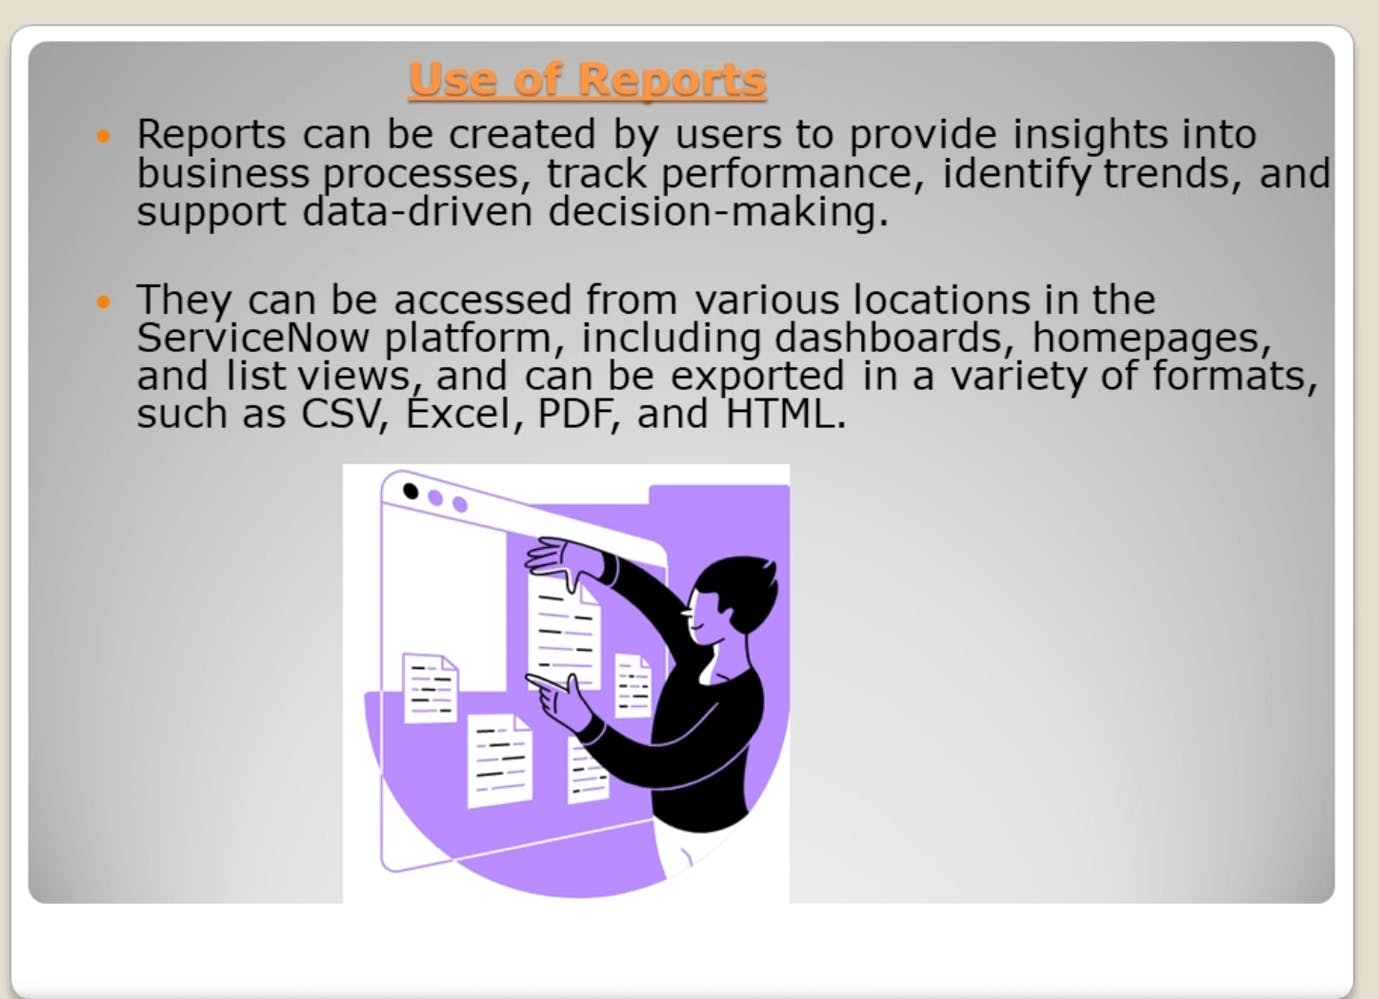
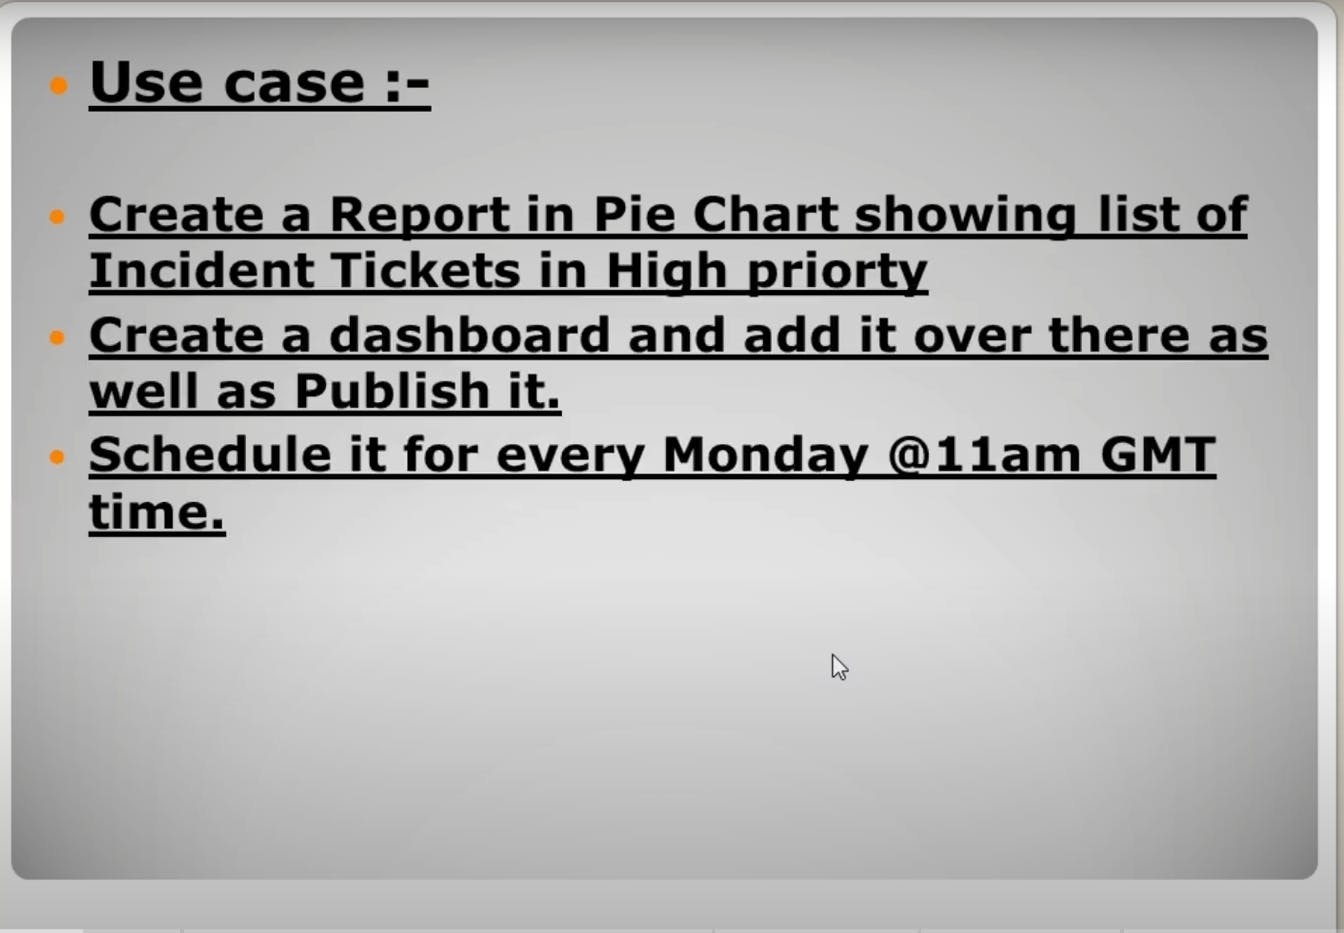
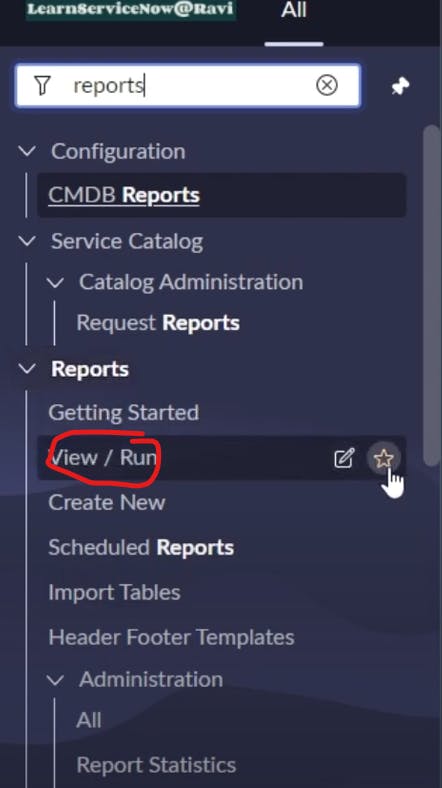
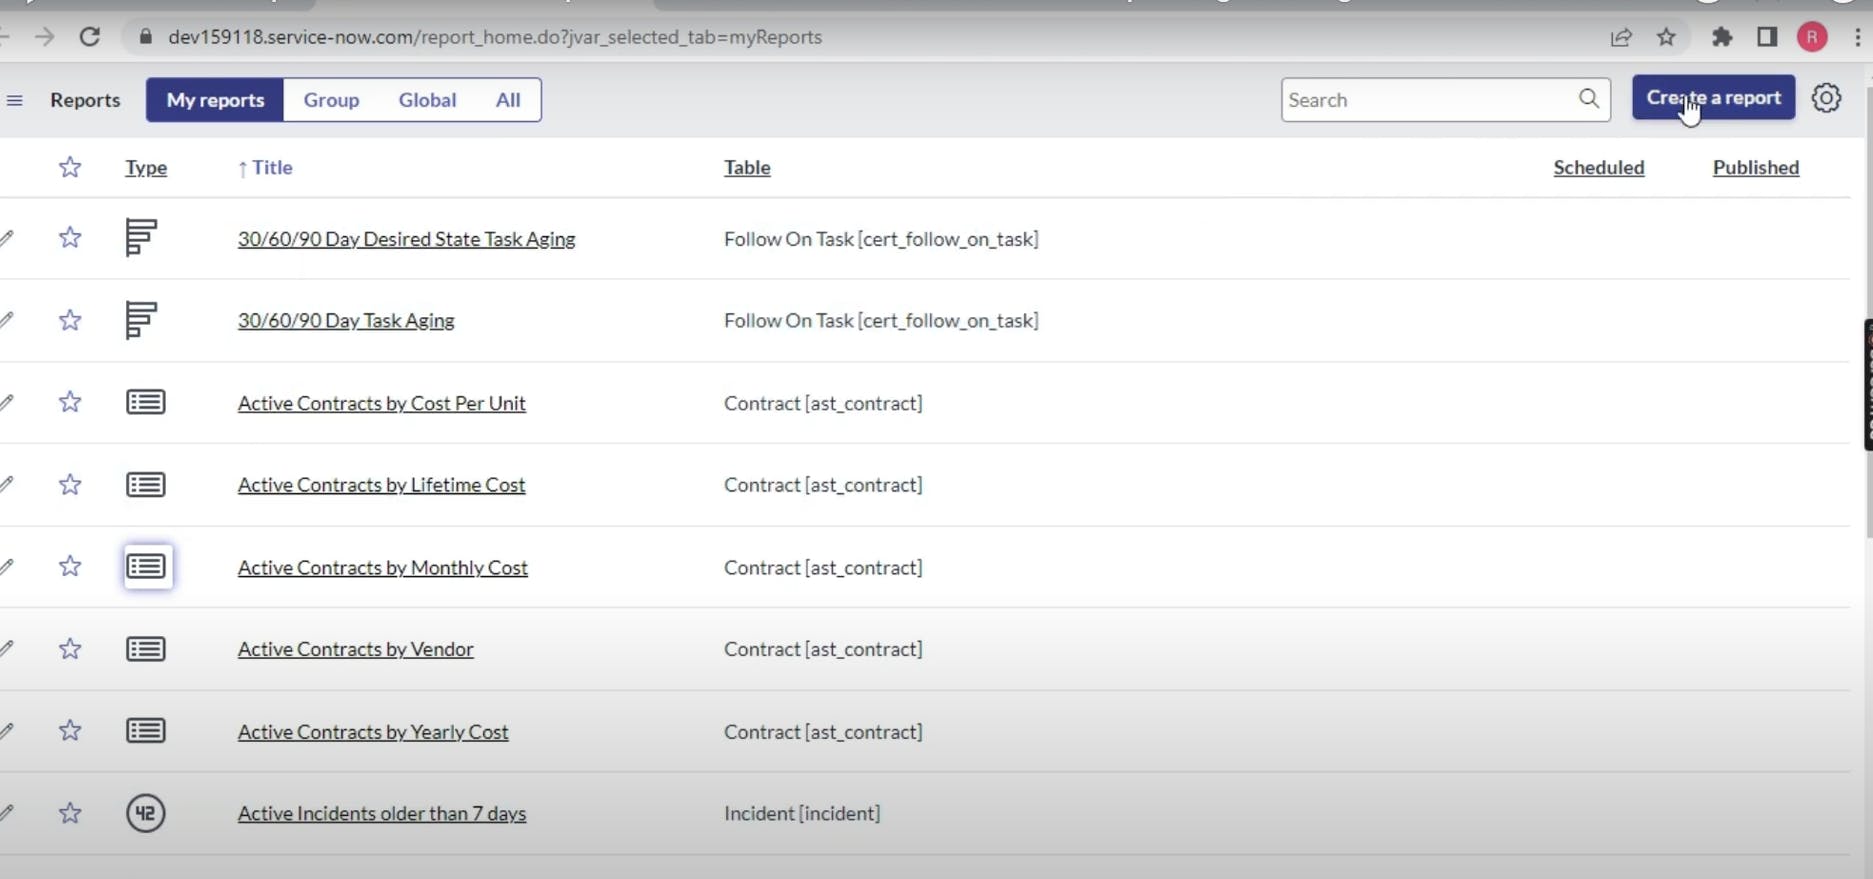
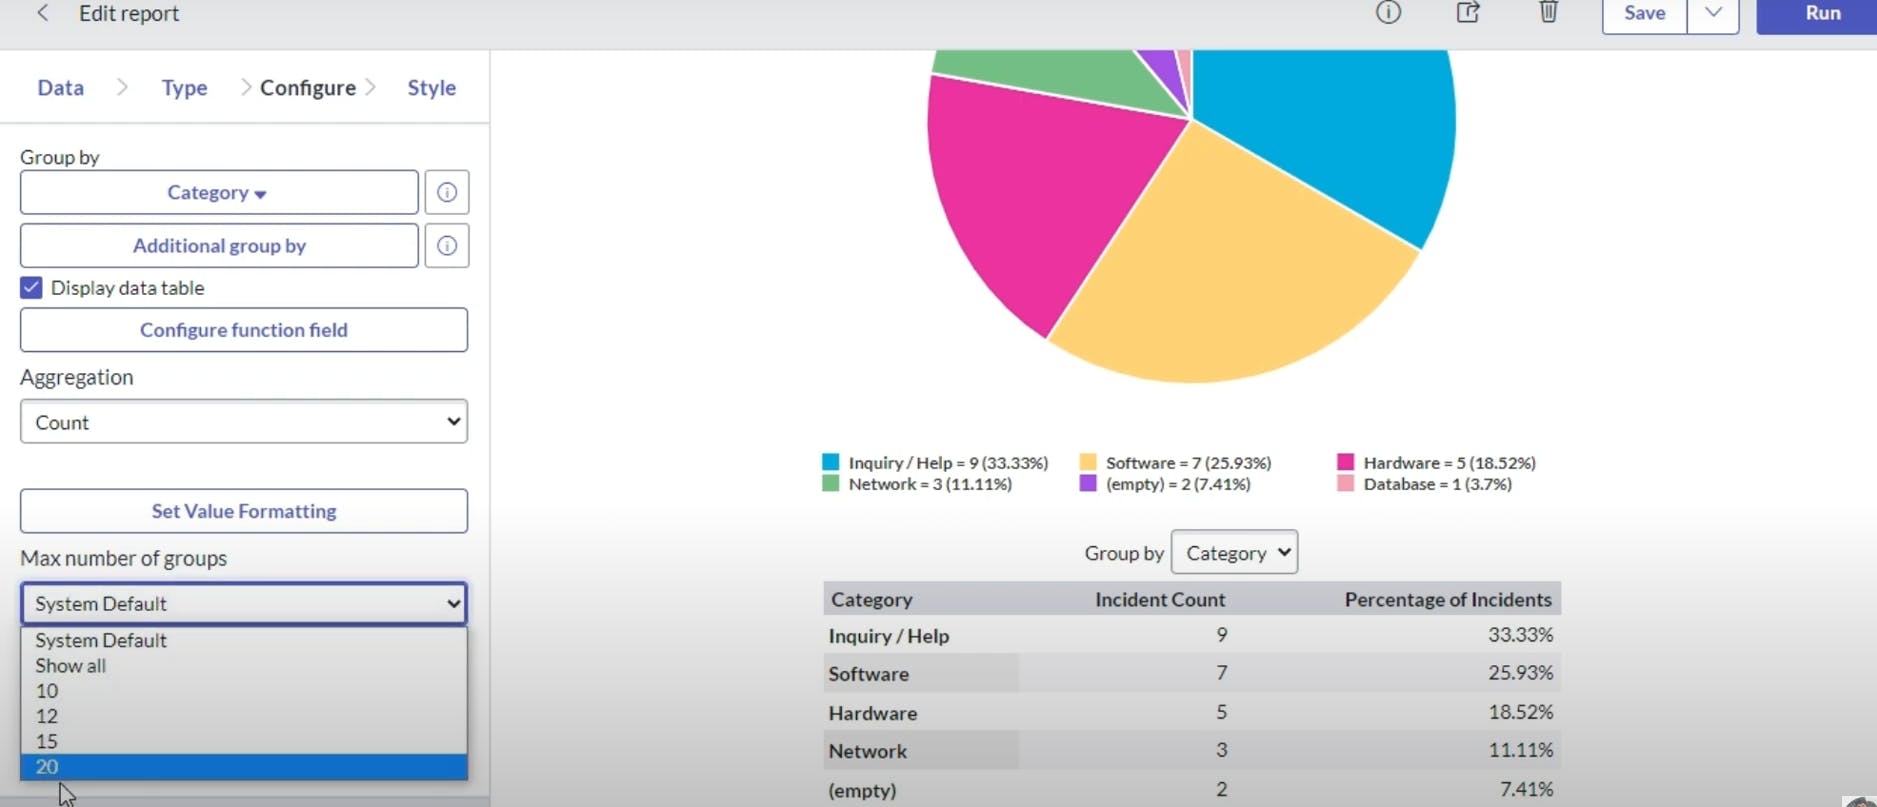
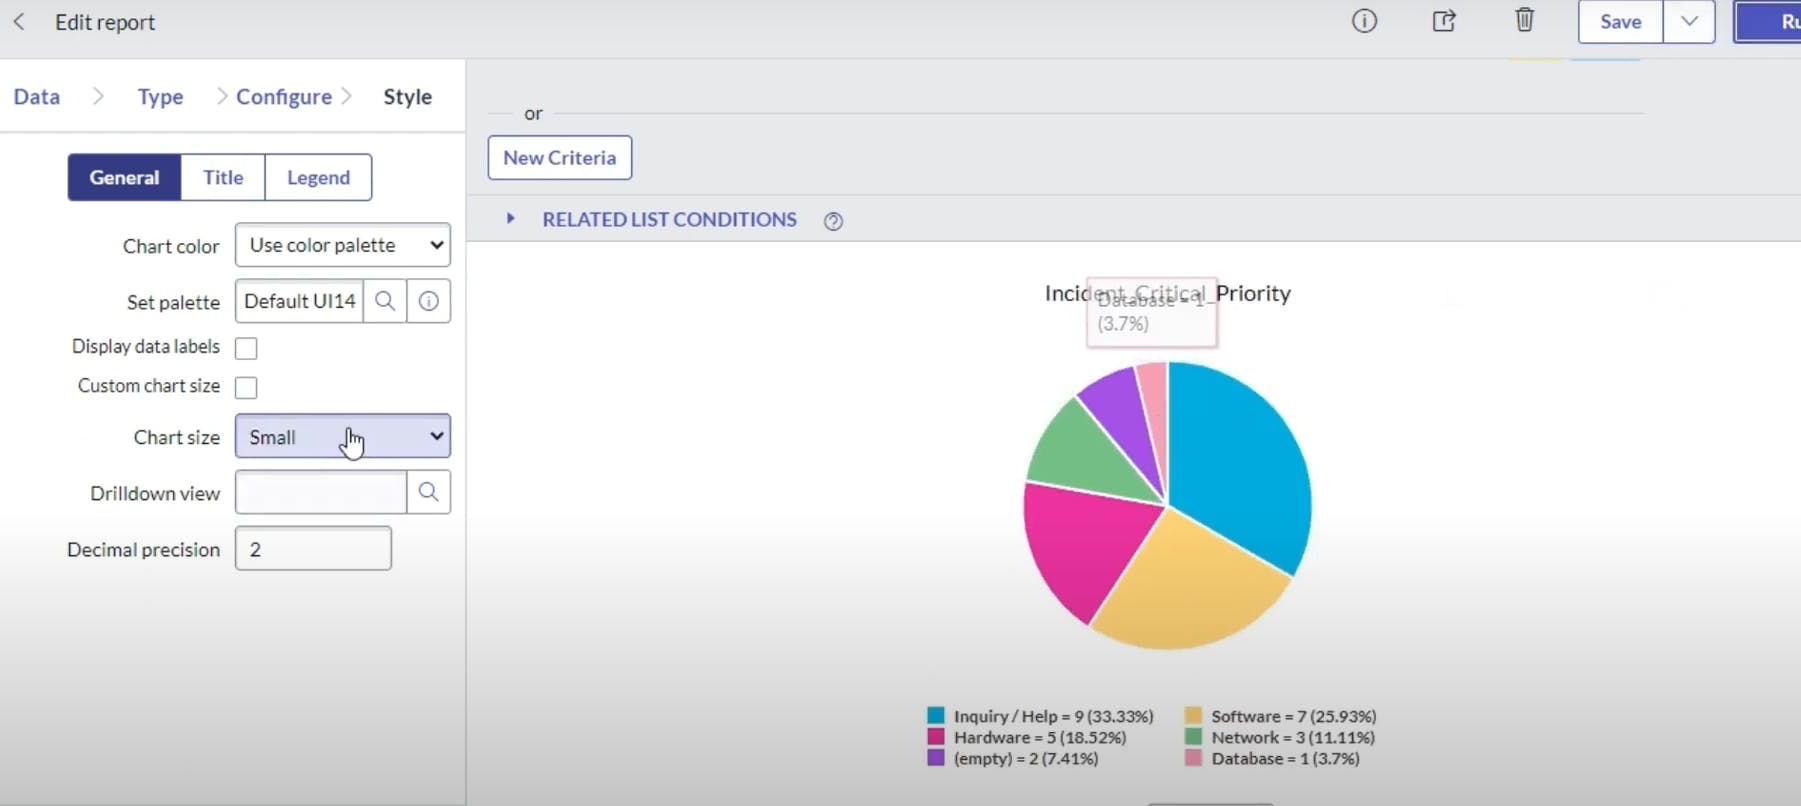
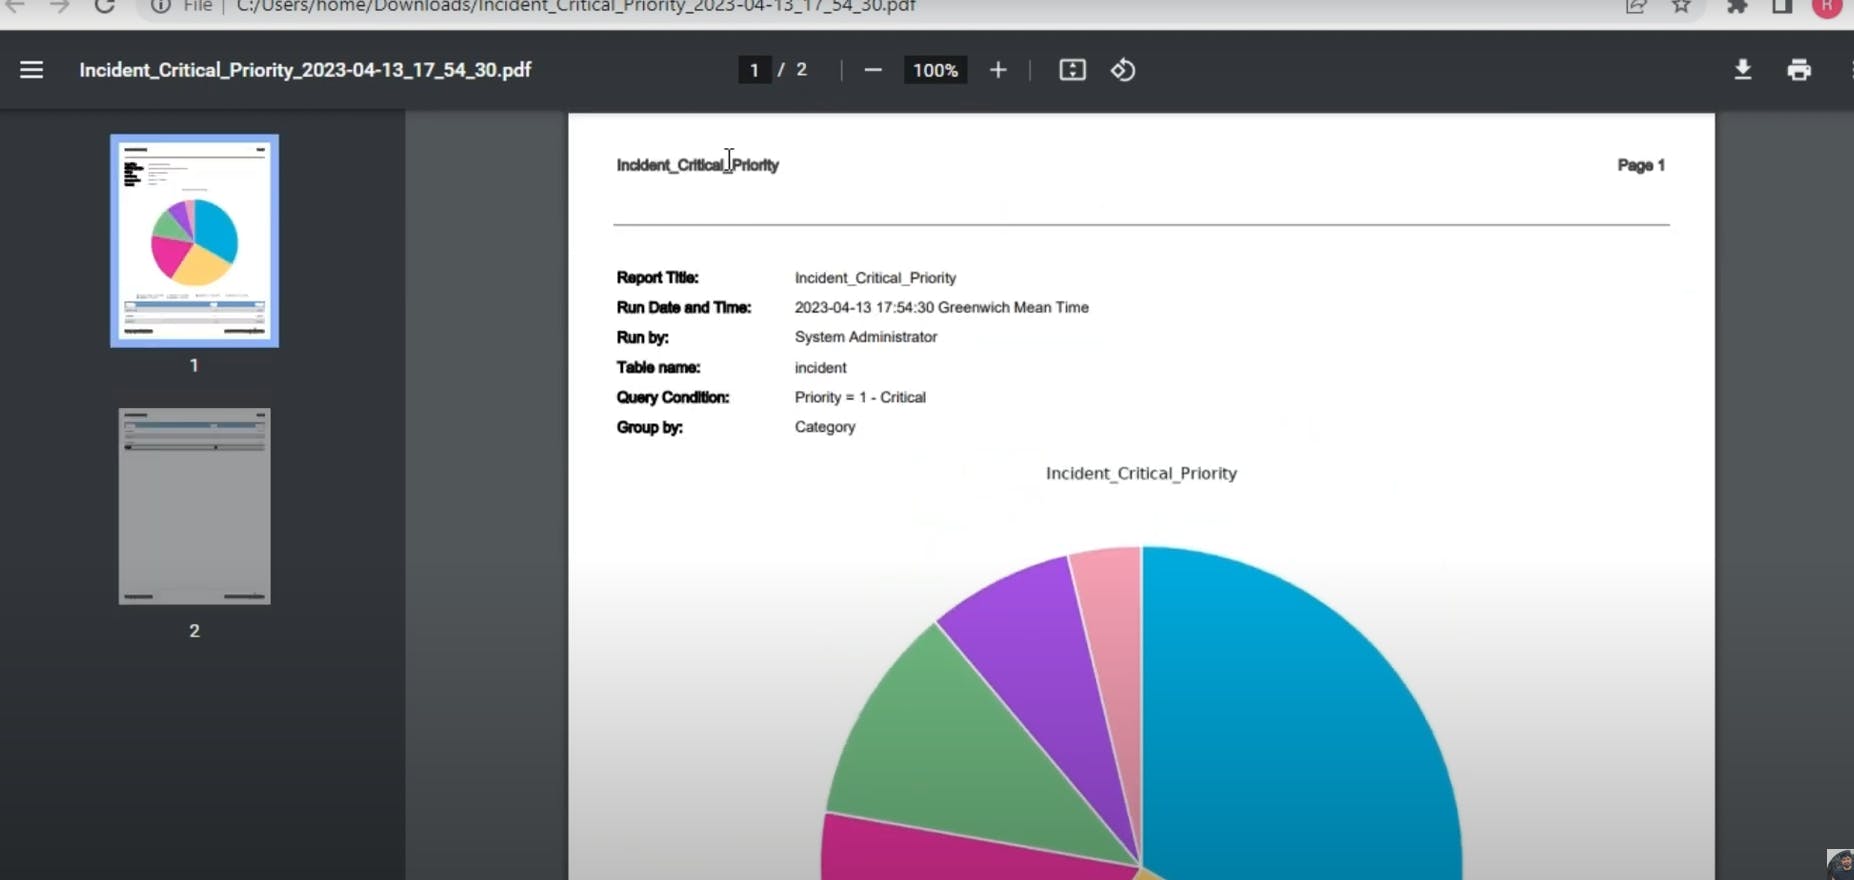
Permalinkservicenow reports and dashboards
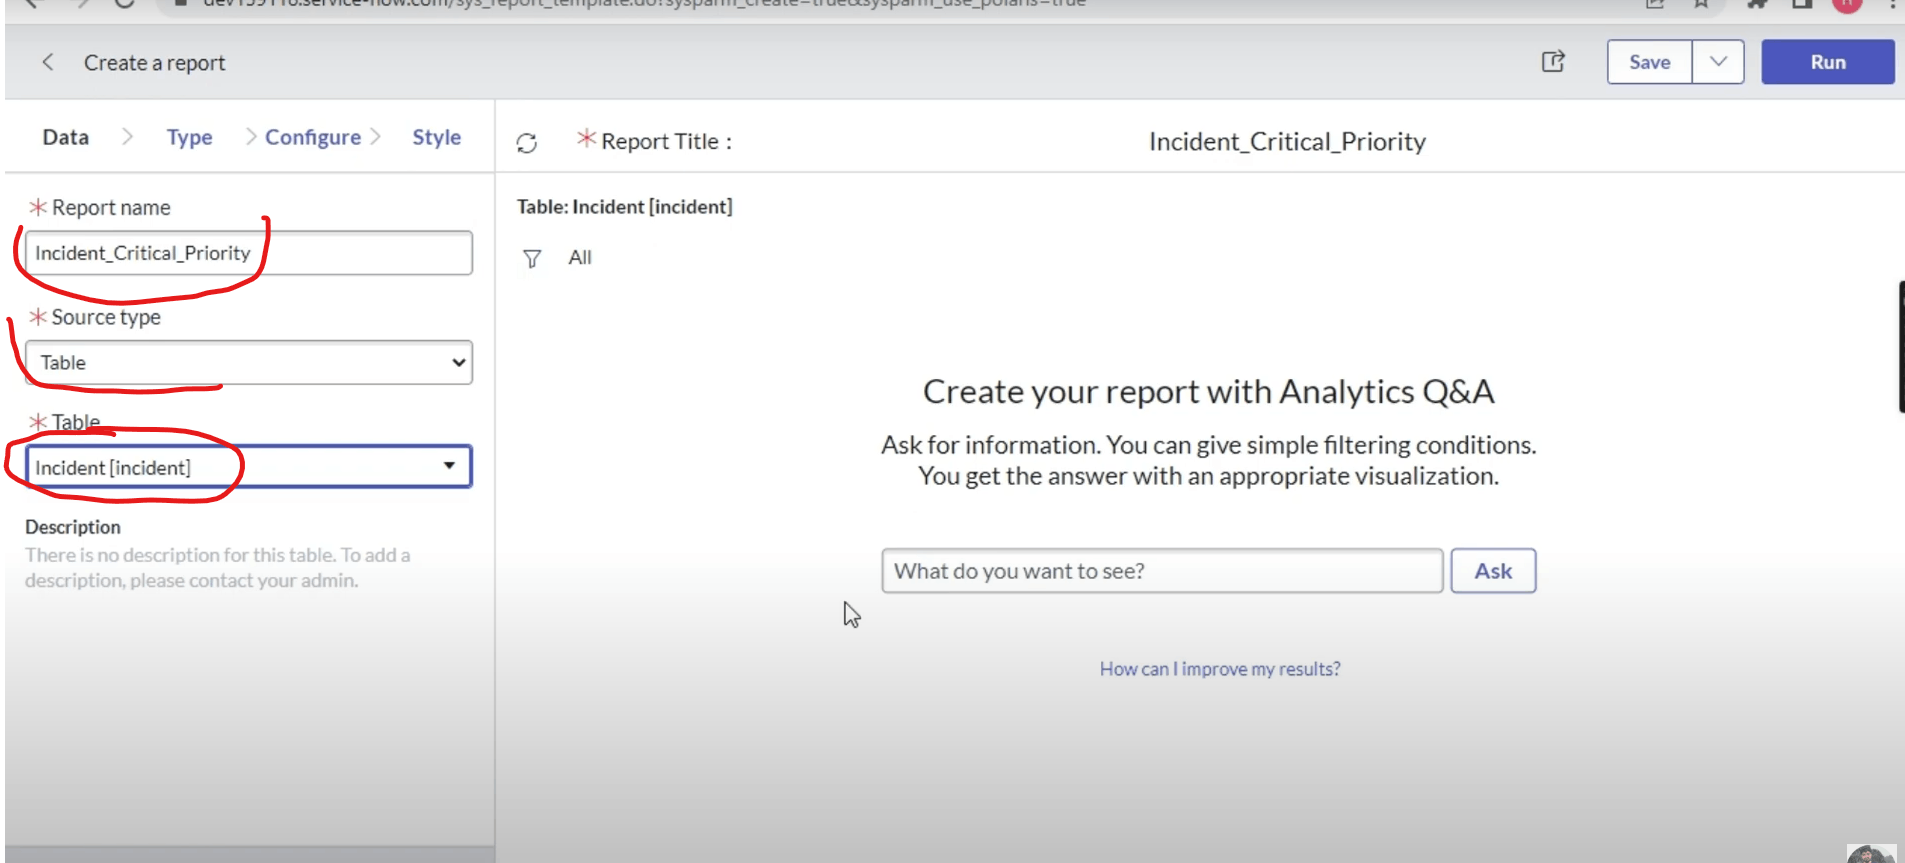
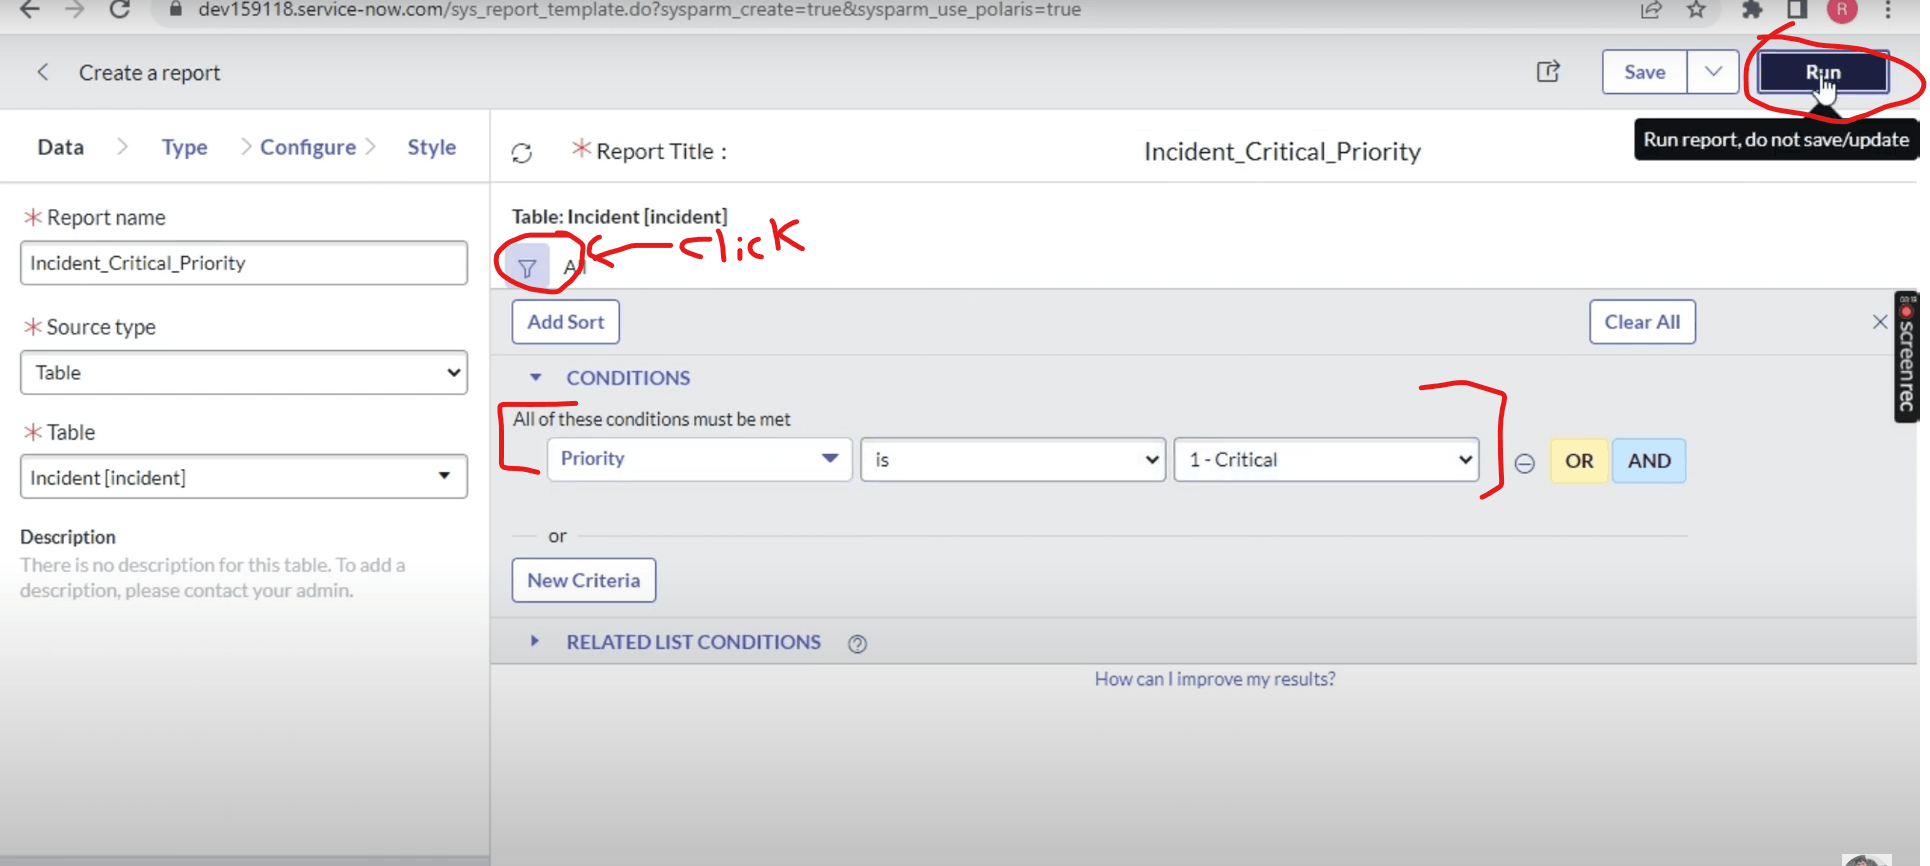
after selecting incident right side filter will appear

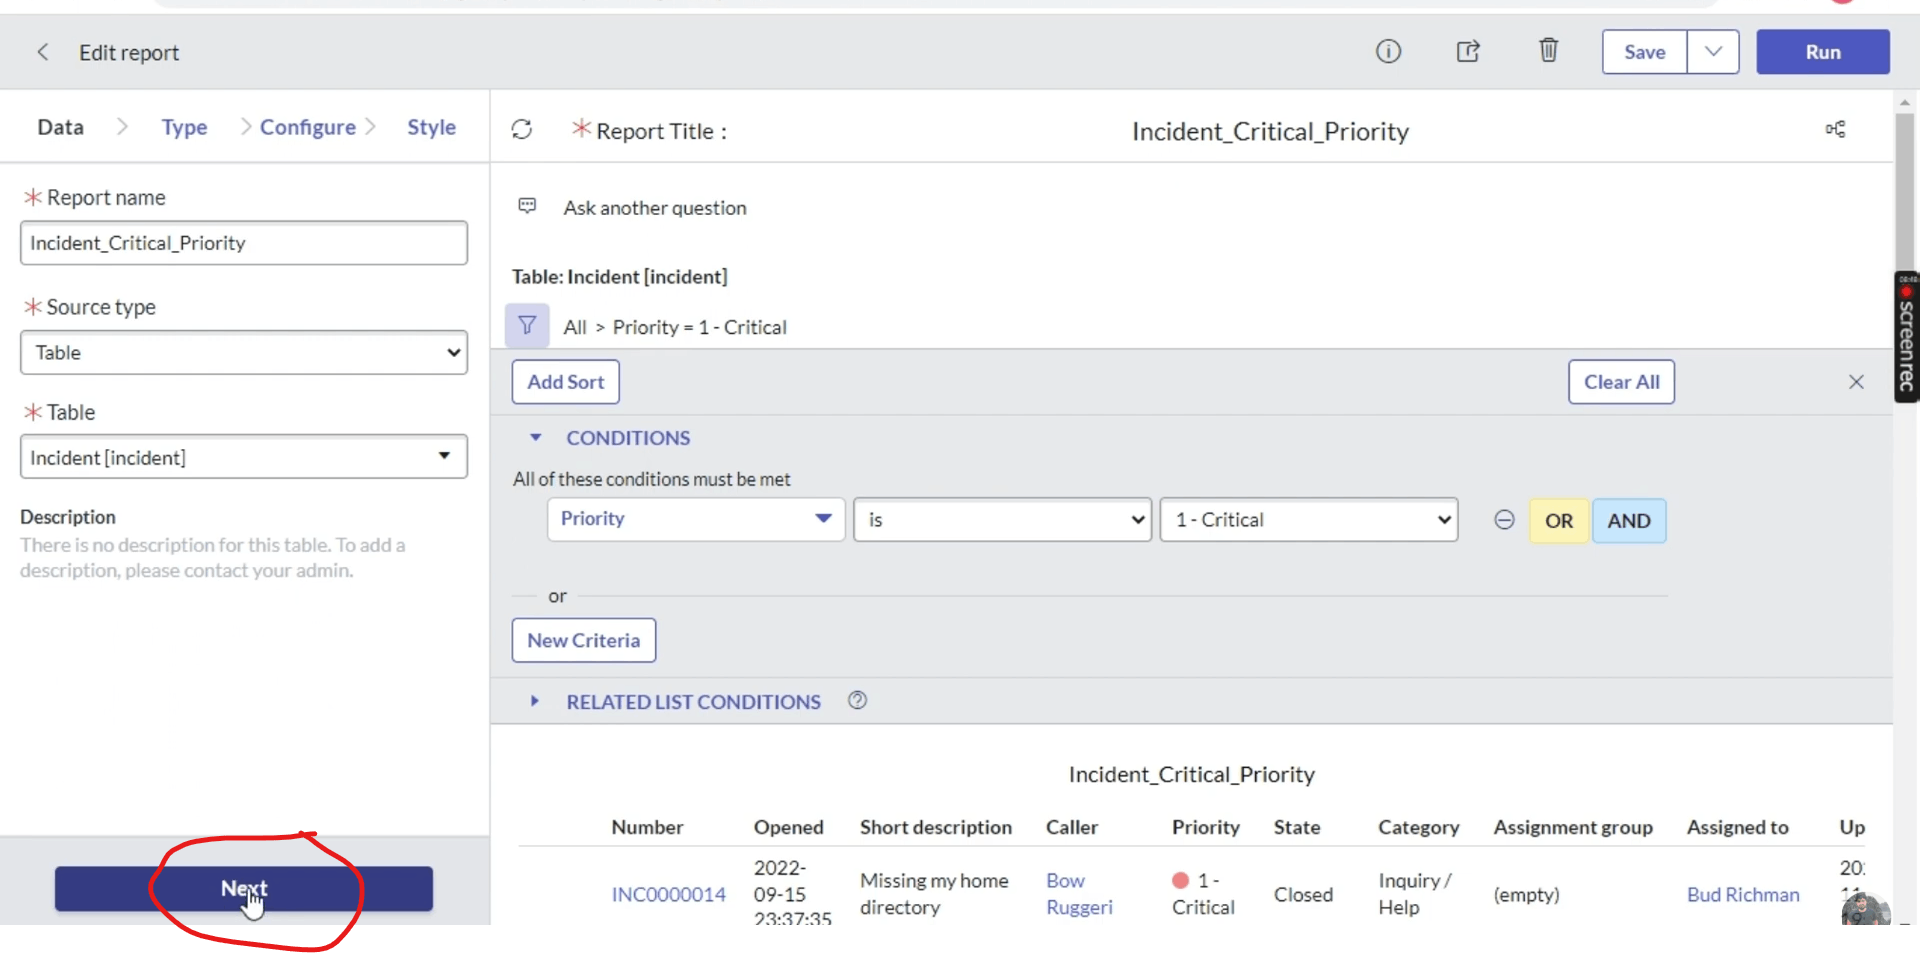
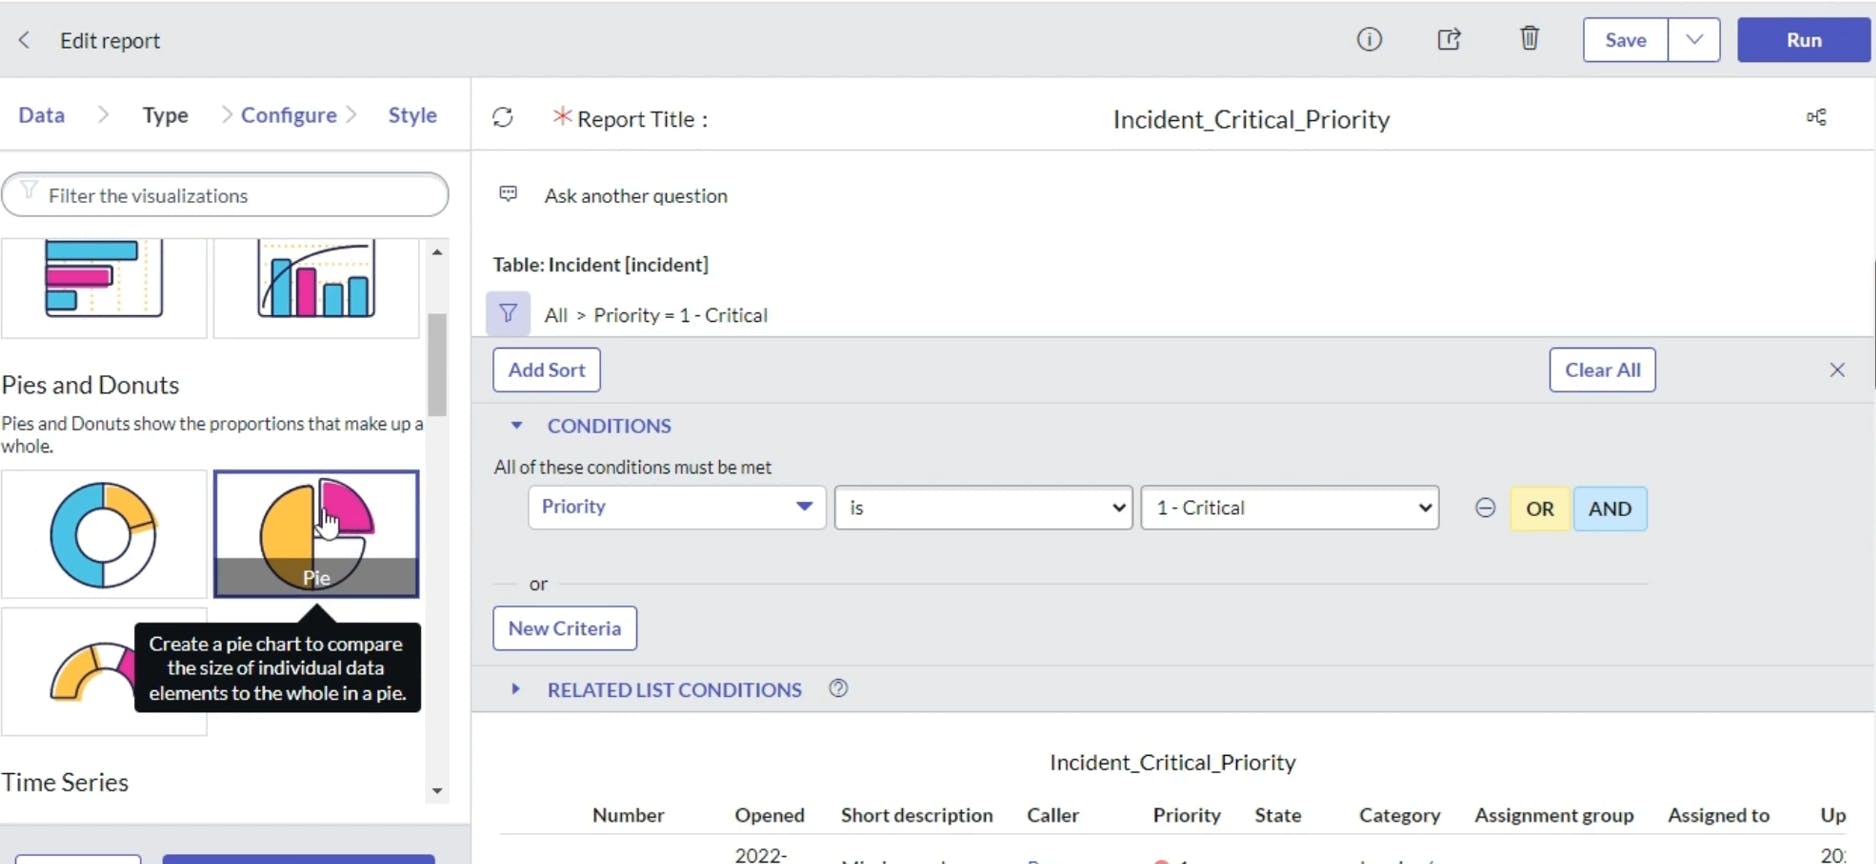
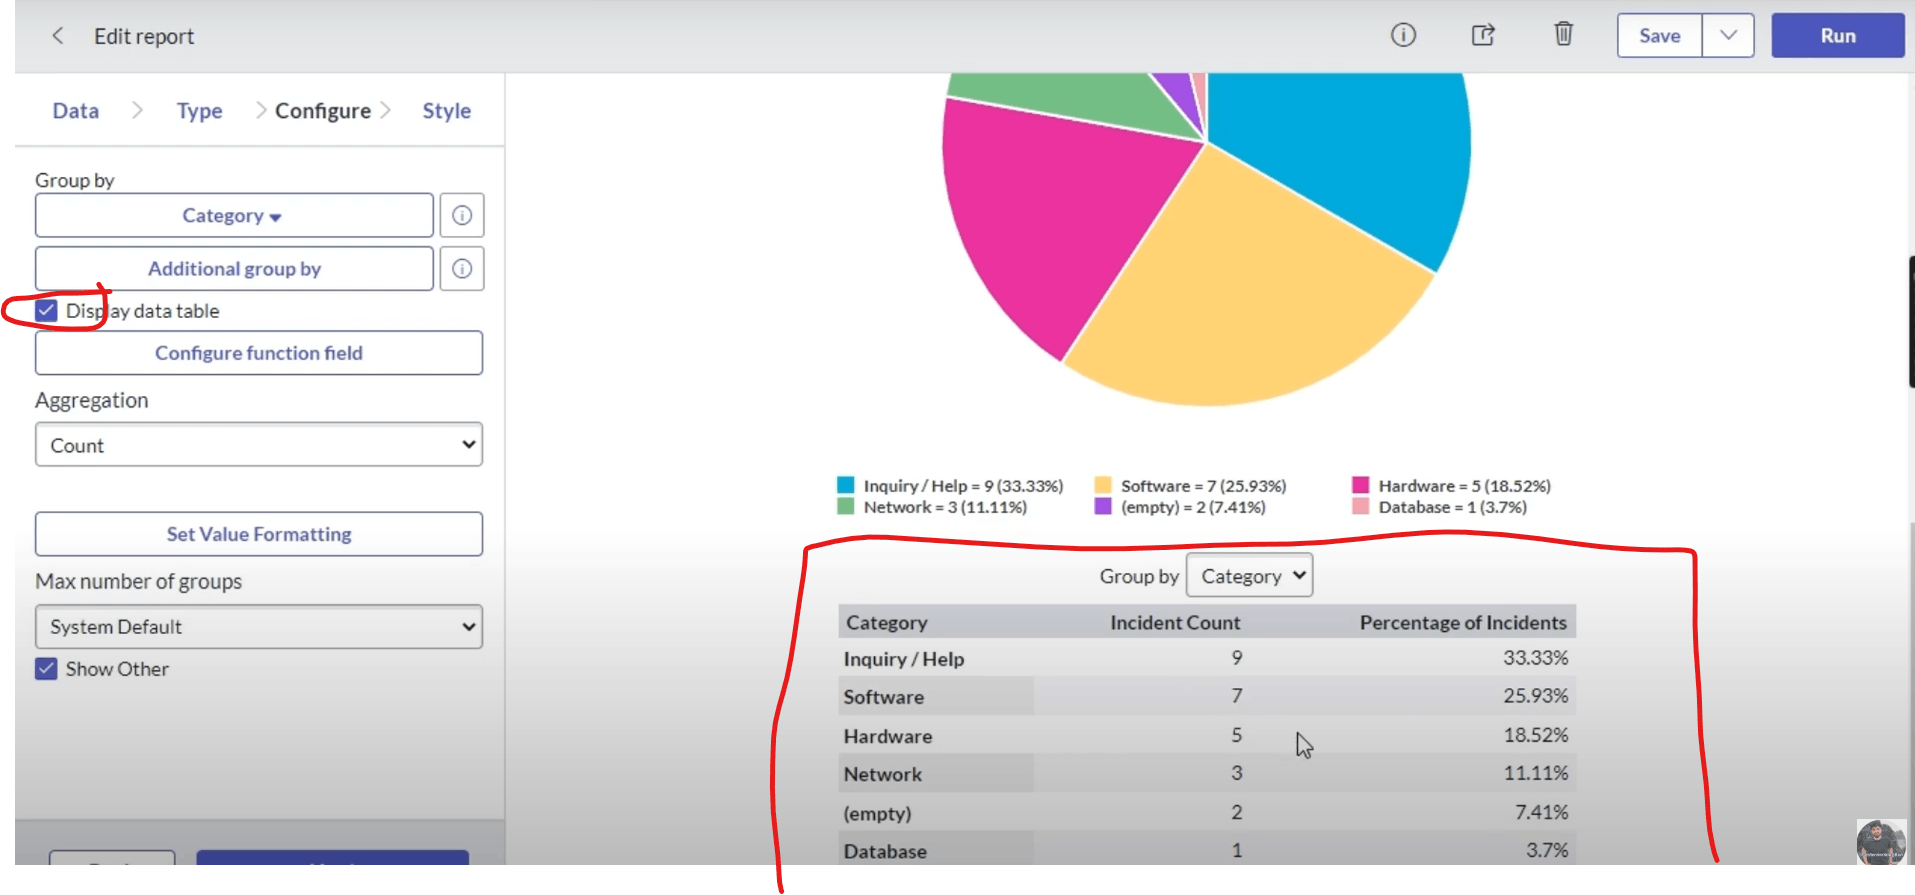
save it and click on next of we want these forms which are in list to pie chart form
click on pie and run

click on next
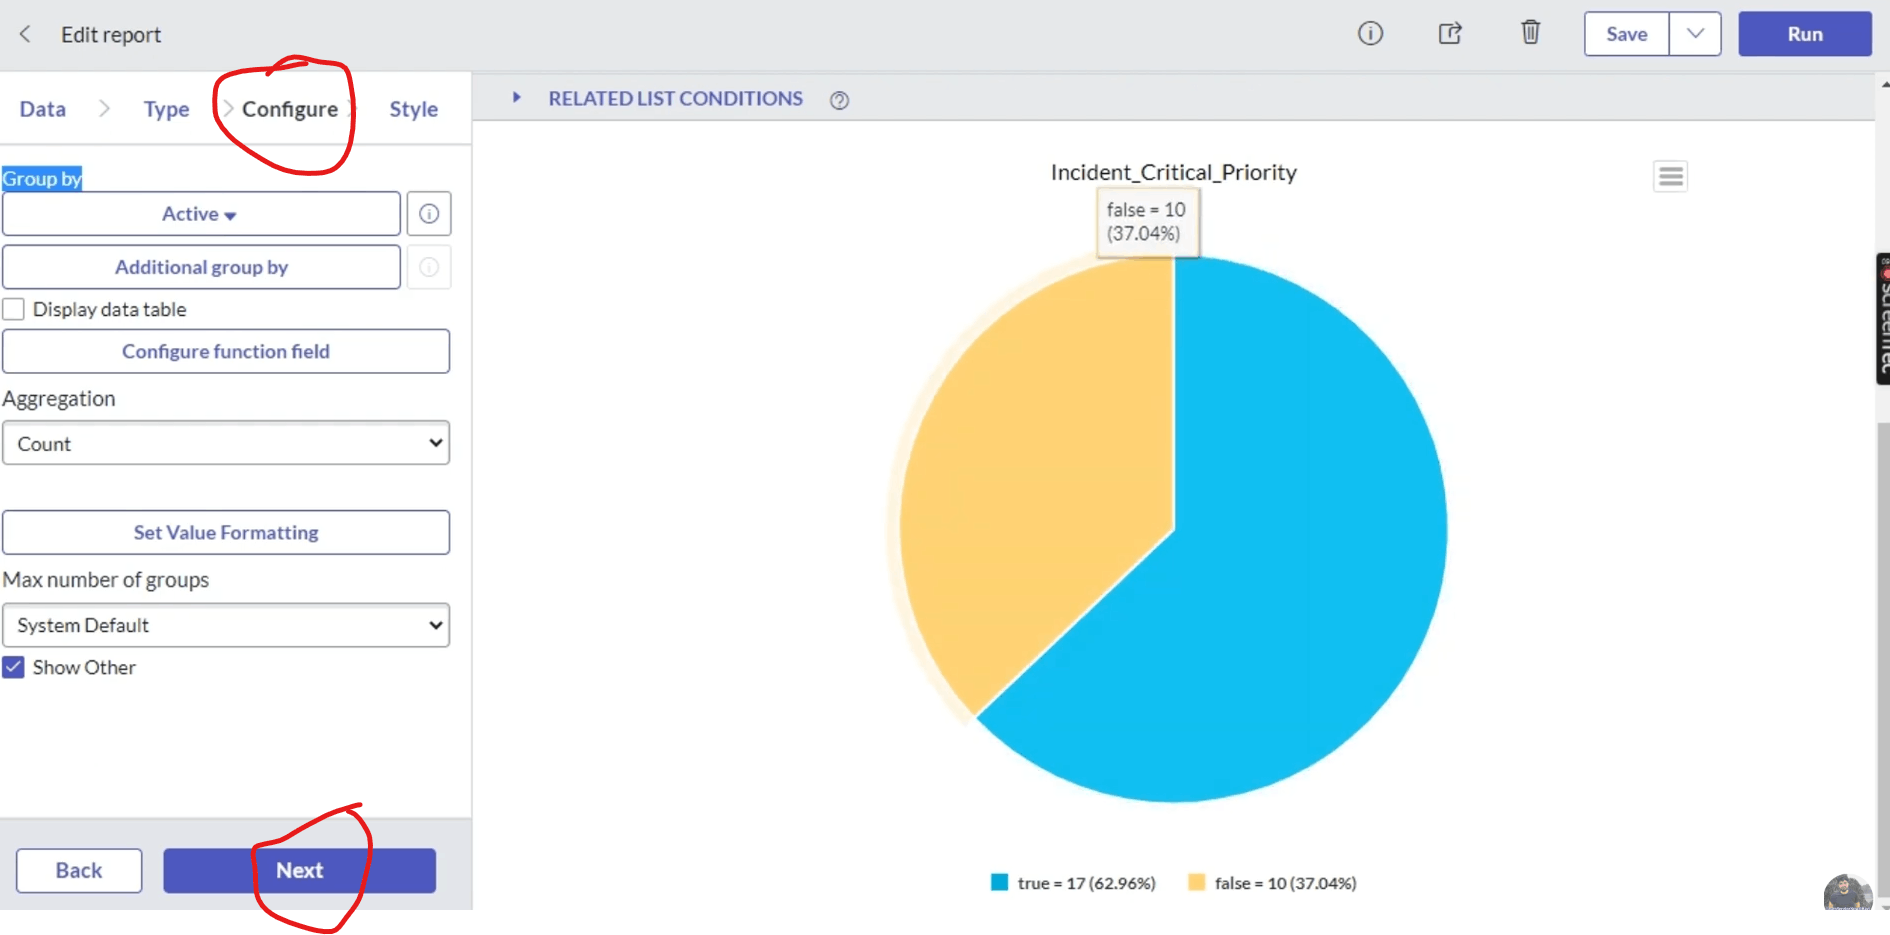
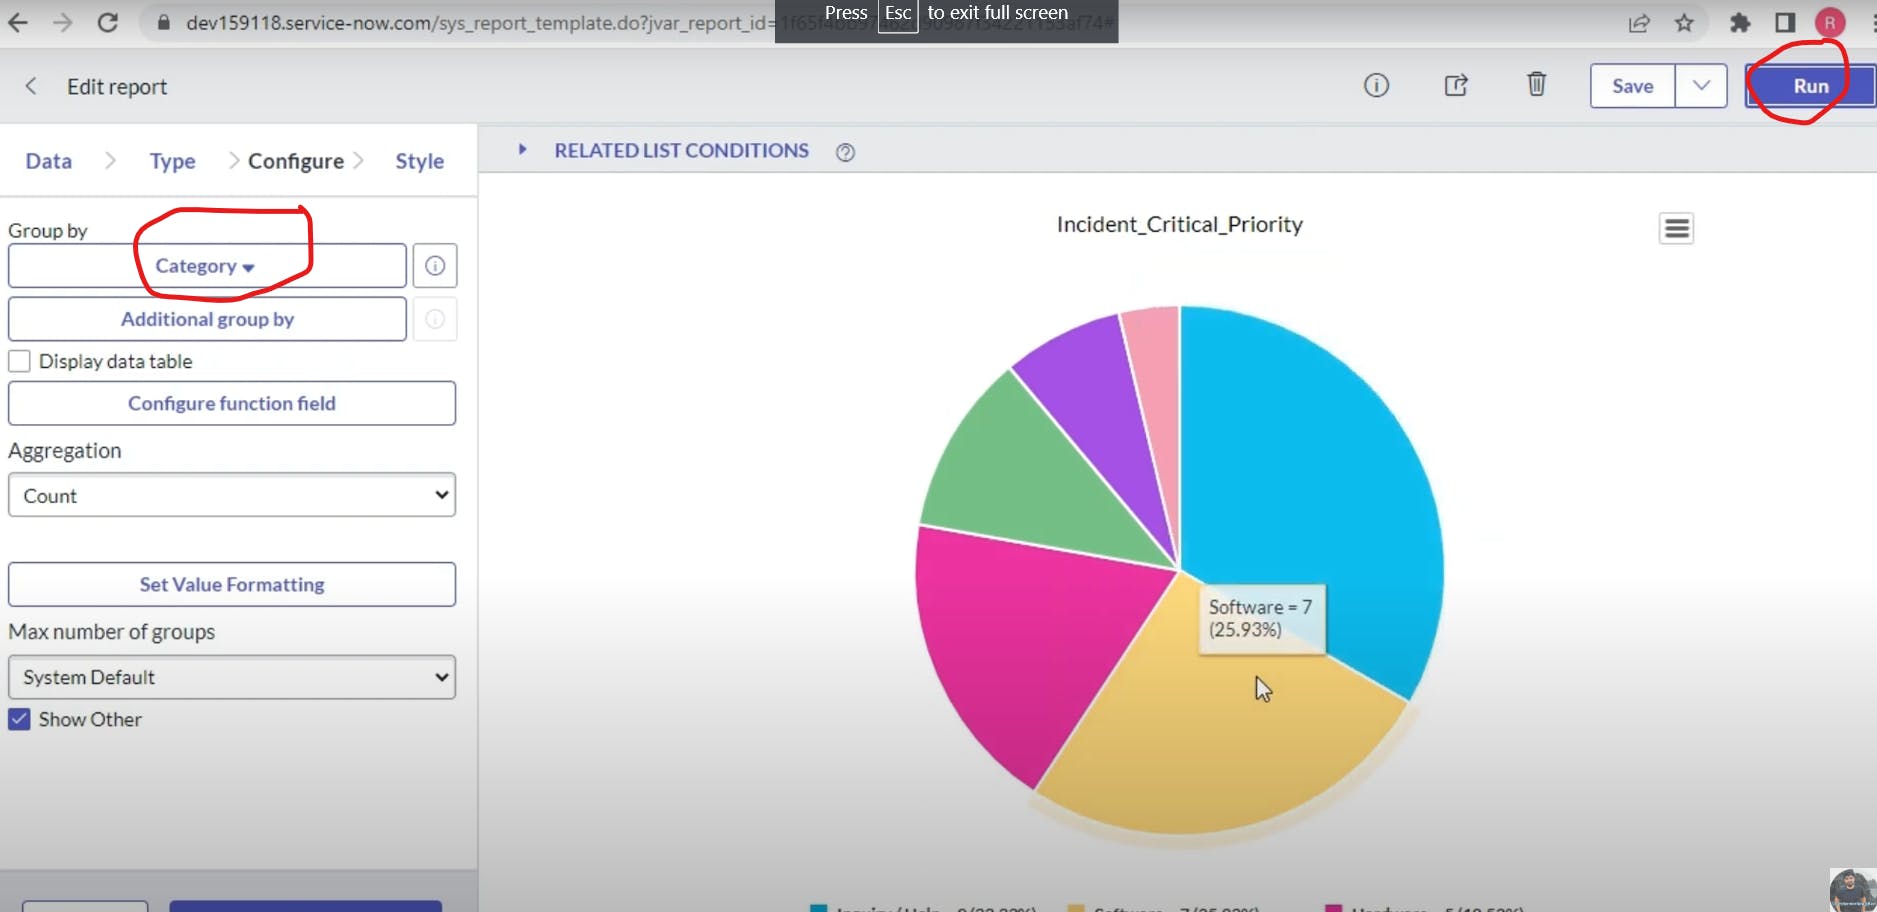
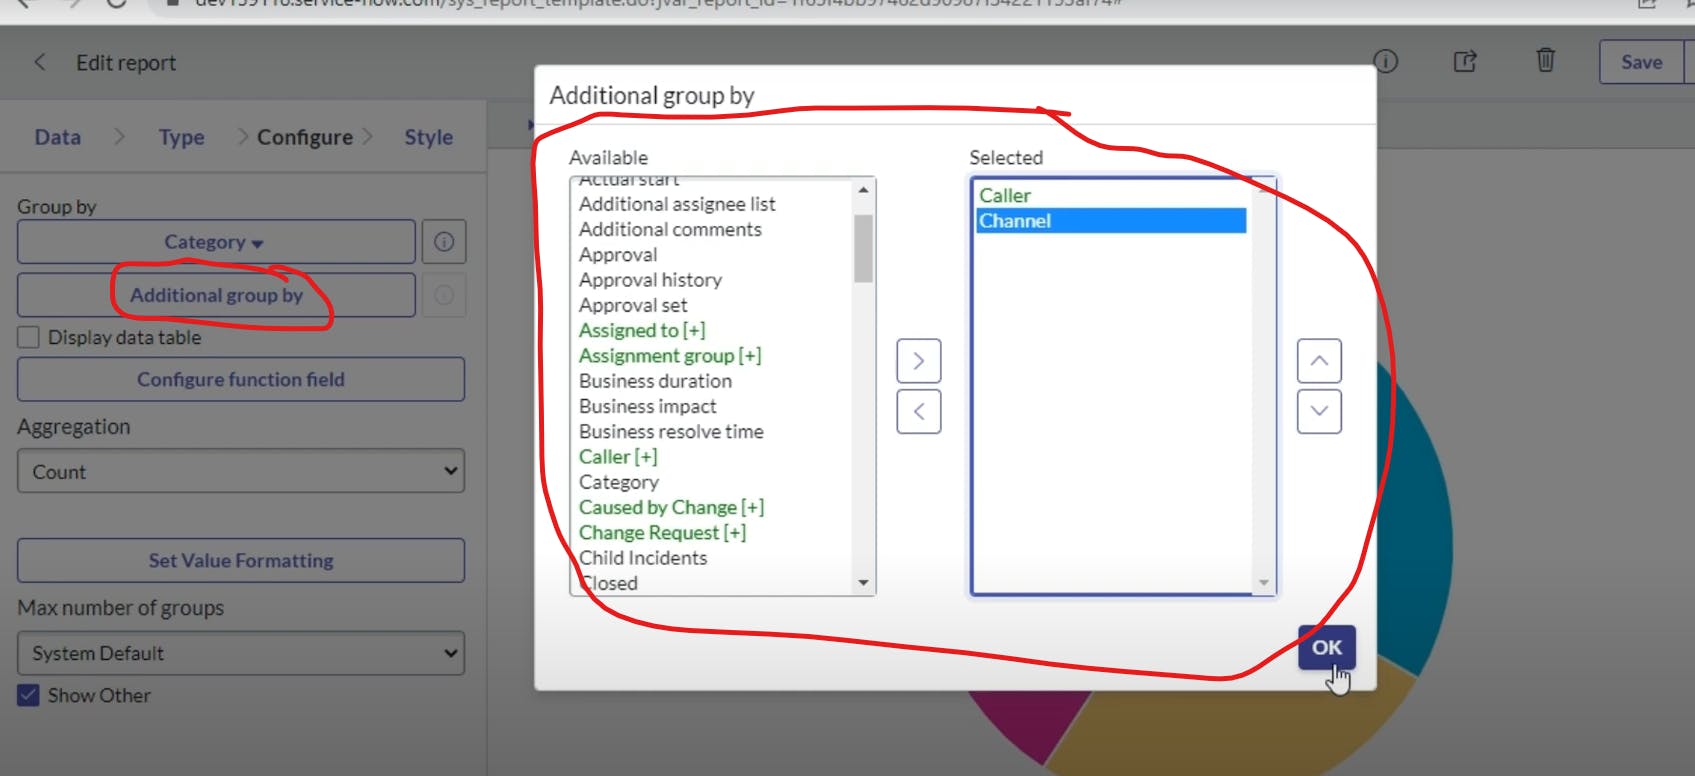
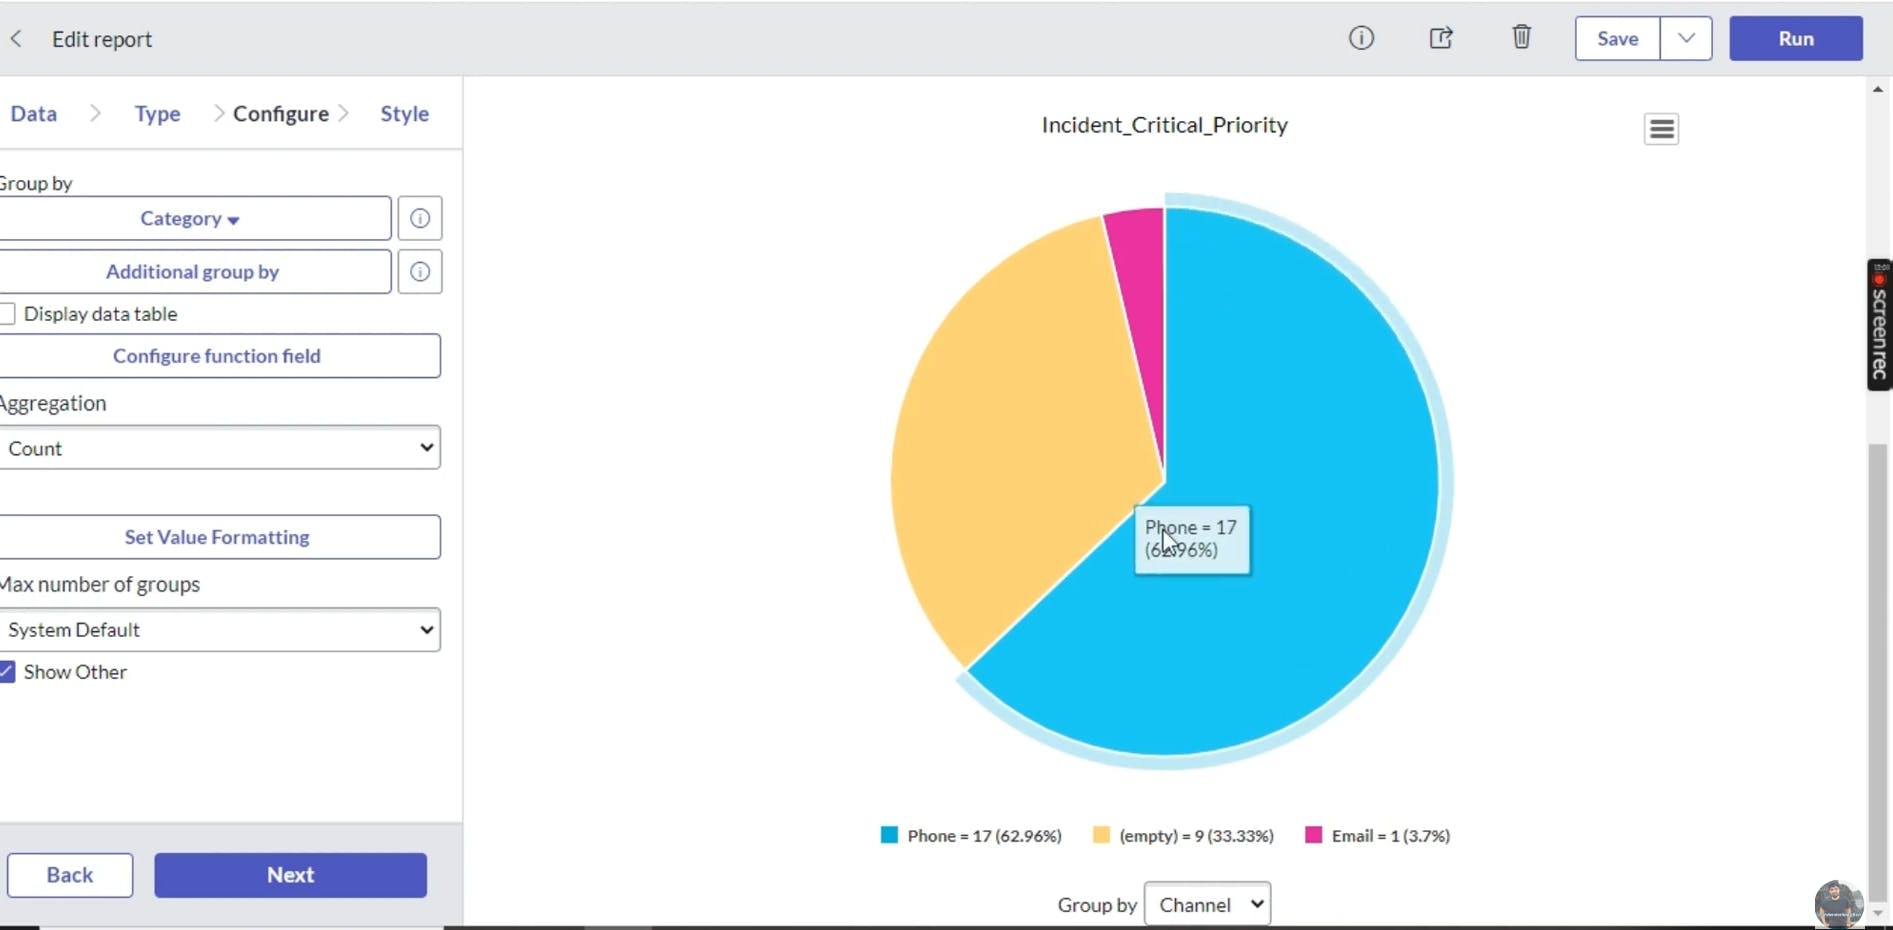
you can group by additional group by and click run
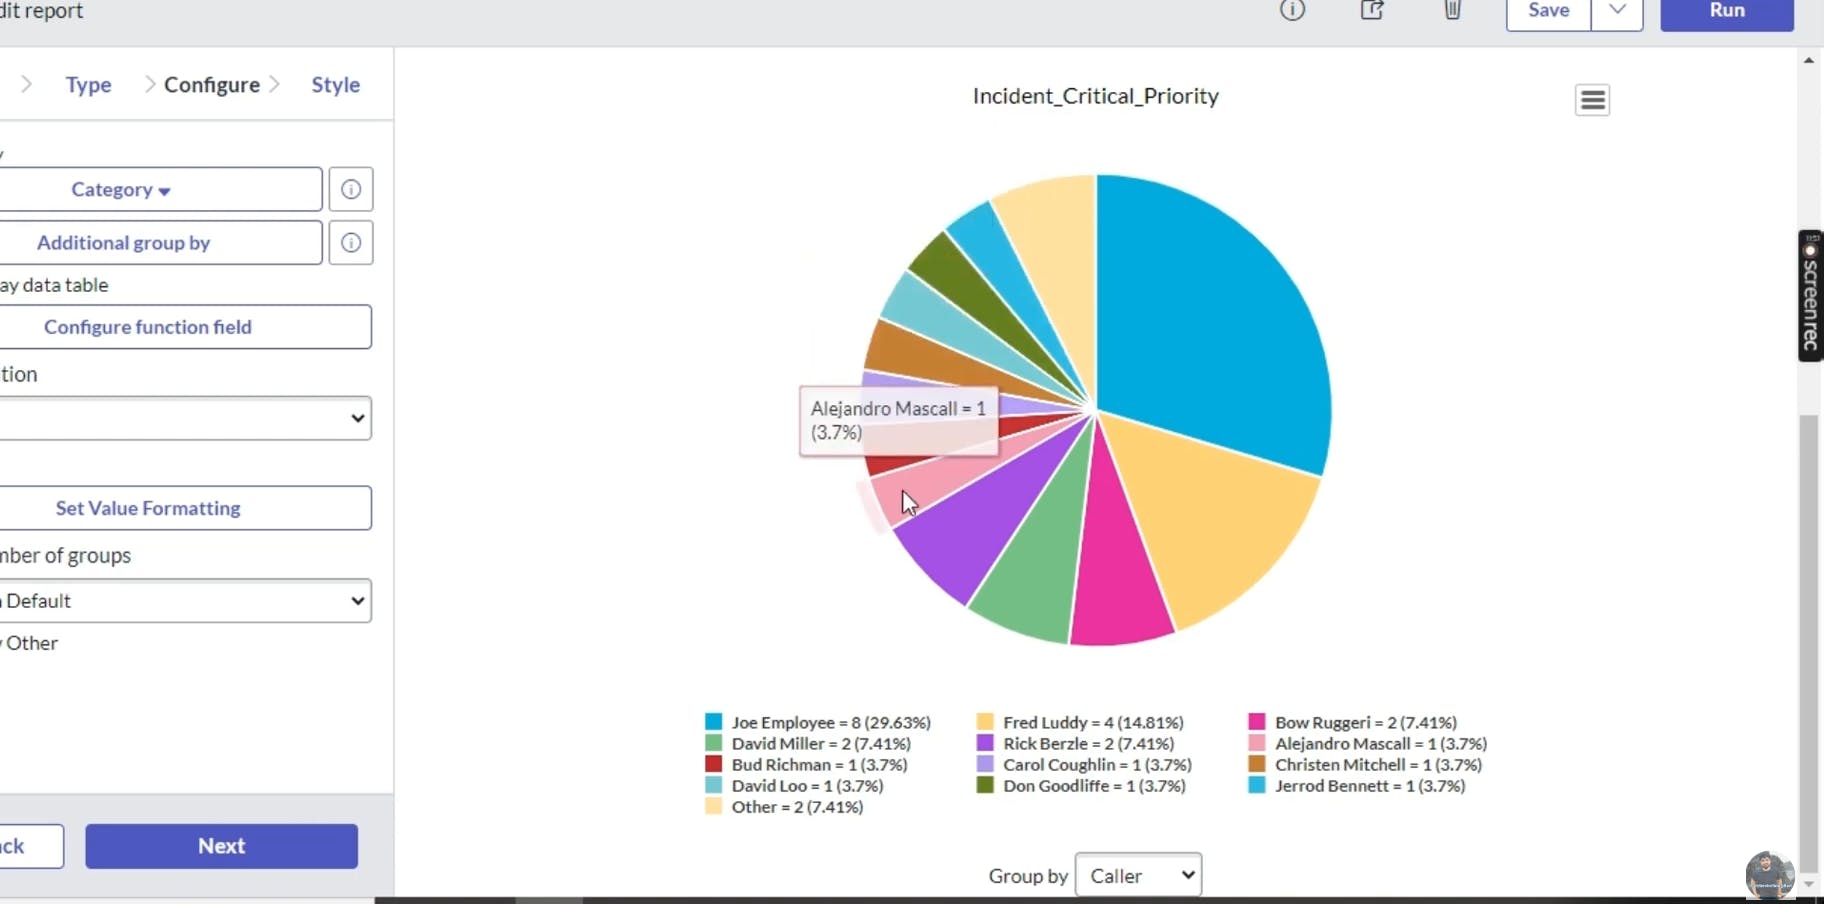
you can change it to group by caller at bottom to see it by group by caller
group by channel
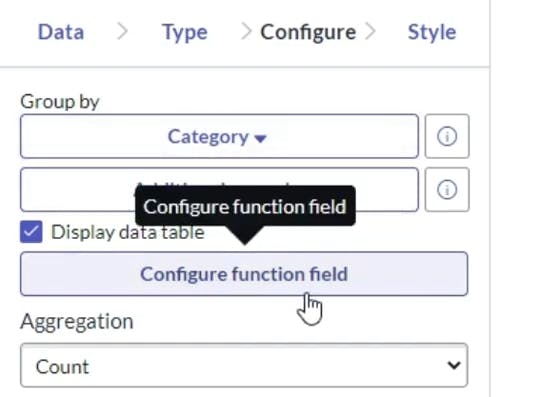
click on configure function field
in developer series we use this
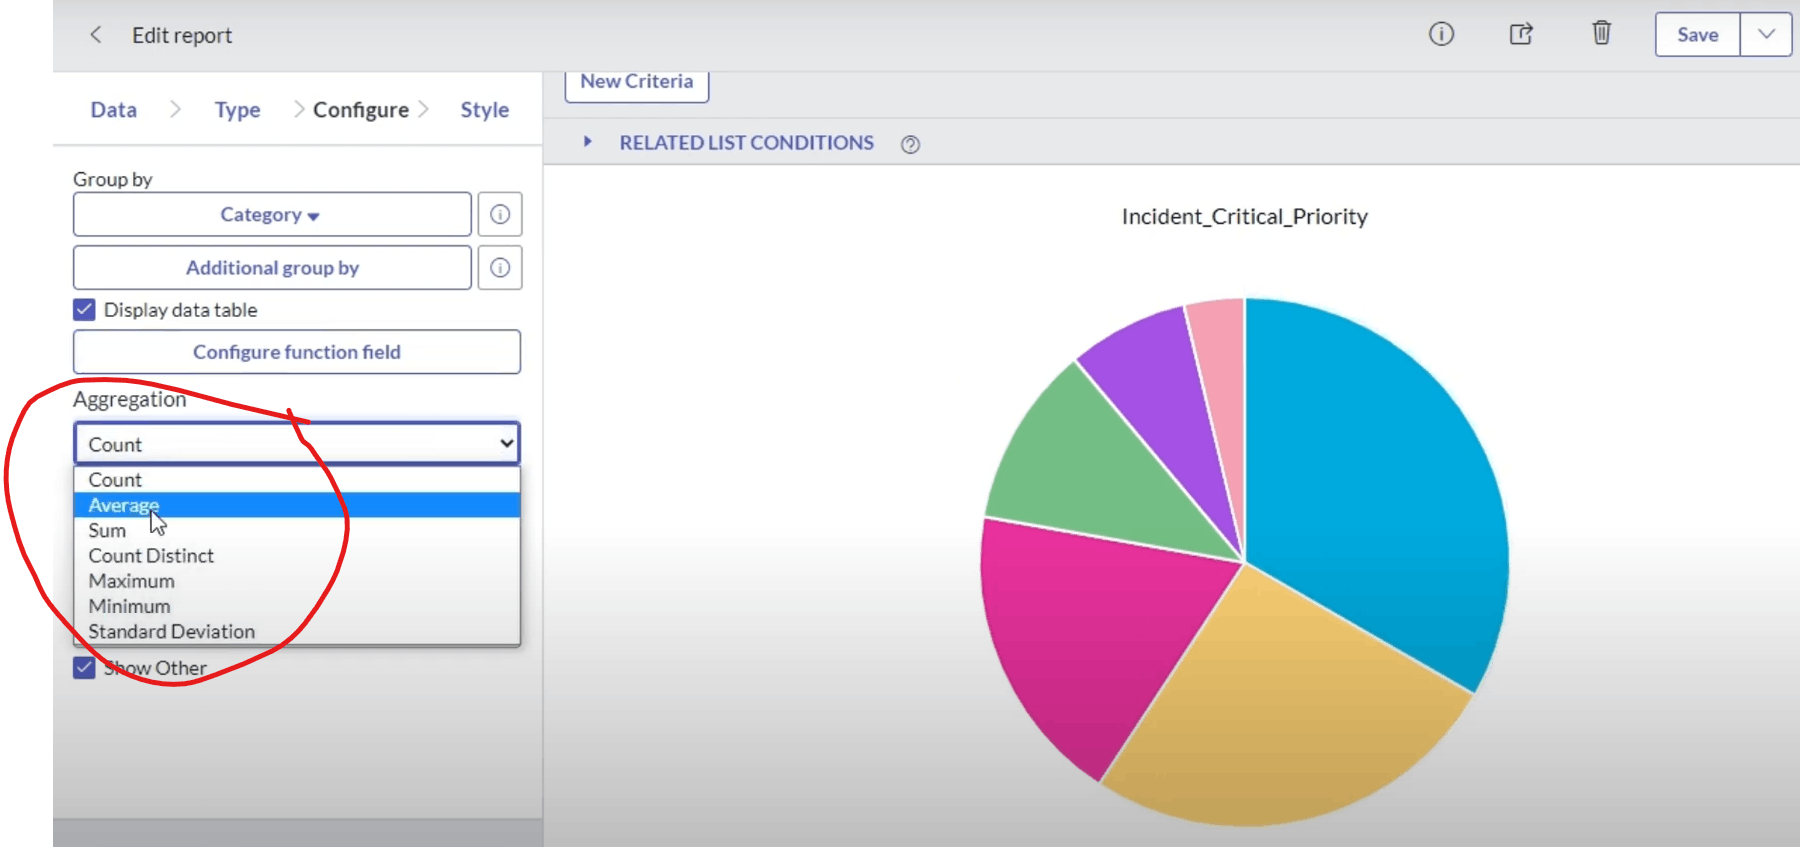
now we can select aggreegation and view chart by count, average, etc

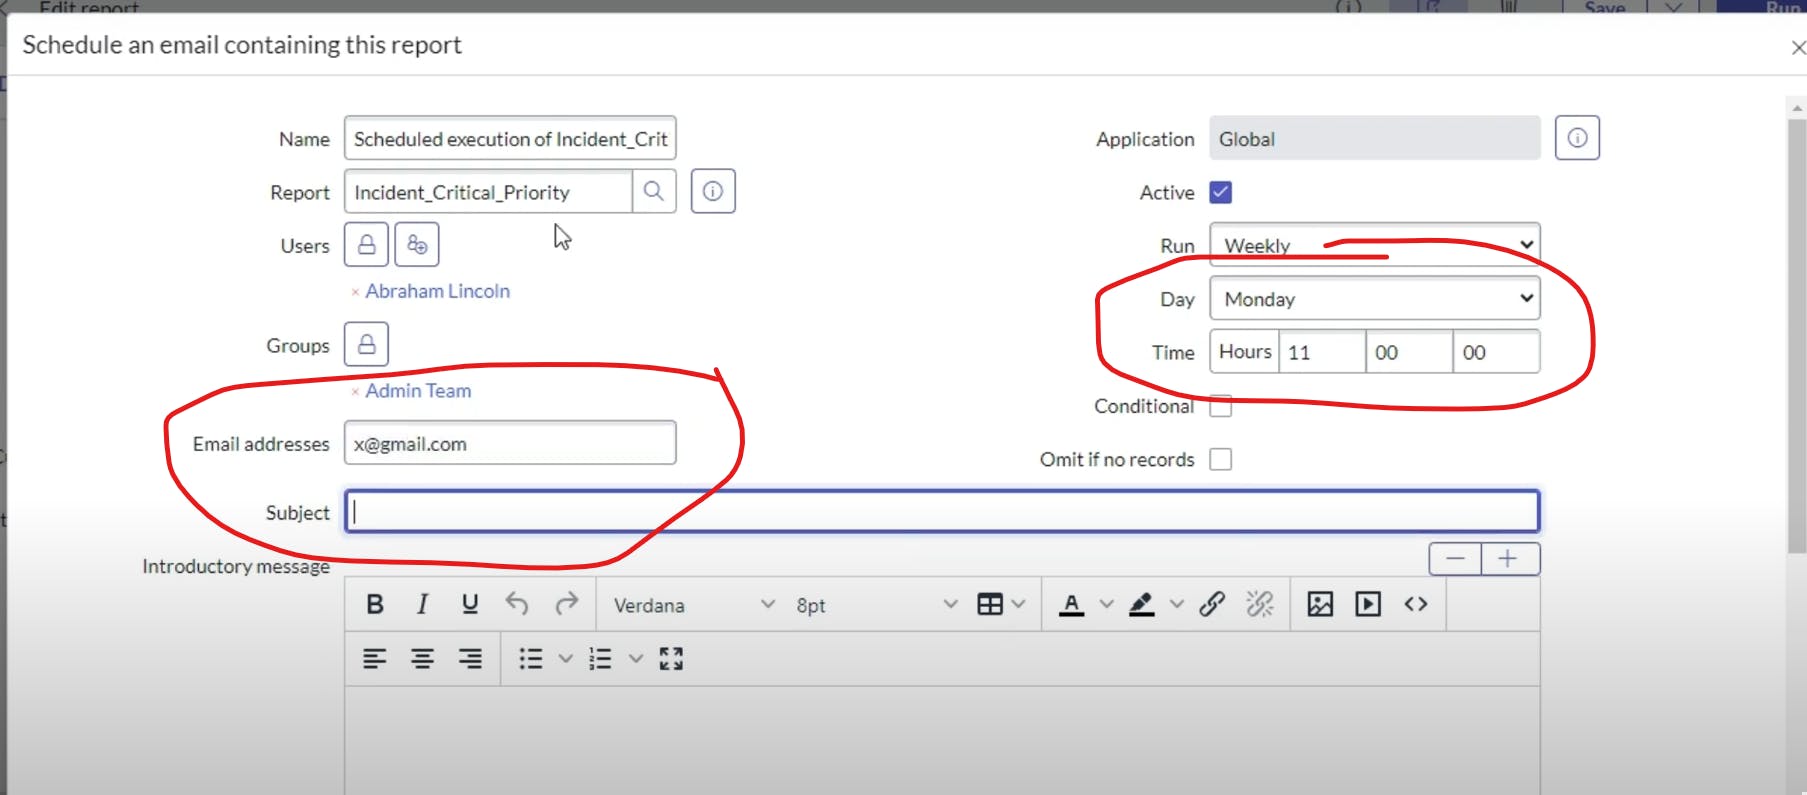
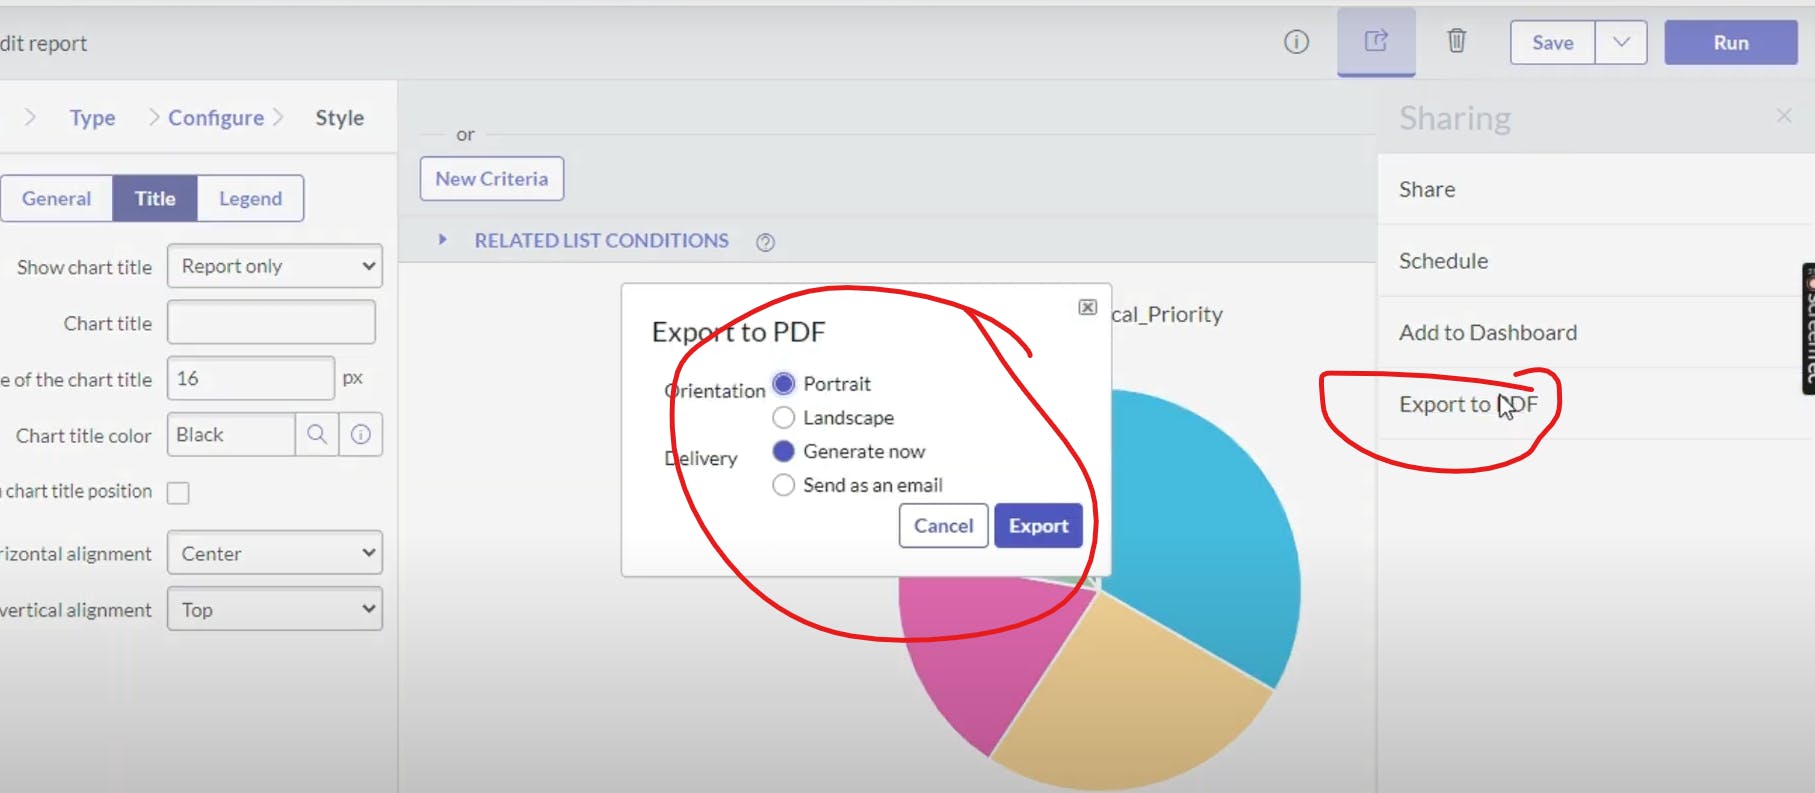
you can share if u want

you can email it by creating a schedule, as for requirement we schedule it monday 11 am
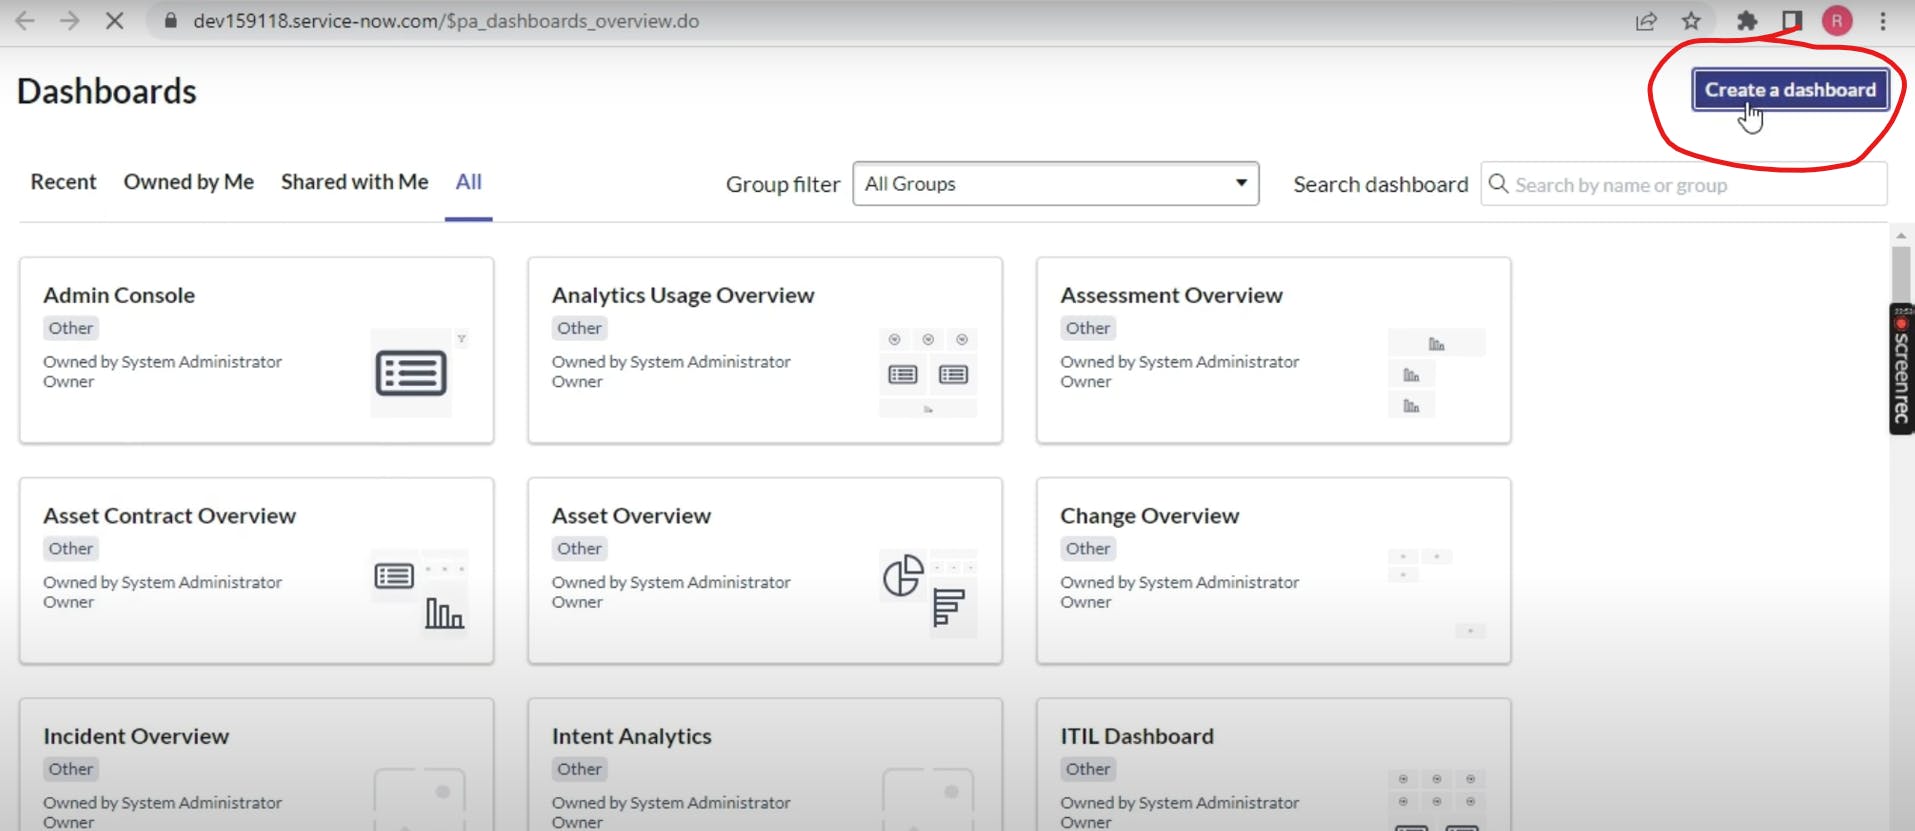
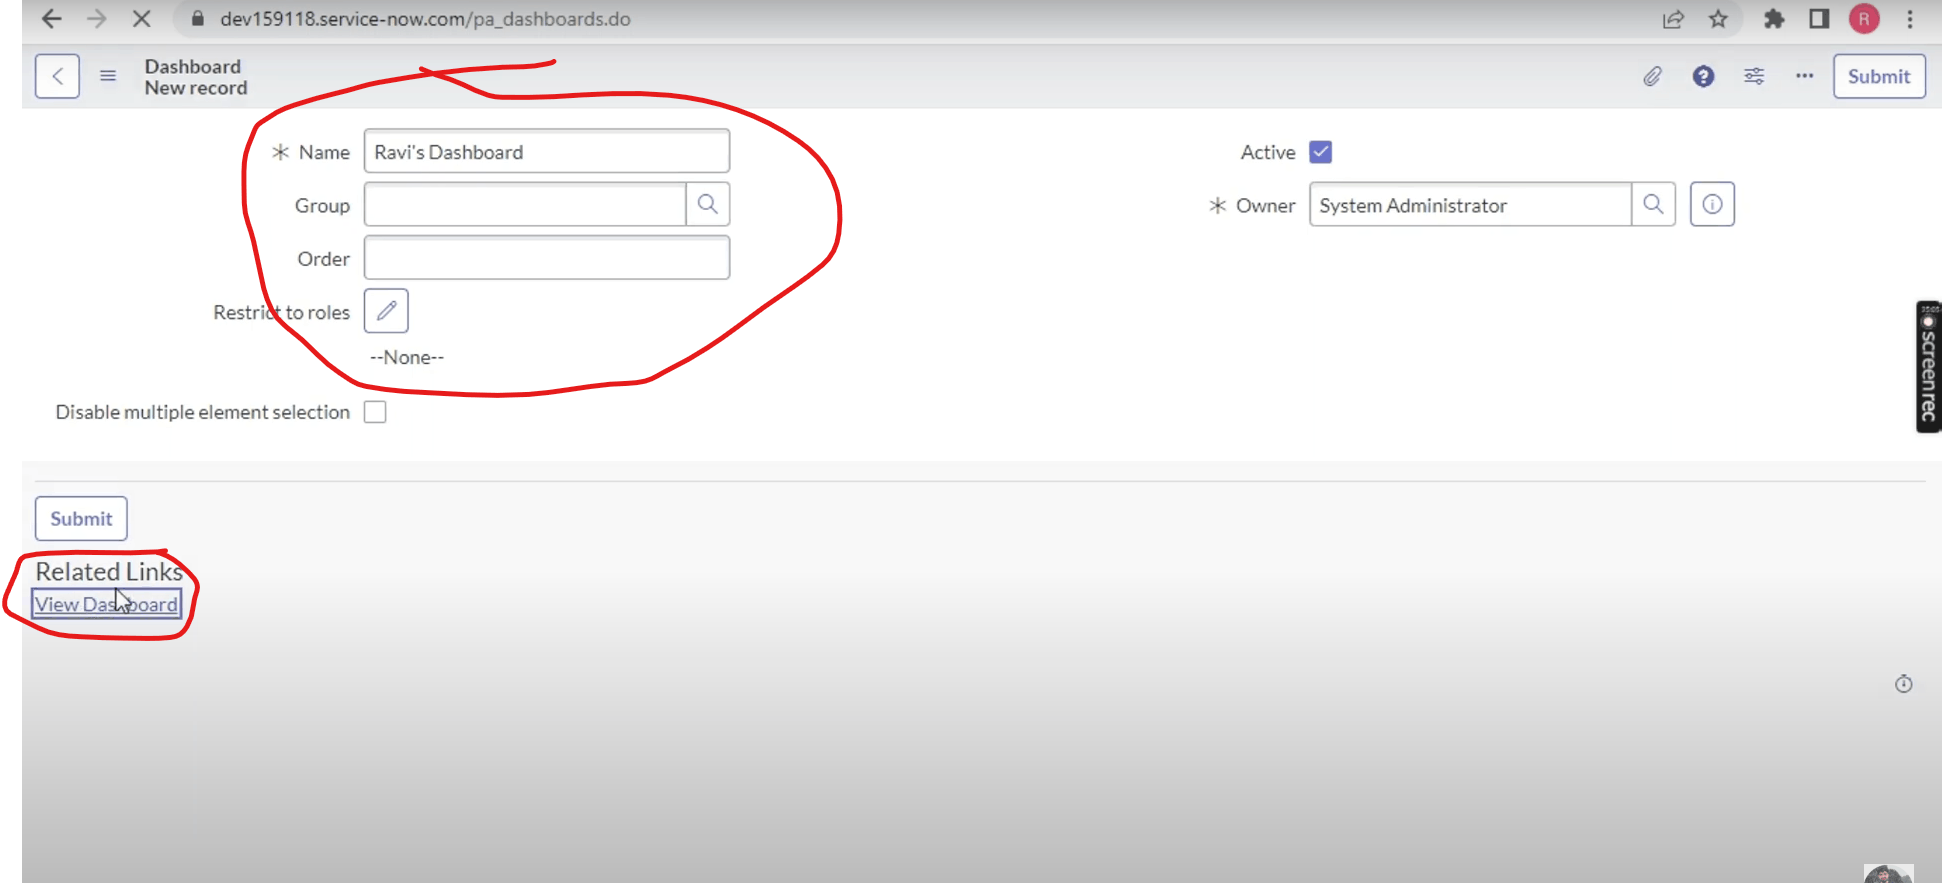
go to dashboards

click on view dashboard


click and add

or
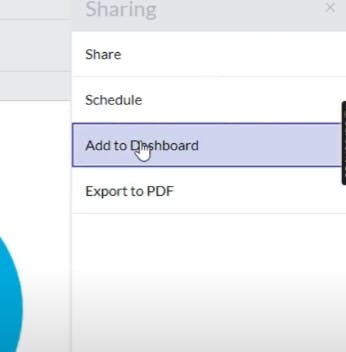

result after clicking add