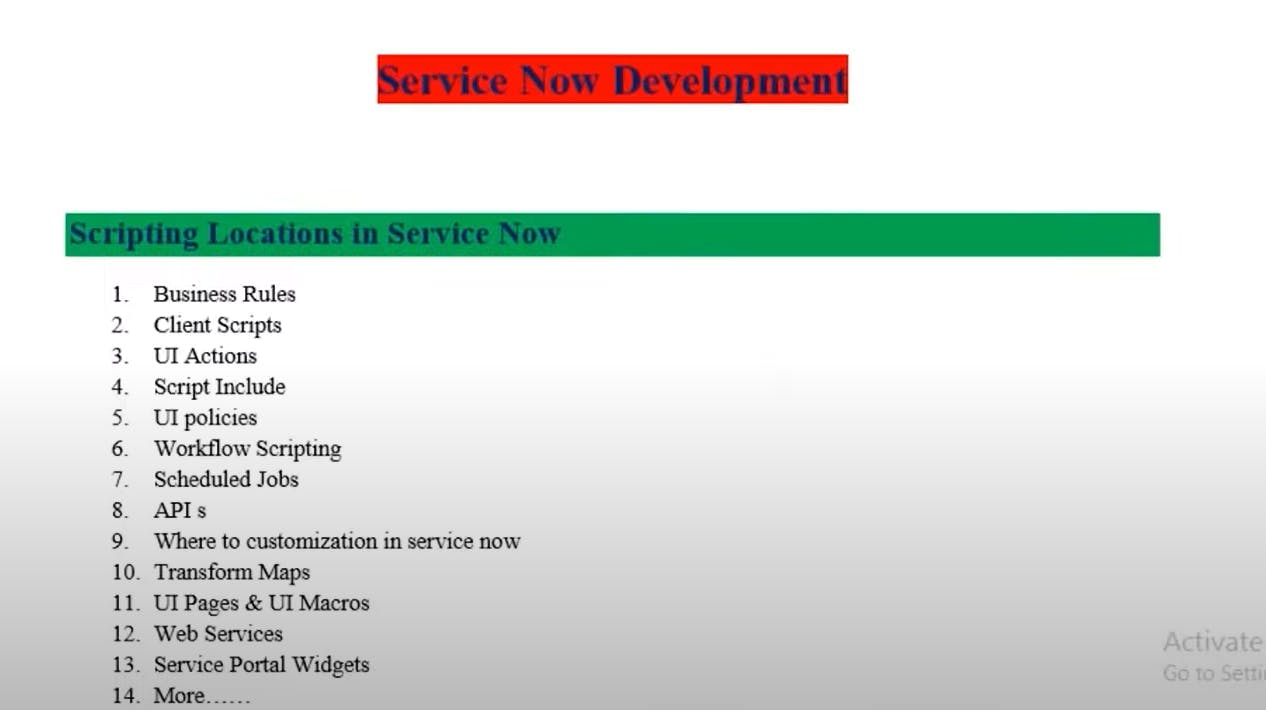
service now dev


Basics Javascript
Arithmetic operators
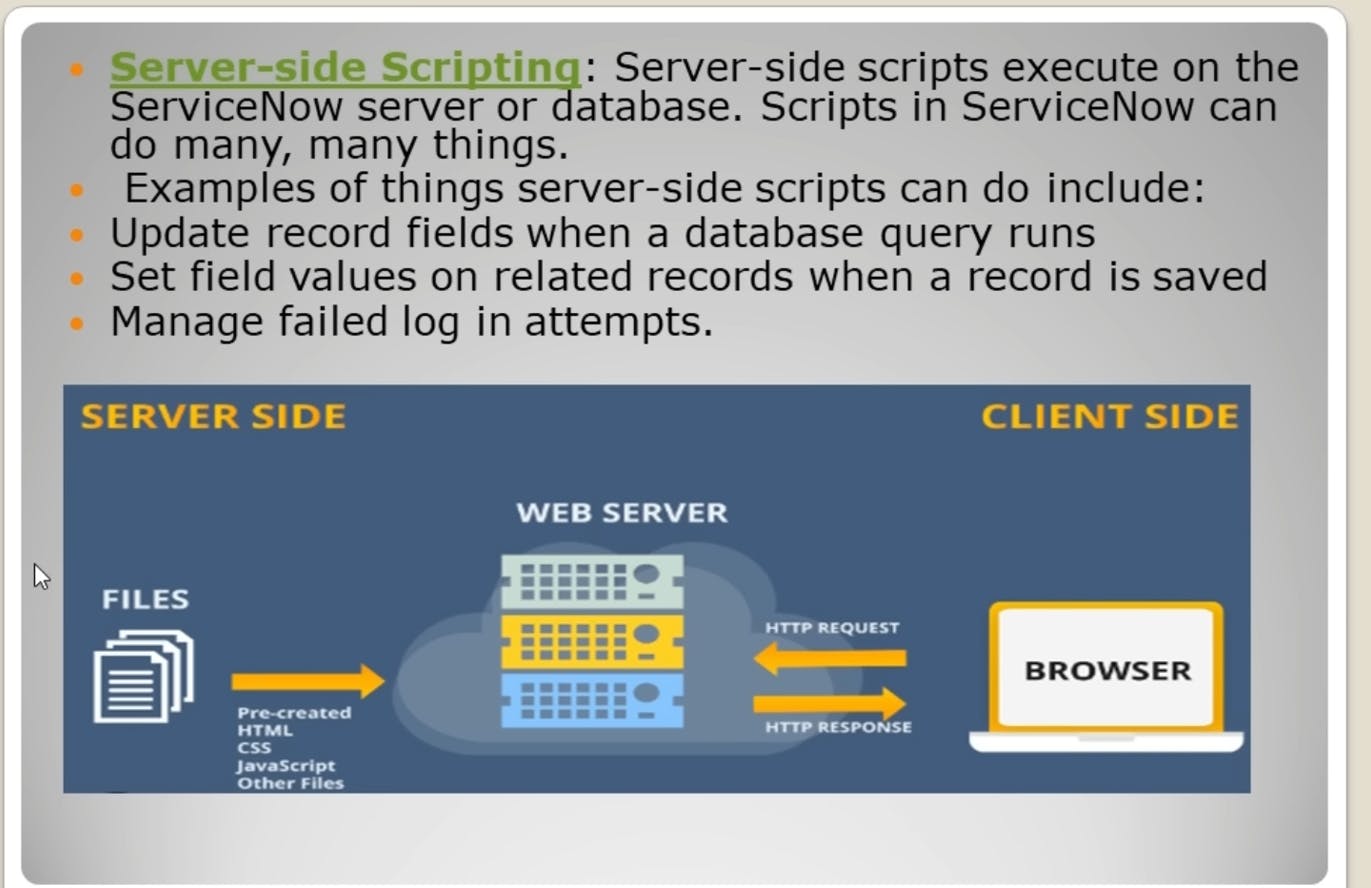
In ServiceNow, as in many programming languages, you can use arithmetic operators to perform mathematical operations on numerical values. Here are the commonly used arithmetic operators in ServiceNow:
Addition (+): The addition operator is used to add two or more numbers together. For example:
var sum = 5 + 3; // sum will be 8Subtraction (-): The subtraction operator is used to subtract one number from another. For example:
var difference = 10 - 4; // difference will be 6Multiplication (*): The multiplication operator is used to multiply two or more numbers. For example:
var product = 6 * 7; // product will be 42Division (/): The division operator is used to divide one number by another. For example:
var quotient = 20 / 4; // quotient will be 5Modulus (%): The modulus operator returns the remainder when one number is divided by another. For example:
var remainder = 17 % 5; // remainder will be 2Increment (++) and Decrement (--): These operators are used to increase or decrease the value of a variable by 1, respectively. For example:
 var count = 5;
 count++; // count will be 6
 count--; // count will be 5 again
These arithmetic operators can be used in ServiceNow scripts, such as business rules, client scripts, and server-side scripts, to perform calculations and manipulate numerical data as needed for your specific business logic and requirements.
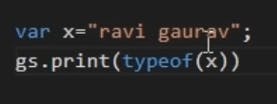
string
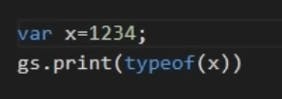
number
objects
Certainly! Here are examples of how you can work with JavaScript objects in the context of ServiceNow:
1. Creating an Object Literal:
You can create an object literal to represent an incident in ServiceNow with properties like "number," "short_description," and "priority."
var incident = {
  number: "INC001234",
  short_description: "Server Down",
  priority: "1 - Critical"
};
2. Accessing Object Properties:
You can access properties of the incident object using dot notation or bracket notation:
var incidentNumber = incident.number; // Using dot notation
var incidentDescription = incident['short_description']; // Using bracket notation
3. Modifying Object Properties:
You can modify properties of the incident object as needed:
incident.priority = "2 - High"; // Changing the priority
4. Adding New Properties:
You can add new properties to the incident object, such as "assigned_to":
incident.assigned_to = "John Doe"; // Adding a new property
5. Object Methods:
You can define methods within an object to perform actions. For example, a method to calculate the escalation time for an incident:
var incident = {
  number: "INC001234",
  short_description: "Server Down",
  priority: "1 - Critical",
  calculateEscalationTime: function() {
    // Your logic to calculate escalation time goes here
    return "2 hours";
  }
};

var escalationTime = incident.calculateEscalationTime(); // Calling the method
6. Iterating Through Object Properties:
You can loop through the properties of an object using a for...in loop:
for (var key in incident) {
  var value = incident[key];
  gs.info(key + ": " + value); // Log each property and its value
}
These examples demonstrate how you can work with JavaScript objects to represent and manipulate data within the ServiceNow platform. In practice, objects are extensively used to manage records, automate processes, and customize the behavior of various components in ServiceNow.
js string methods
length

slice


replace

uppercase

lowercase

trim
it will remove all spaces

split

array

GlideRecord
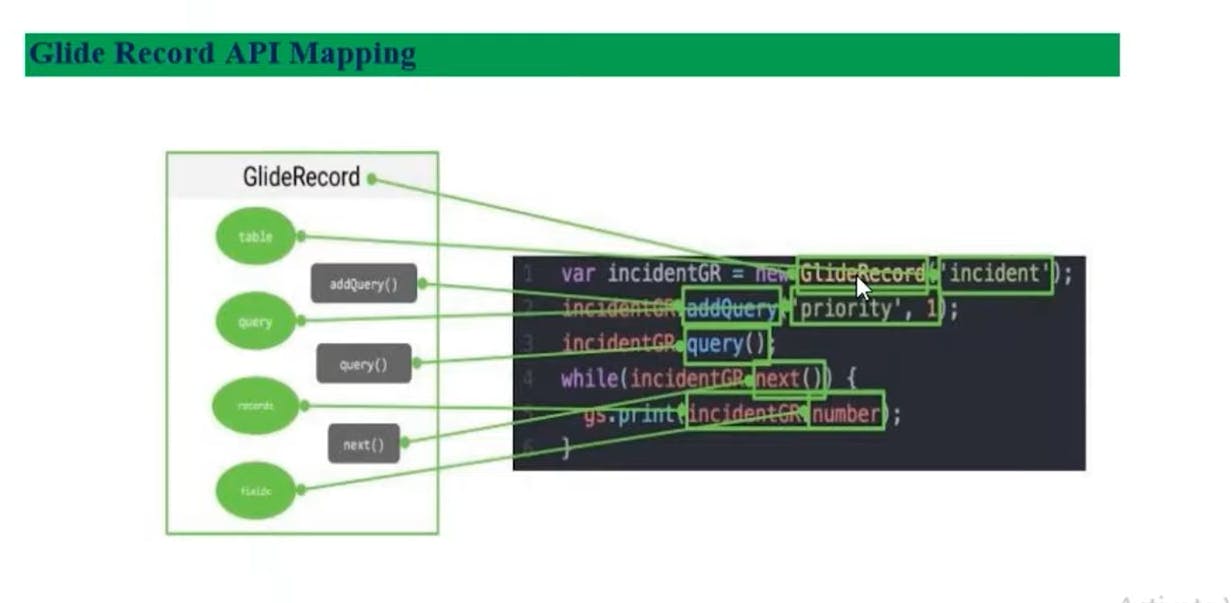

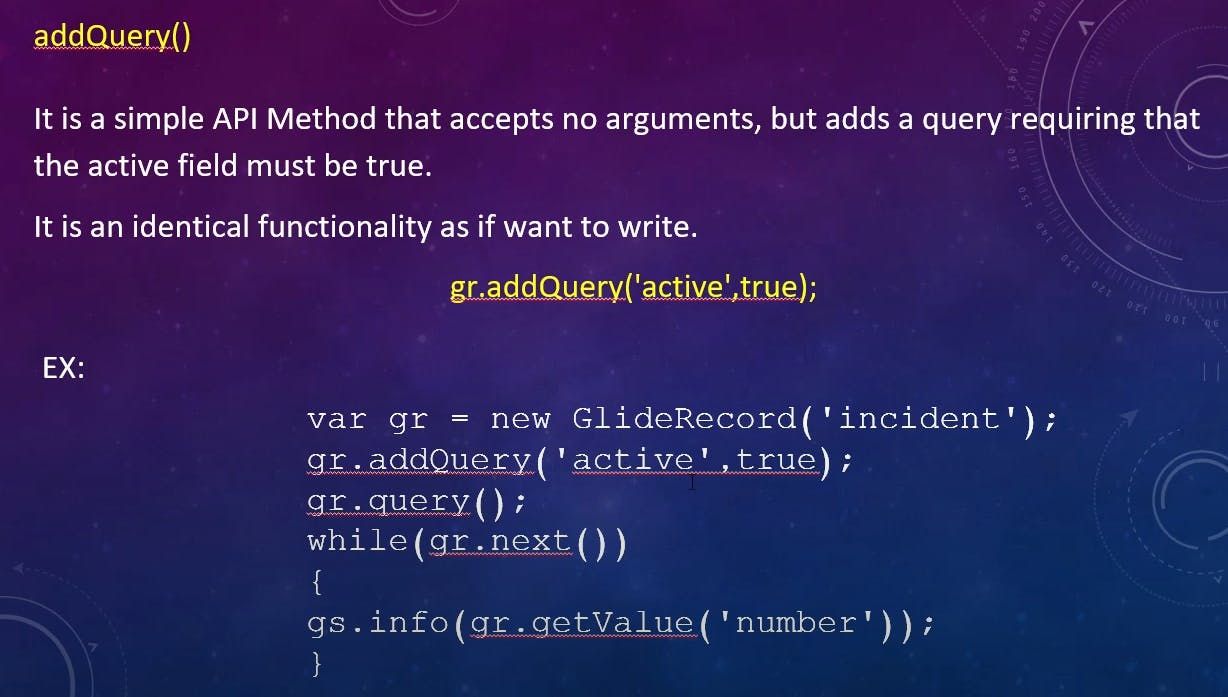
addQuery()
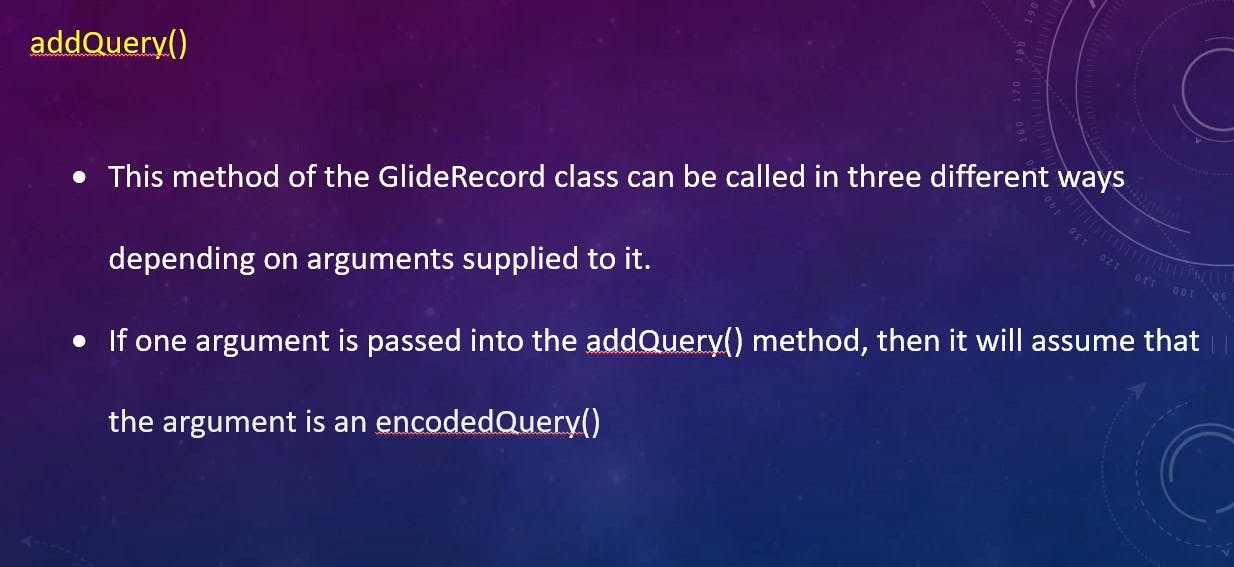
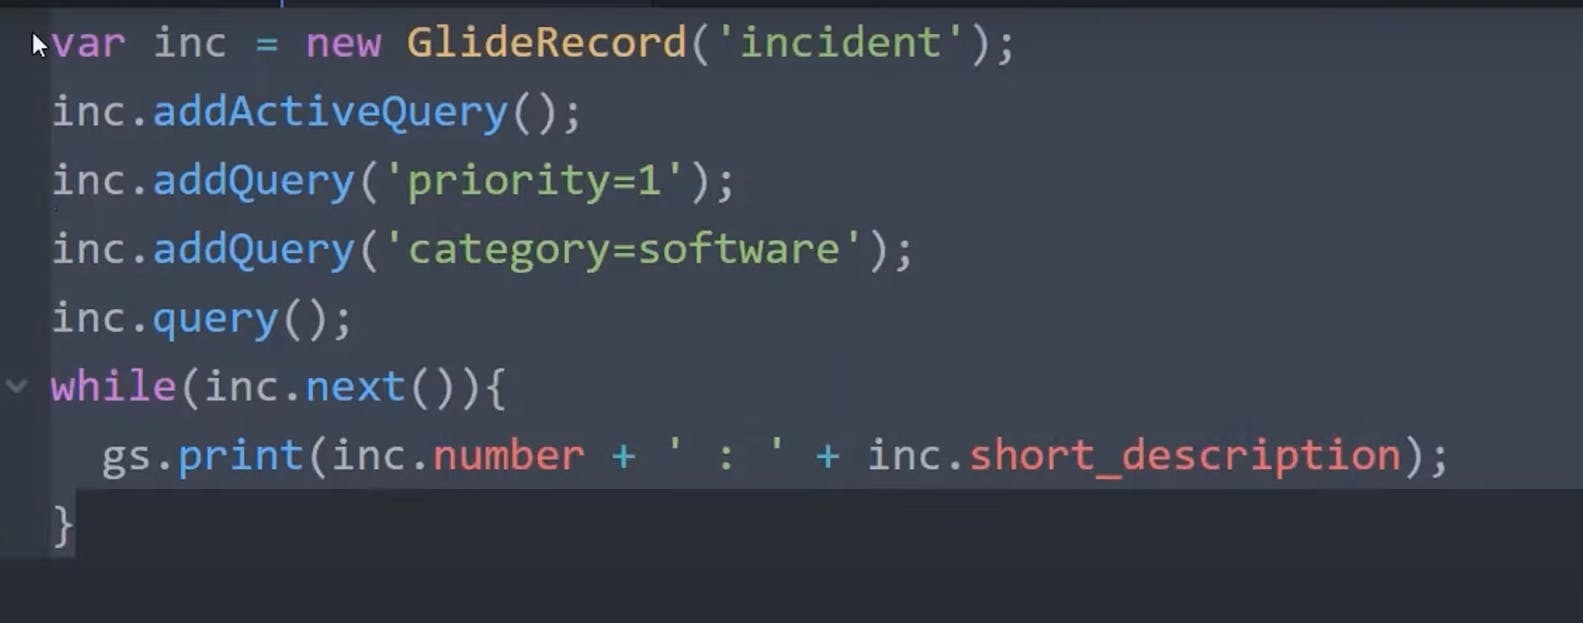
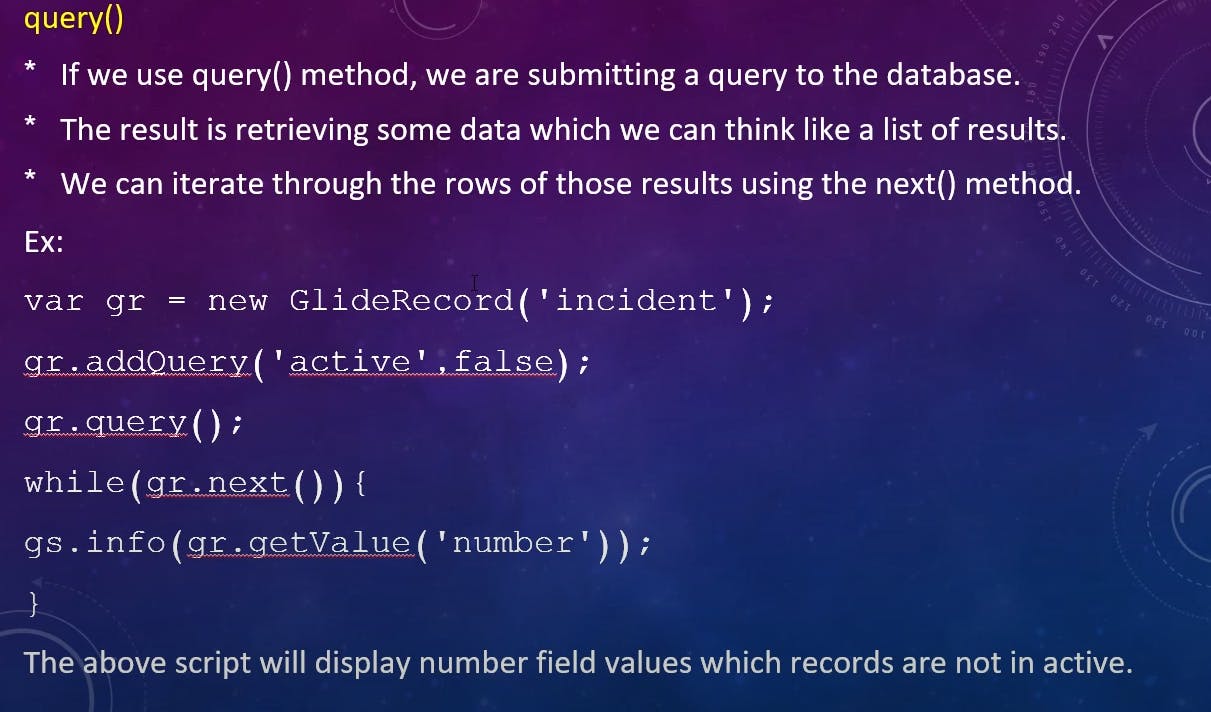
query()
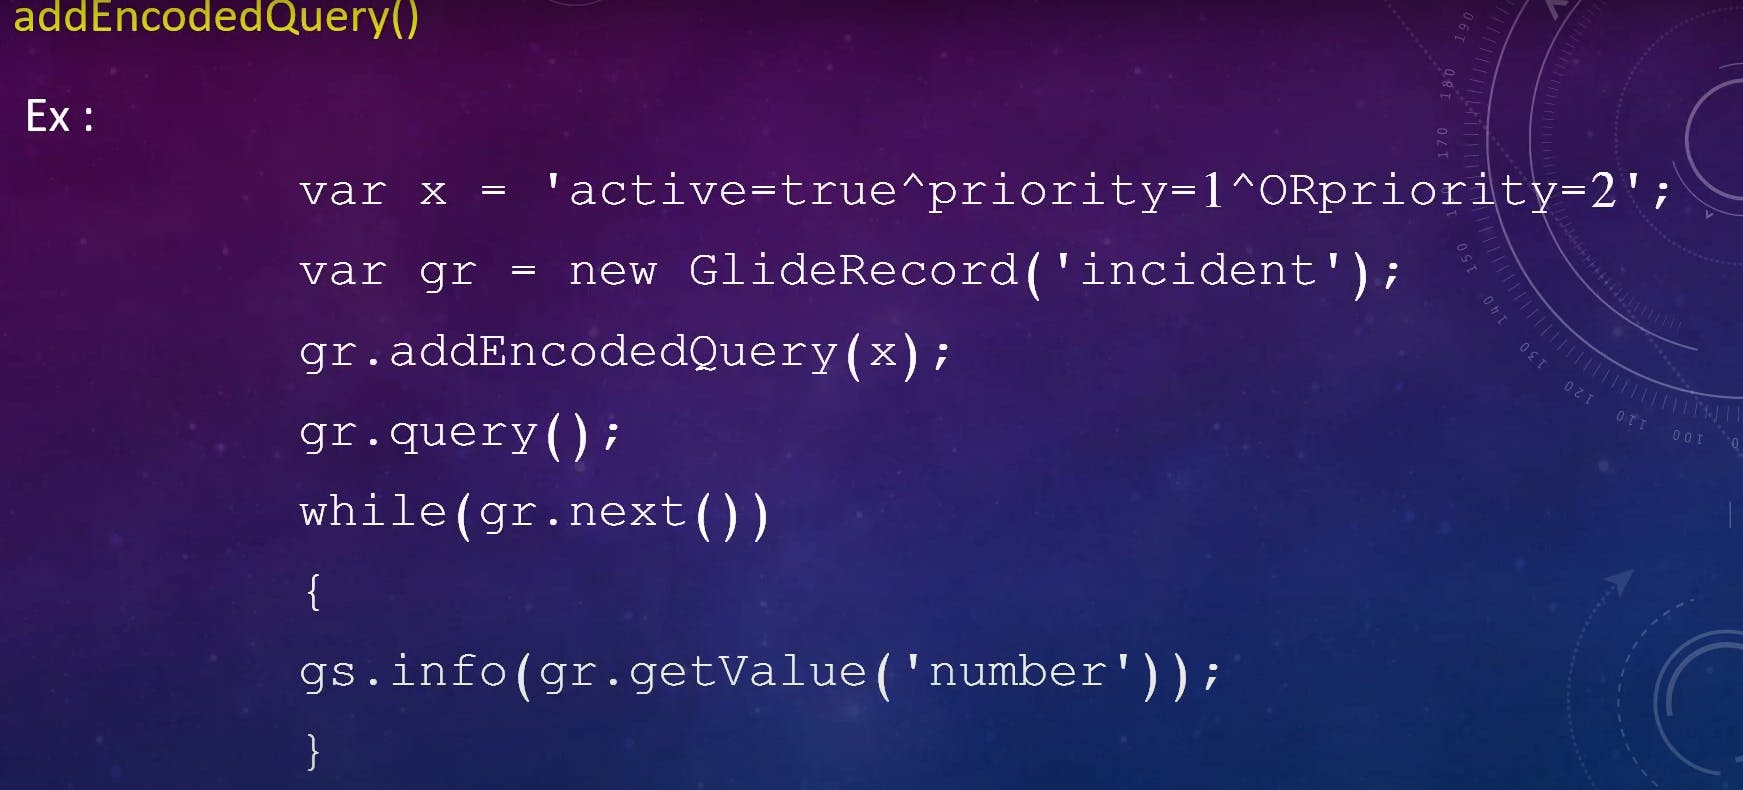
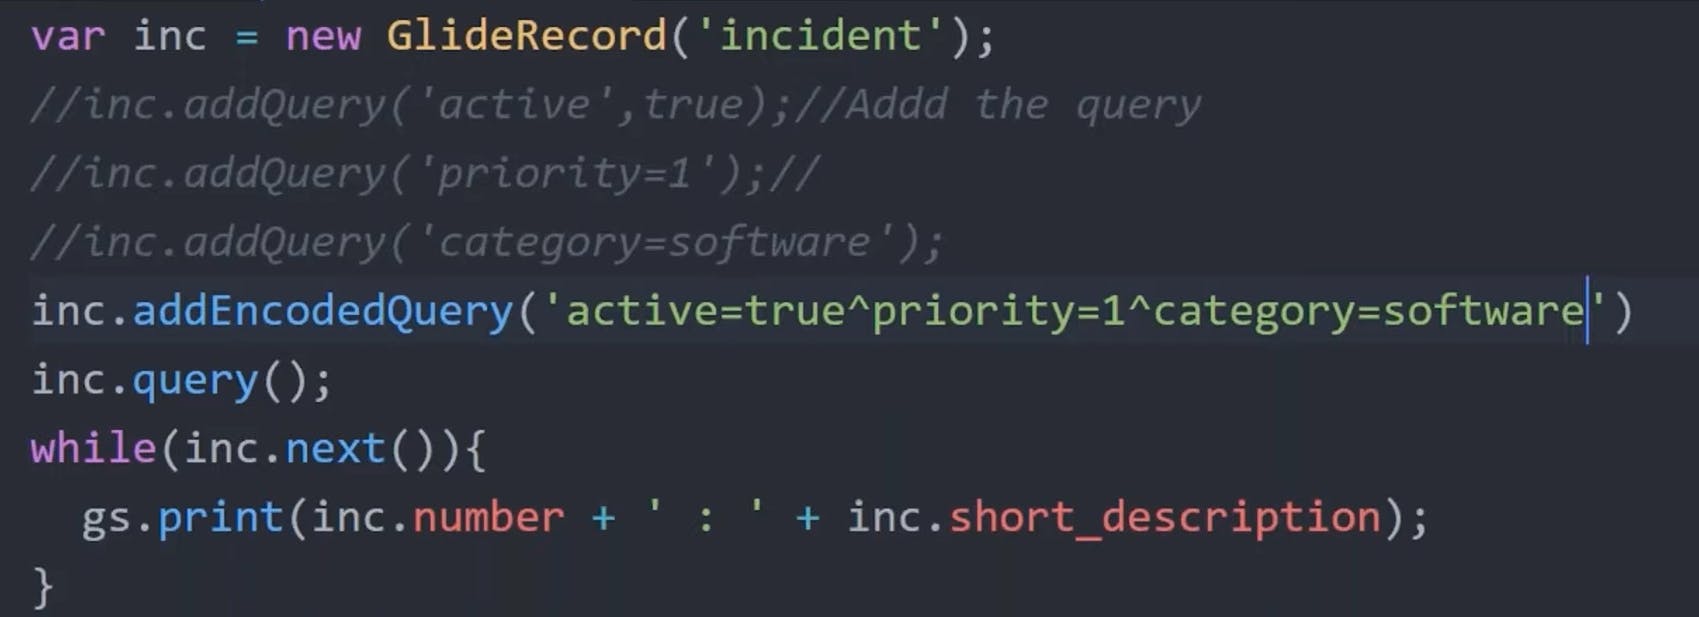
addEncodedQuery
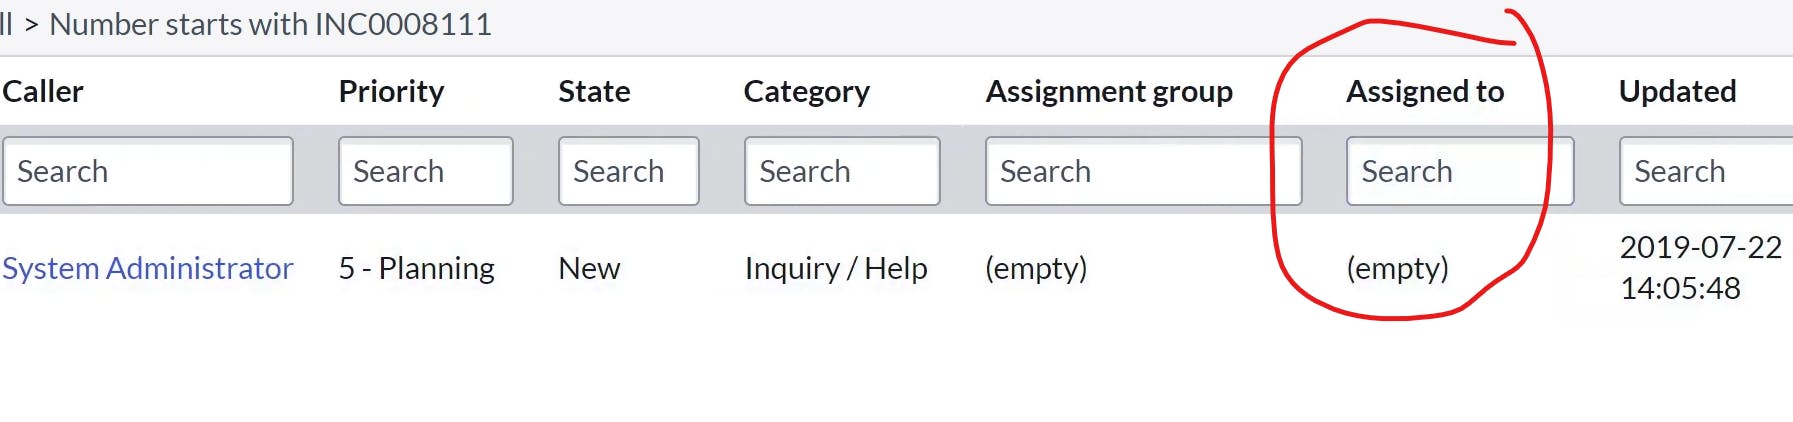
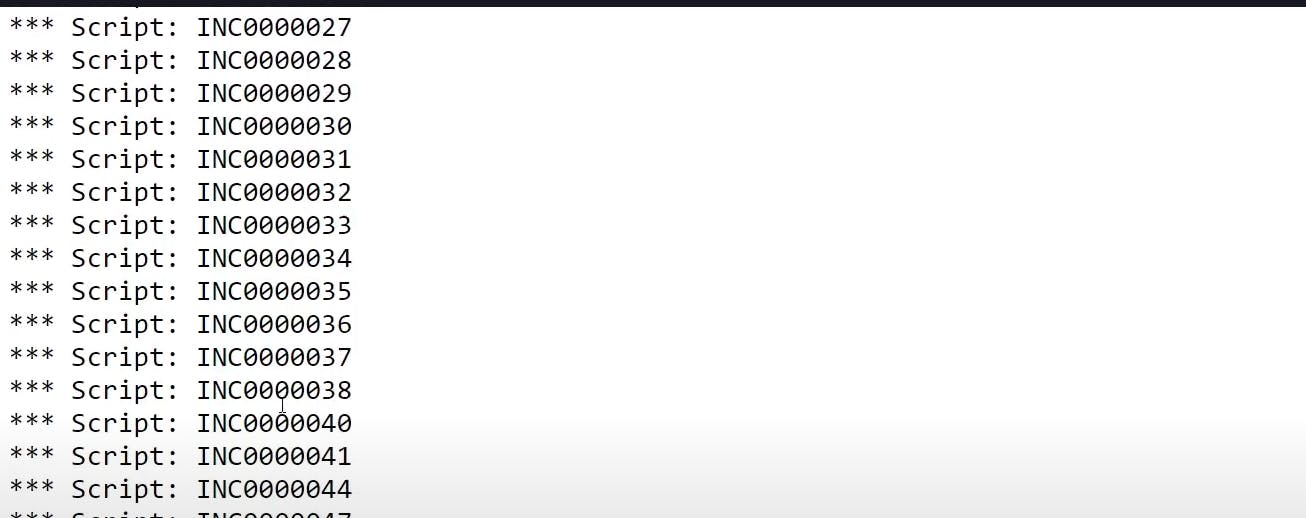
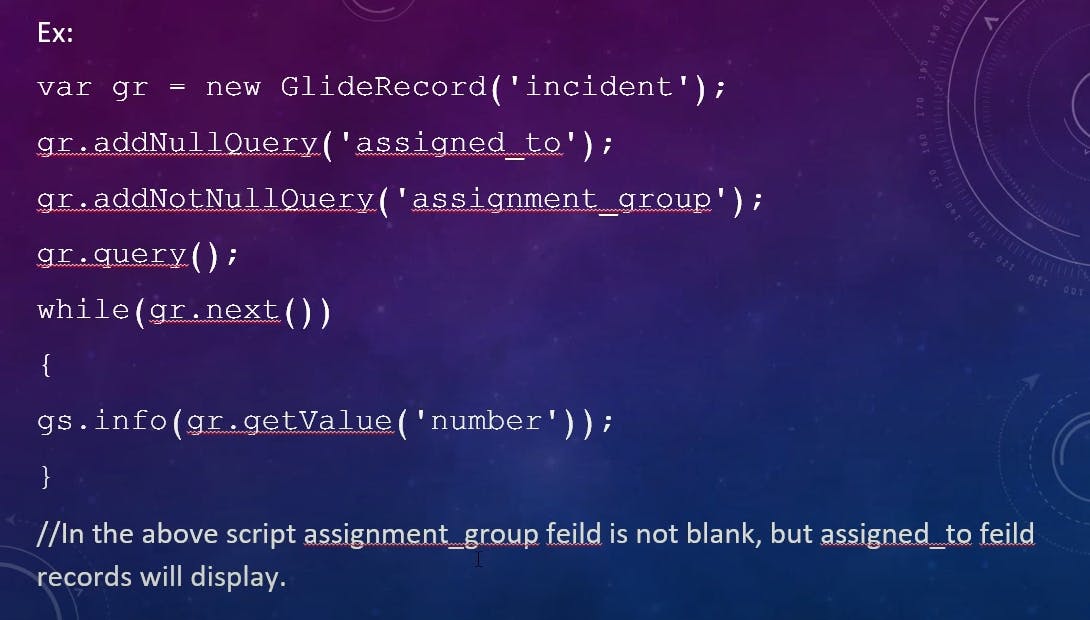
addNullQuery()
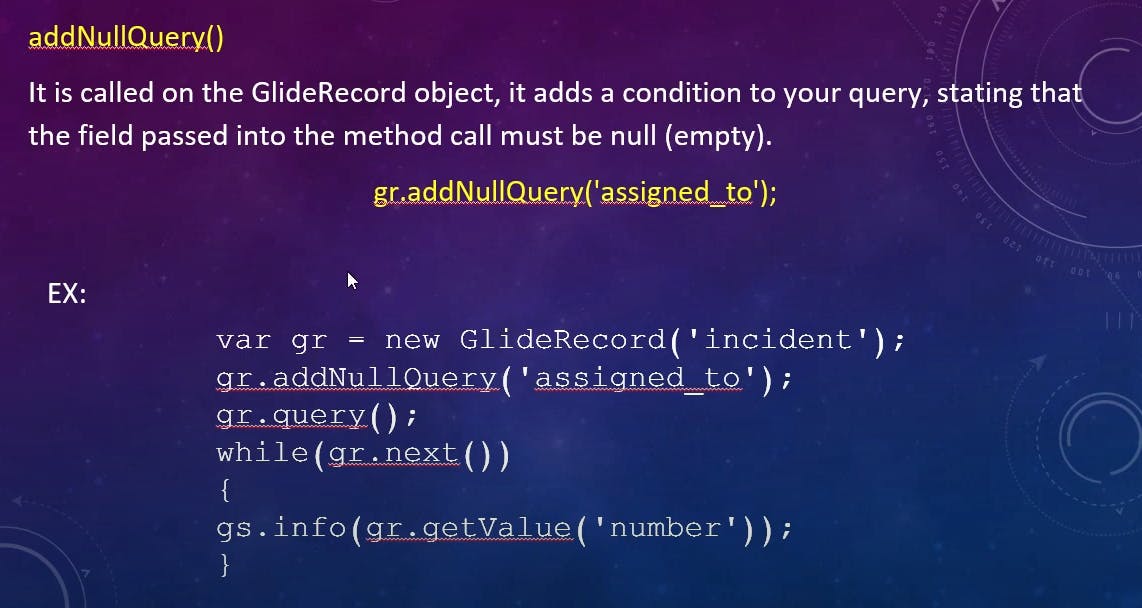
it will result all the numbers with assigned to as null
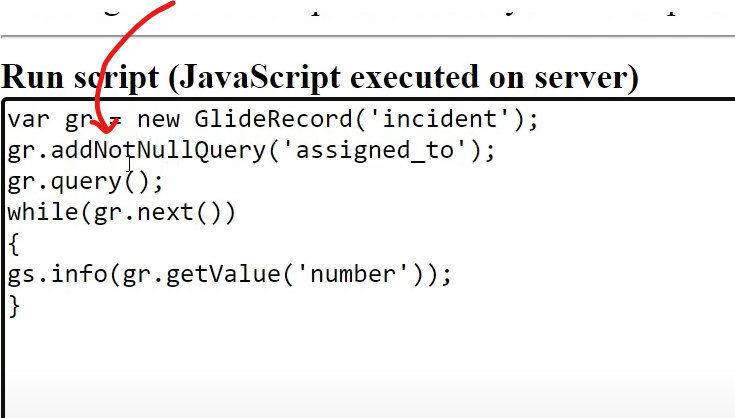
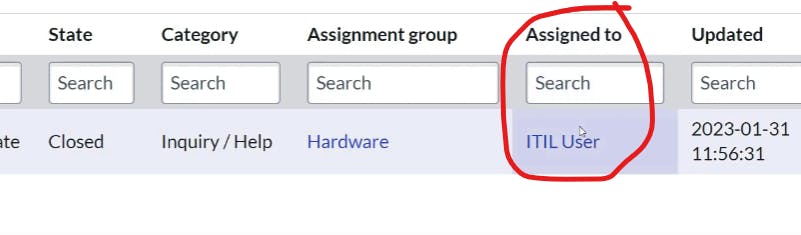
addNotNullQuery()
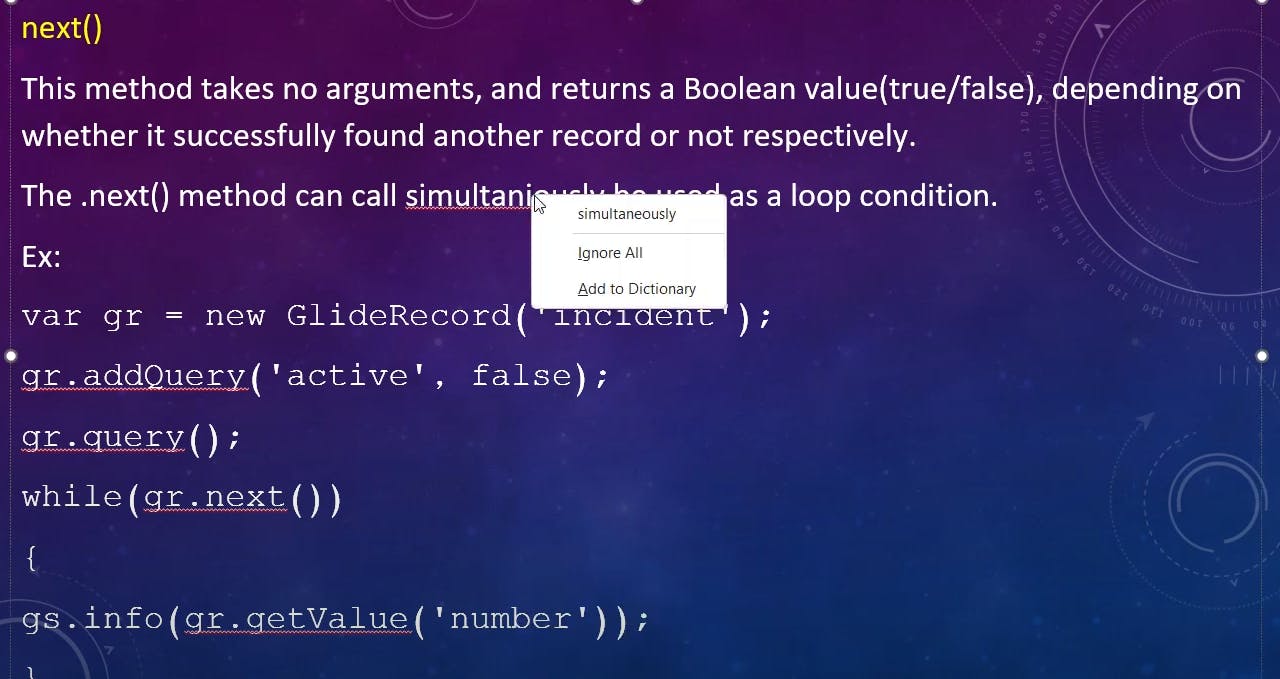
next()
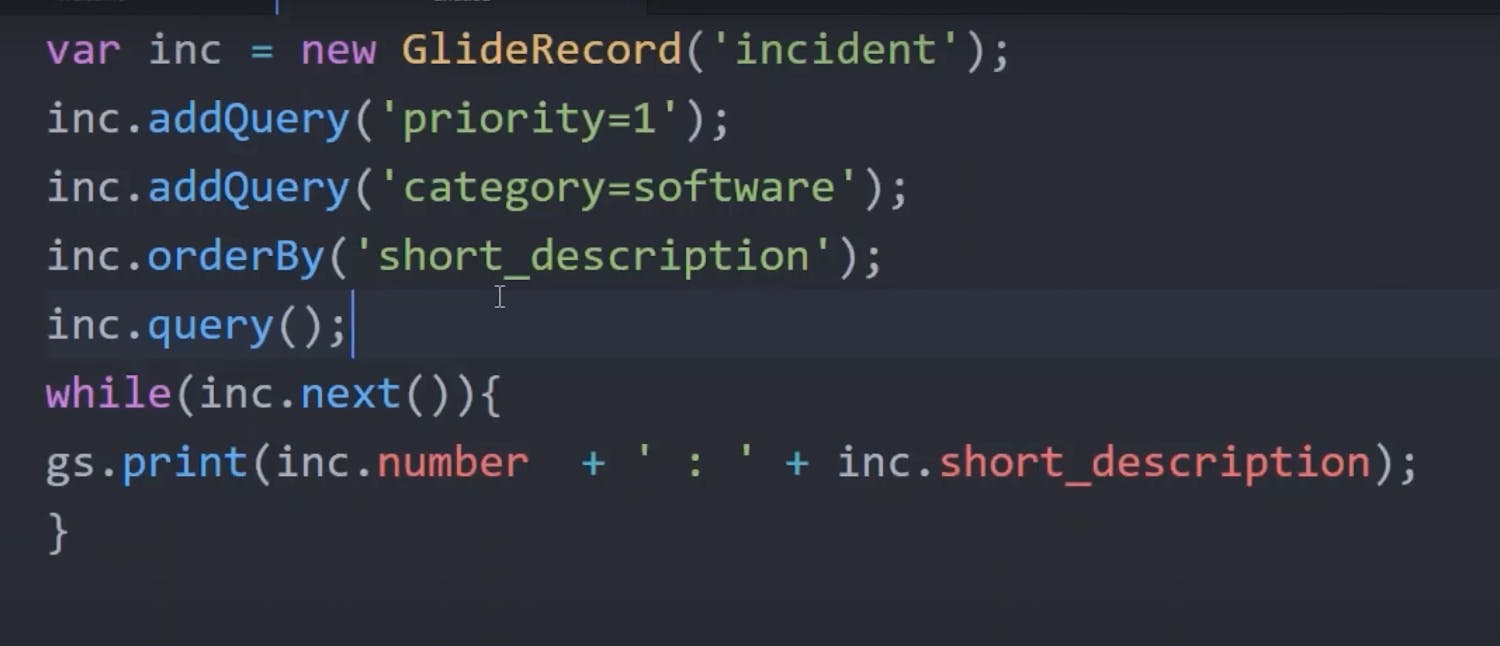
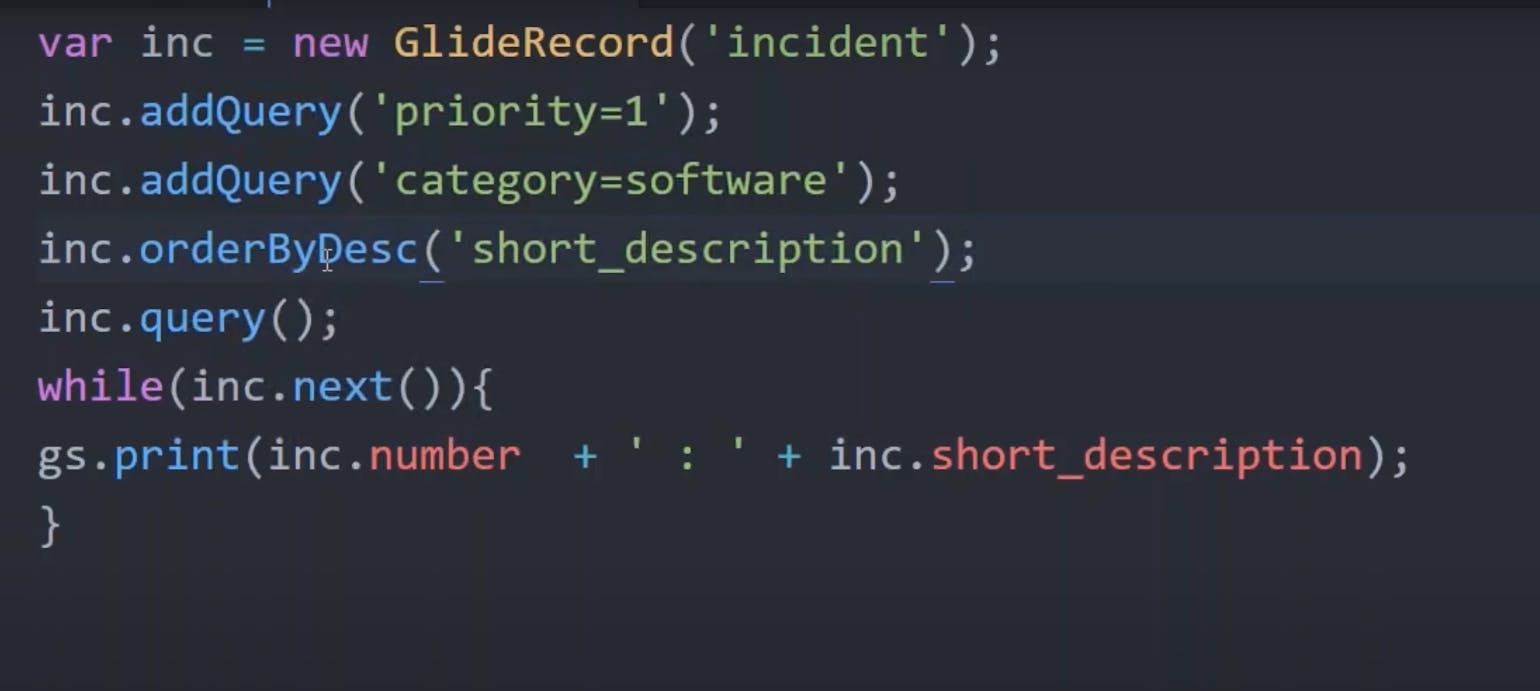
orderBy()

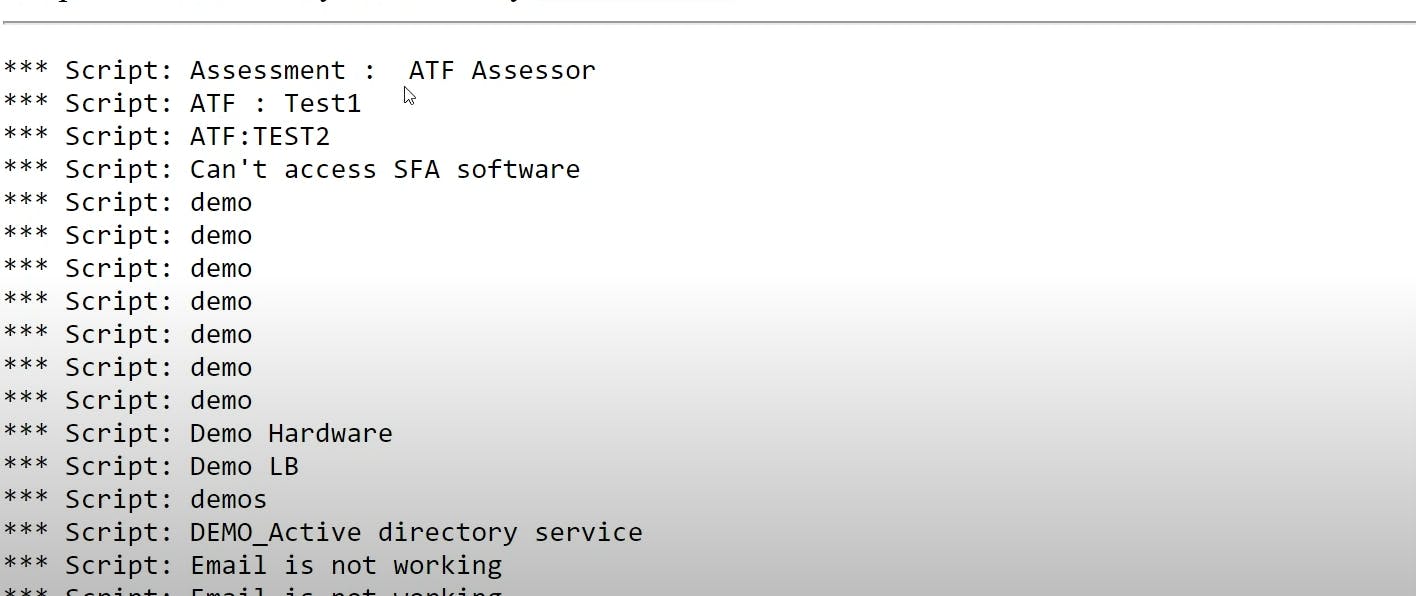
output will be in asc order
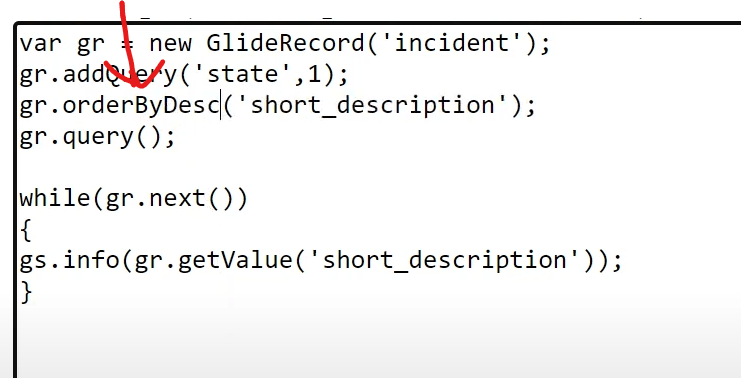
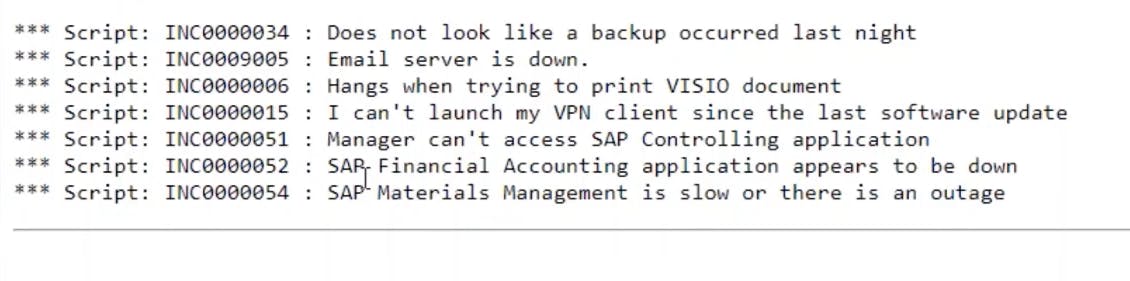
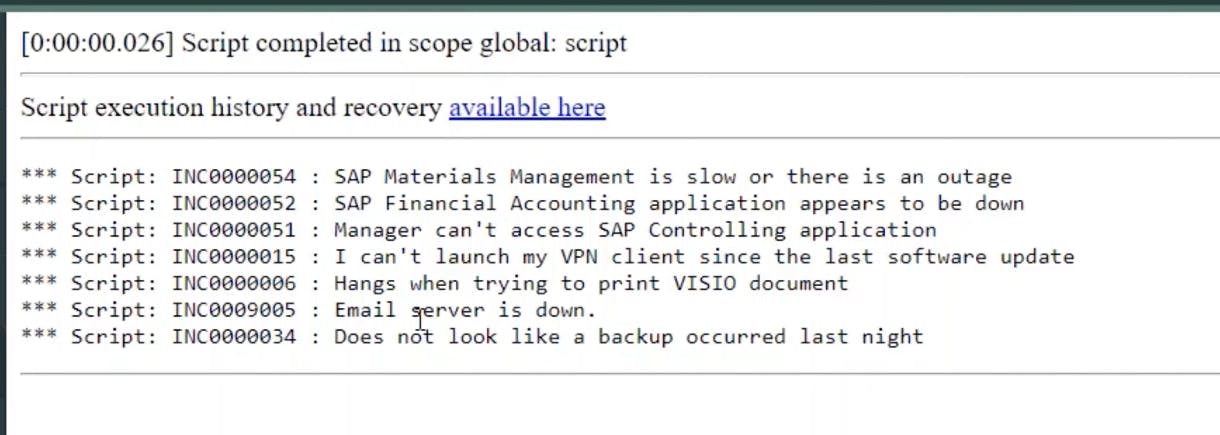
in descending order
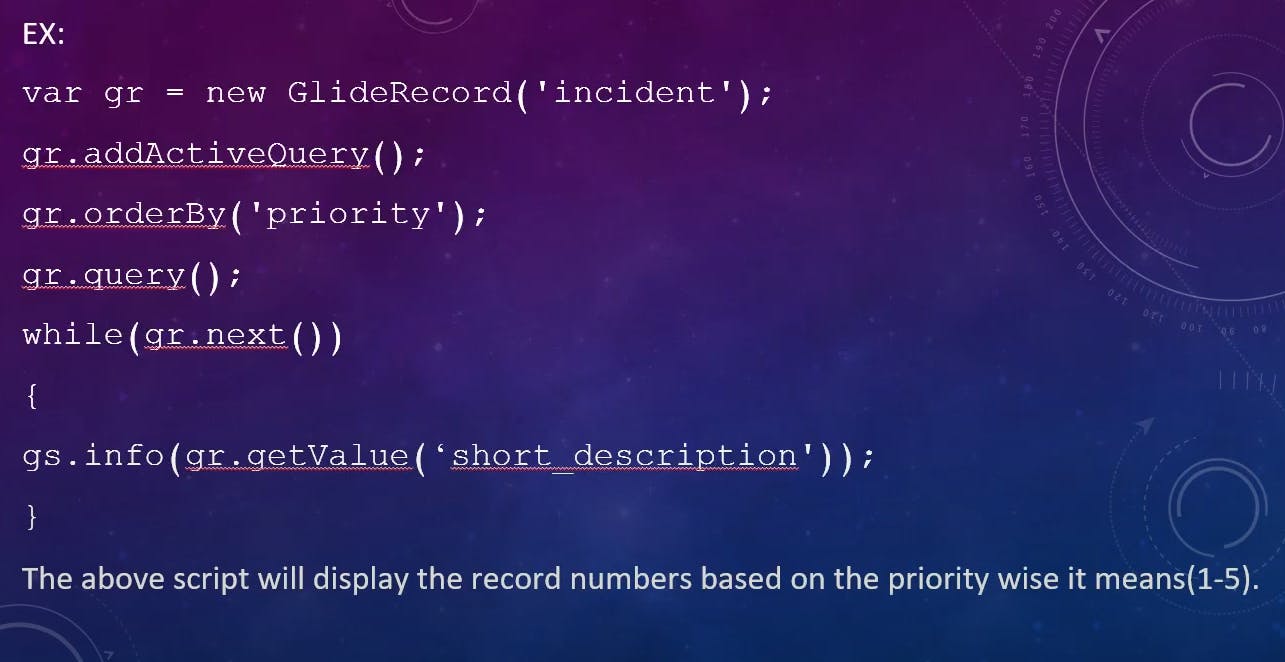
In ServiceNow's GlideRecord, the orderBy query is used to specify the sorting order for query results when retrieving records from a table. This query allows you to define one or more fields by which the records should be sorted and specify whether the sorting should be in ascending (ASC) or descending (DESC) order.
Here's how the orderBy query works in GlideRecord:
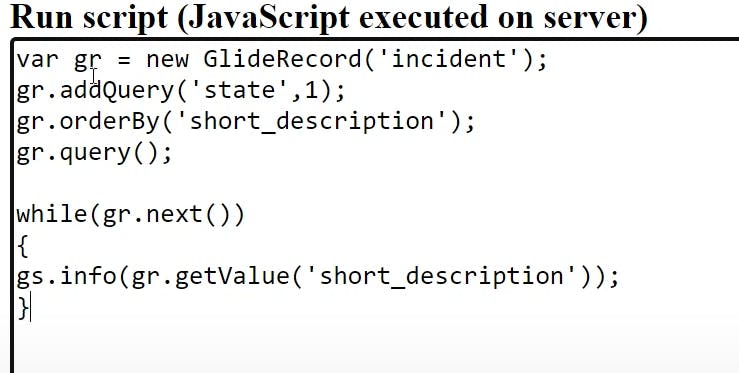
Ascending (ASC) Sorting:
To sort records in ascending order (e.g., from A to Z or from 1 to 9), you specify the field(s) by which you want to sort, followed by
.orderBy()with the optional parameter set to'ASC'. For example:var gr = new GlideRecord('incident'); gr.addQuery('active', true); gr.orderBy('priority', 'ASC'); gr.query();
Descending (DESC) Sorting:
To sort records in descending order (e.g., from Z to A or from 9 to 1), you specify the field(s) followed by
.orderBy()with the optional parameter set to'DESC'. For example:var gr = new GlideRecord('incident'); gr.addQuery('active', true); gr.orderBy('priority', 'DESC'); gr.query();
Sorting by Multiple Fields:
You can sort records by multiple fields by chaining
orderBycalls. For example:var gr = new GlideRecord('incident'); gr.addQuery('active', true); gr.orderBy('priority', 'DESC'); gr.orderBy('opened_at', 'ASC'); gr.query();
Clearing Sorting:
To clear any existing sorting criteria and retrieve records in their default order, you can use
.orderBy()with no parameters:gr.orderBy(); // Clears any existing sorting criteria gr.query();
Dynamic Sorting:
You can also use variables or dynamic values in the
orderByquery to make it adaptable based on user input or conditions:var sortOrder = 'ASC'; // Could be dynamically determined var gr = new GlideRecord('incident'); gr.addQuery('active', true); gr.orderBy('priority', sortOrder); gr.query();
The orderBy query is a powerful tool for controlling the order in which records are retrieved from the database, ensuring that query results are presented in a meaningful way for users or automated processes. It's often used in combination with other query conditions to filter and sort records based on specific criteria.
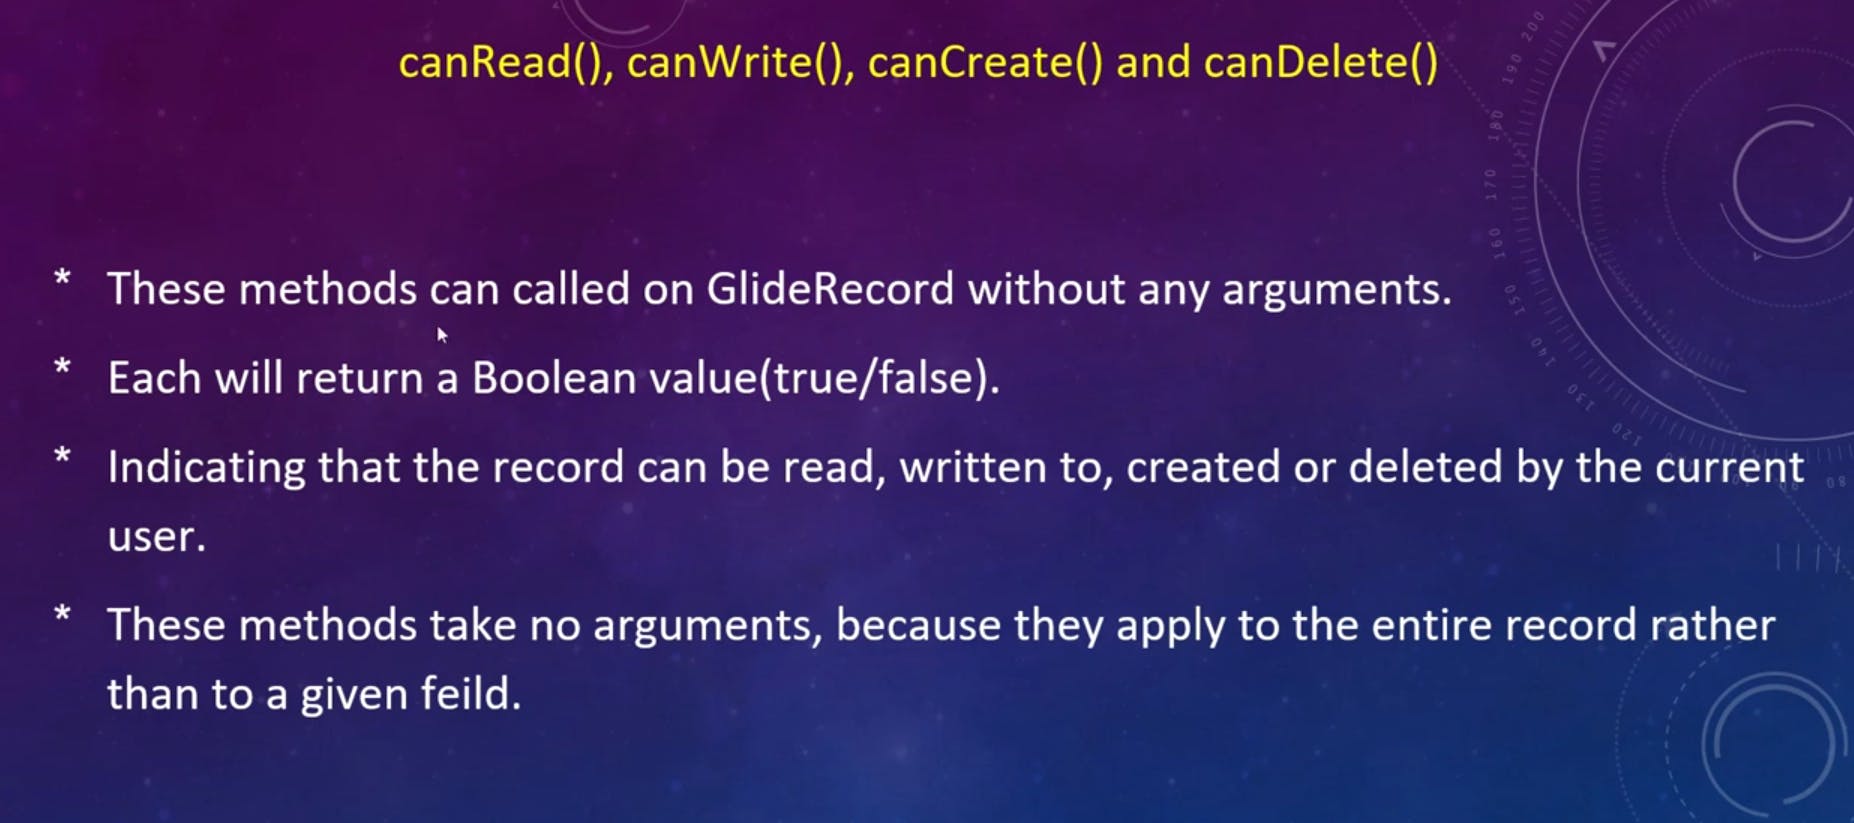
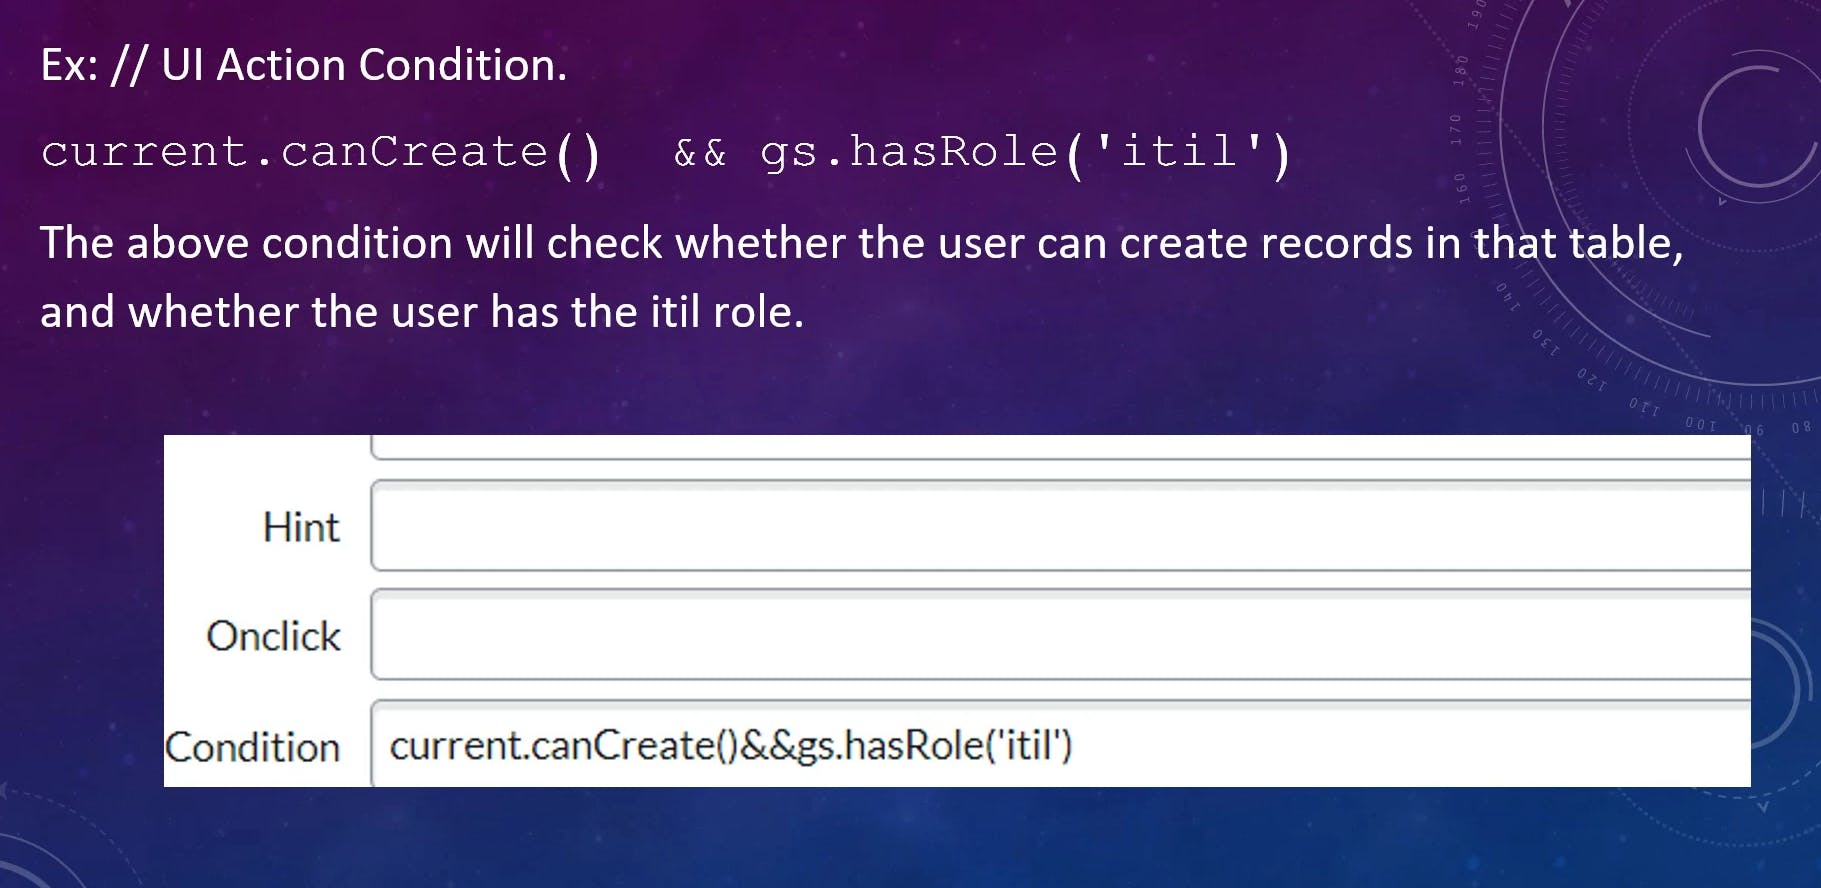
canRead()
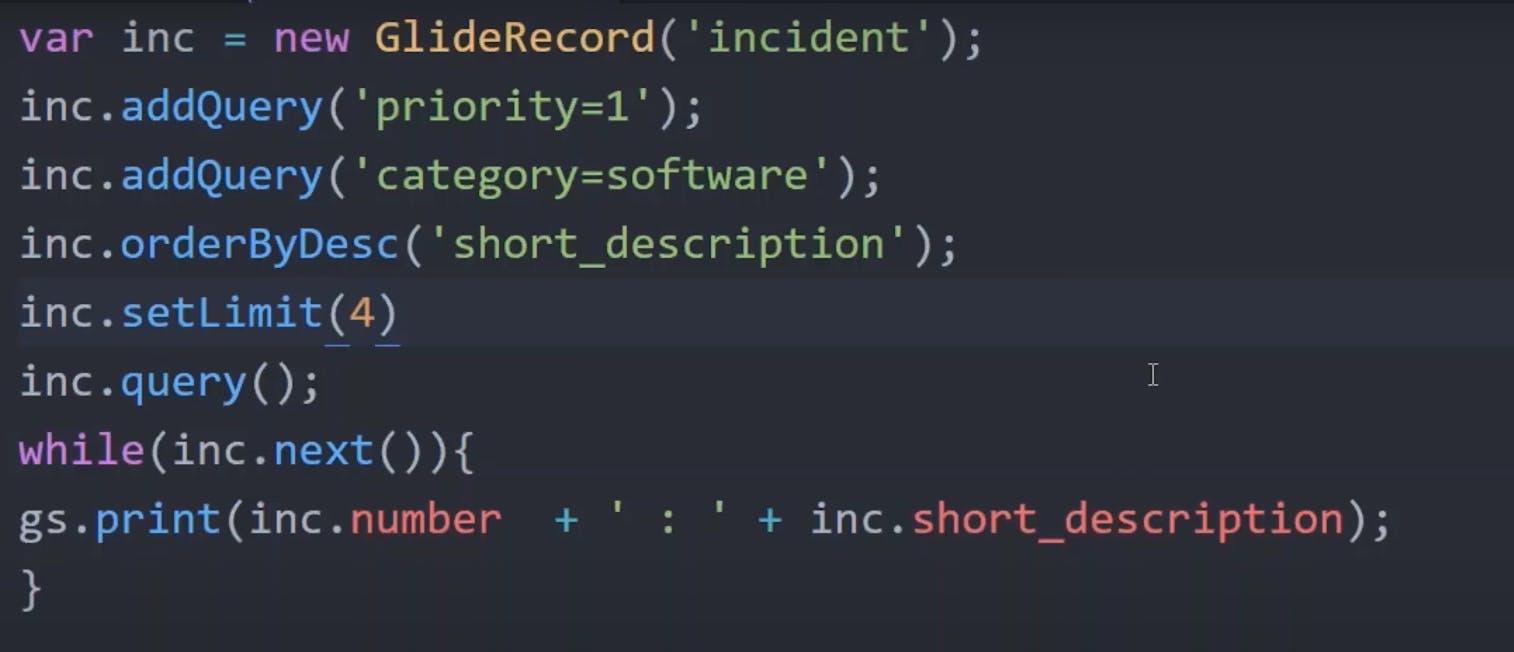
setLimit()
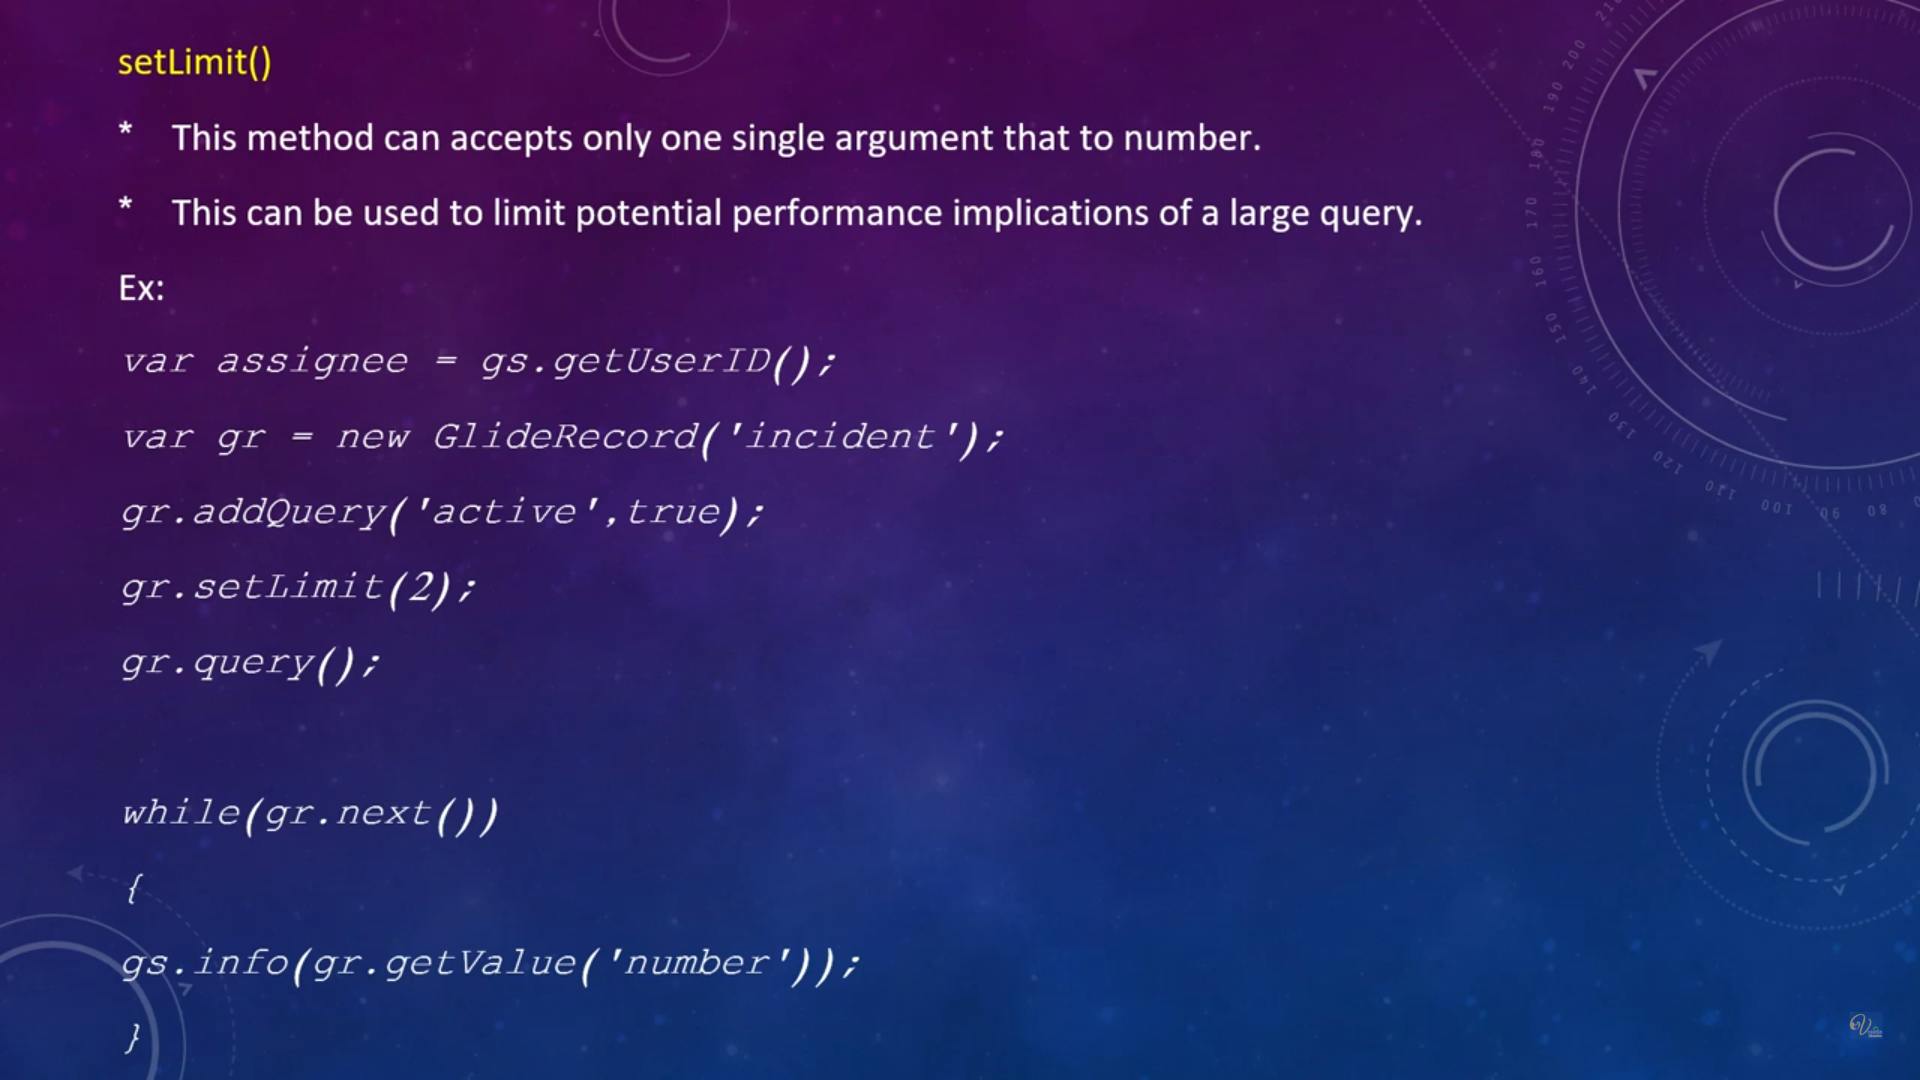
In ServiceNow's GlideRecord, the setLimit method is used to specify the maximum number of records to be retrieved when executing a query. This method is helpful when you want to limit the number of records returned by a query to improve performance or to paginate results.
Here's how the setLimit method works in GlideRecord:
var gr = new GlideRecord('incident');
gr.addQuery('active', true);
gr.orderBy('priority', 'DESC');
gr.setLimit(10); // Limit the query to retrieve a maximum of 10 records.
gr.query();
In this example:
We create a GlideRecord object for the 'incident' table.
We add a query condition to filter records where the 'active' field is true.
We specify that the records should be sorted by 'priority' in descending order.
We use the
setLimitmethod to limit the query to retrieve a maximum of 10 records.Finally, we execute the query using
gr.query().
By setting a limit, you ensure that only a specific number of records meeting your criteria are fetched. This can be beneficial for various purposes:
Performance: Limiting the number of records retrieved can improve query performance, especially when dealing with tables containing a large number of records.
Pagination: When implementing pagination in user interfaces, you can use
setLimitto retrieve a specific page of records at a time. For example, you can fetch the first 10 records, then the next 10, and so on.Resource Management: Limiting the number of records retrieved can help manage server resources and prevent excessive data retrieval, which could impact system performance.
Keep in mind that setting a limit should be done thoughtfully to balance performance and usability. The appropriate limit value depends on your specific use case and the expected size of the result set.
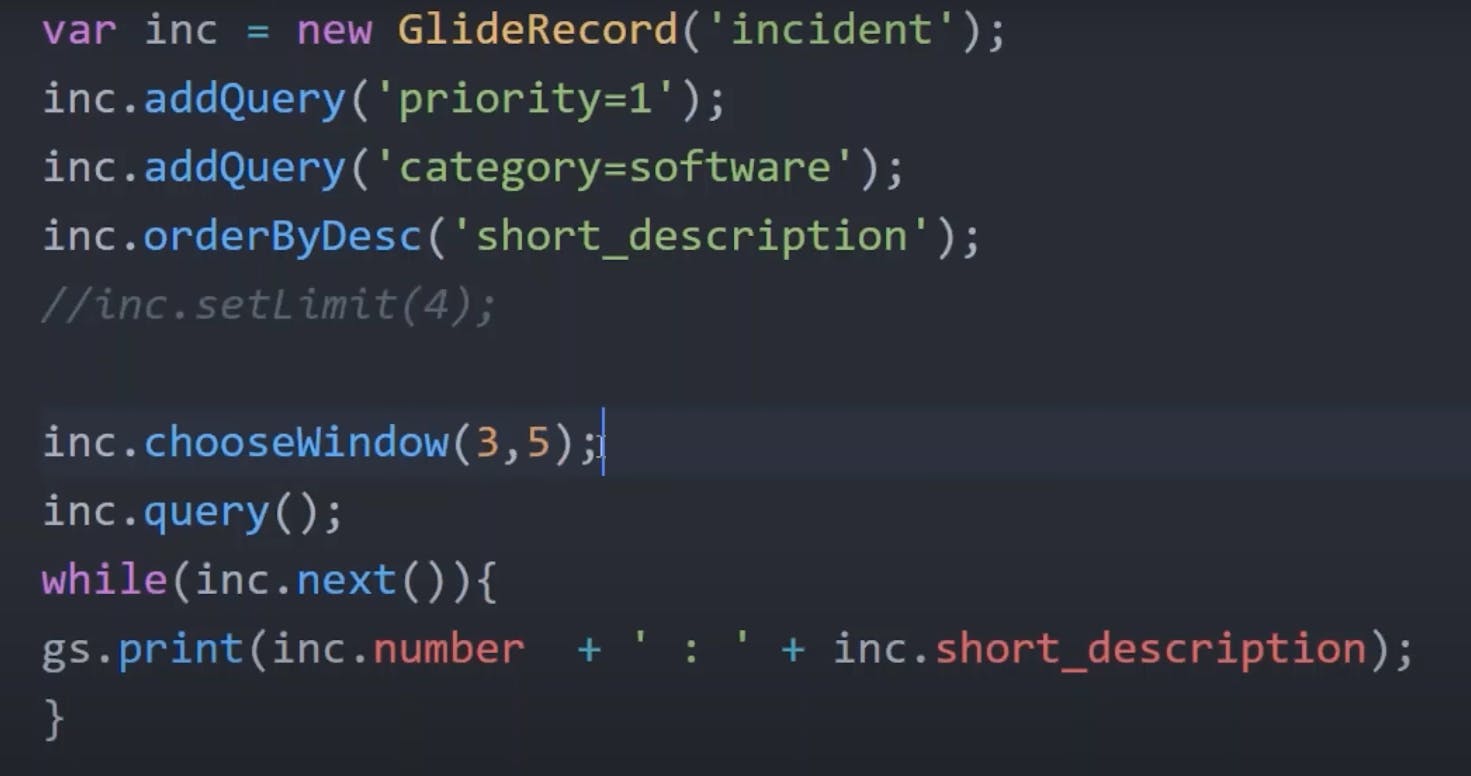
chooseWindow()
In ServiceNow's GlideRecord, the chooseWindow method is used to specify a range or window of records that you want to retrieve when executing a query. This method is particularly useful for implementing pagination, allowing you to fetch a specific page of records at a time from a potentially large result set.
The chooseWindow method takes two parameters:
first(integer): This parameter specifies the index of the first record you want to retrieve in the result set. The first record has an index of 0.last(integer): This parameter specifies the index of the last record you want to retrieve in the result set. It is inclusive, meaning that the record at the "last" index will be included in the results.
Here's how you can use the chooseWindow method in GlideRecord:
var gr = new GlideRecord('incident');
gr.addQuery('active', true);
gr.orderBy('priority', 'DESC');

var firstRecordIndex = 0; // Index of the first record to retrieve
var lastRecordIndex = 9; // Index of the last record to retrieve (e.g., for a page size of 10)

gr.chooseWindow(firstRecordIndex, lastRecordIndex);
gr.query();
In this example:
We create a GlideRecord object for the 'incident' table.
We add a query condition to filter records where the 'active' field is true.
We specify that the records should be sorted by 'priority' in descending order.
We define
firstRecordIndexandlastRecordIndexto determine the range of records to retrieve, which corresponds to a page size of 10 records (0-9).We use the
chooseWindowmethod to set the range of records to retrieve based on the specified index range.Finally, we execute the query using
gr.query()to retrieve the records within the chosen window.
This approach is commonly used in pagination, where you can easily switch between different pages of records by adjusting the first and last indices. It's especially useful when working with large result sets to improve performance and provide a better user experience.
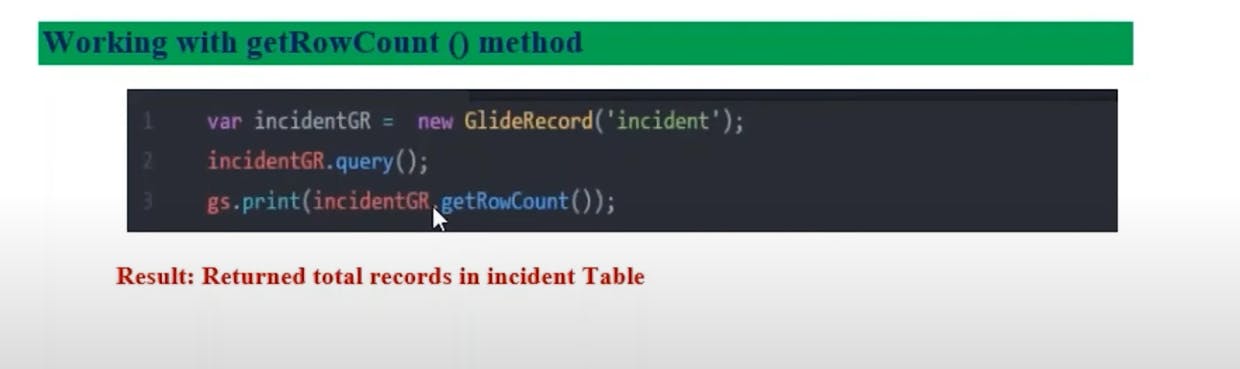
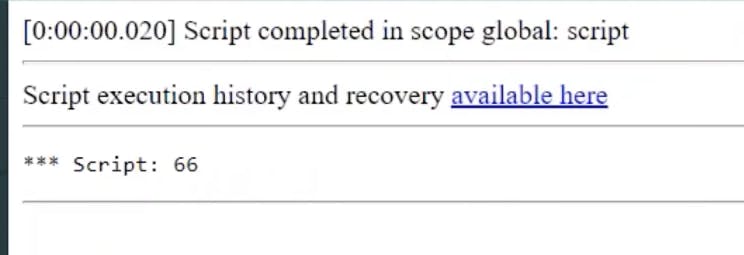
getRowCount()
The getRowCount() method is a part of the GlideRecord API in ServiceNow. It is used to determine the total number of records that match the current query conditions within a GlideRecord object. This method can be particularly useful when you want to know the count of records that meet certain criteria without actually retrieving all the records themselves.
Here's how to use the getRowCount() method in GlideRecord:
var gr = new GlideRecord('incident');
gr.addQuery('active', true); // Adding a query condition to filter active records.
gr.addQuery('priority', '1'); // Adding another query condition to filter by priority.
gr.query(); // Executing the query.

var rowCount = gr.getRowCount(); // Getting the count of matching records.

gs.info('Number of active incidents with priority 1: ' + rowCount);
In this example:
We create a GlideRecord object for the 'incident' table.
We add query conditions to filter records based on the 'active' field being true and the 'priority' field being '1'.
We execute the query using
gr.query().We use
gr.getRowCount()to retrieve the count of records that meet the specified criteria.
The getRowCount() method can be helpful in scenarios where you want to perform actions based on the count of records or when you need to display the total number of matching records to users without fetching all the records. It's a performance-efficient way to retrieve just the count of records instead of the entire result set.

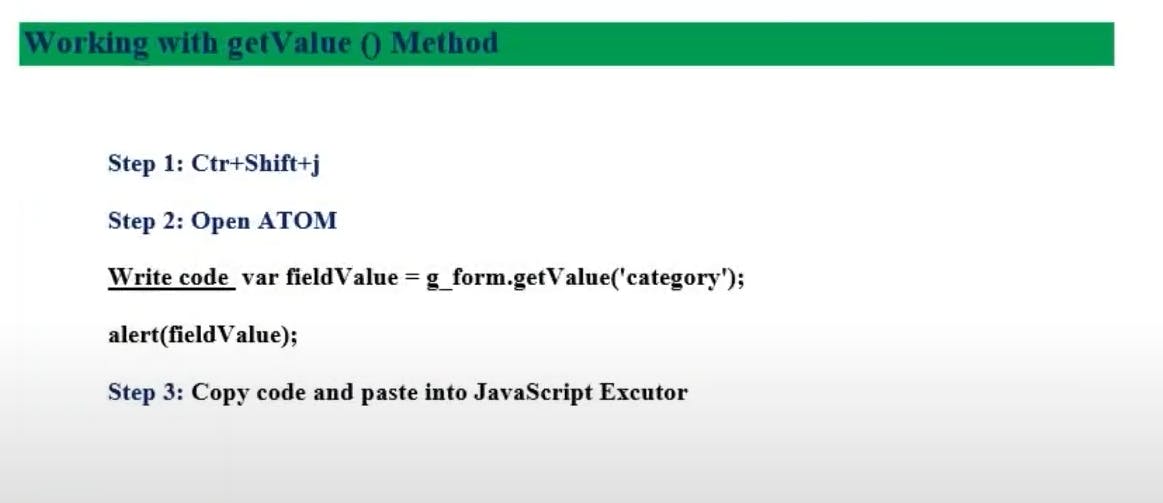
getValue()
The getValue(fieldName) method in ServiceNow's GlideRecord API is used to retrieve the value of a specific field in the current record of a GlideRecord object. It allows you to access and work with the data stored in individual fields within a record. Here's how the getValue() method works:
var gr = new GlideRecord('incident'); // Create a GlideRecord object for the 'incident' table.
gr.addQuery('number', 'INC0010001'); // Add a query condition to retrieve a specific incident record.
gr.query(); // Execute the query.

if (gr.next()) {
    // Access the values of specific fields in the current record.
    var incidentNumber = gr.getValue('number');
    var shortDescription = gr.getValue('short_description');

    gs.info('Incident Number: ' + incidentNumber);
    gs.info('Short Description: ' + shortDescription);
} else {
    gs.info('Incident record not found.');
}
In this example:
We create a GlideRecord object for the 'incident' table.
We add a query condition to filter records where the 'number' field matches a specific incident number, 'INC0010001'.
We execute the query using
gr.query().We use an
ifstatement withgr.next()to check if there is a record in the result set.If a record is found, we use the
gr.getValue(fieldName)method to retrieve the values of specific fields in the current record, such as 'number' and 'short_description'.We then print the values to the script output using
gs.info().If no record is found (e.g., due to the query conditions not being met), we print a message indicating that the incident record was not found.
The getValue() method is commonly used when you need to access and work with the data within a record's fields, whether it's for displaying information to users, performing calculations, or making decisions based on field values. It allows you to retrieve and work with individual field values as needed.
setValue()

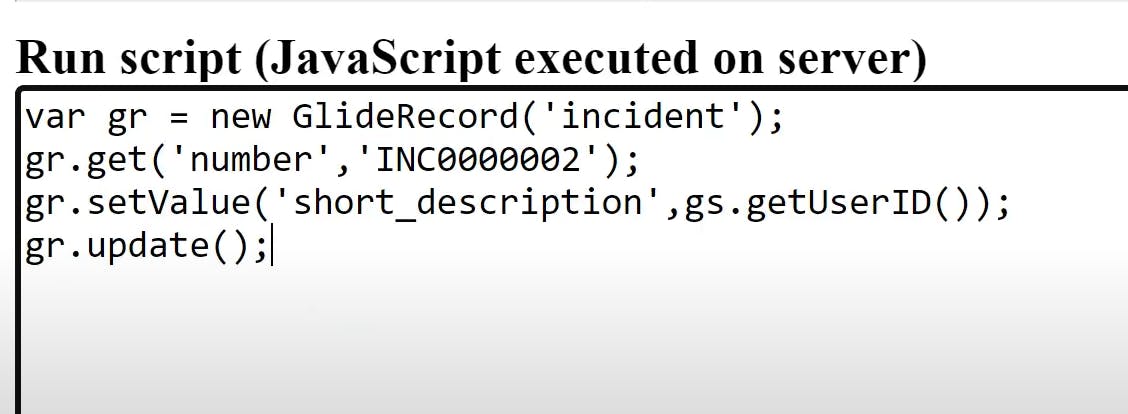
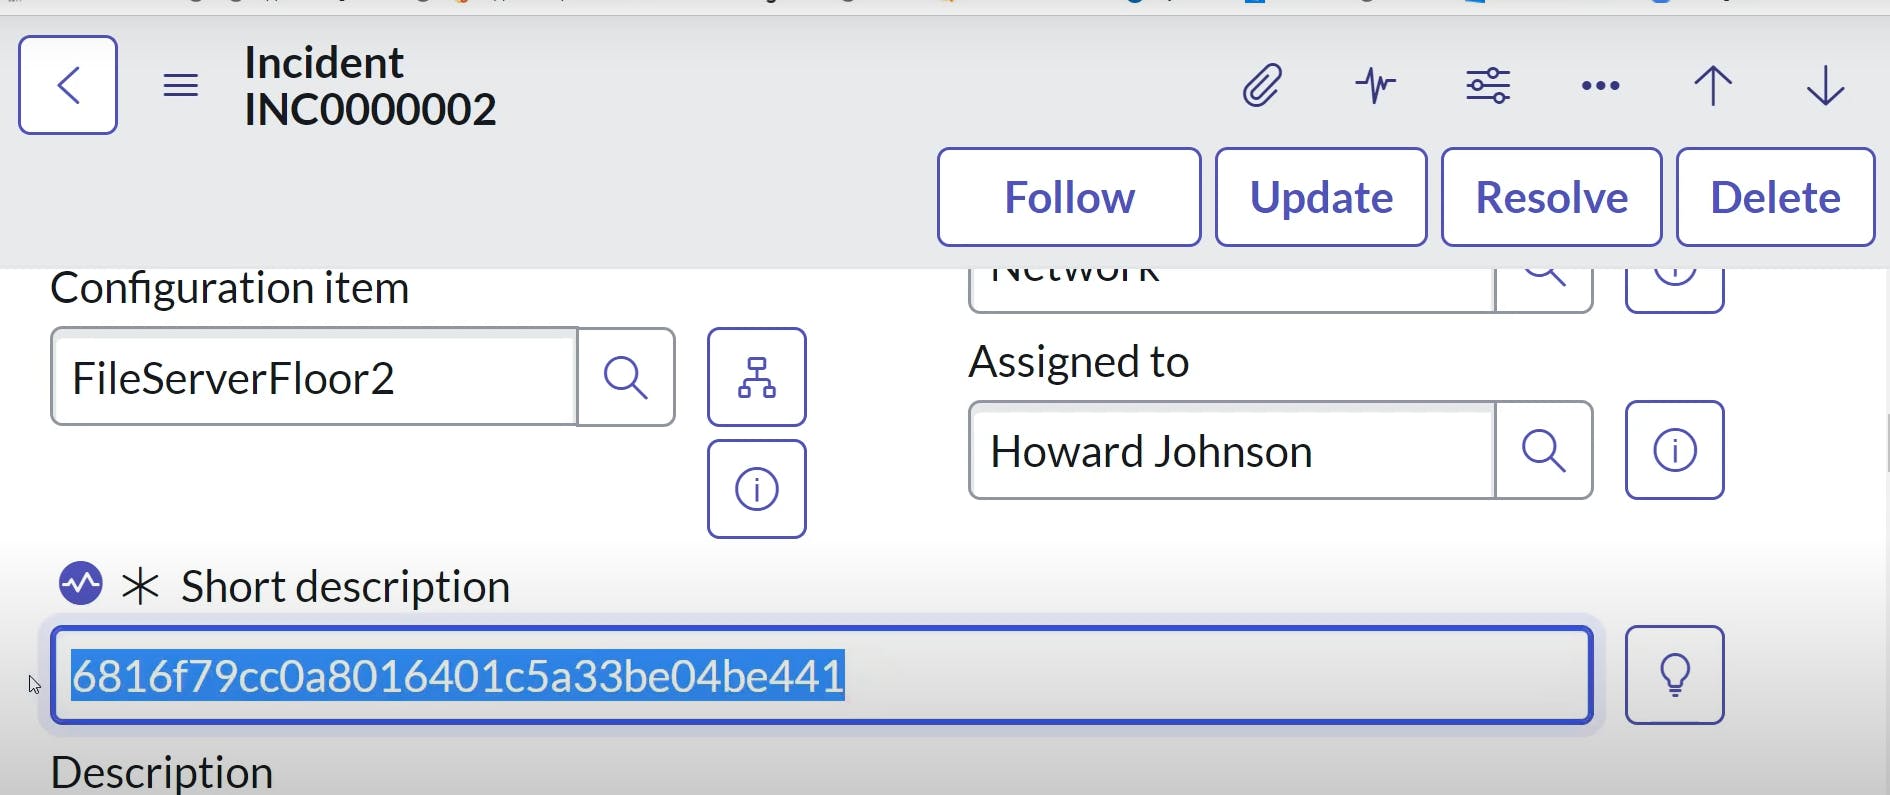
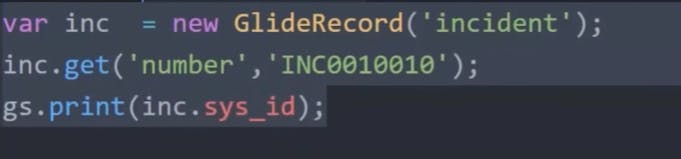
get()
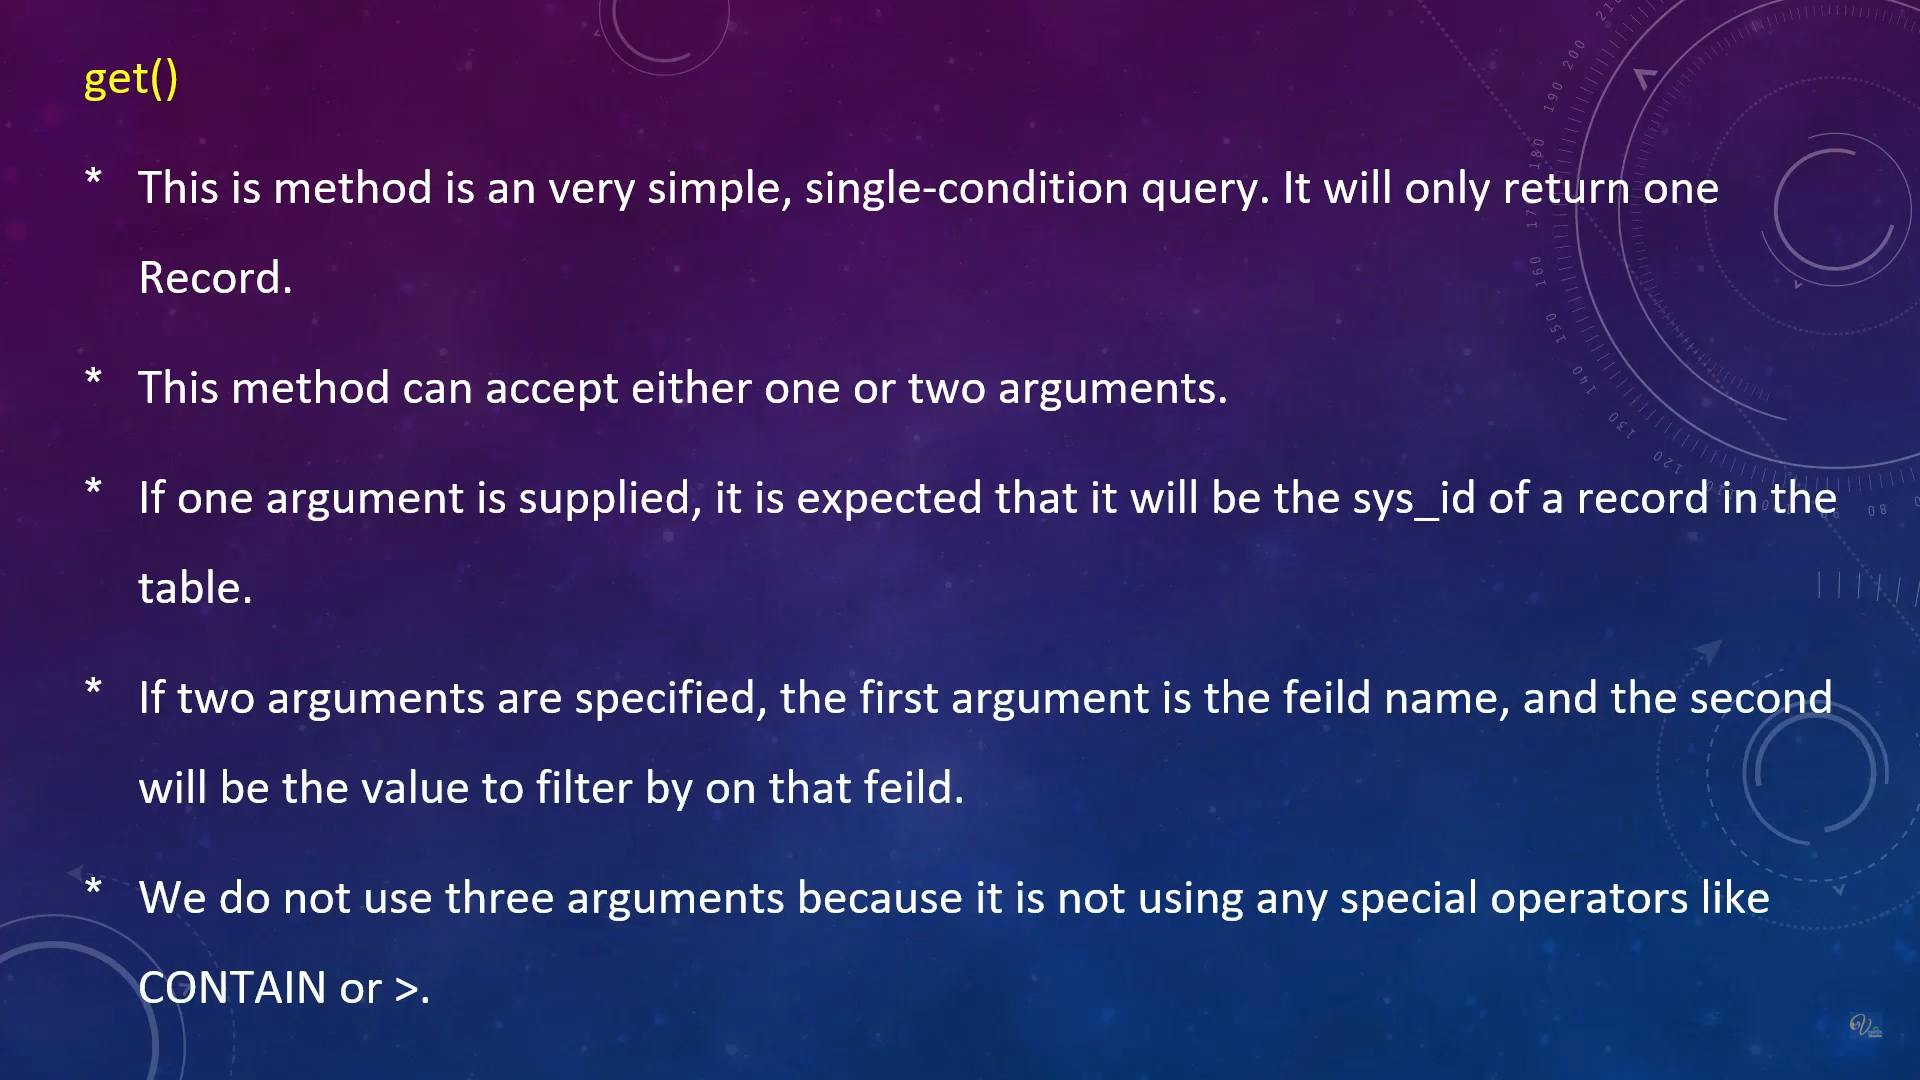
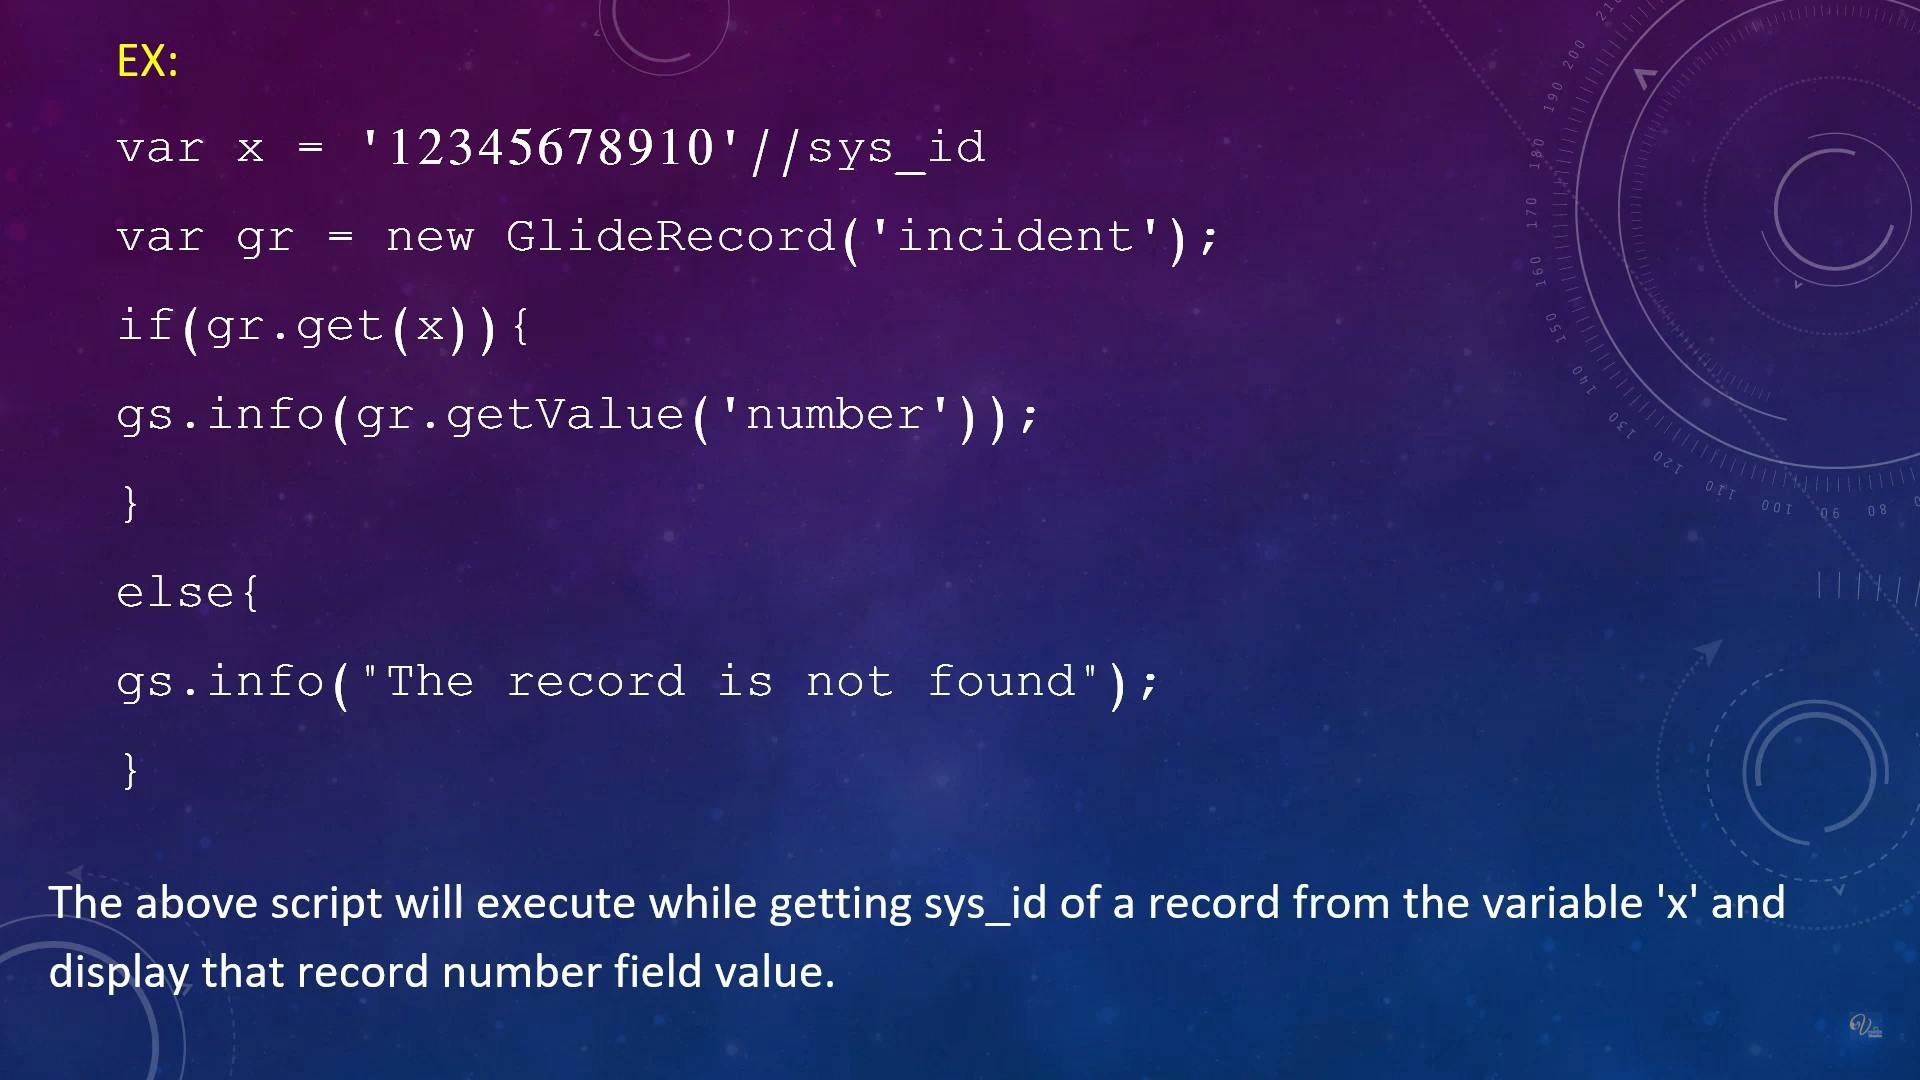

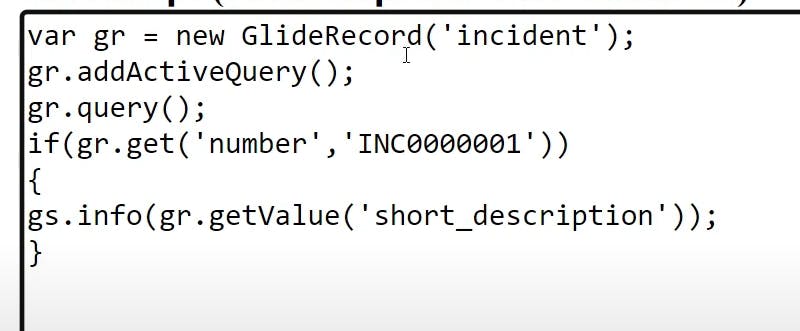
In ServiceNow's GlideRecord API, the get method is used to retrieve a specific record by its sys_id (system identifier). This method allows you to fetch a single record from a table based on its unique identifier. Here's how the get method works:
var gr = new GlideRecord('incident'); // Create a GlideRecord object for the 'incident' table.
var sysId = 'a7dbadf71b1223005be7cc689619ae84'; // Replace with the sys_id of the specific record you want to retrieve.

if (gr.get(sysId)) {
    // The record with the specified sys_id was found.
    gs.print('Incident Number: ' + gr.getValue('number'));
    gs.print('Short Description: ' + gr.getValue('short_description'));
} else {
    // The record with the specified sys_id was not found.
    gs.print('Record not found.');
}
In this example:
We create a GlideRecord object for the 'incident' table using
var gr = new GlideRecord('incident');.We specify the
sys_idof the specific record we want to retrieve in thesysIdvariable.We use the
get(sysId)method to attempt to retrieve the record with the providedsys_id.If the record with the specified
sys_idis found, thegetmethod returnstrue, and we can access its field values usinggr.getValue(fieldName).If the record is not found, the
getmethod returnsfalse, and we can handle this case accordingly.
The get method is useful when you need to fetch a single, specific record based on its unique identifier. It's commonly used when you know the sys_id of the record you want to retrieve, such as when responding to user requests or when you need to update or display a particular record's details.


hasNext()
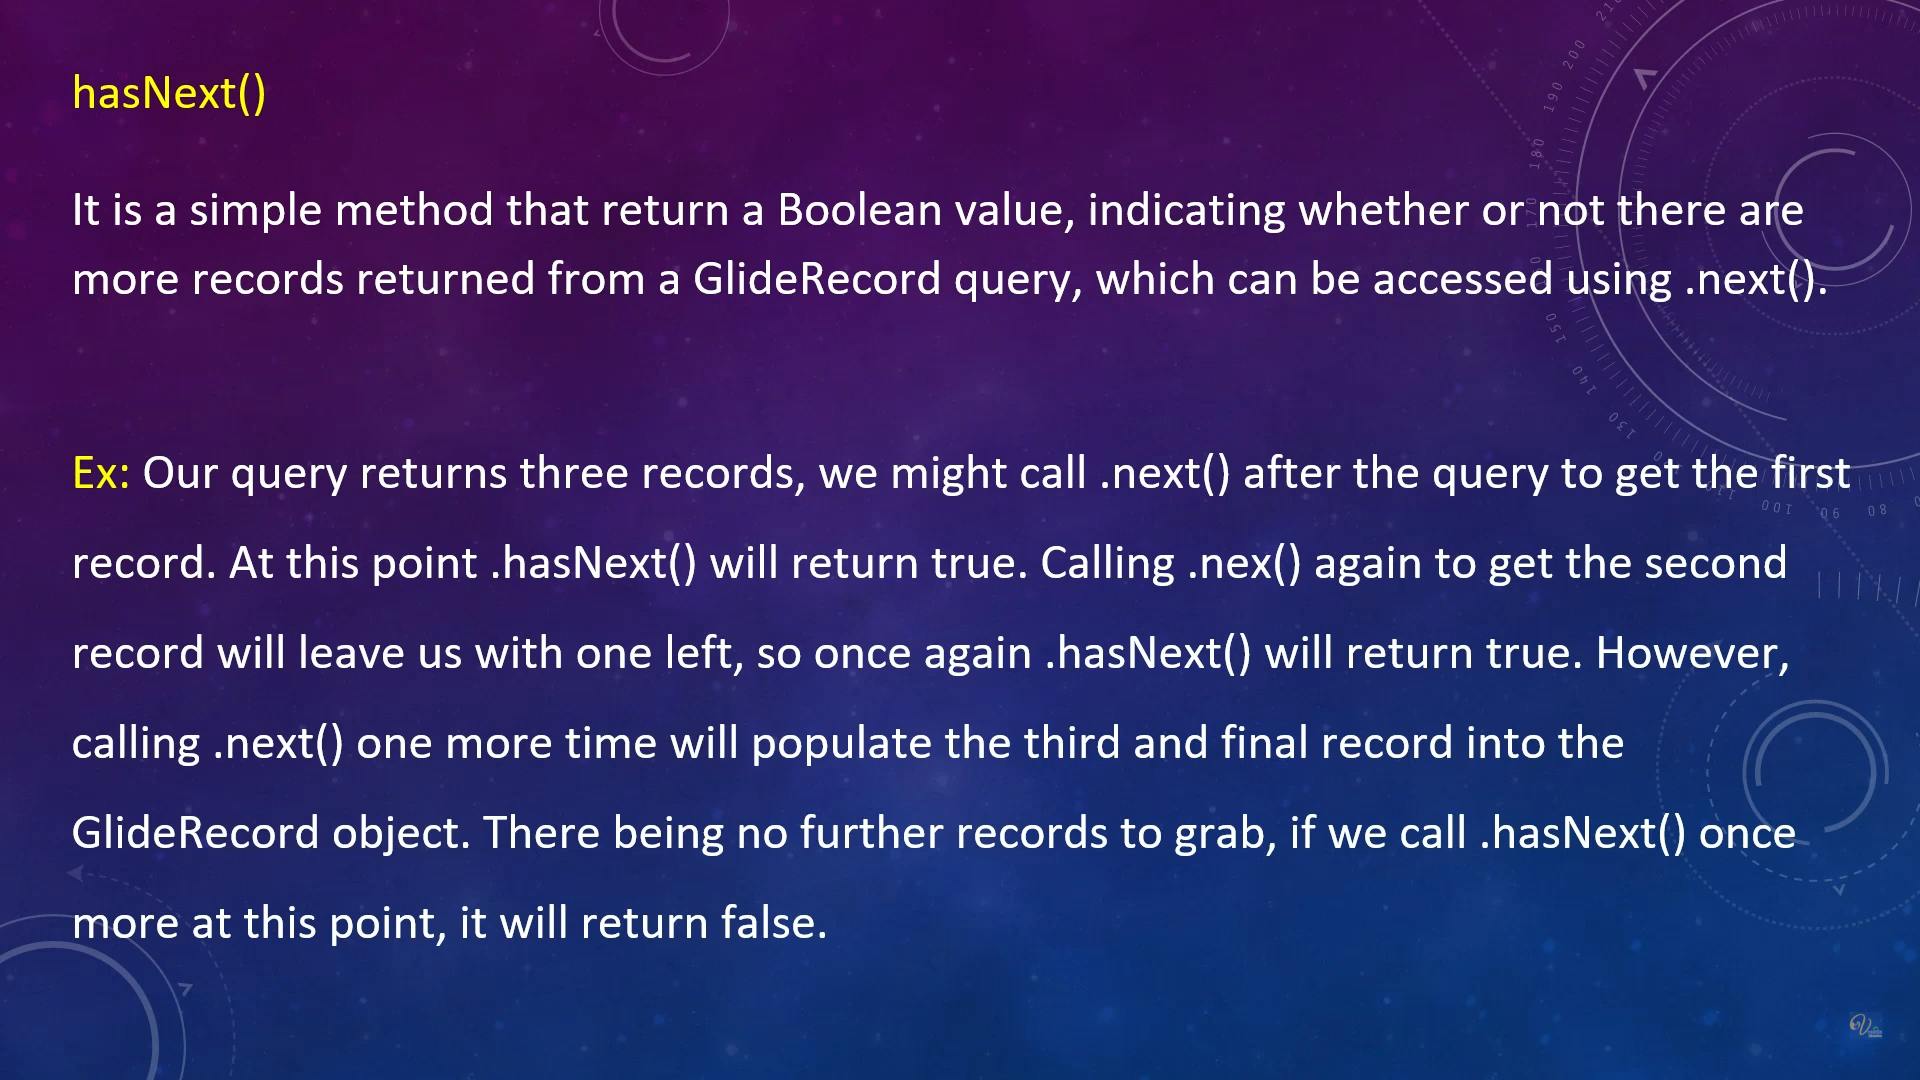
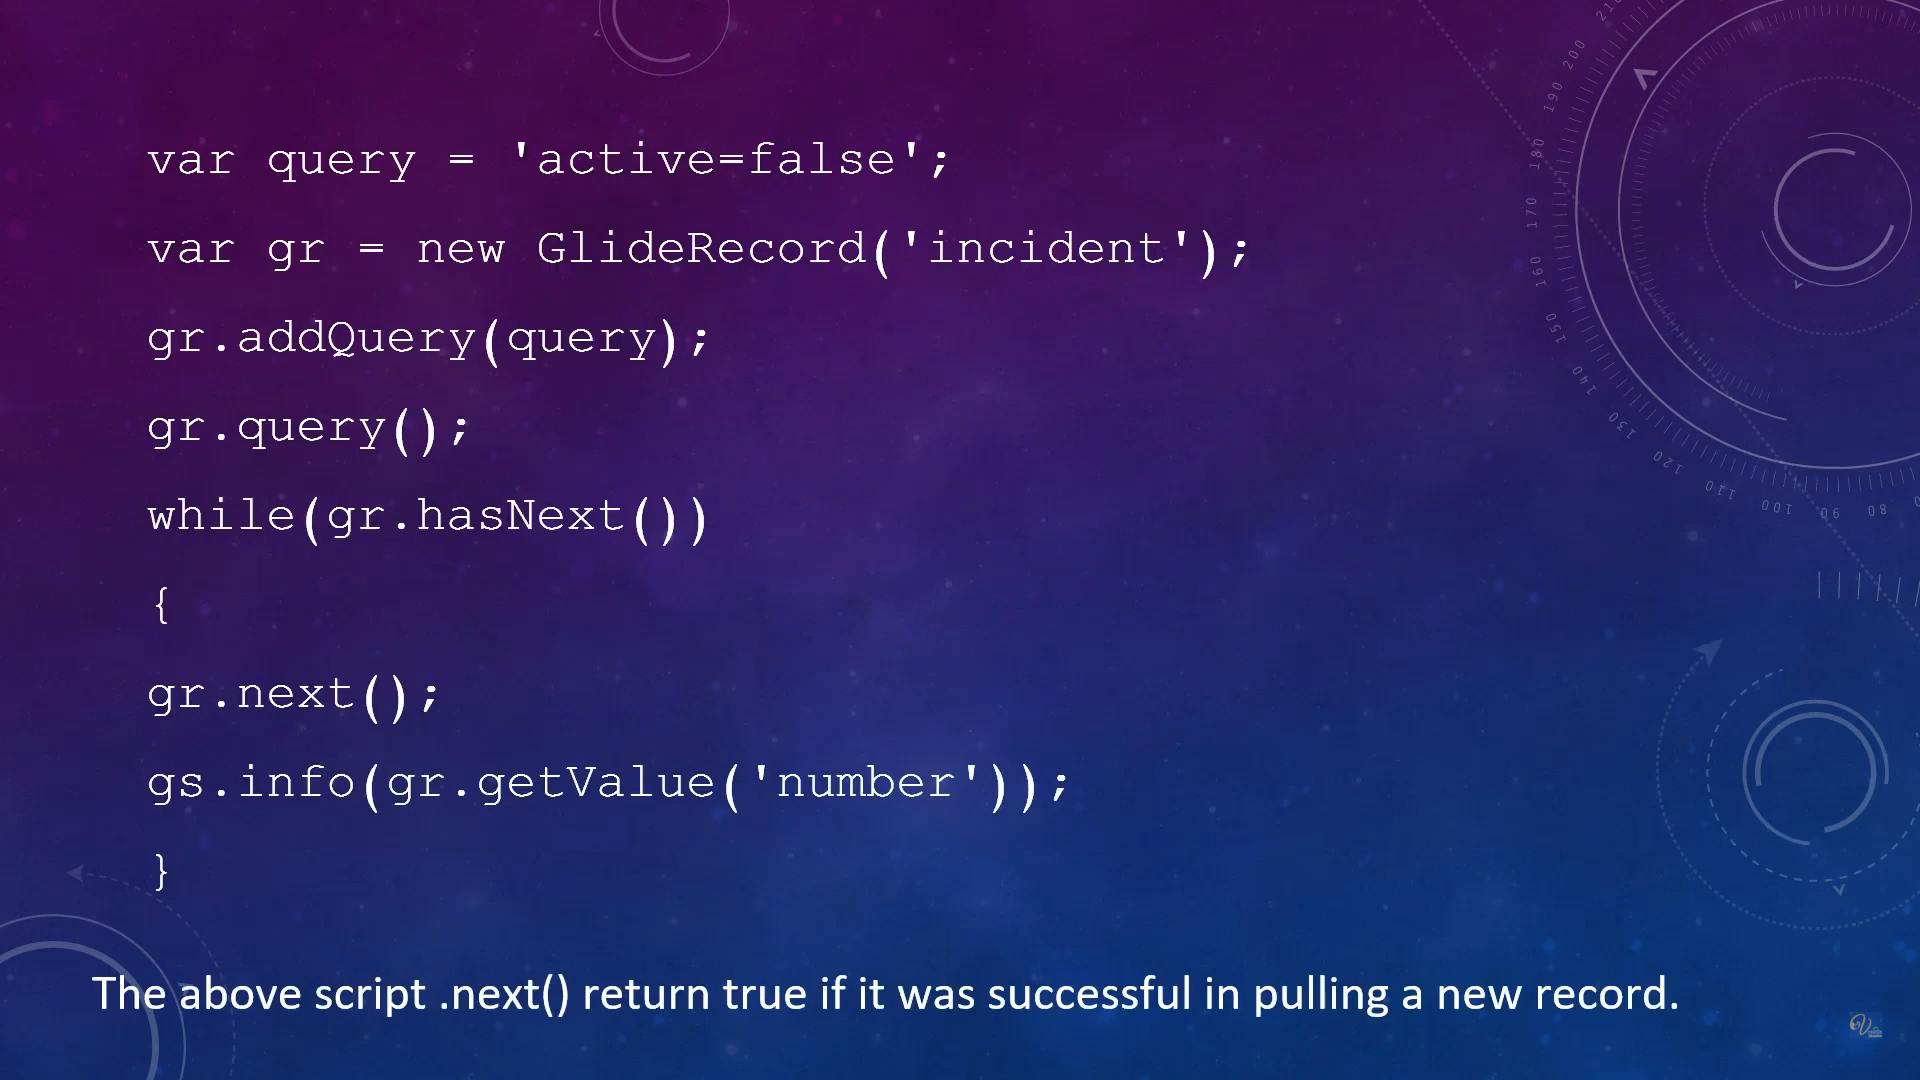
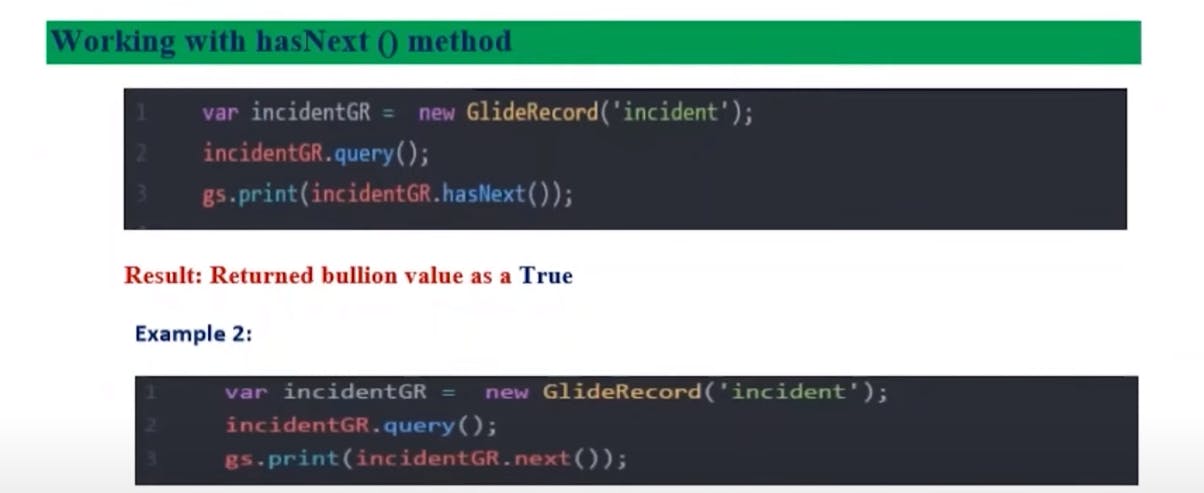
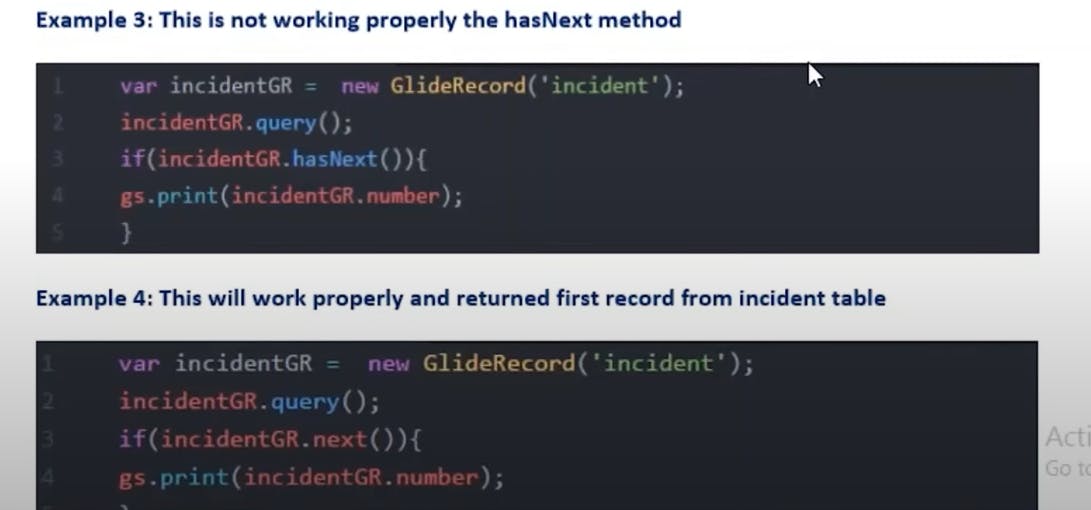
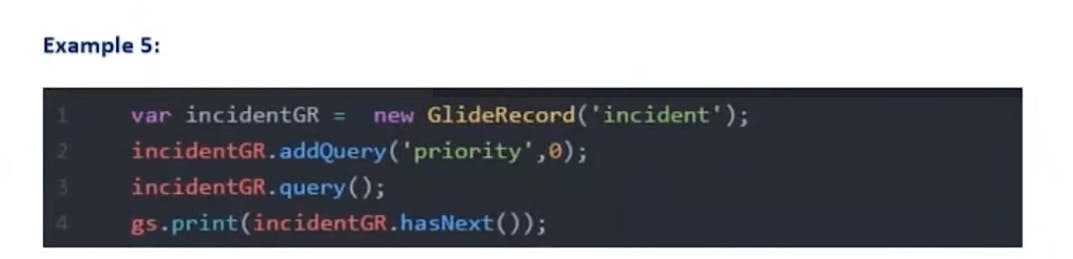
In ServiceNow's GlideRecord API, the hasNext method is used to check whether there are more records in the result set that meet the query conditions and can be iterated through. This method is often used in conjunction with a while loop to iterate through multiple records sequentially. Here's how the hasNext method works:
var gr = new GlideRecord('incident'); // Create a GlideRecord object for the 'incident' table.
gr.addQuery('active', true); // Add a query condition to filter active records.
gr.orderBy('priority'); // Order the records by 'priority' field.

gr.query(); // Execute the query.

while (gr.hasNext()) {
    gr.next(); // Move to the next record in the result set.

    // Access and process the current record's field values.
    var incidentNumber = gr.getValue('number');
    var priority = gr.getValue('priority');

    gs.info('Incident Number: ' + incidentNumber + ', Priority: ' + priority);
}
In this example:
We create a GlideRecord object for the 'incident' table.
We add a query condition to filter records where the 'active' field is true.
We specify that the records should be ordered by the 'priority' field.
We execute the query using
gr.query().We use a
whileloop with thegr.hasNext()condition. ThehasNextmethod returnstrueif there are more records in the result set, andfalseif there are no more records.Inside the loop, we use
gr.next()to move to the next record in the result set.We then access and process the current record's field values using
gr.getValue(fieldName).The loop continues until there are no more records, as determined by
gr.hasNext()returningfalse.
The hasNext method is valuable for iterating through a set of records that match specific query conditions, especially when you need to process each record one by one. It helps prevent issues with infinite loops by checking if there are more records to process before moving to the next record.
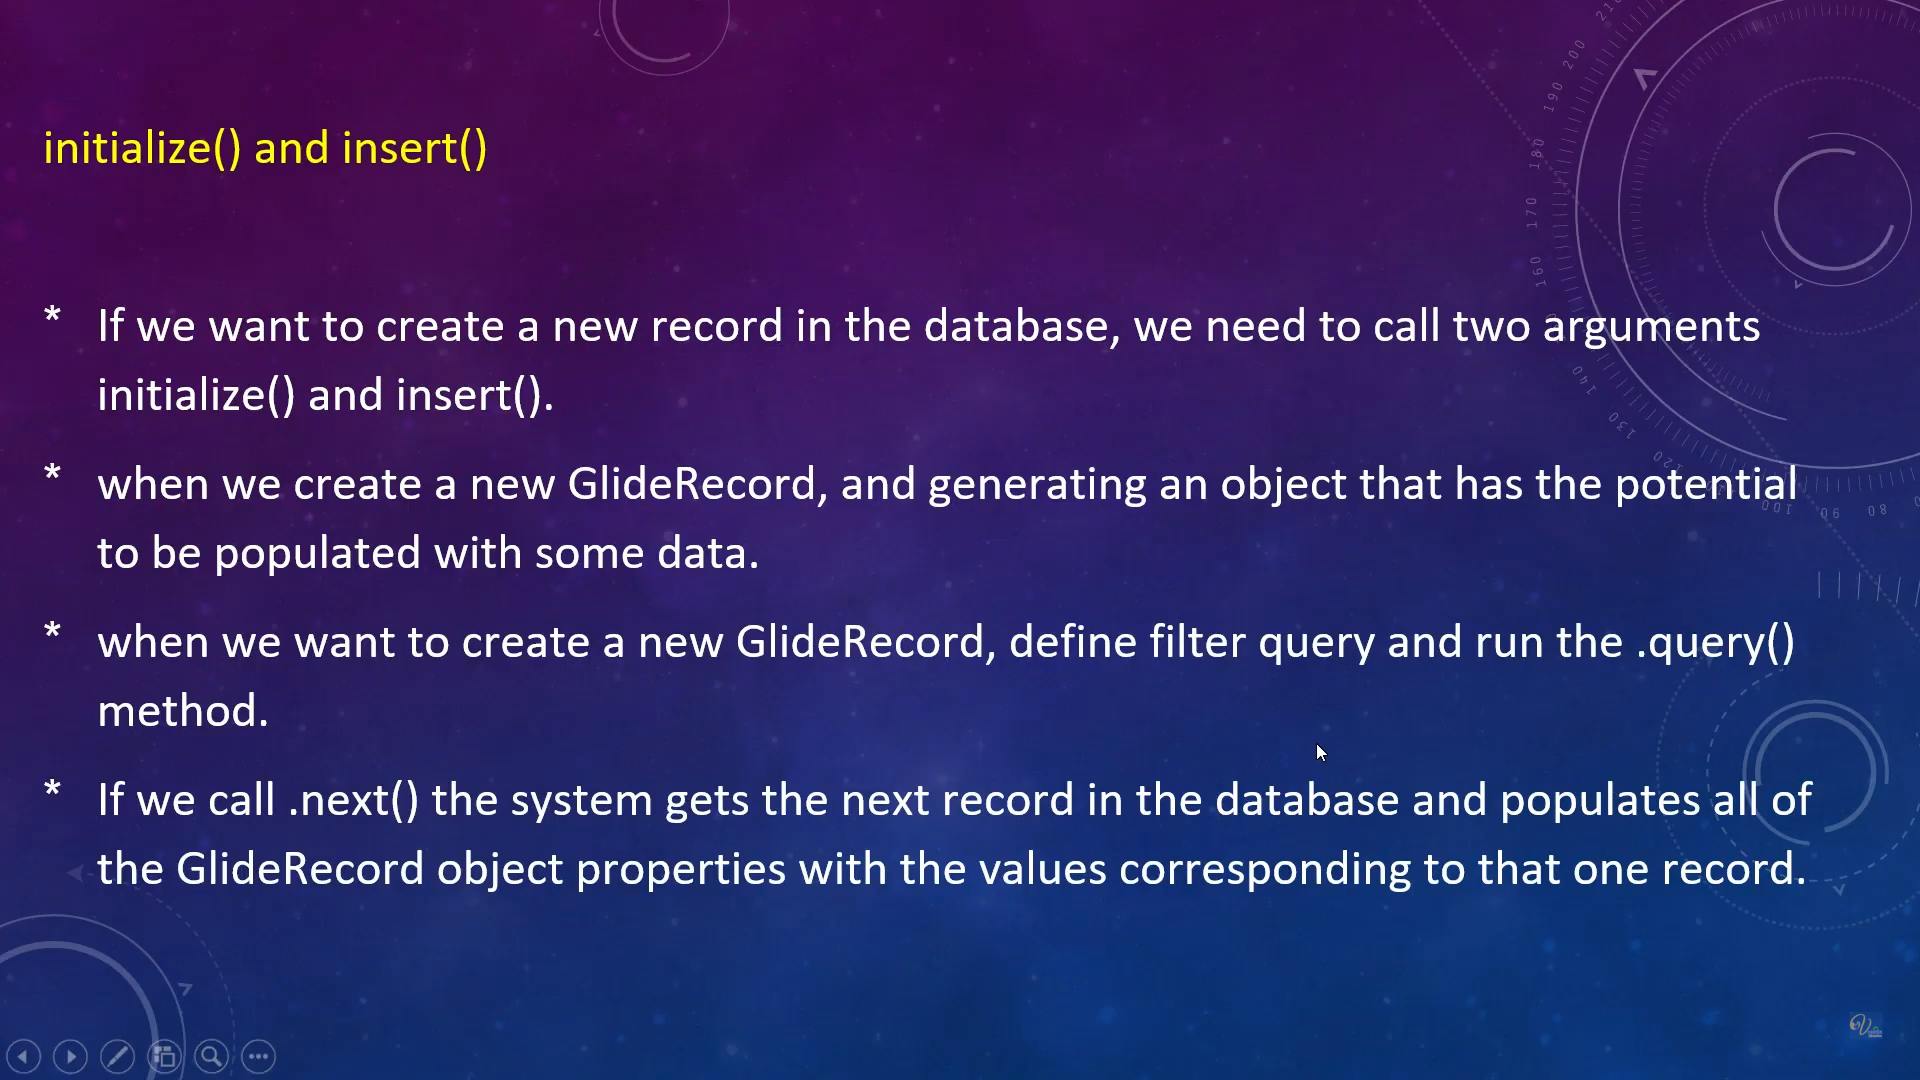
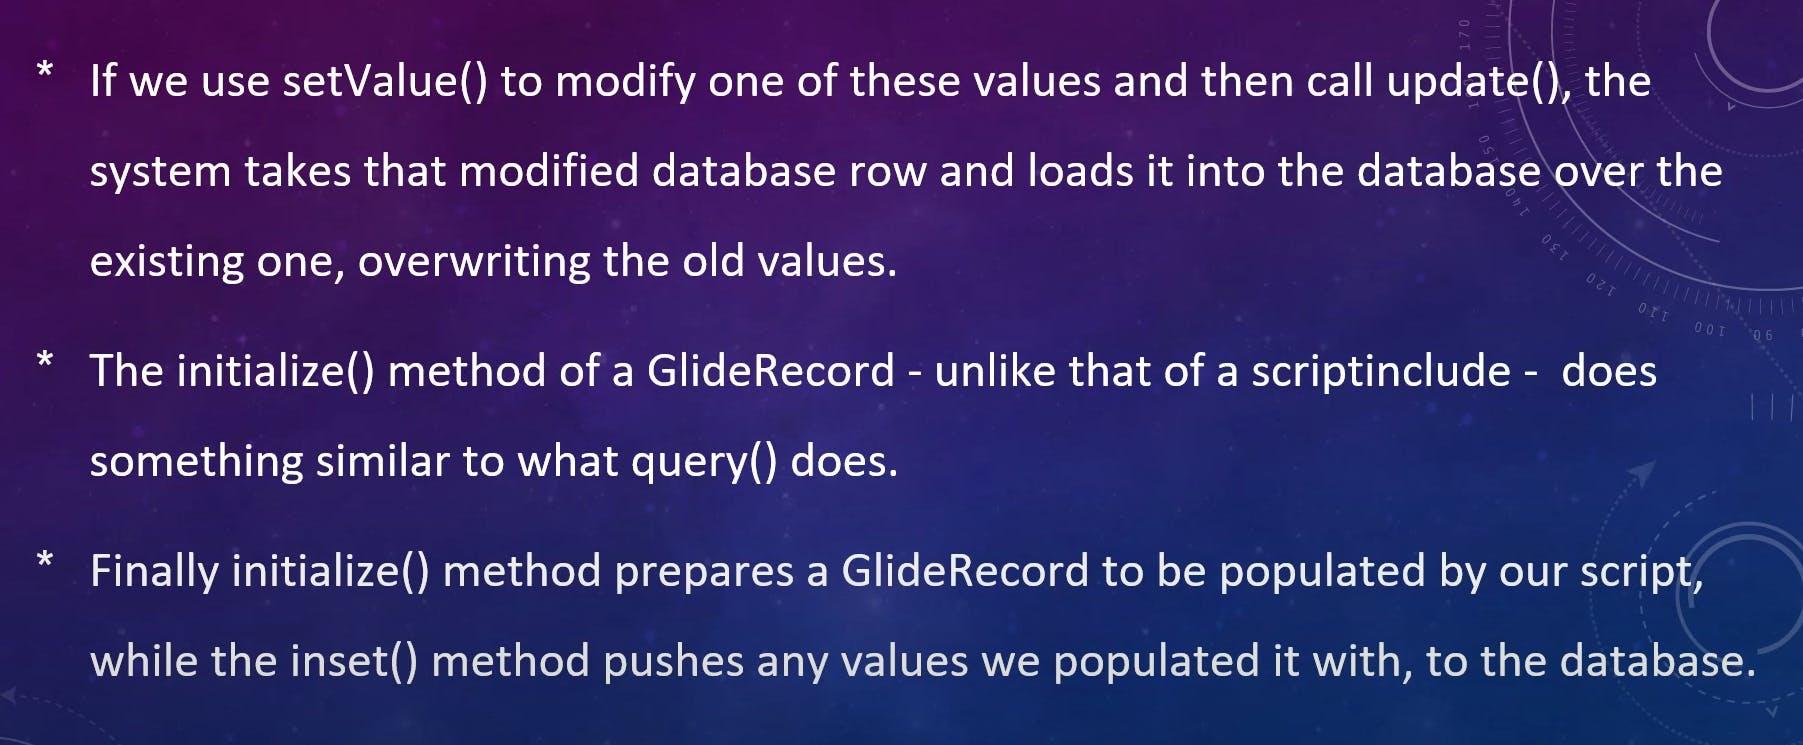
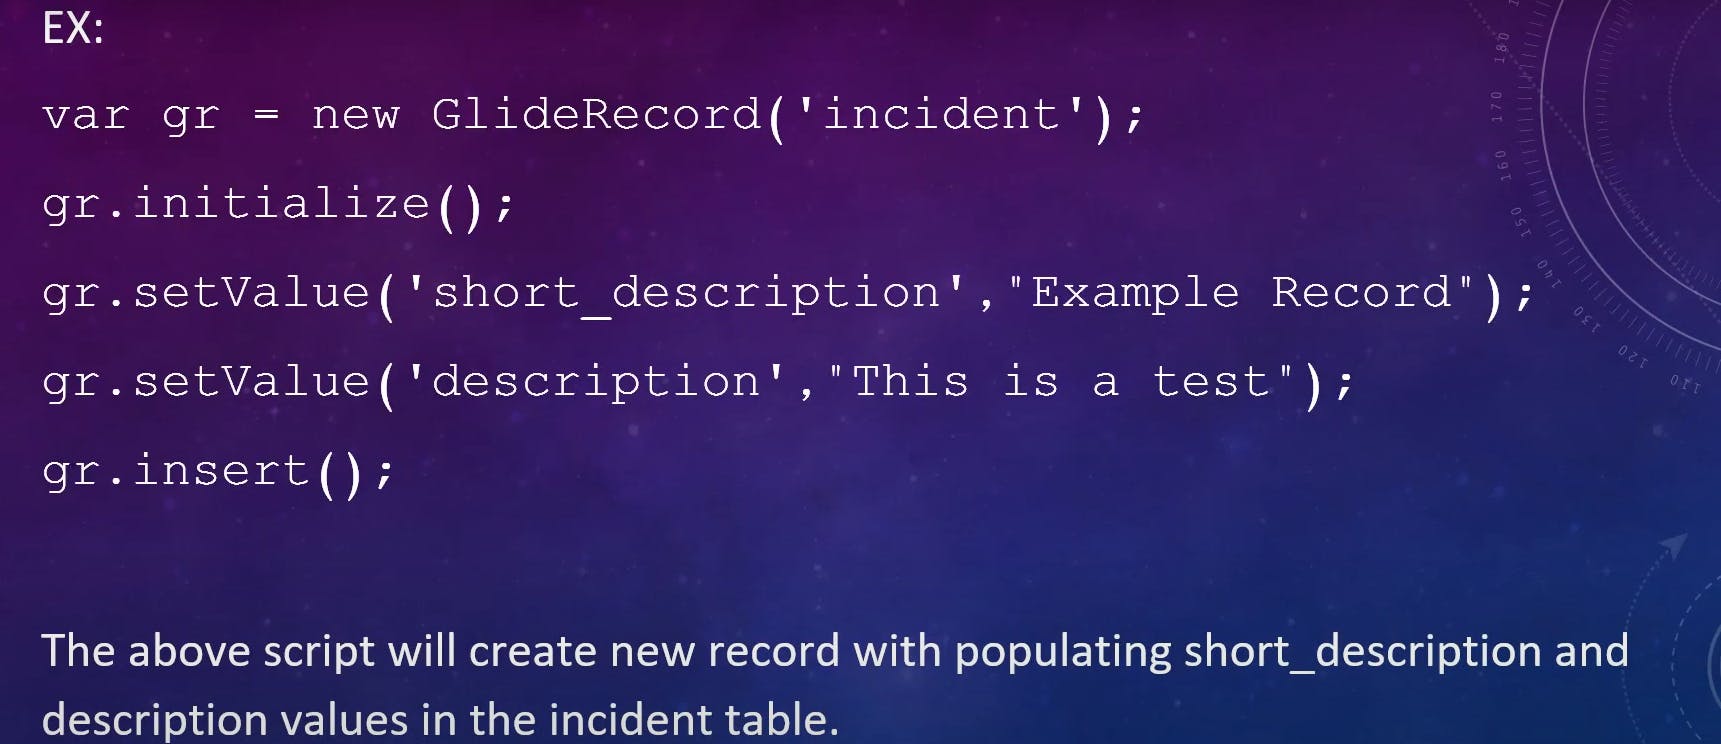
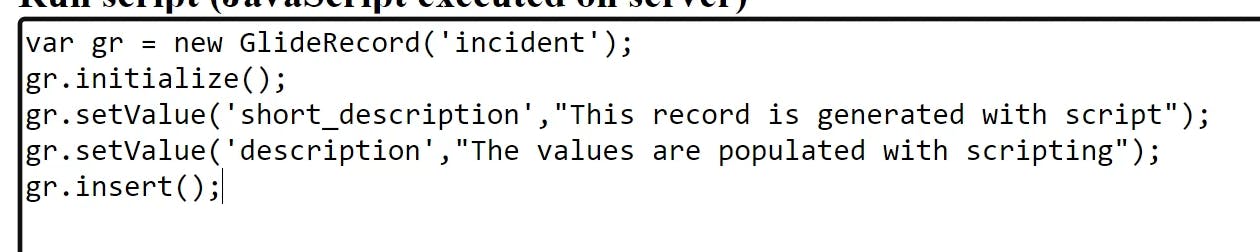
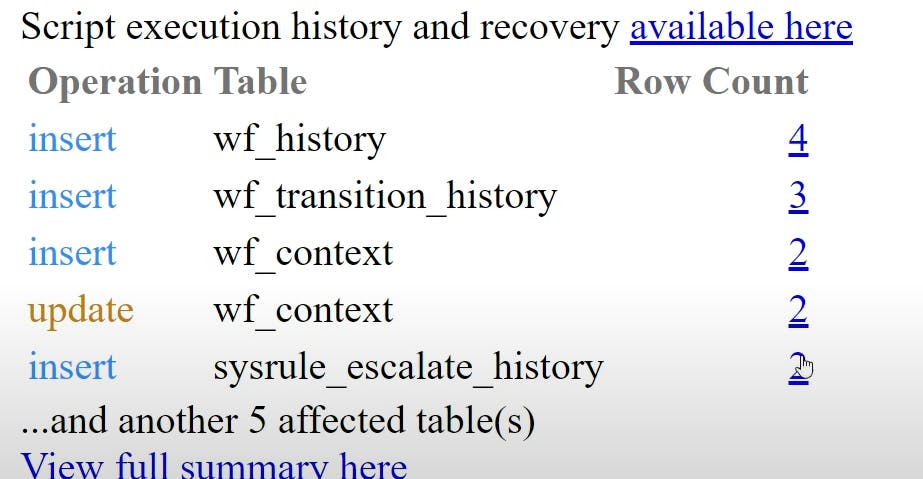
Initialize and insert()
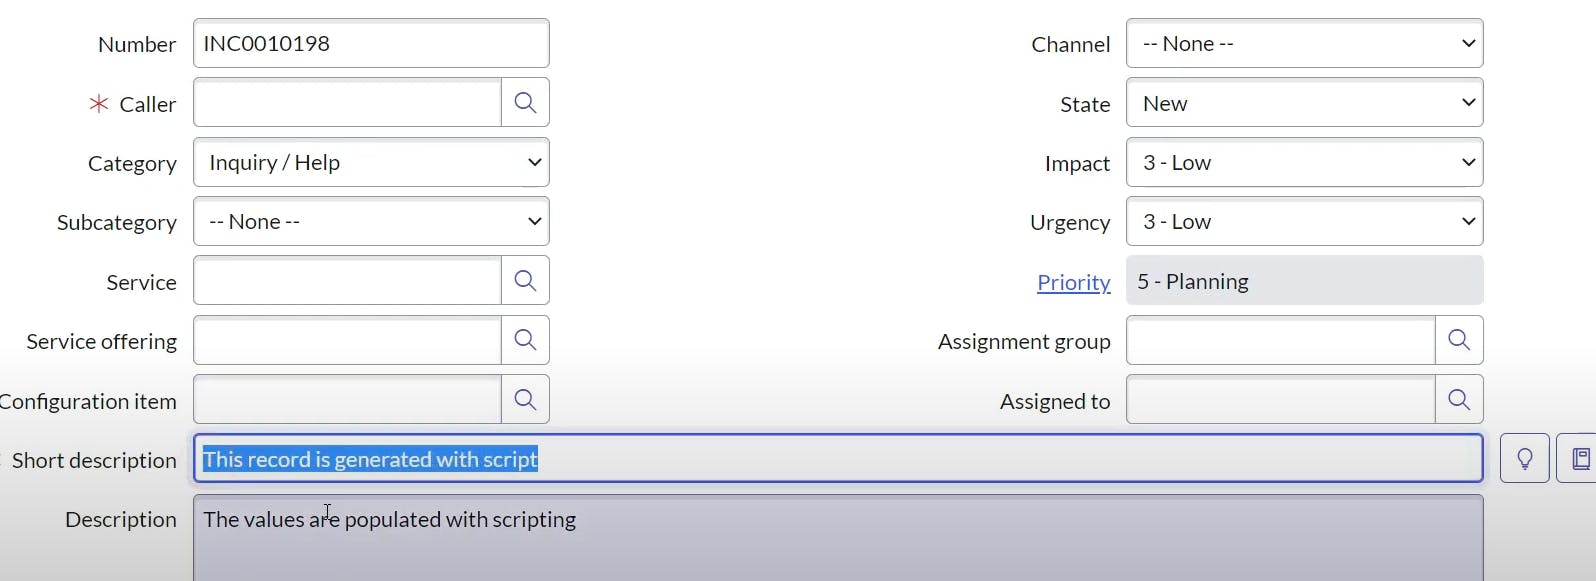
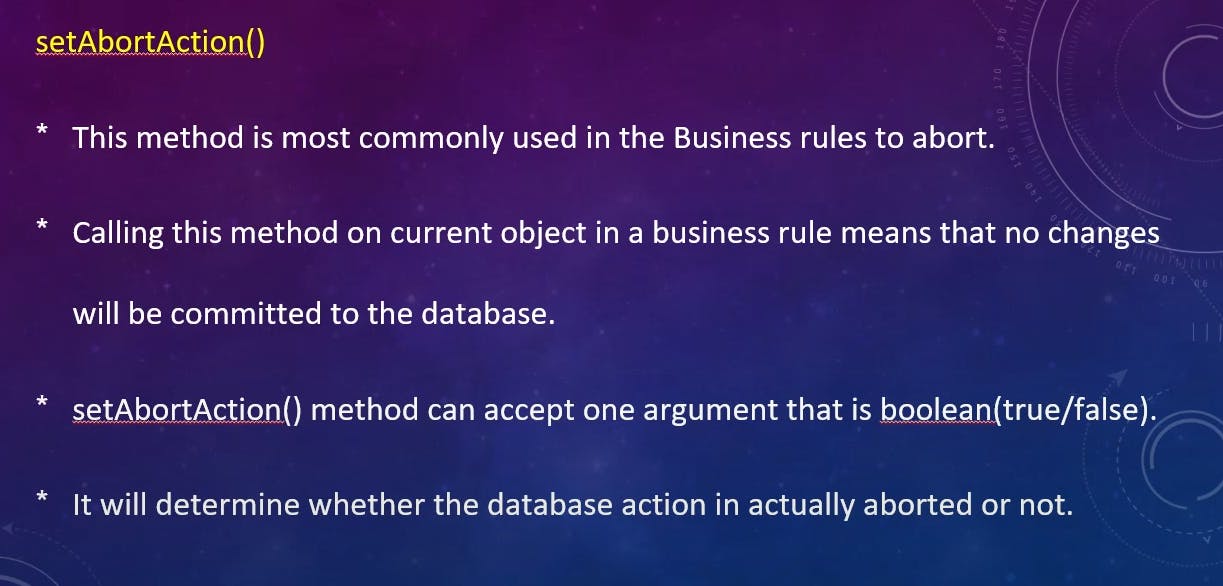
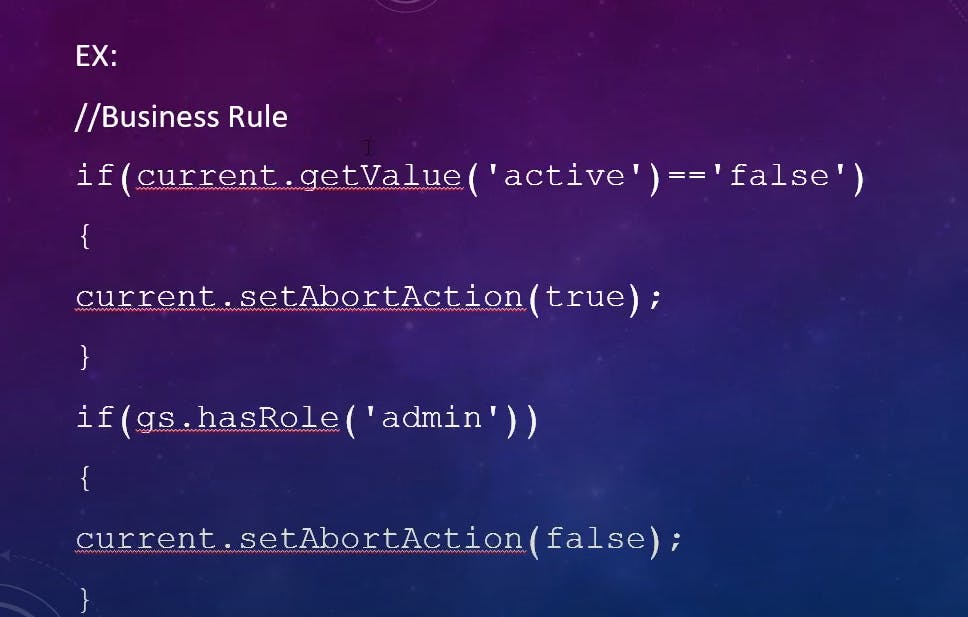
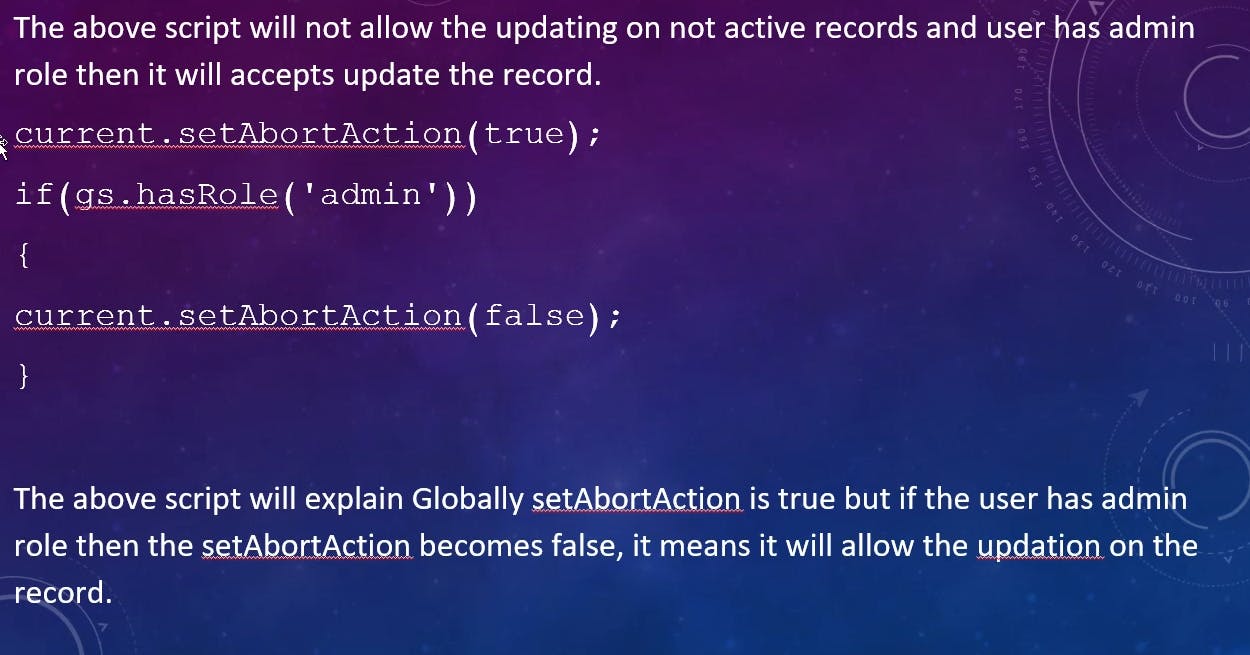
setAbortAction()
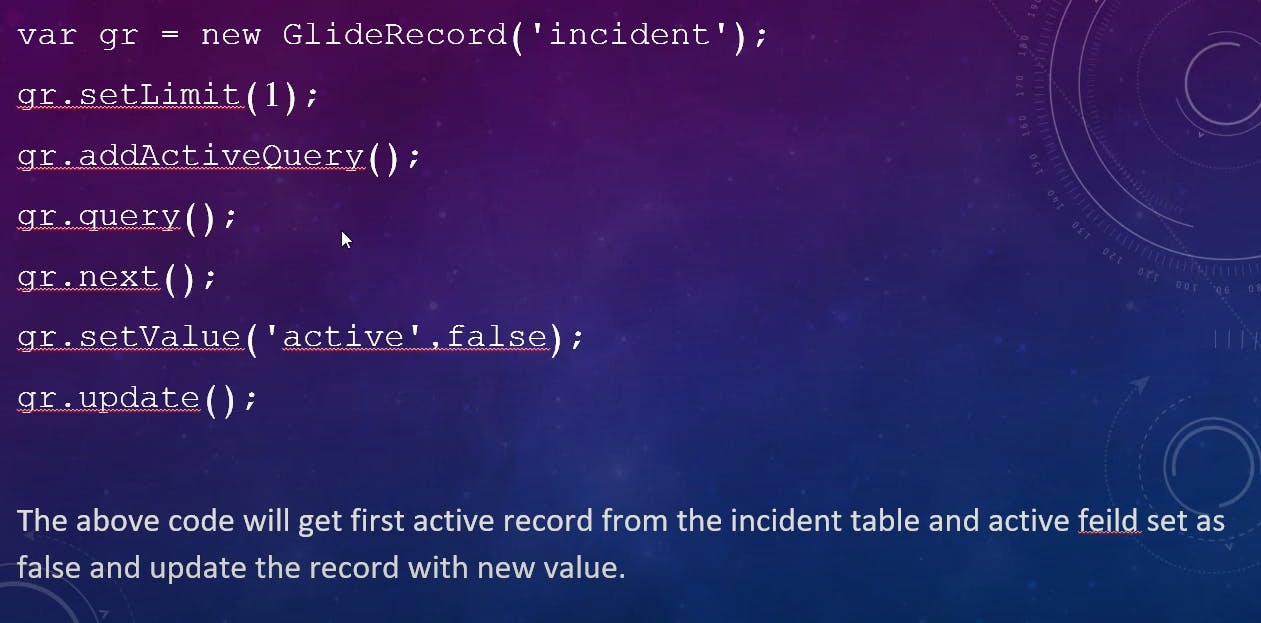
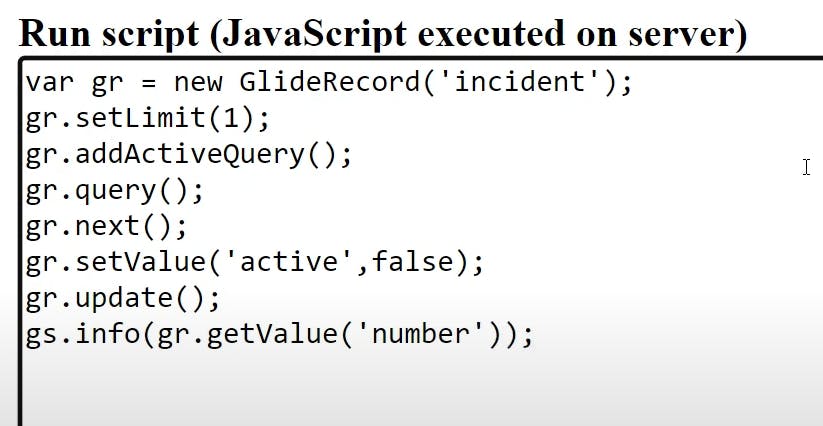
update()
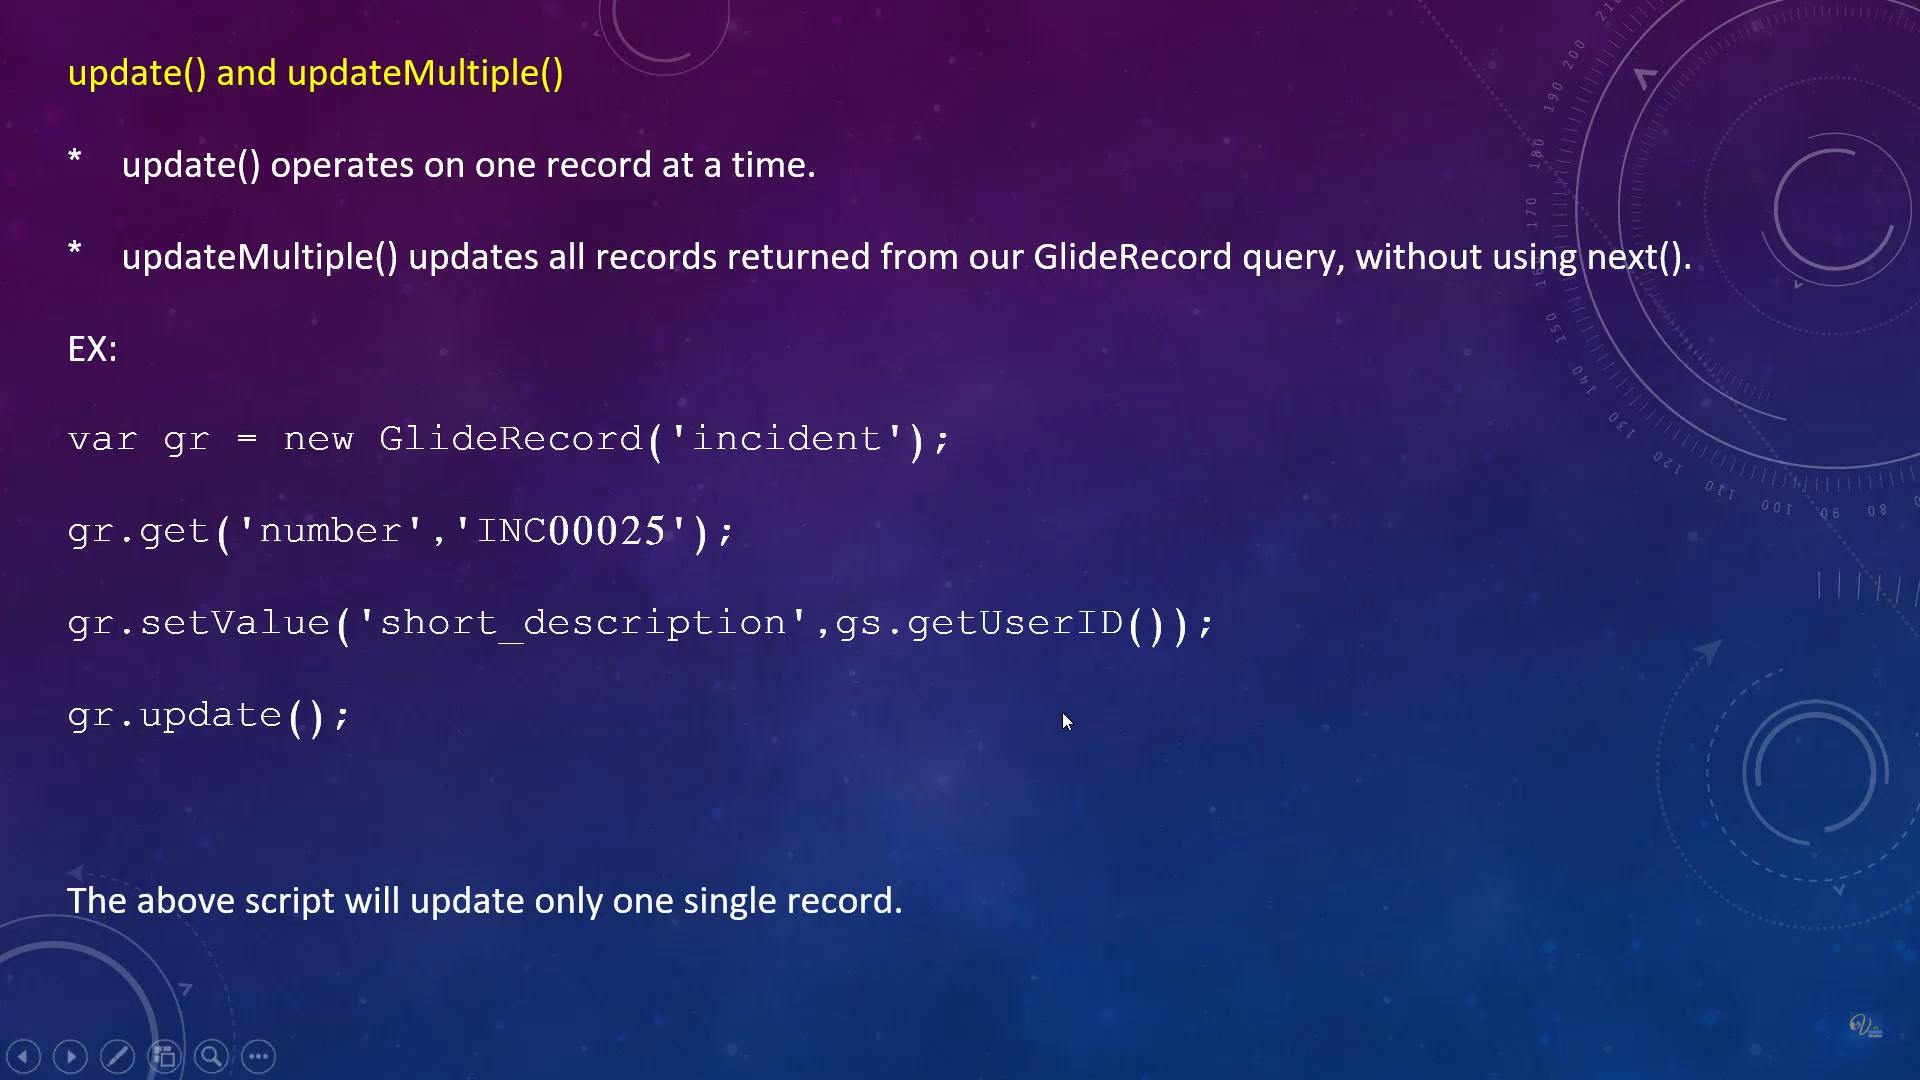
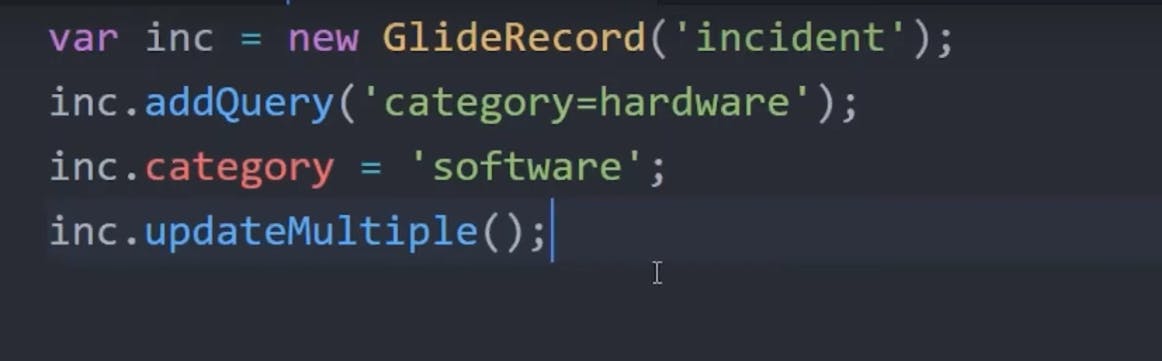
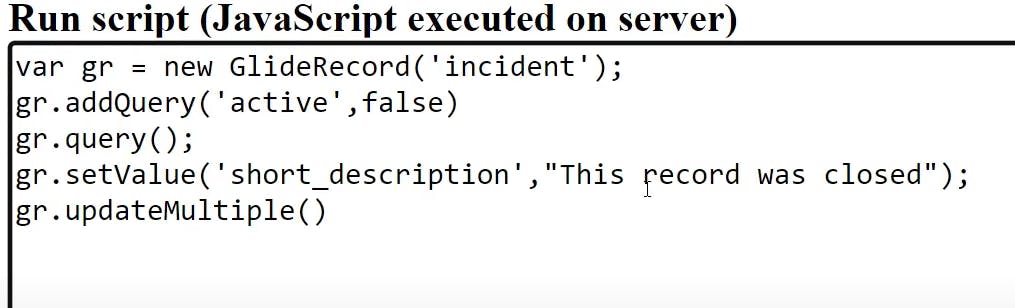
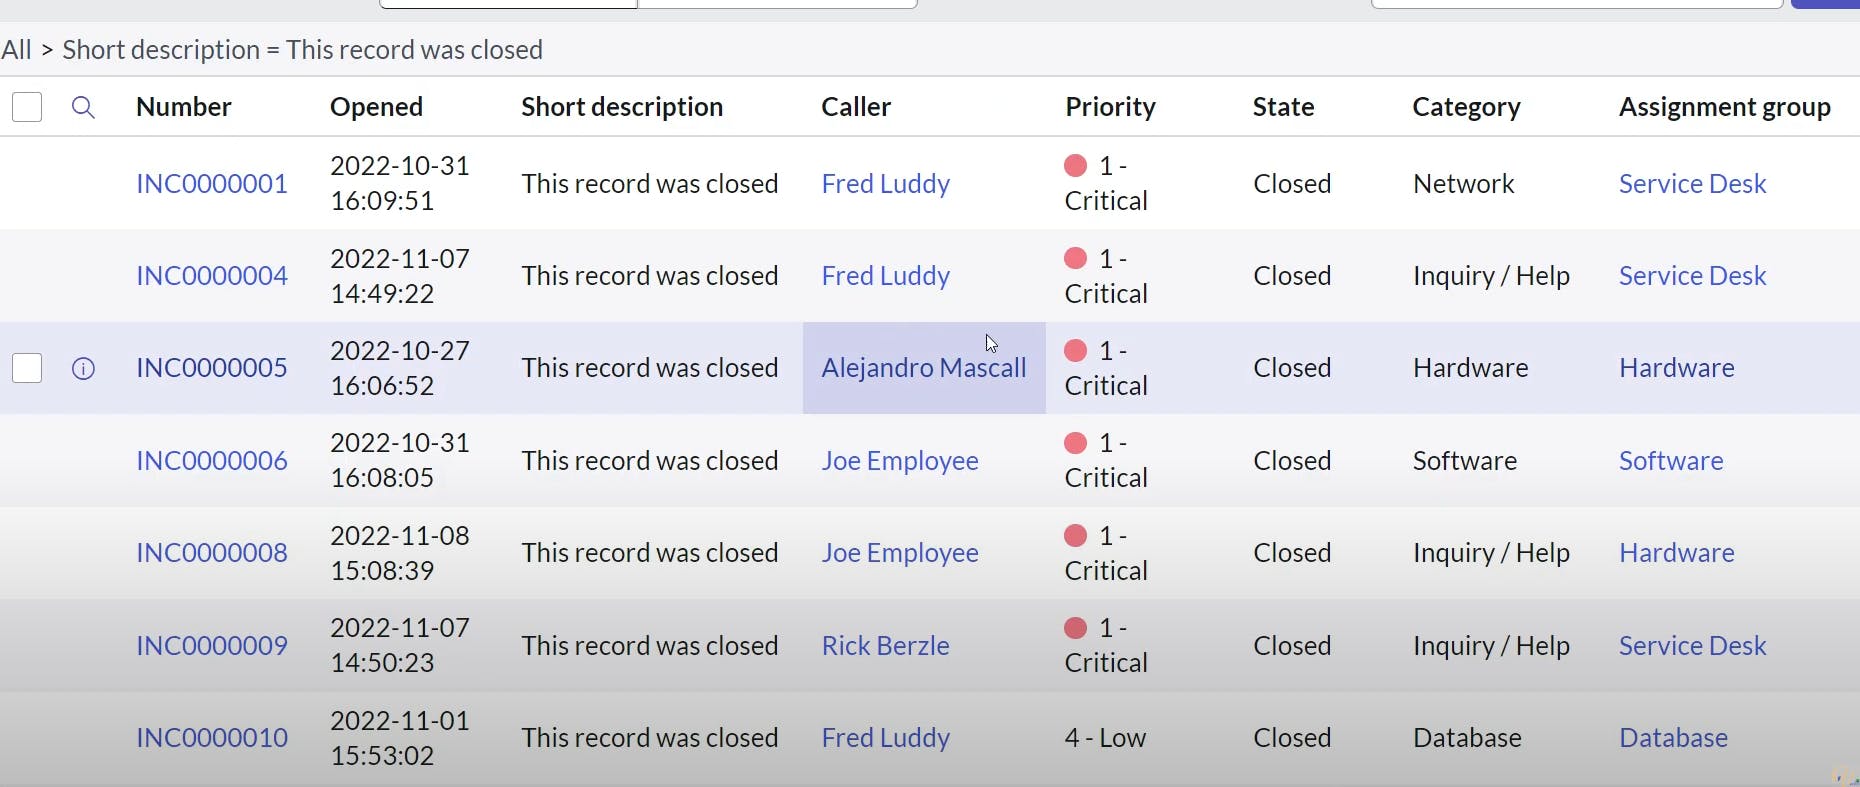
updateMultiple()
it updates all category of hardware to software
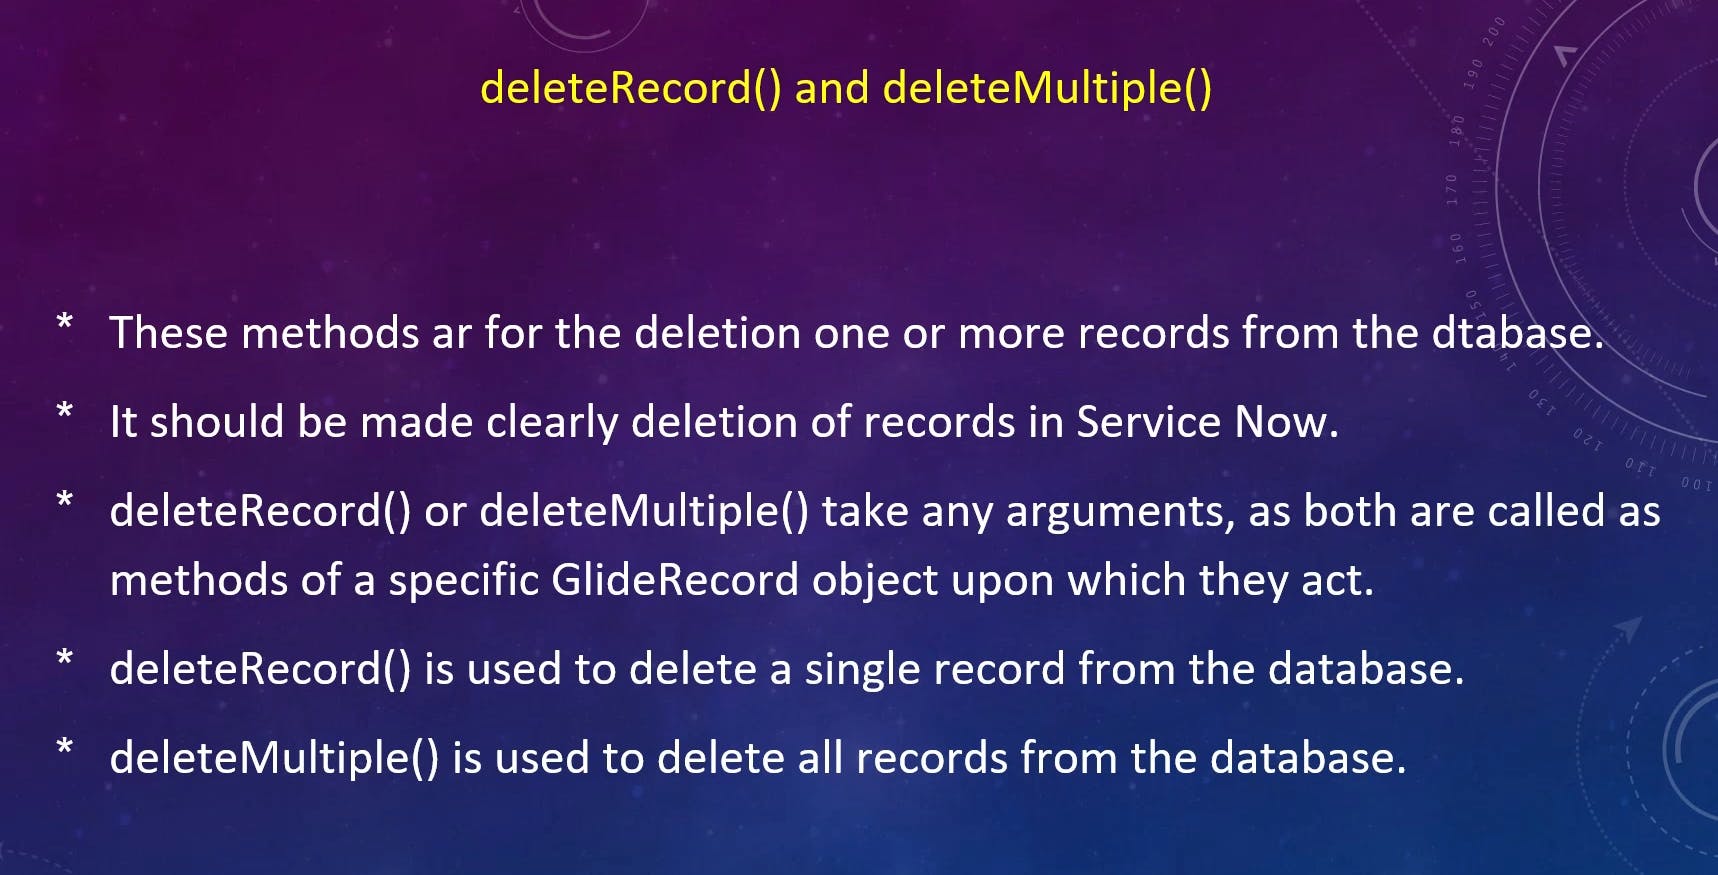
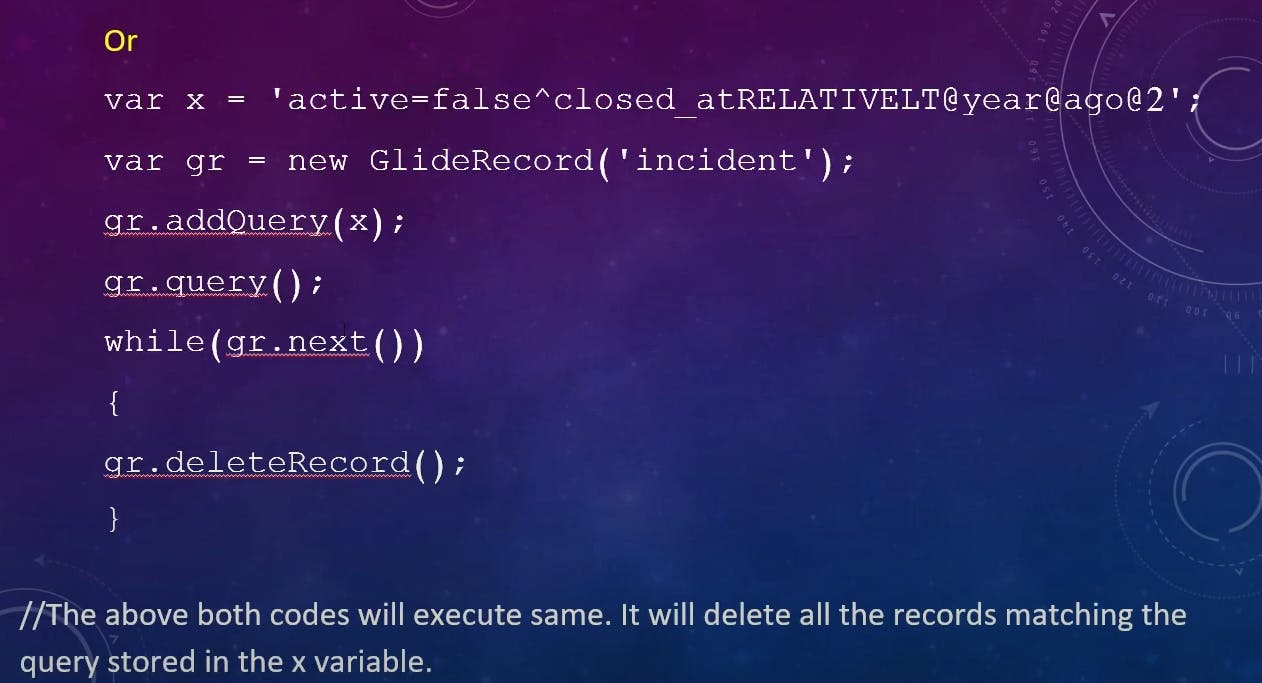
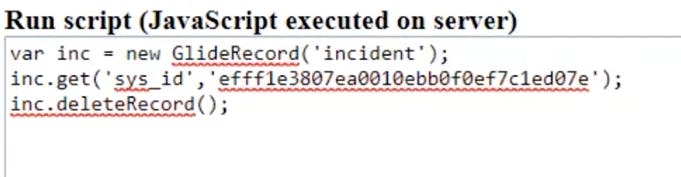
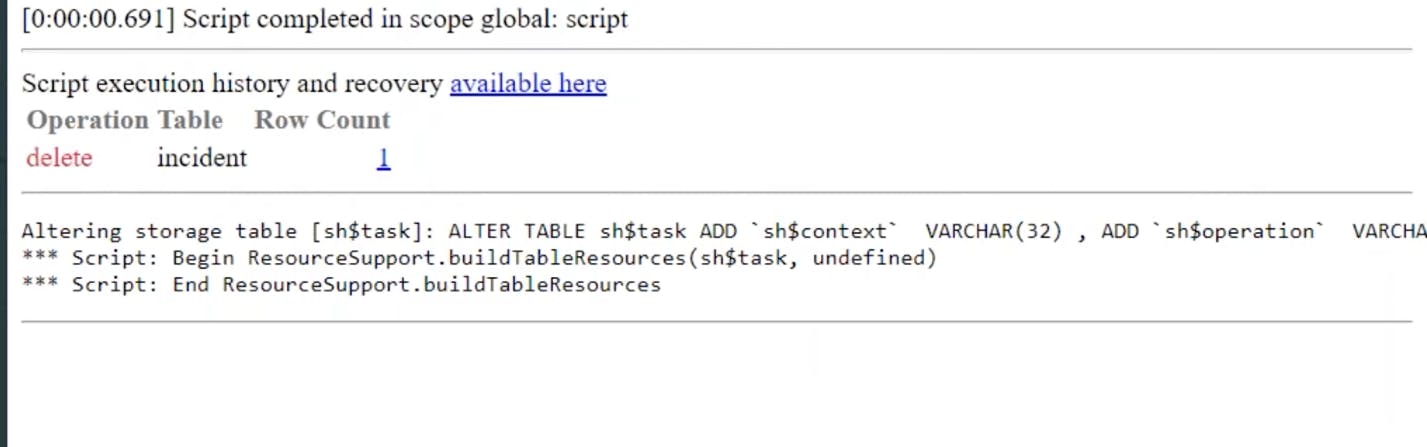
deleteRecord()

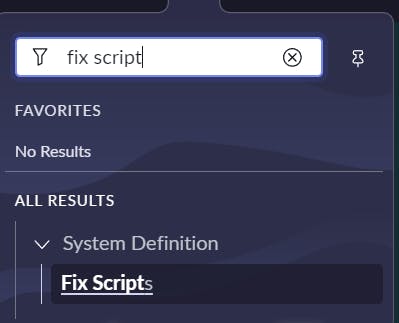
click on new
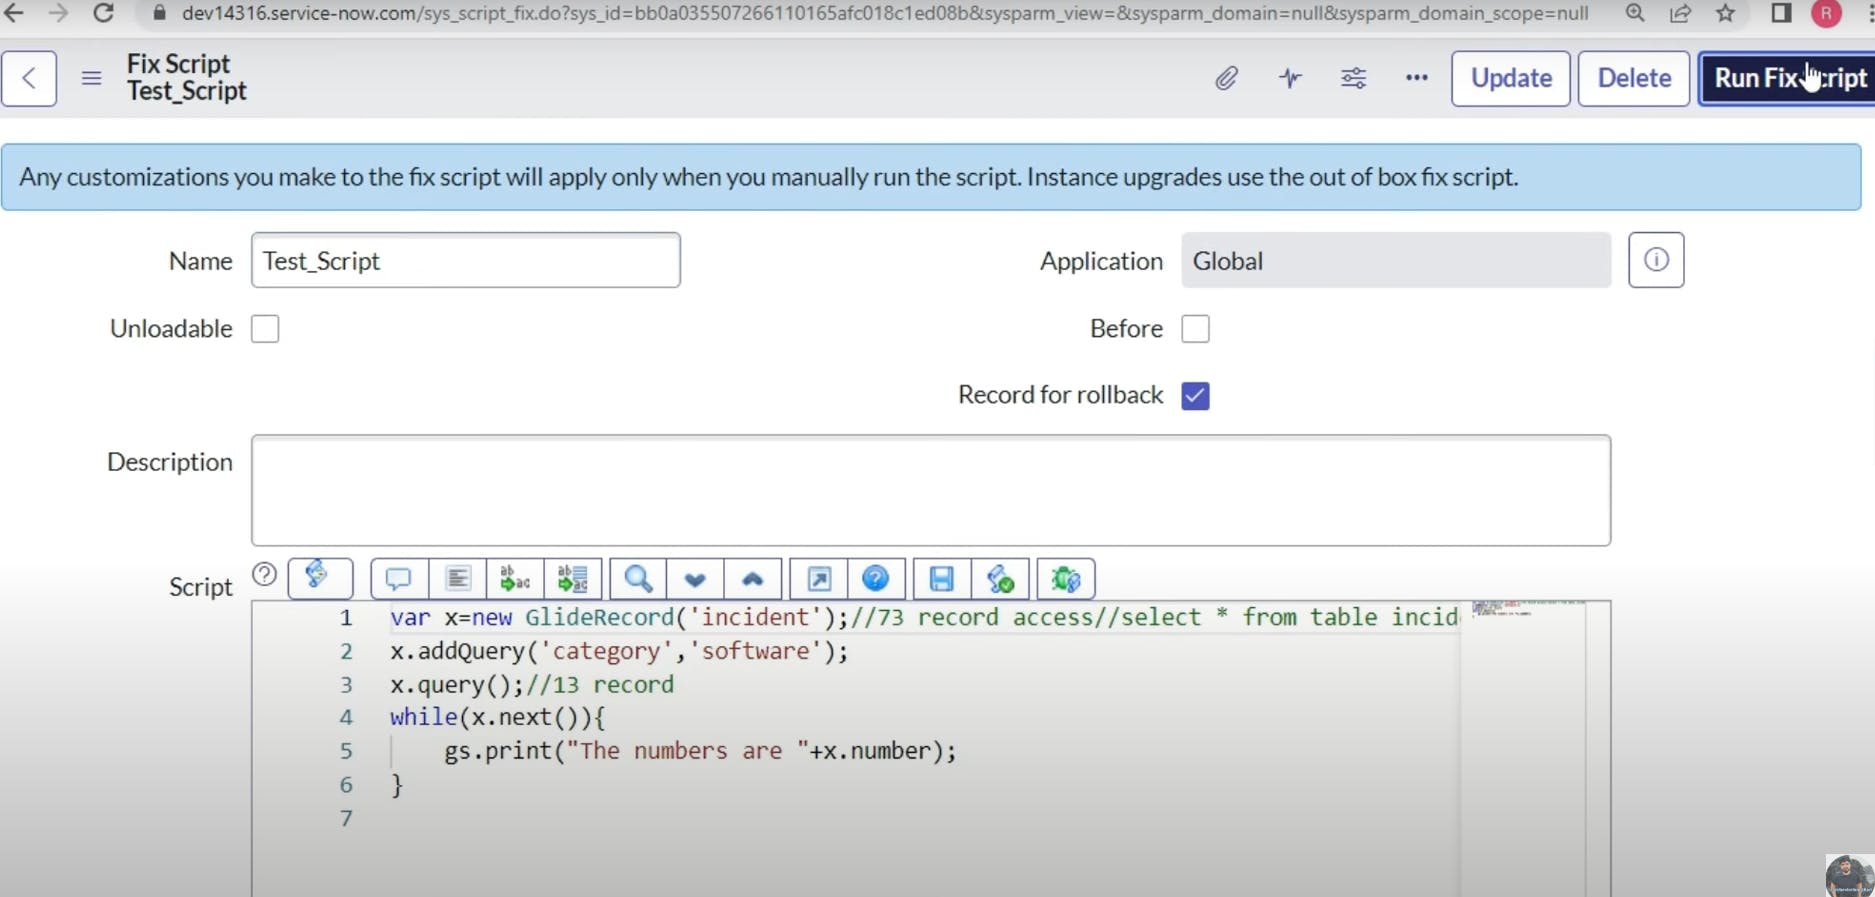
:
var x = new GlideRecord("incident");:var x: This line declares a new variable namedx.new GlideRecord("incident"): Here, a new GlideRecord object is created and associated with the "incident" table in the ServiceNow instance. This GlideRecord object, referred to asx, will be used to query and manipulate records in the "incident" table.
x.addQuery("category", "software");:x: This is the GlideRecord object we created earlier..addQuery("category", "software"): This line adds a query condition to the GlideRecord. It specifies that you want to retrieve records where the "category" field equals "software."
x.query();:x: Once again, this refers to the GlideRecord object..query(): This method is called to execute the query with the conditions specified earlier. It retrieves the records from the "incident" table that match the query criteria.
while(x.next()){:x: It's the GlideRecord object..next(): This method is used in a loop to iterate through the result set of records obtained from the query. It moves to the next record in the result set. The loop continues as long as there are more records to process.
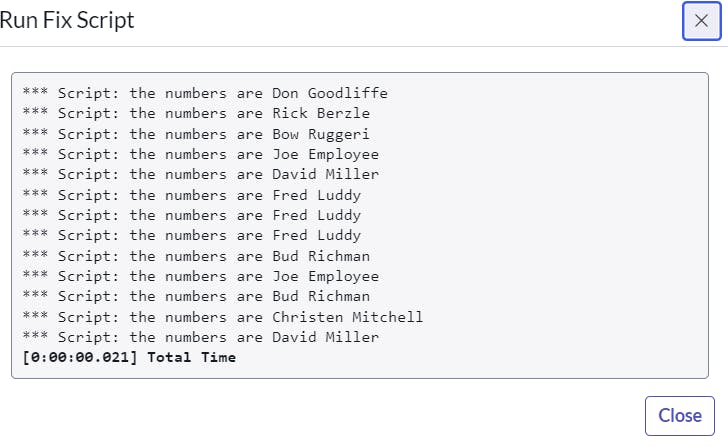
gs.print("the numbers are " + x.number);:gs.print(): This is a ServiceNow function used to print a message to the system log."the numbers are " + x.number: This line prints a message that includes the value of the "number" field of the current incident record. Thex.numberexpression retrieves the value of the "number" field for the current record.
So, in summary, this script does the following:
It queries the "incident" table in ServiceNow to retrieve records where the "category" field is set to "software."
It then iterates through the result set of records and prints a message to the system log for each record. The message includes the value of the "number" field for each incident record that matches the query criteria.
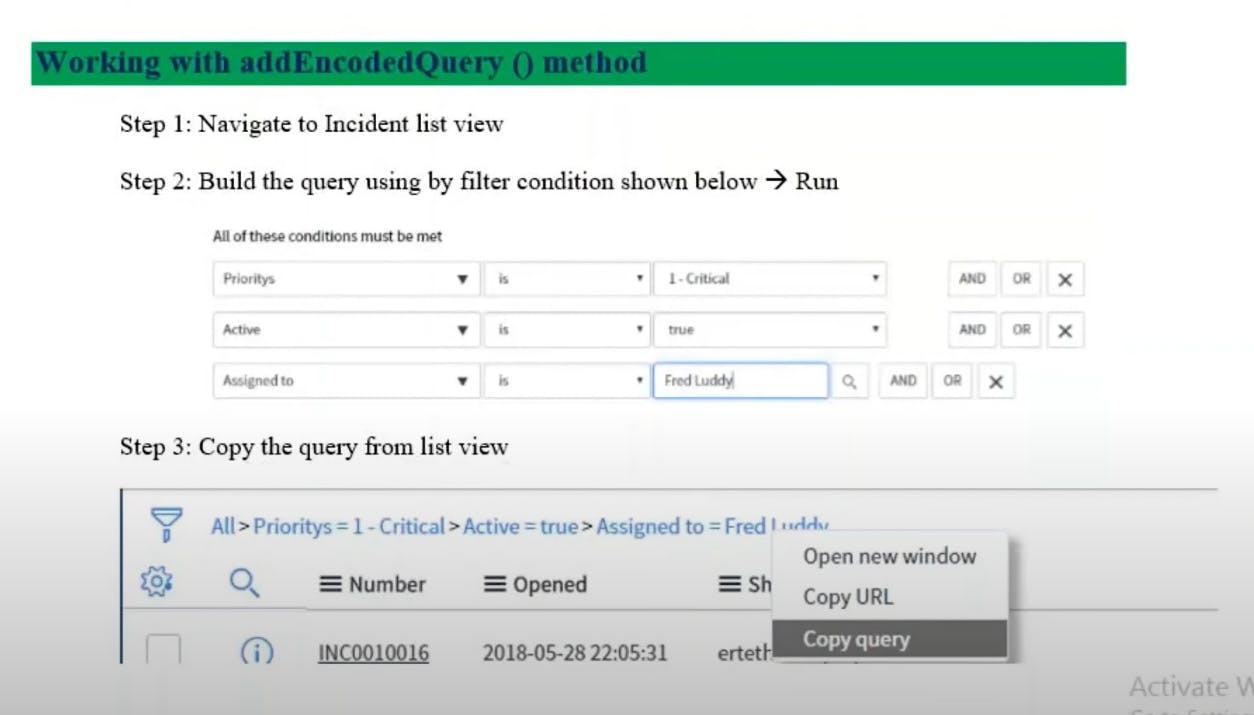
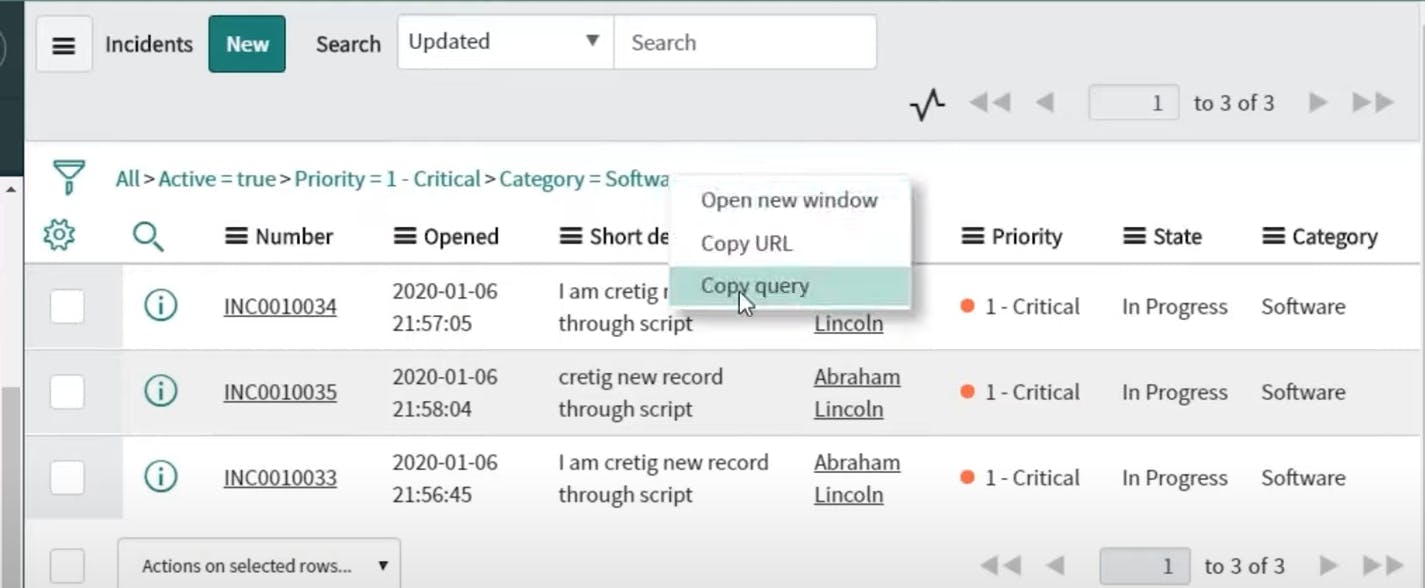
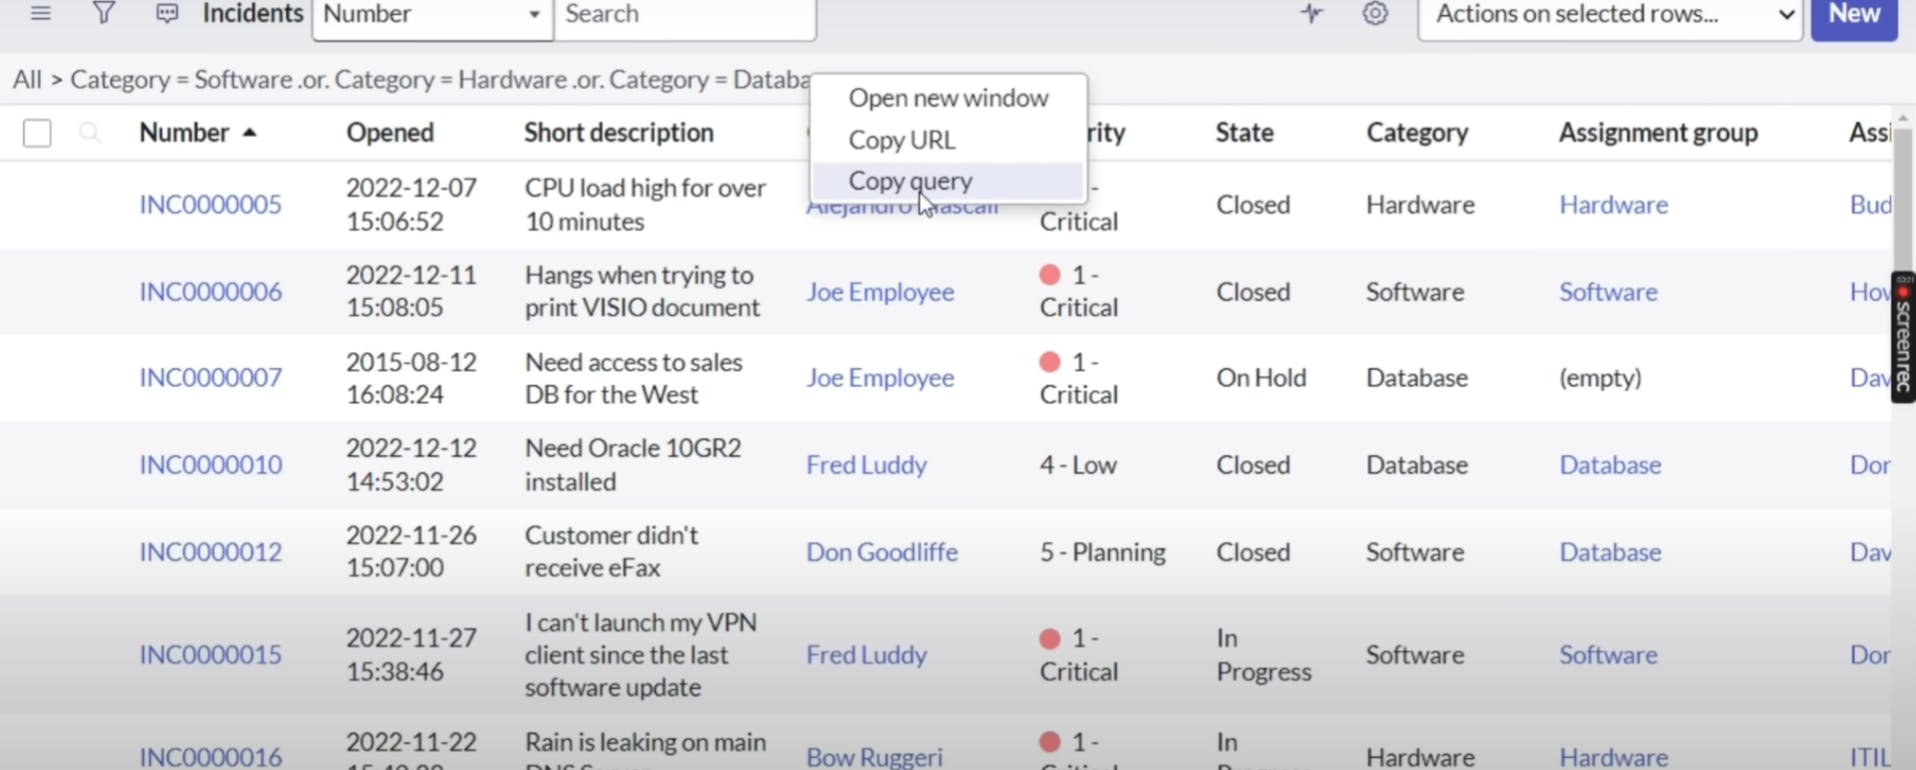
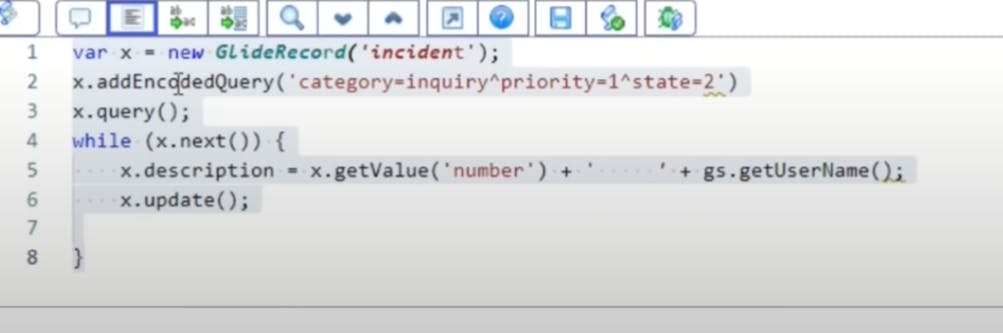
you can even put queries by copying filters and using addEncodedQuery

var x=new GlideRecord("incident");
x.addQuery("category","software");
x.query();
while(x.next()){
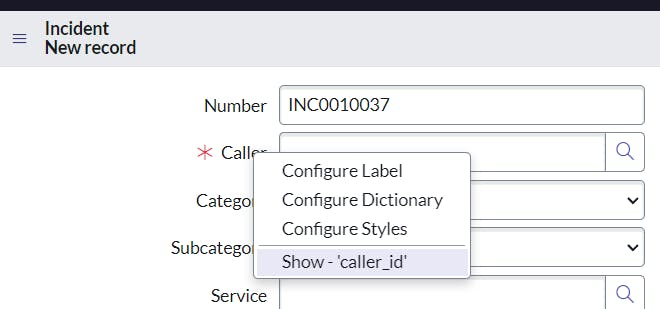
gs.print("the numbers are "+x.caller_id.name);
}
gs.print("the numbers are " + x.caller_id.name);:
gs.print(): This is a ServiceNow function used to print a message to the system log."the numbers are " + x.caller_id.name: This line prints a message that includes the value of the "name" field of the "caller_id" reference field for the current incident record. Thex.caller_id.nameexpression retrieves the value of the "name" field from the related user record (referenced by the "caller_id" field) for the current incident.
if we write just caller_id without .name we only get sys id's , if we want fields we have to specify .name


var x=new GlideRecord("incident");
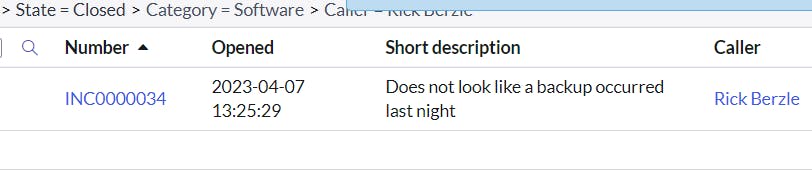
x.addEncodedQuery("state=7^category=software^caller_id=5137153cc611227c000bbd1bd8cd2006");
x.query();
if(x.next()){
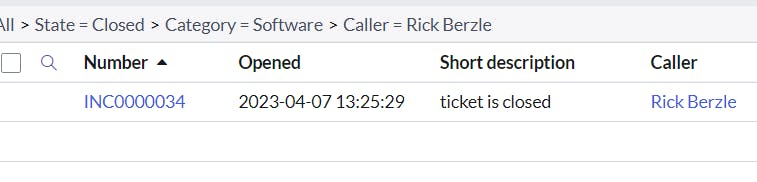
x.short_description="ticket is closed";
x.update();
}
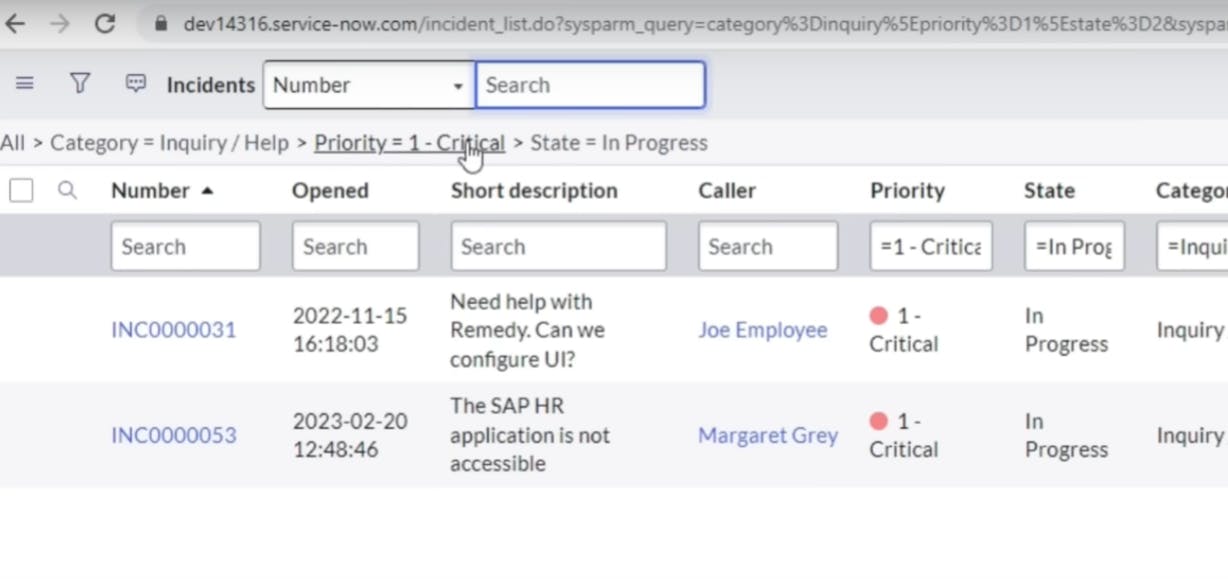
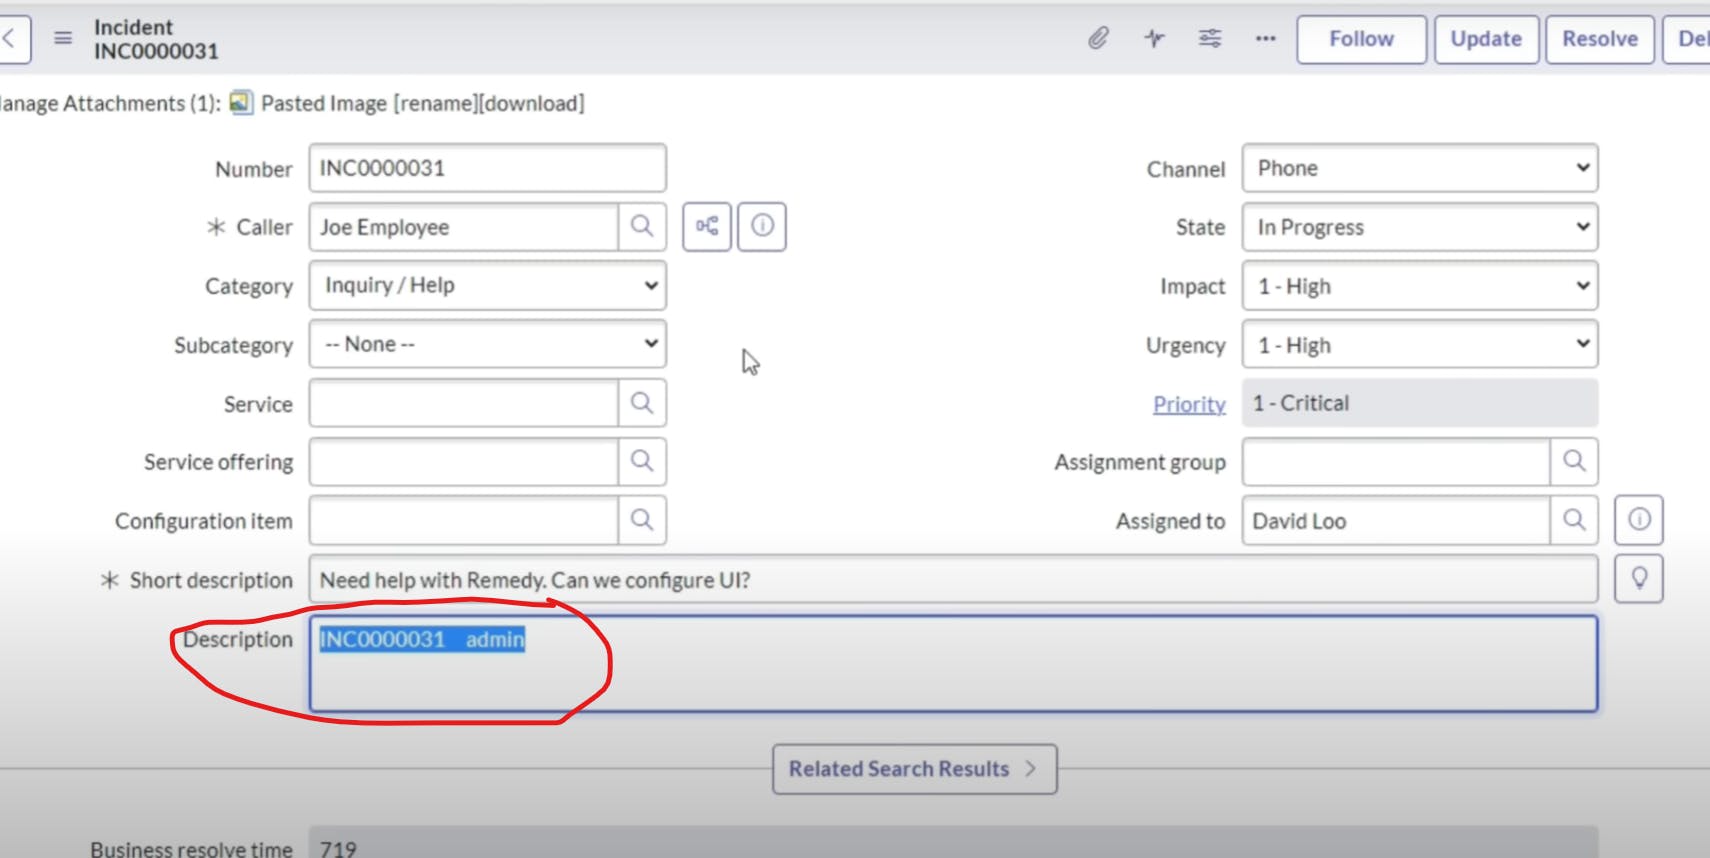
In summary, this script does the following:
It queries the "incident" table in ServiceNow to retrieve records that meet specific criteria (state=7, category=software, caller_id=5137153cc611227c000bbd1bd8cd2006).
If at least one record is found, it sets the "short_description" field of the first matching record to "ticket is closed" and then updates the record. This could be used, for example, to mark an incident as closed or to change its description when specific conditions are met.
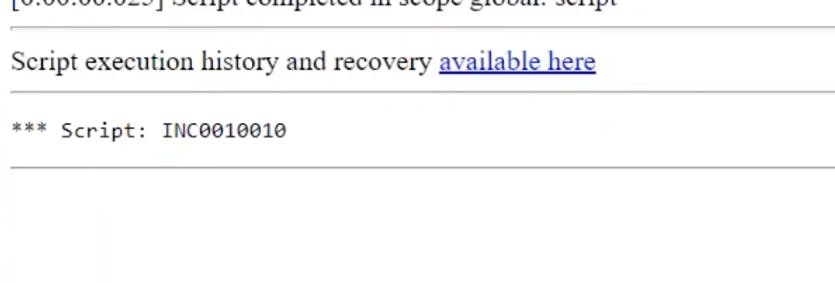
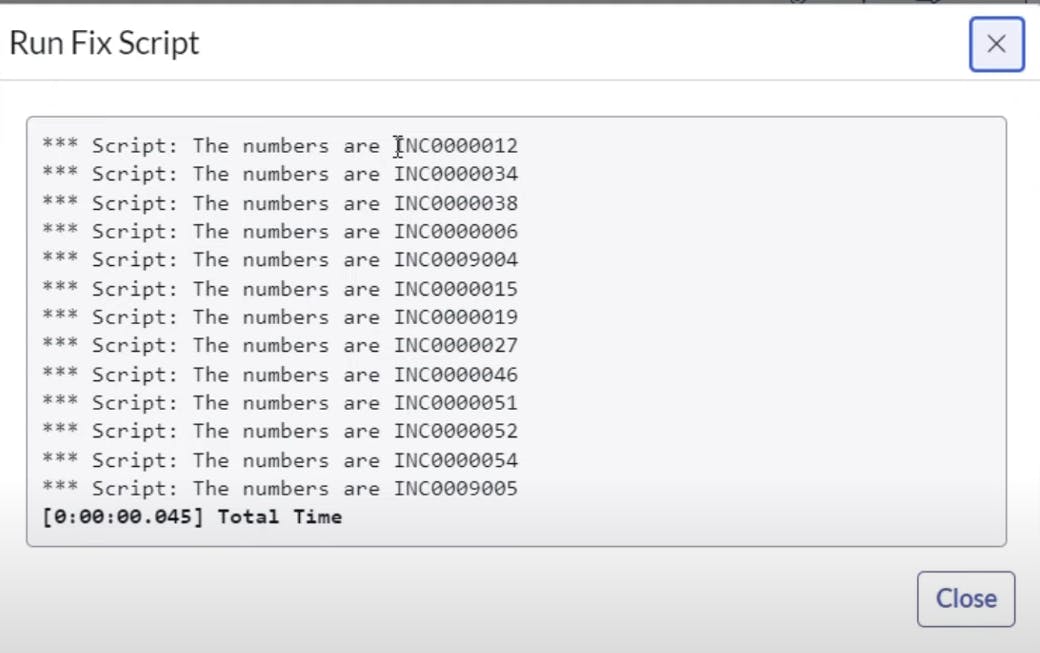
output:
before
after


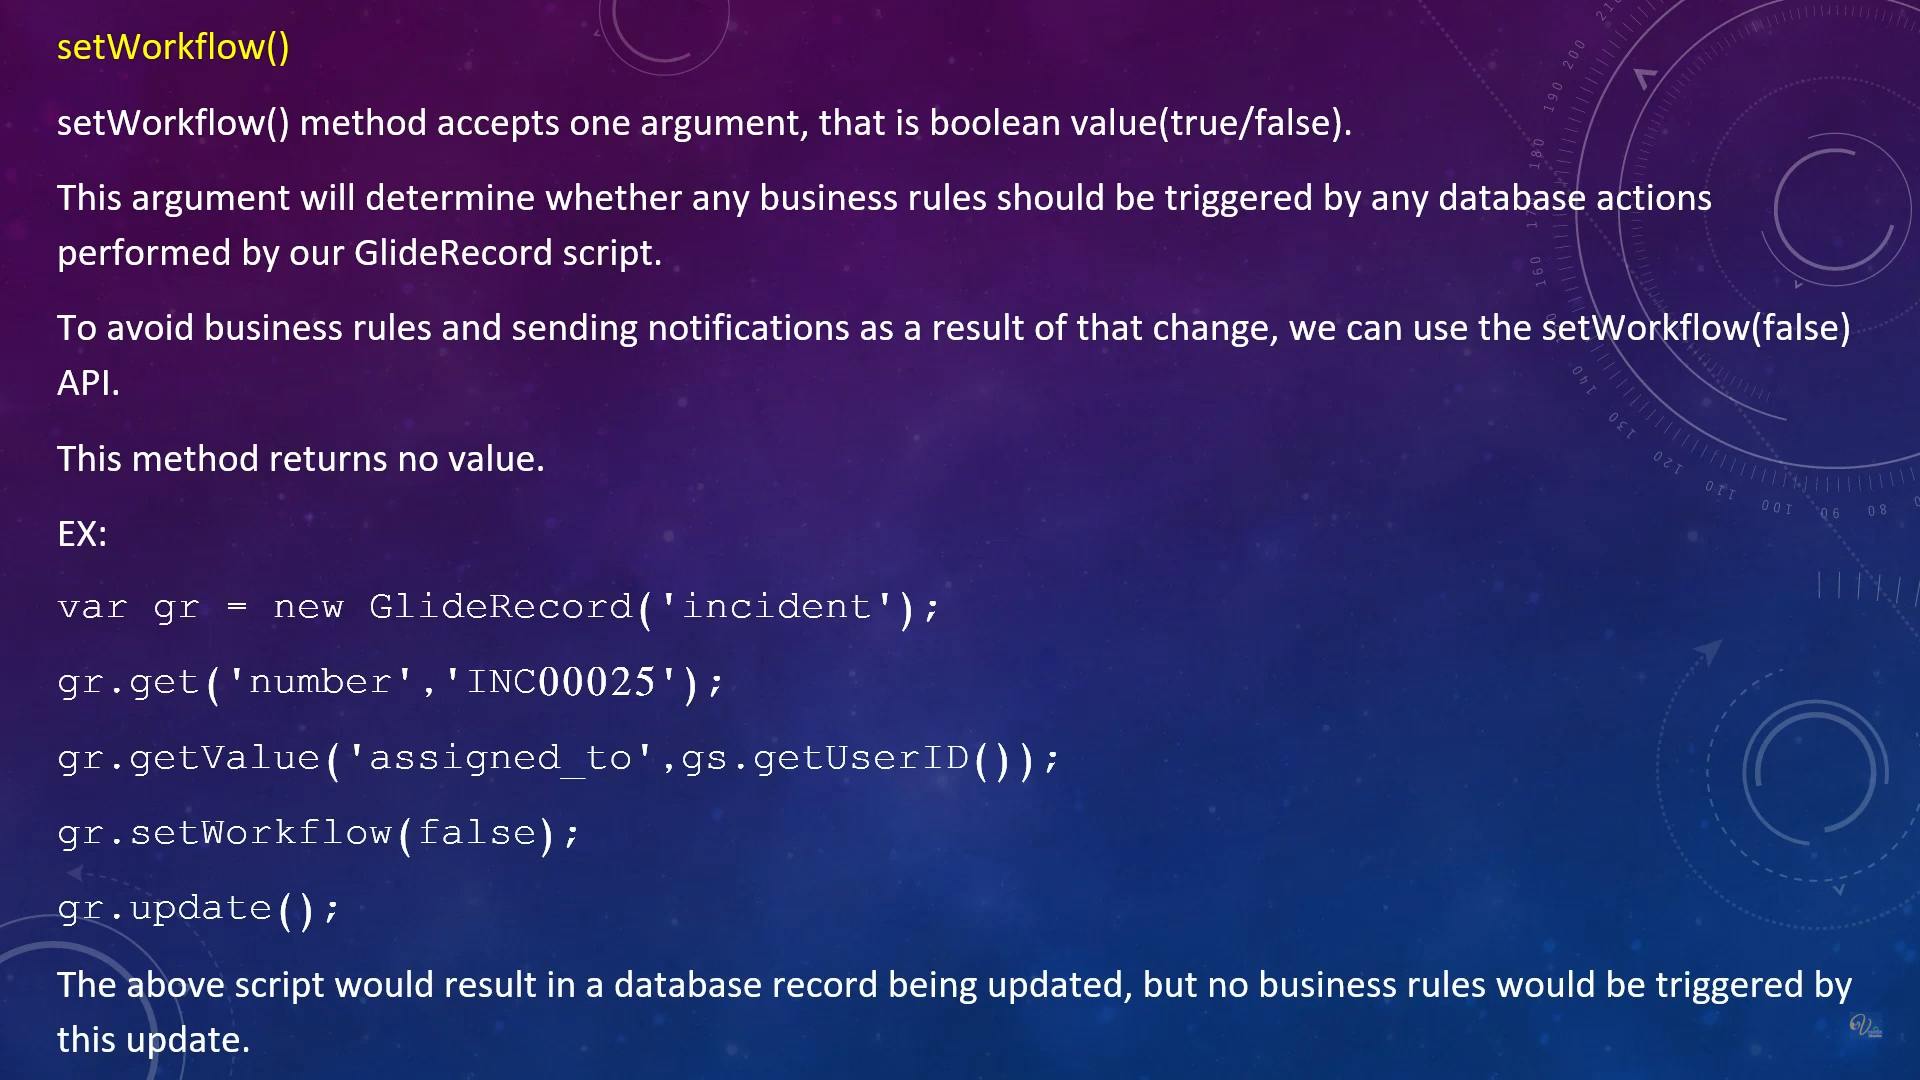
setWorkFlow()
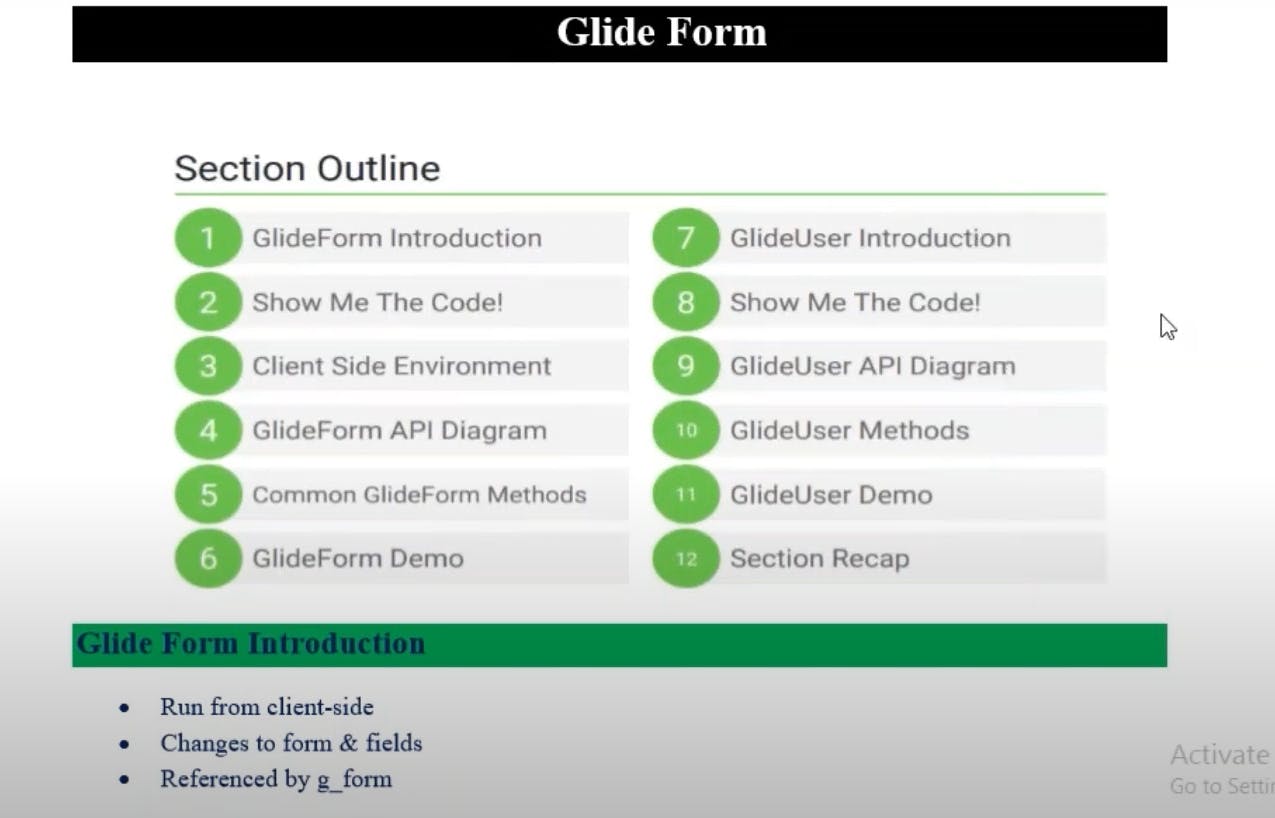
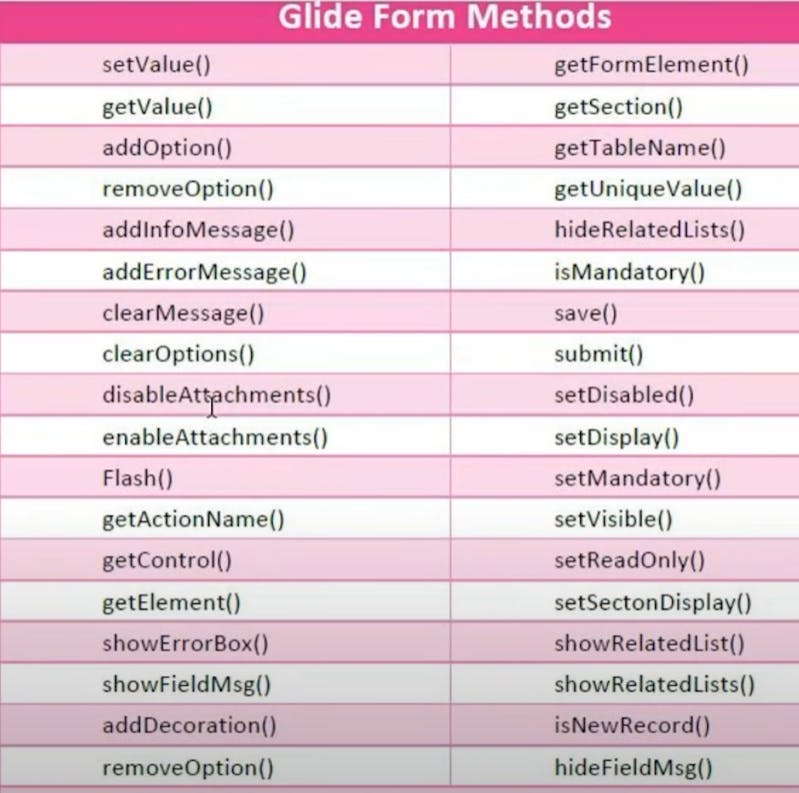
GlideForm
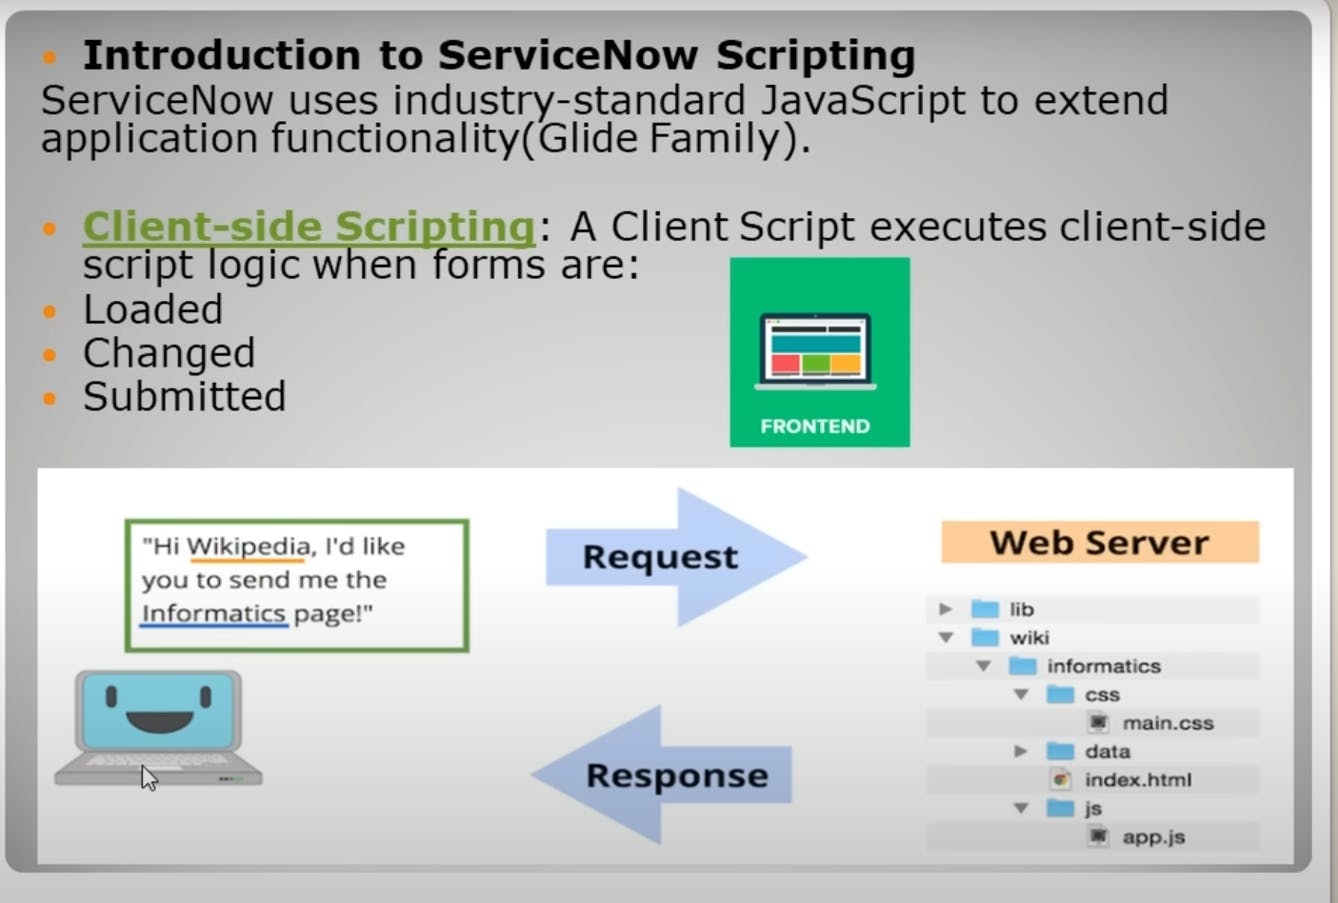
In ServiceNow, GlideForm is a JavaScript API that allows developers to interact with and manipulate forms within the ServiceNow platform. GlideForm provides methods and properties to customize and control the behavior and appearance of forms. It is commonly used in client-side scripting, UI policies, and business rules to enhance the user experience and automate processes on forms.
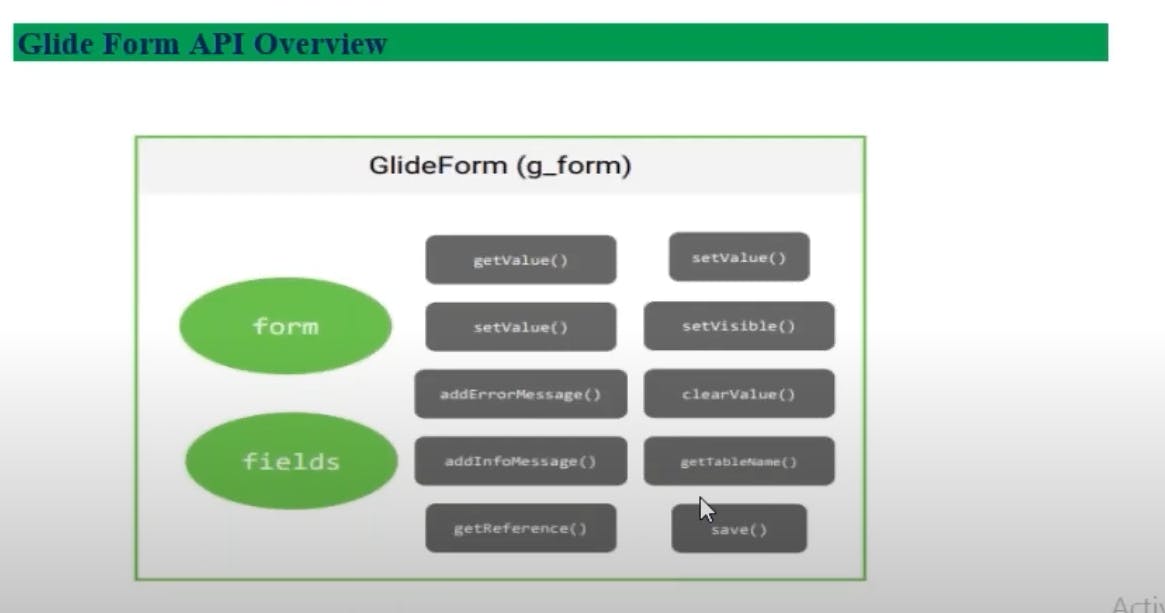
Here are some key aspects and uses of GlideForm:
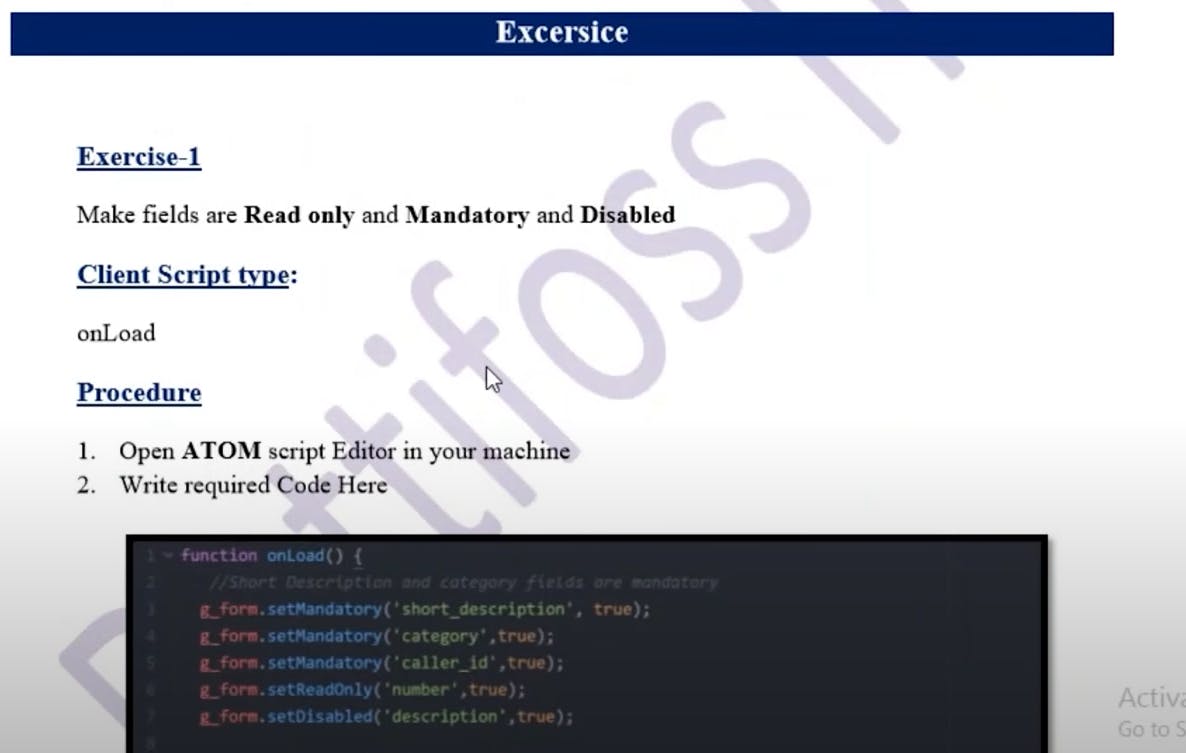
Accessing GlideForm: You can access the current GlideForm object in client scripts using the global variable
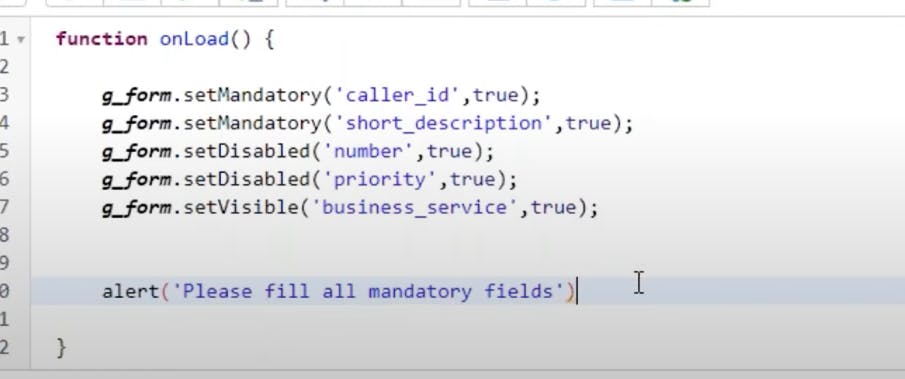
g_form. This object represents the form currently displayed to the user.Field Interaction: GlideForm provides methods to interact with form fields, such as
setValue(),getValue(),setReadOnly(),setMandatory(), andsetDisplay(). These methods allow you to set field values, read field values, control field properties, and change field display styles dynamically.Form Validation: You can use GlideForm methods like
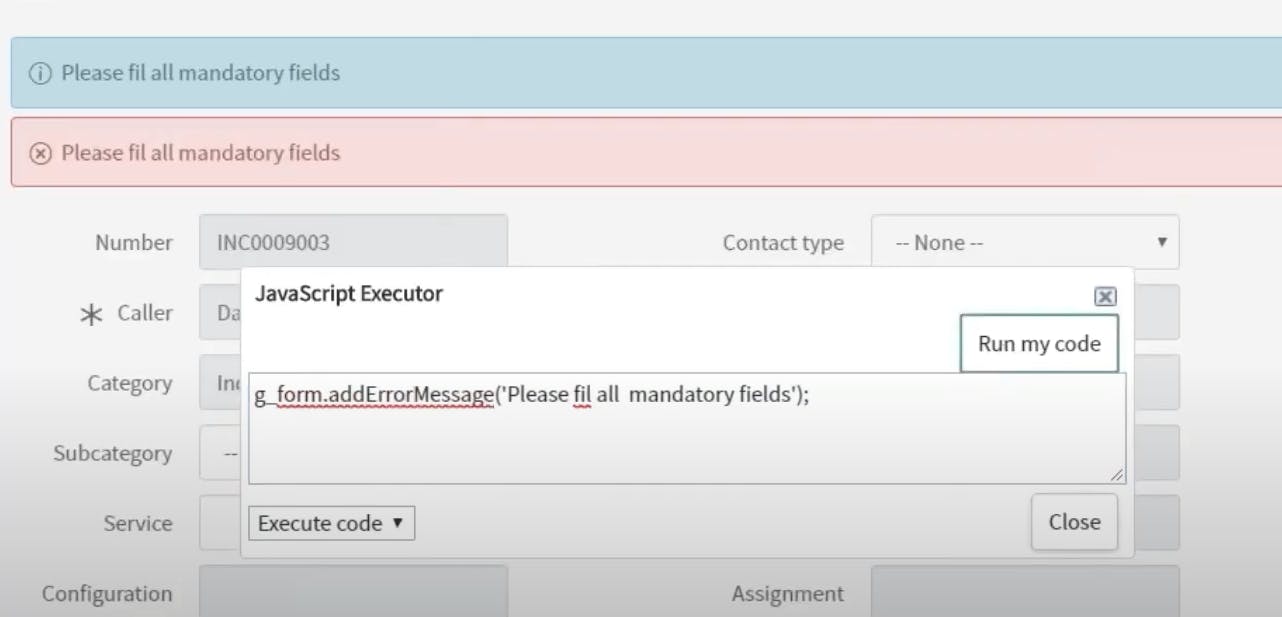
addErrorMessage()andclearMessages()to display validation messages to users and perform client-side validation.Form Submission: GlideForm allows you to submit and save forms using methods like
submit()andsave(). These methods are used to create or update records on the server.Dynamic Field Manipulation: GlideForm enables dynamic manipulation of fields and form sections based on user interactions or business rules. For example, you can show or hide fields, make fields mandatory, or set their read-only status based on certain conditions.
Client Scripts: You can attach client scripts to forms, which use GlideForm extensively to implement client-side logic and validations.
UI Policies: GlideForm is often used in UI policies to control the behavior of fields and sections on forms, making them more dynamic based on user actions.
Form State Tracking: GlideForm provides information about the state of the form, such as whether it's in add mode, edit mode, or view mode. You can access this information using properties like
isAddOrEditMode().Form Variables: GlideForm allows you to work with form variables, which are used to pass data between forms or processes.
Here's a basic example of using GlideForm to set a field value in a client script:
var fieldValue = 'Sample Value';
g_form.setValue('field_name', fieldValue);
This script sets the value of a field with the name 'field_name' to 'Sample Value' on the current form.
GlideForm is a powerful tool for customizing forms and improving user interactions within the ServiceNow platform. Developers often use it to create a more user-friendly and efficient experience for ServiceNow users.

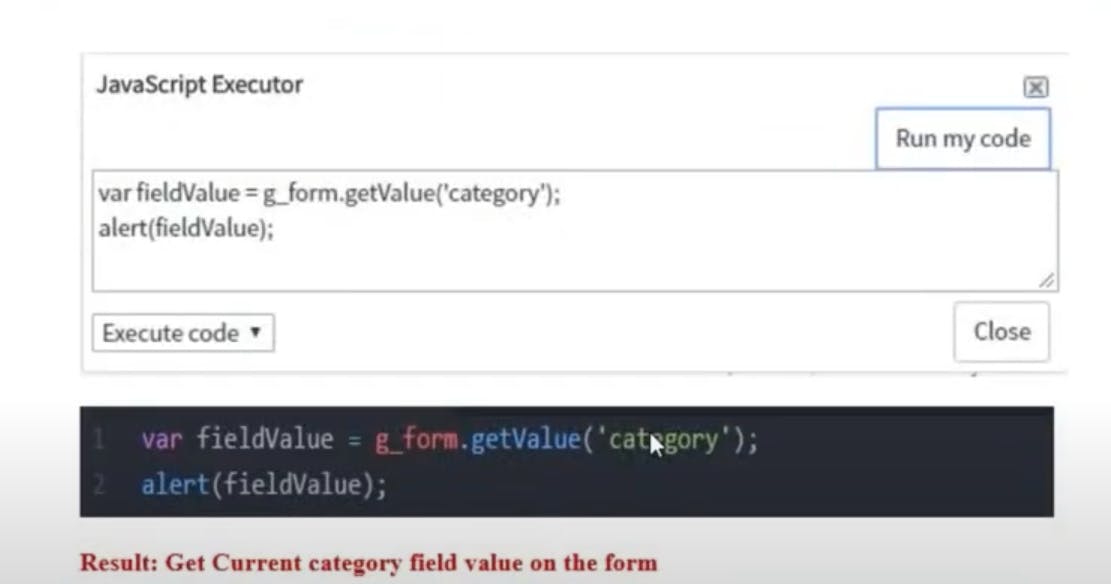
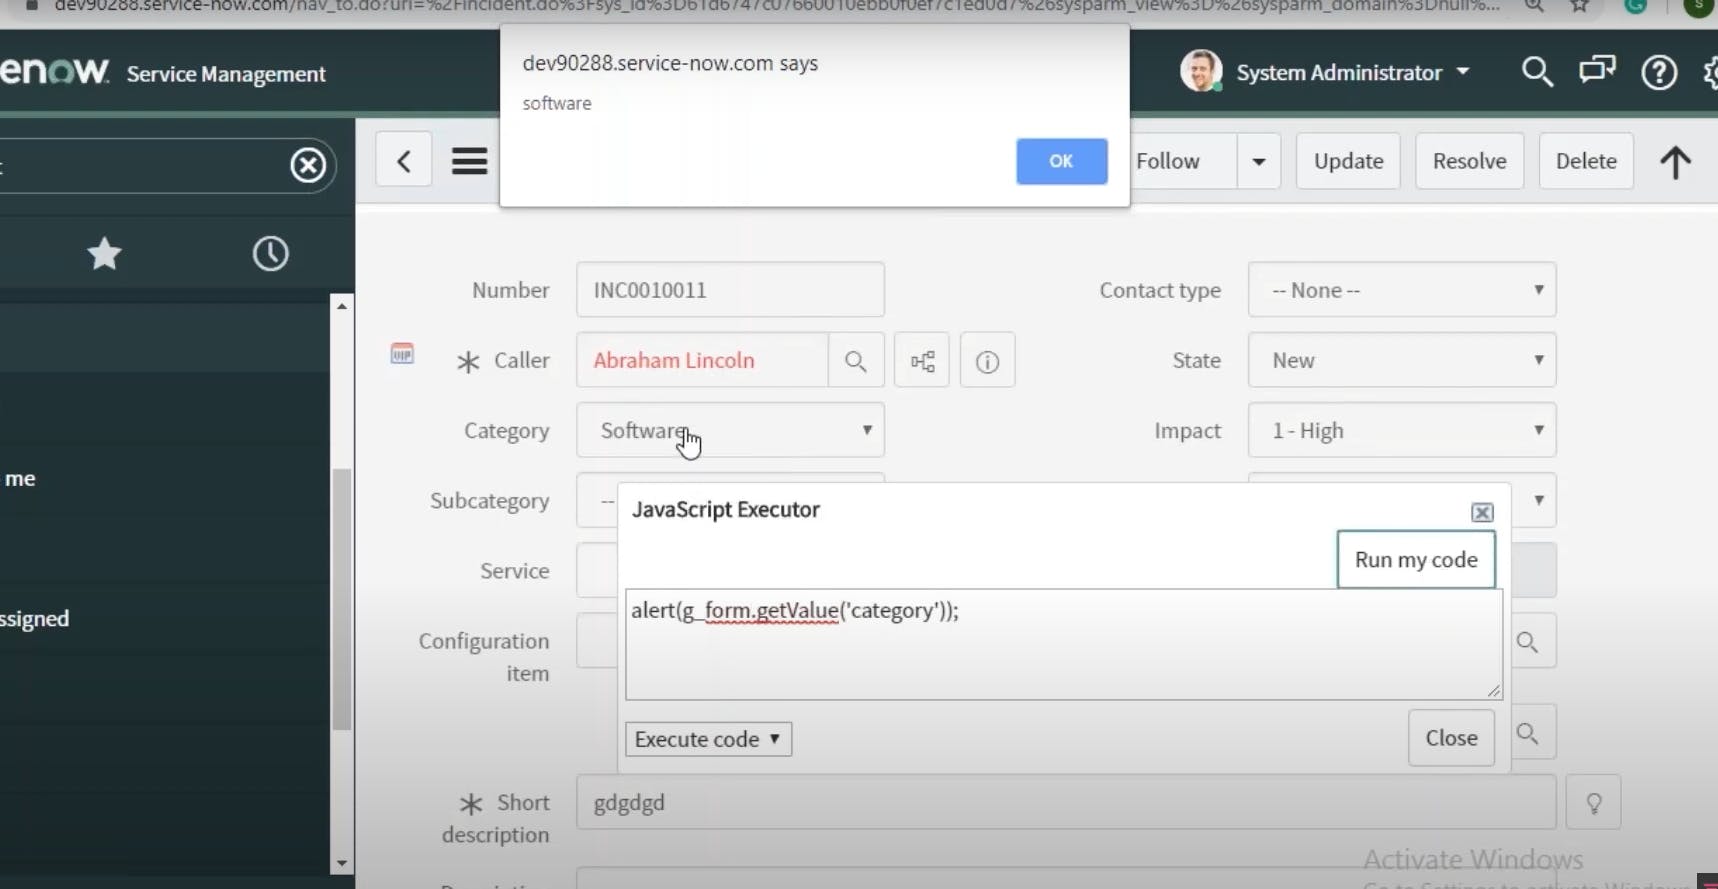
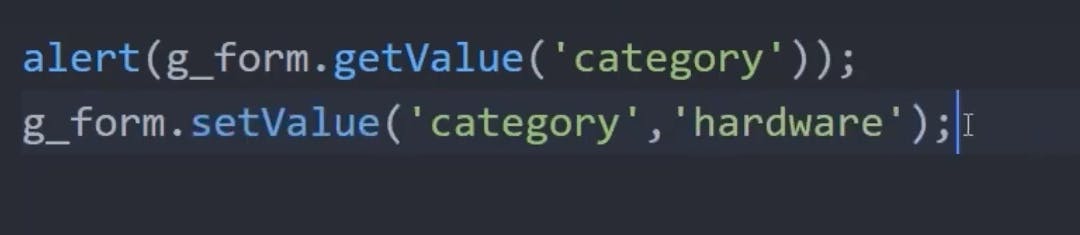
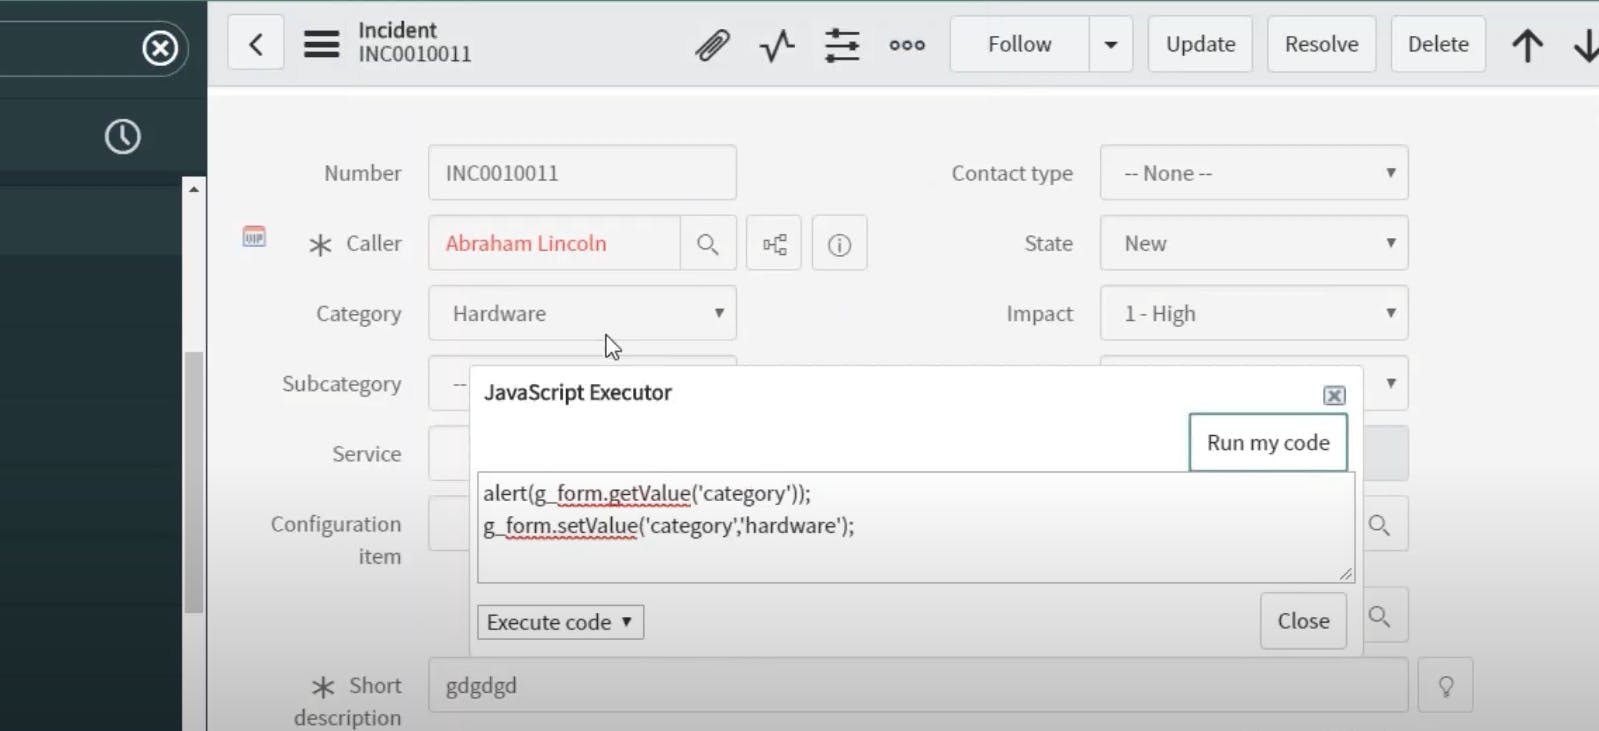
getValue()
setValue()
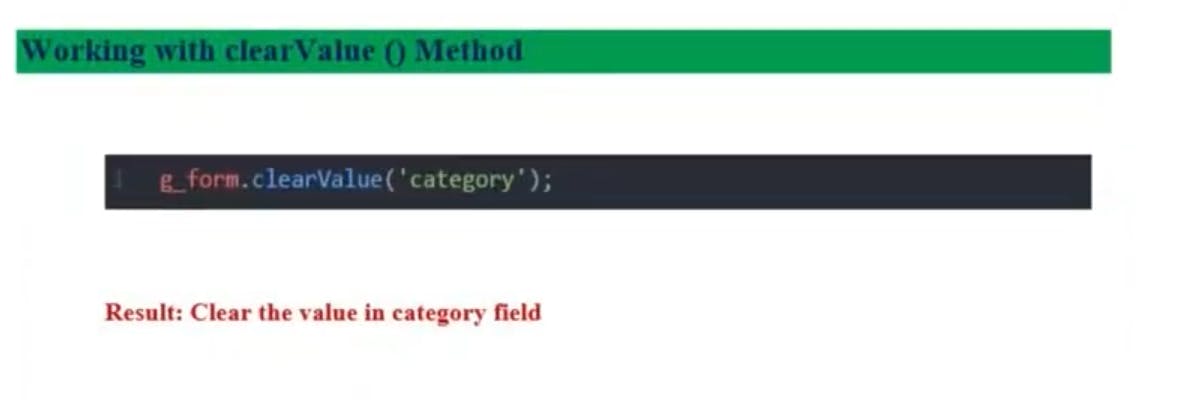
clearValue()
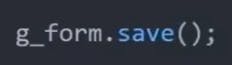
save()

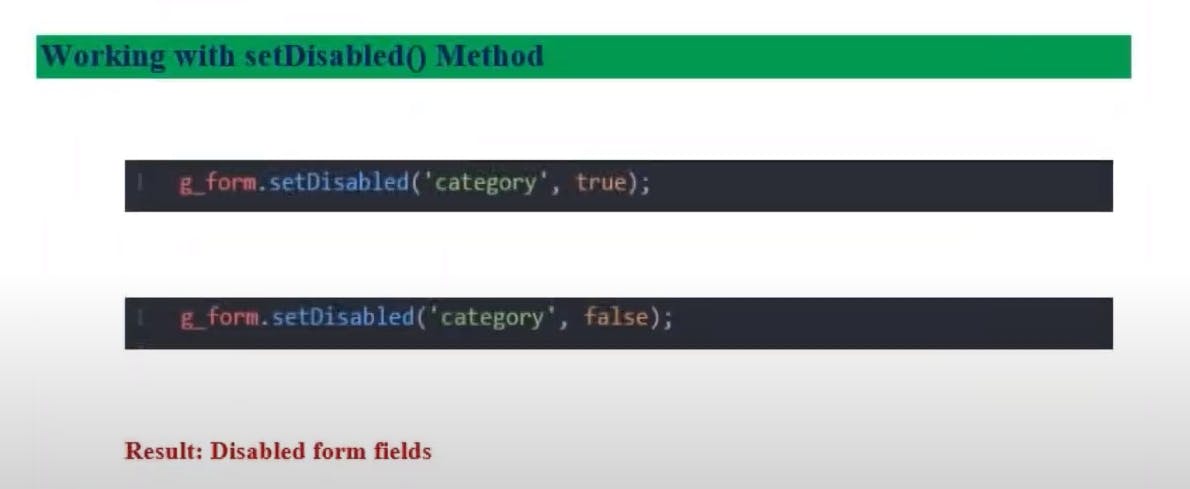
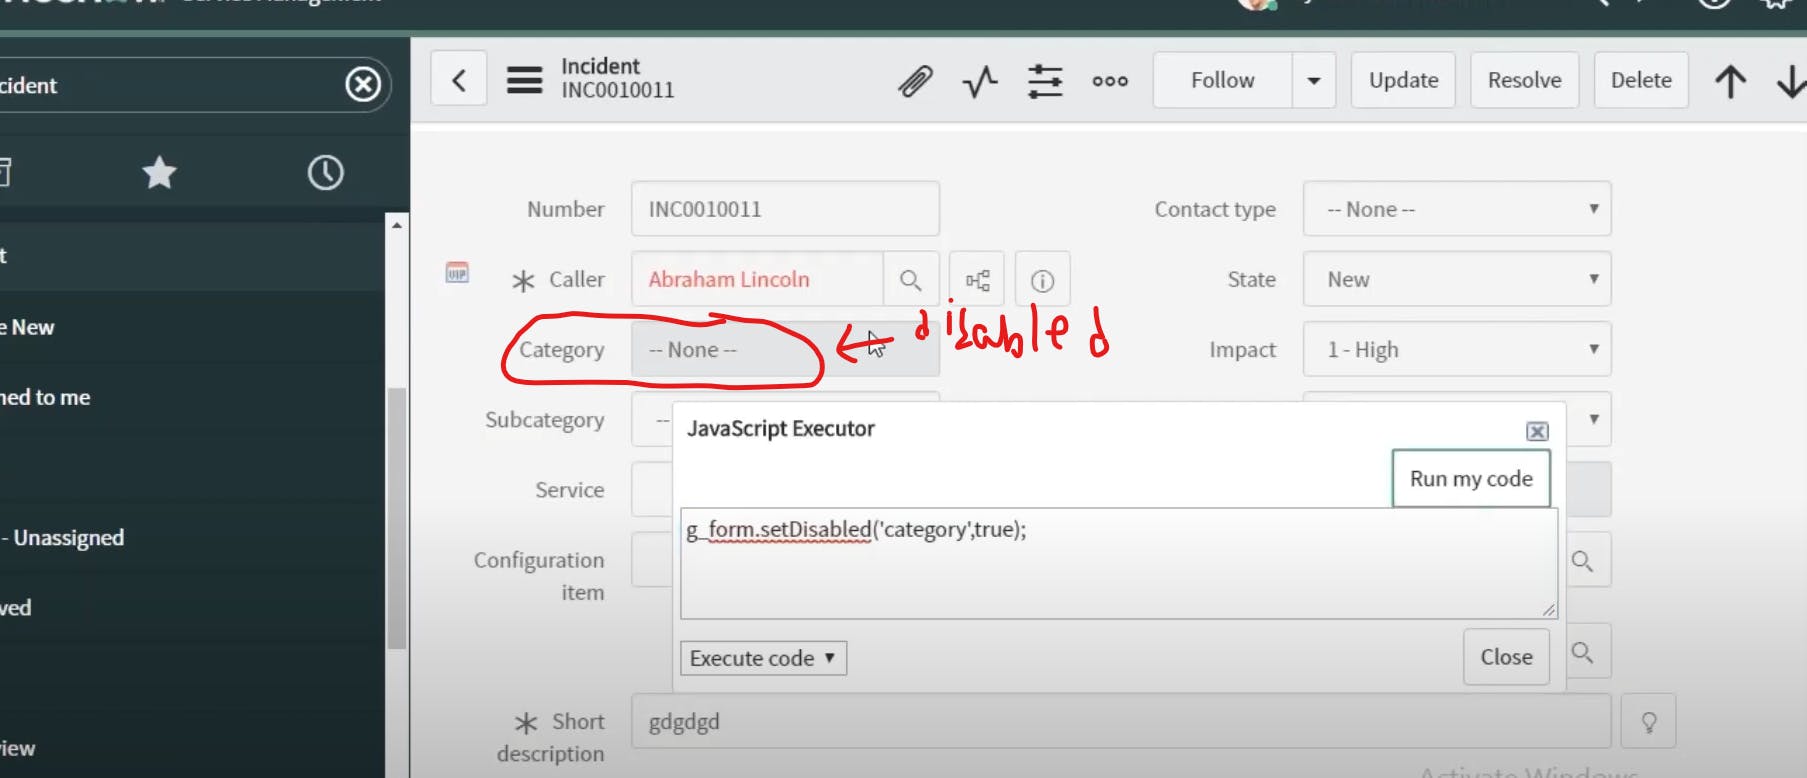
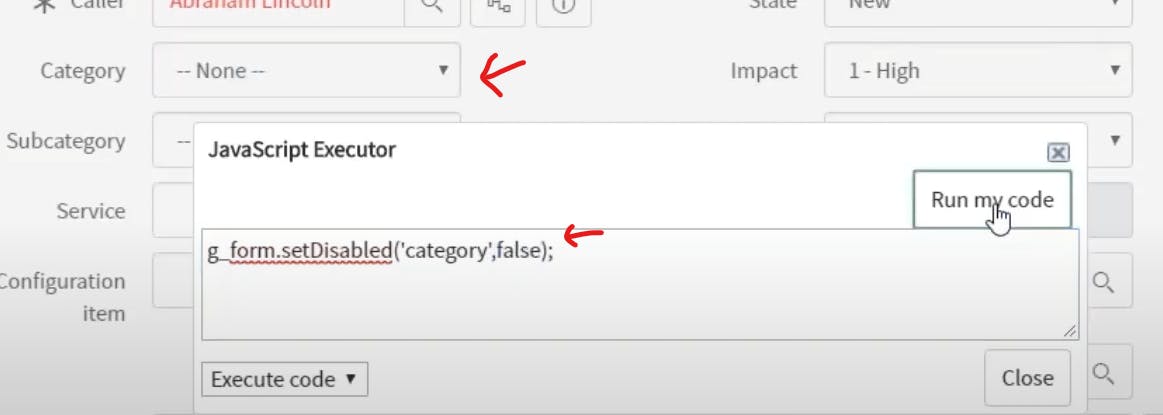
setDisabled()
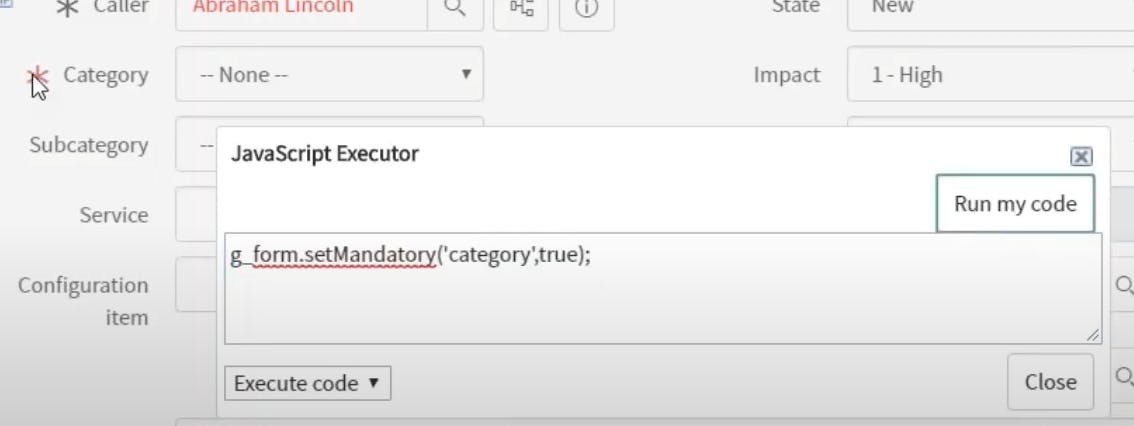
setMandatory()
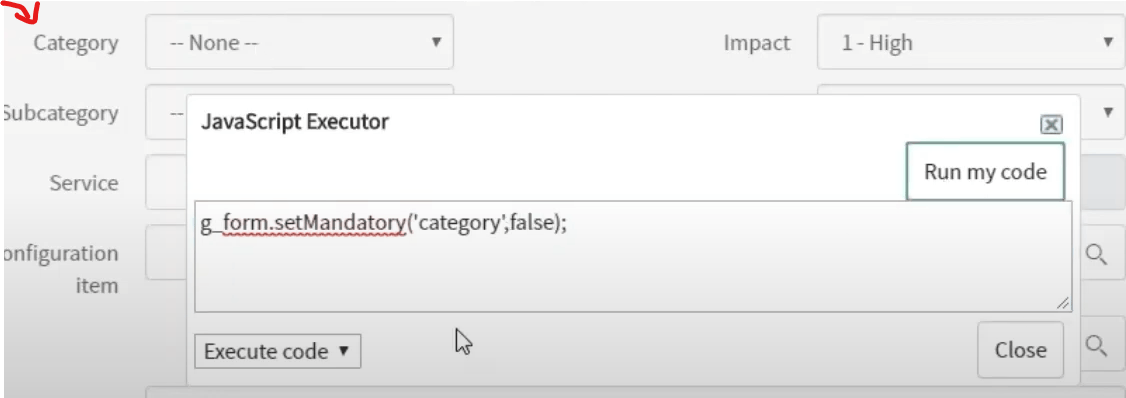
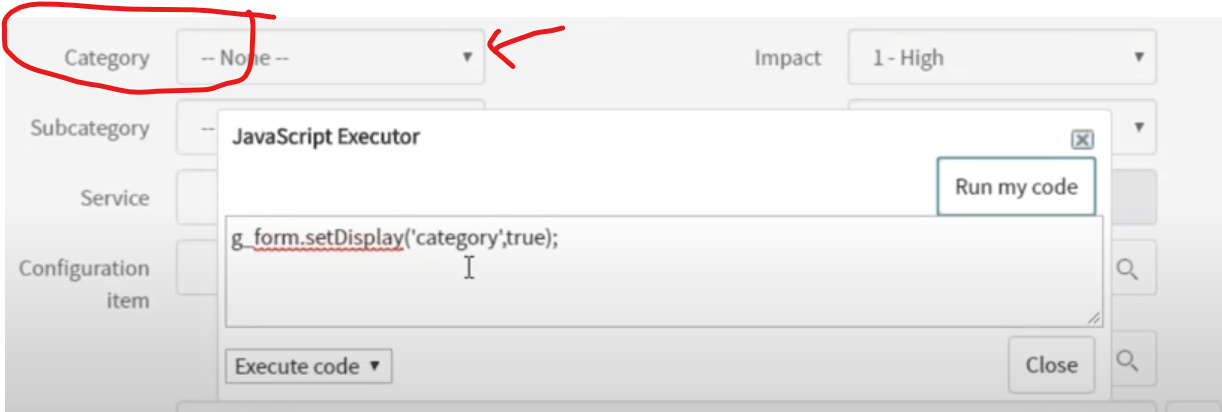
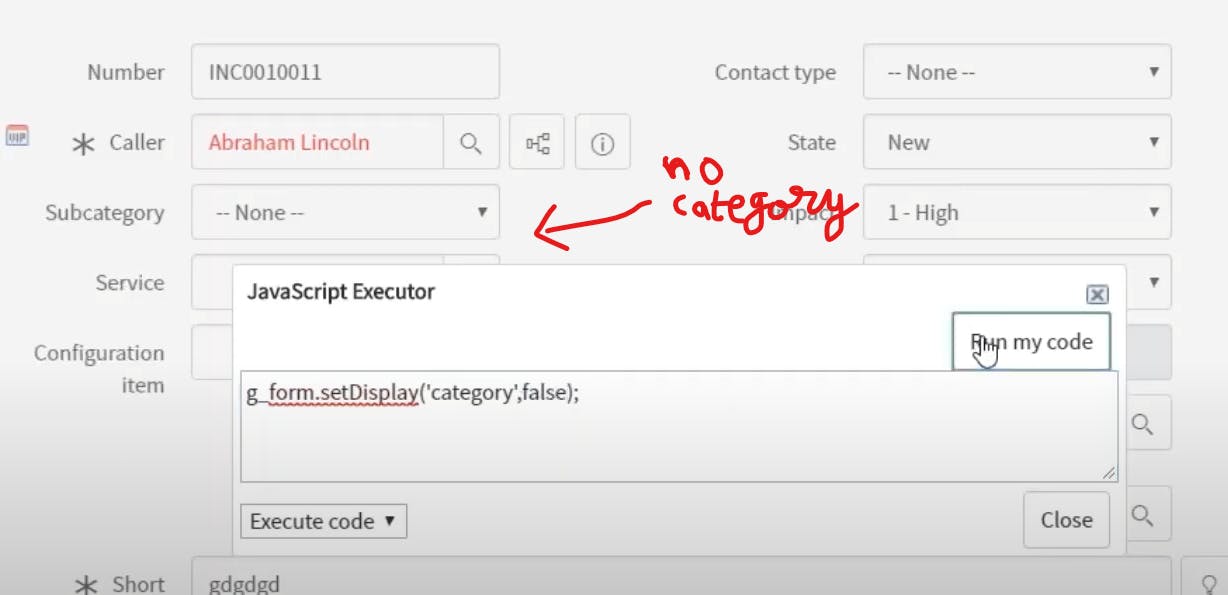
setDisplay()
if it is true
if set to false
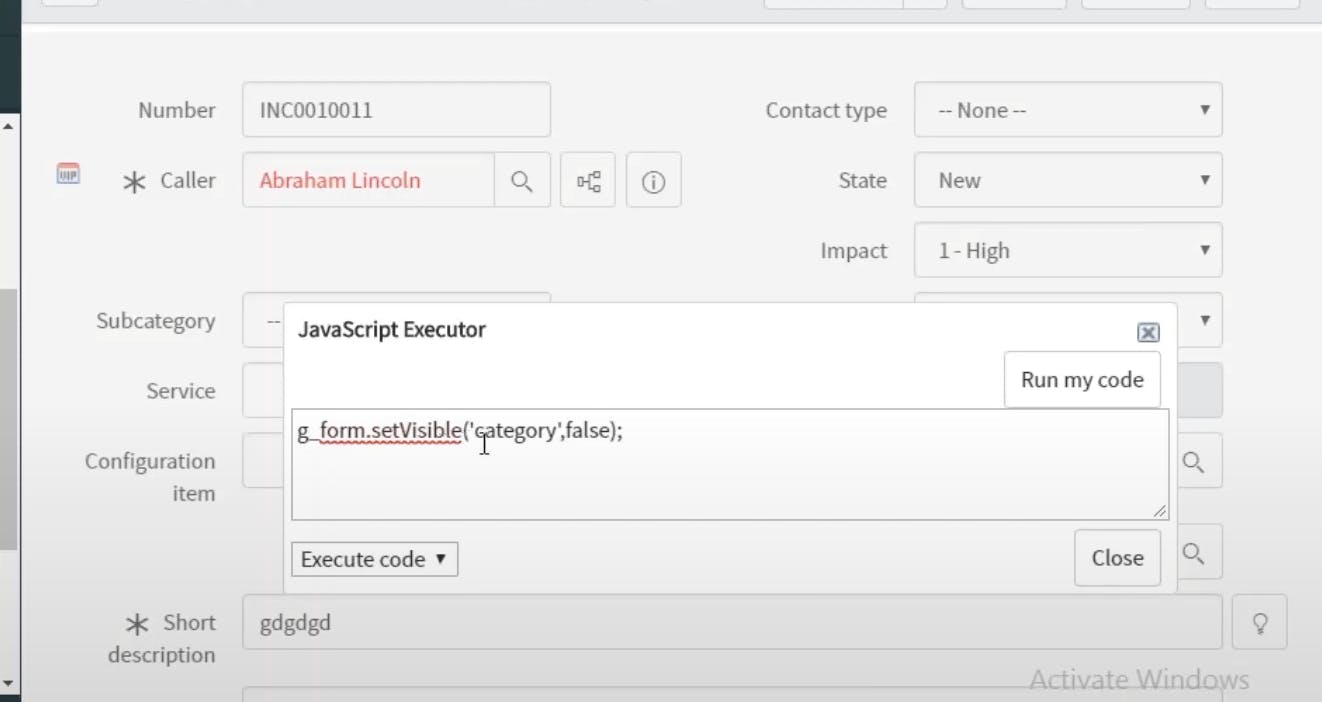
setVisible()
it will make space stay there itself after removing
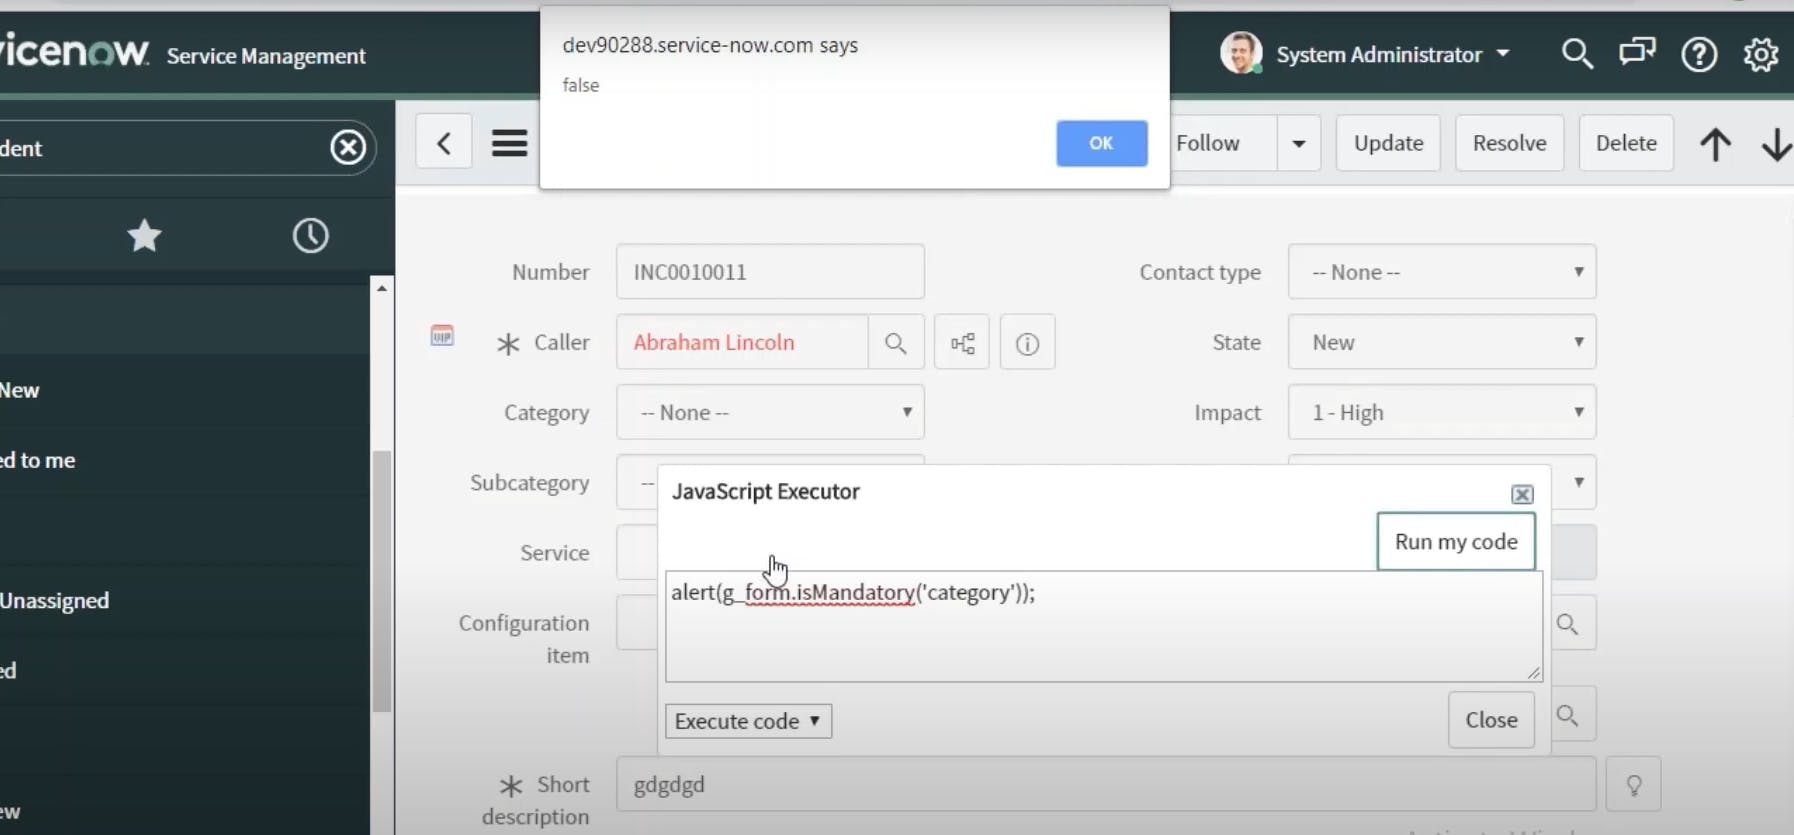
isMandatory()

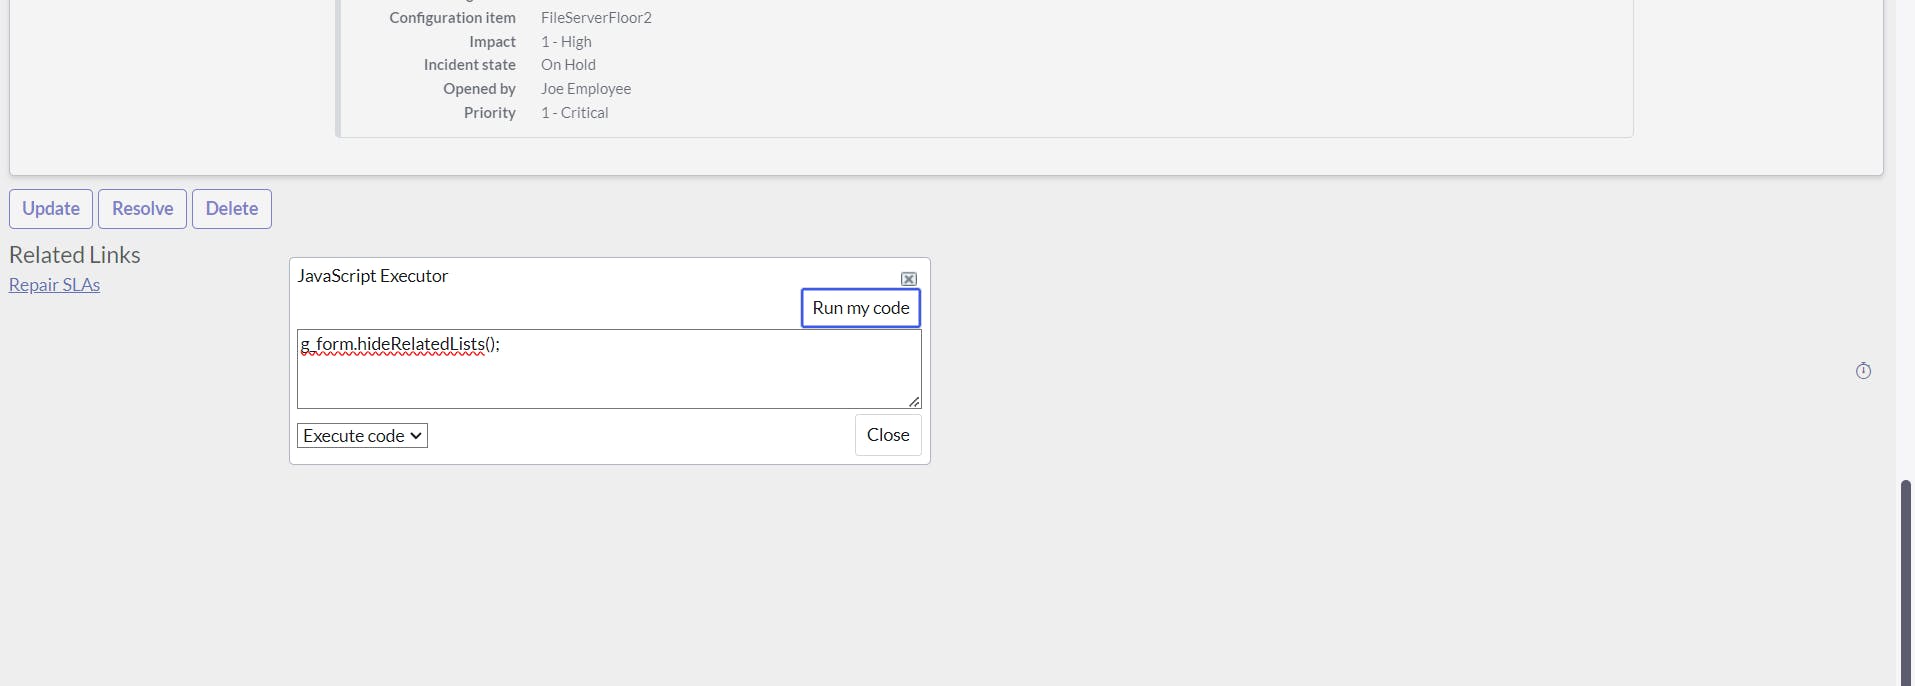
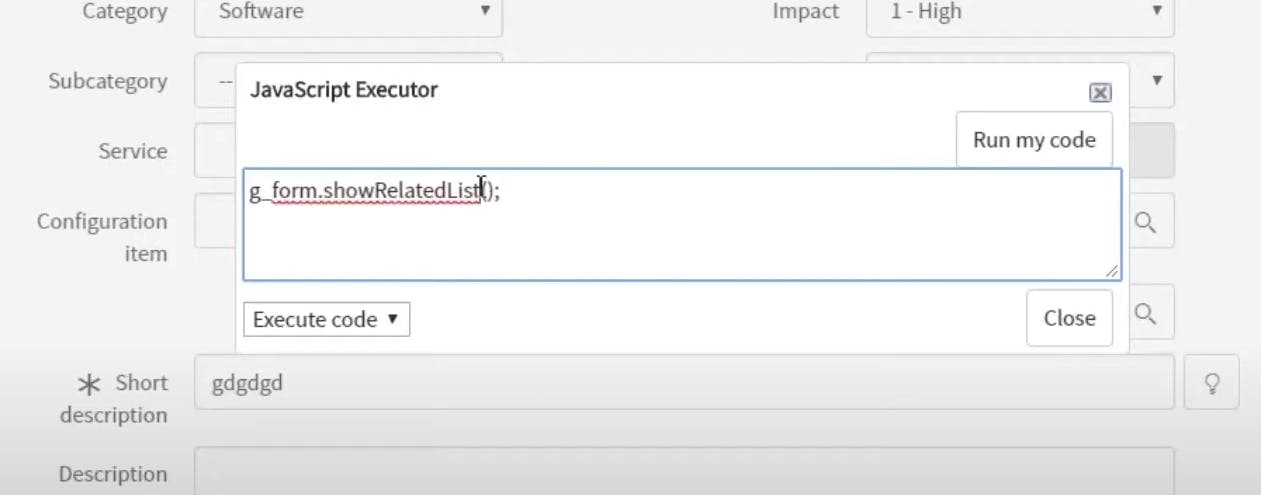
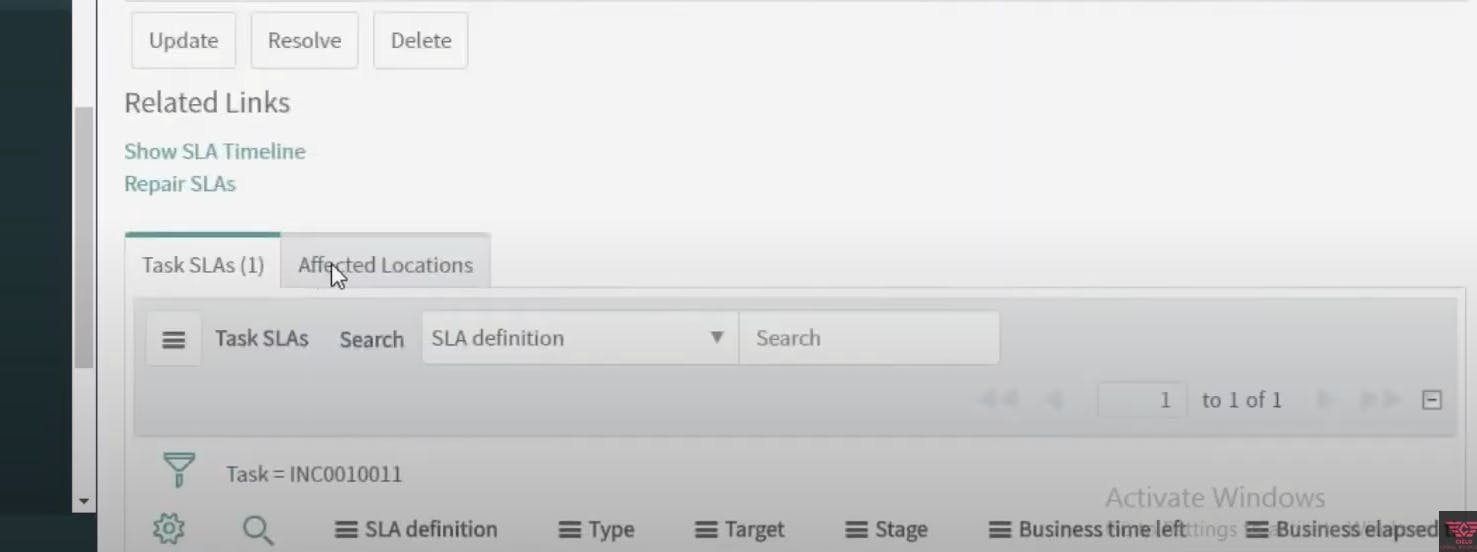
hideRelatedLists() and show
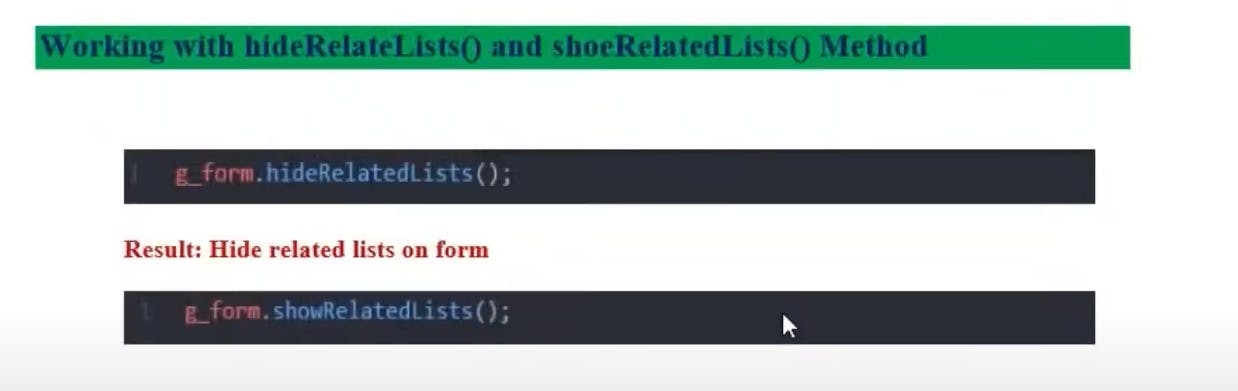
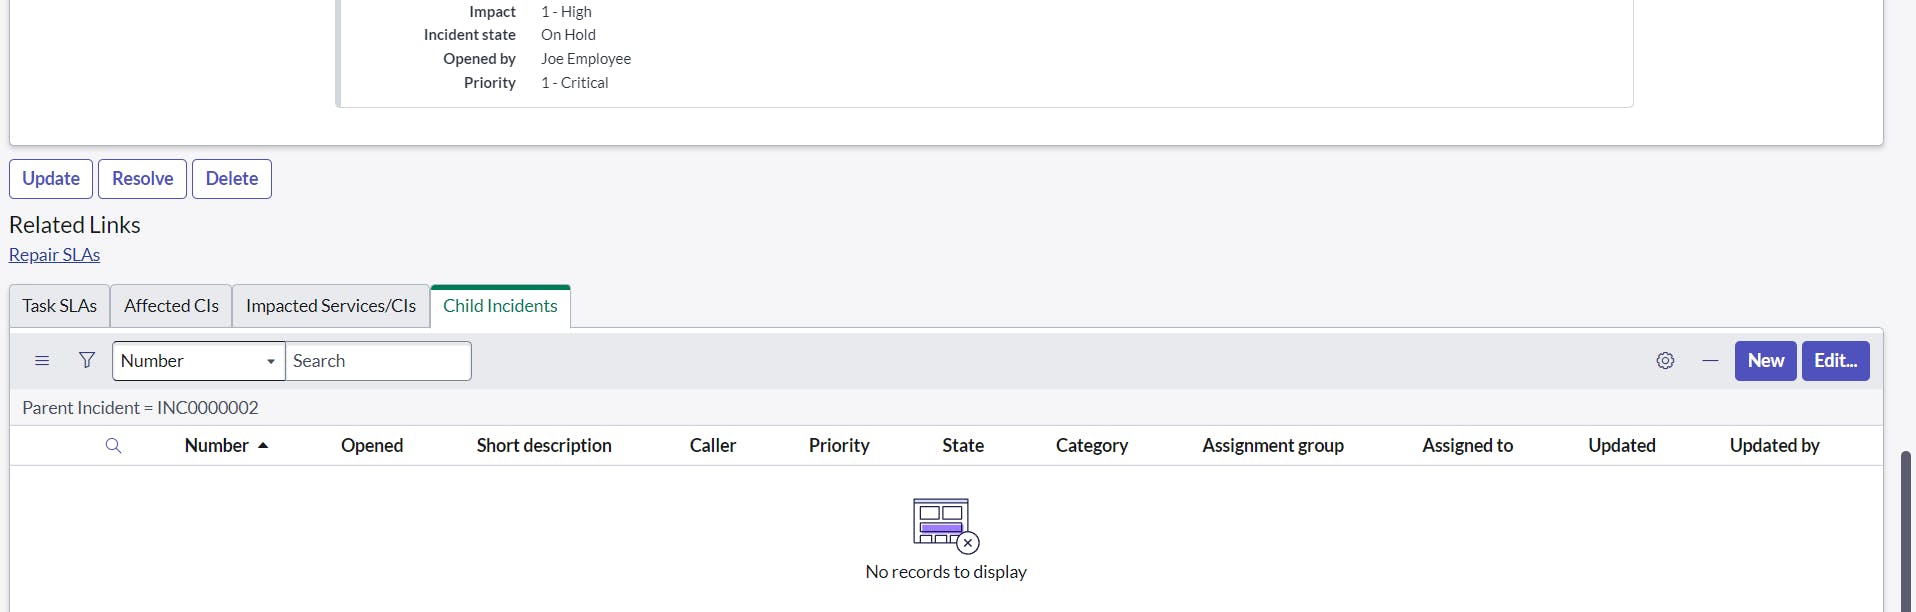
now related lists will be hidden
disableAttachments() and enable
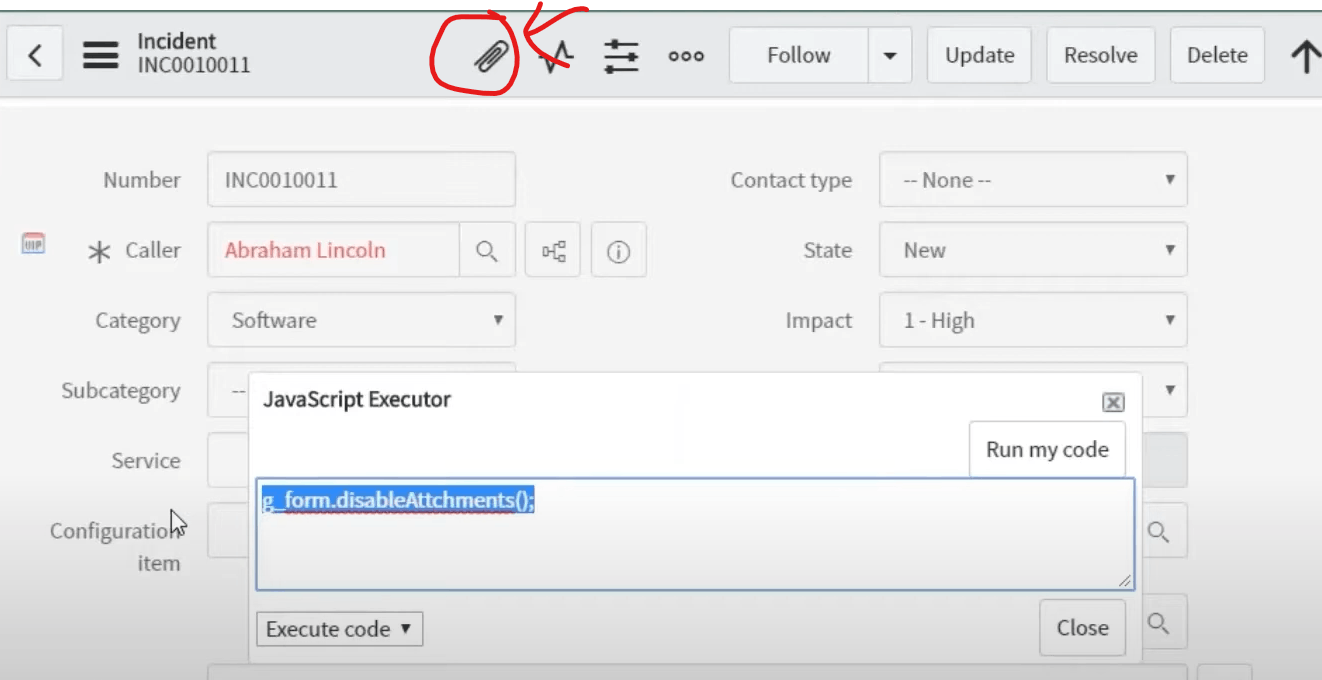
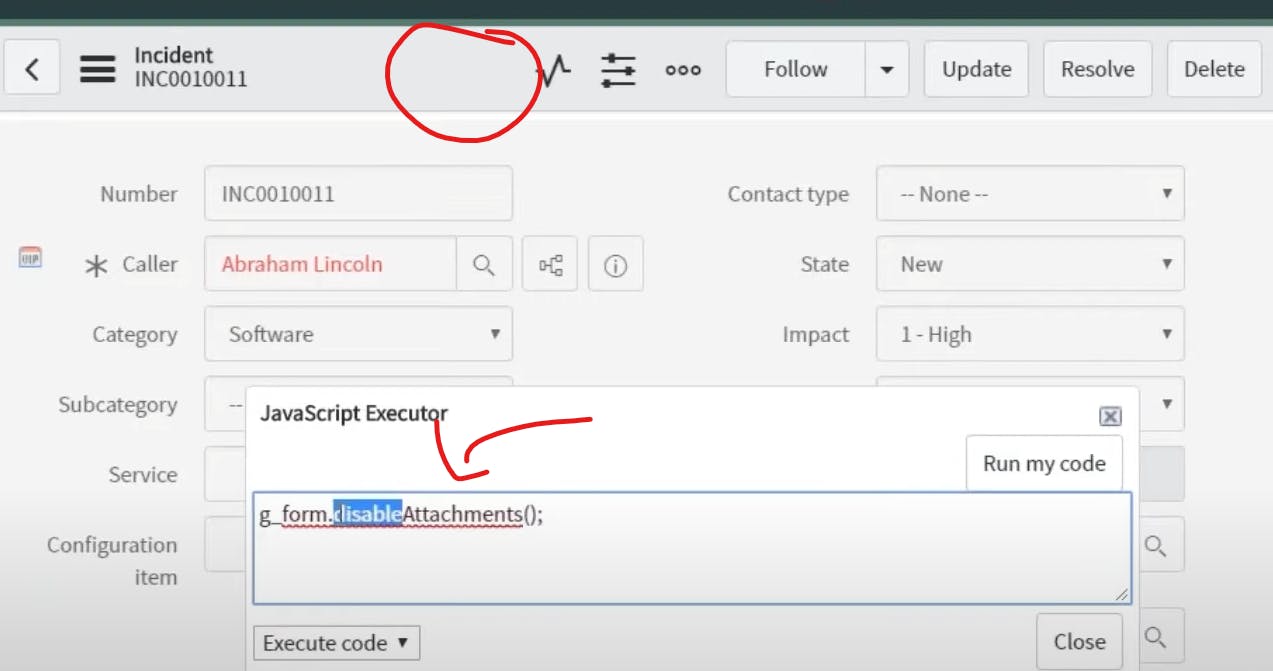
enable

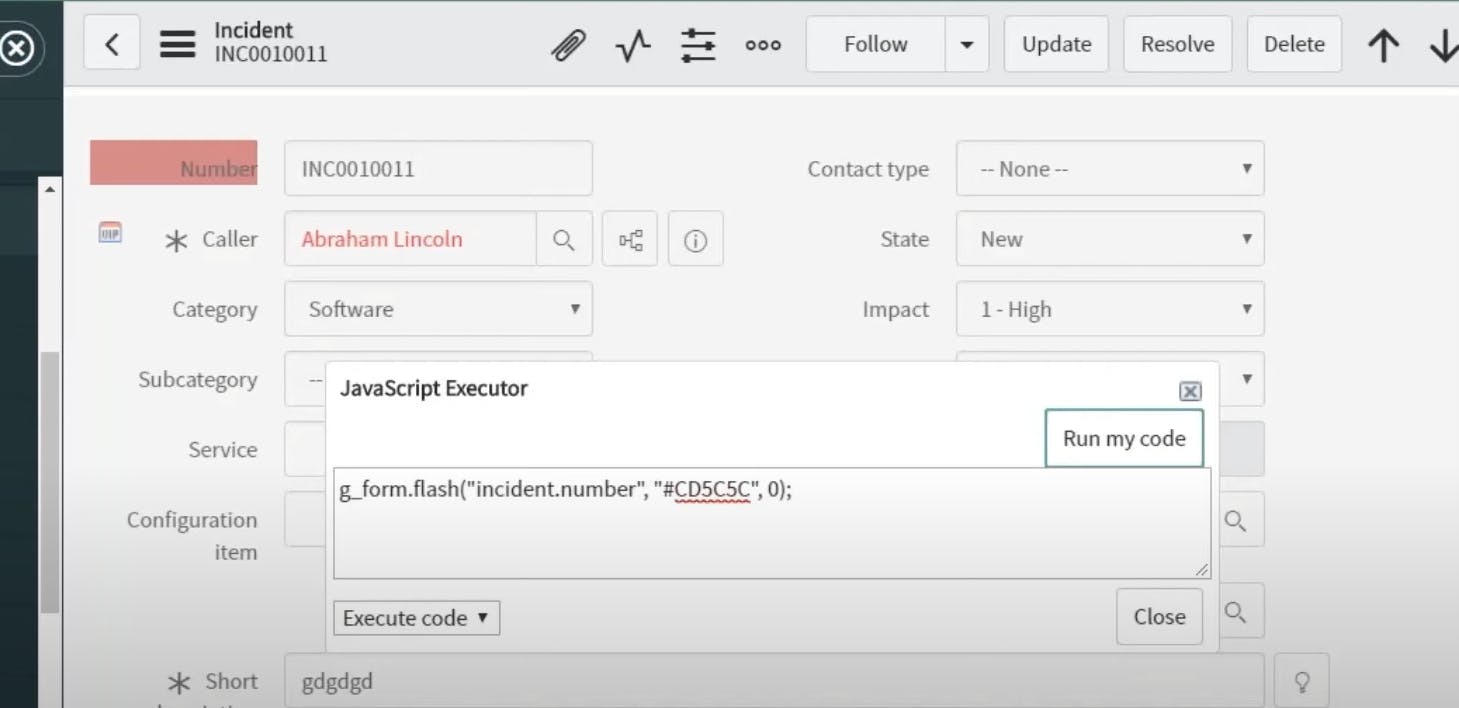
Flash
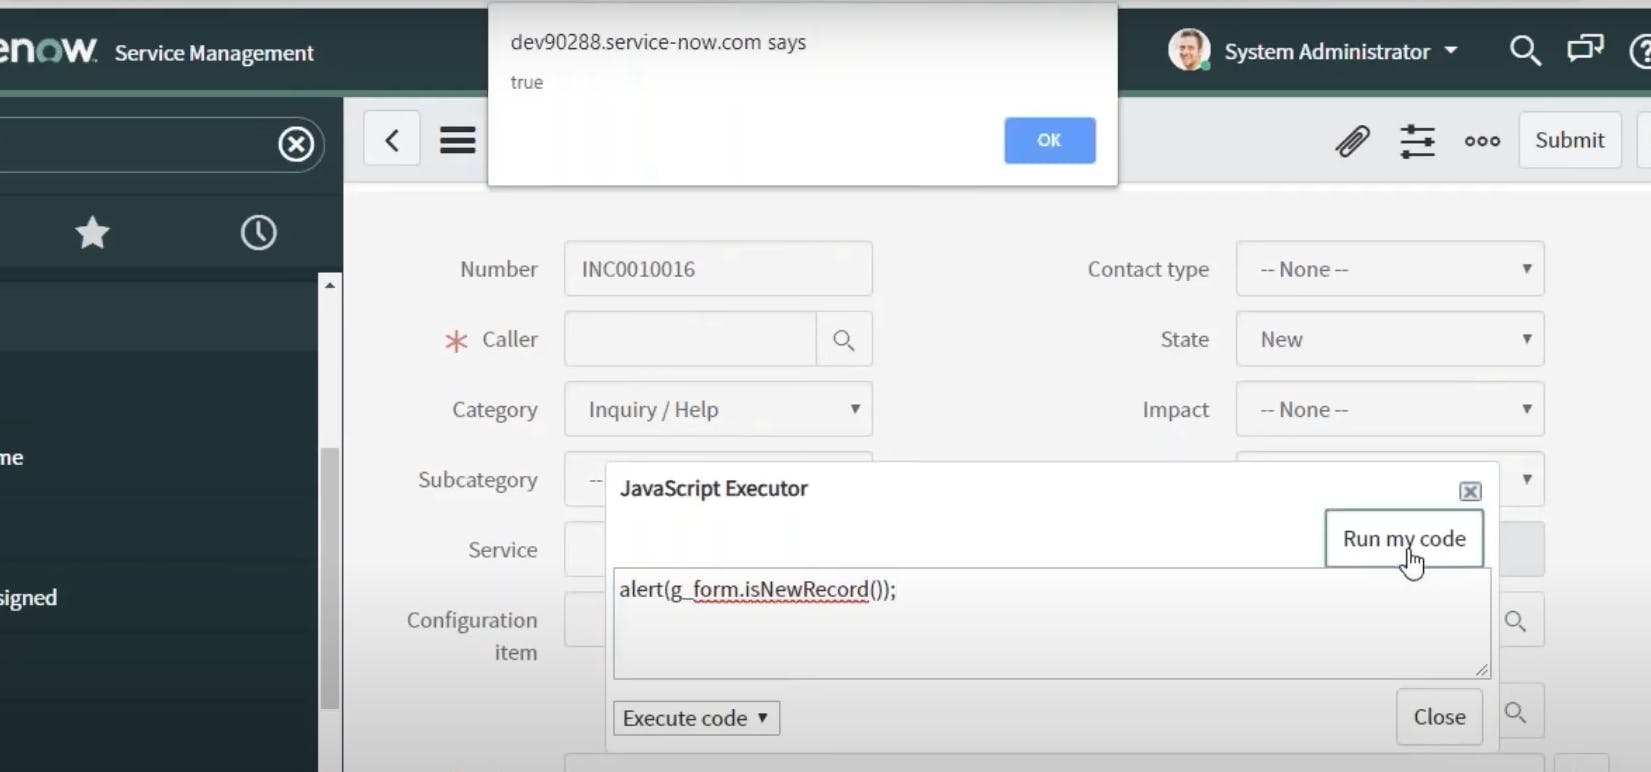
isNewRecord()
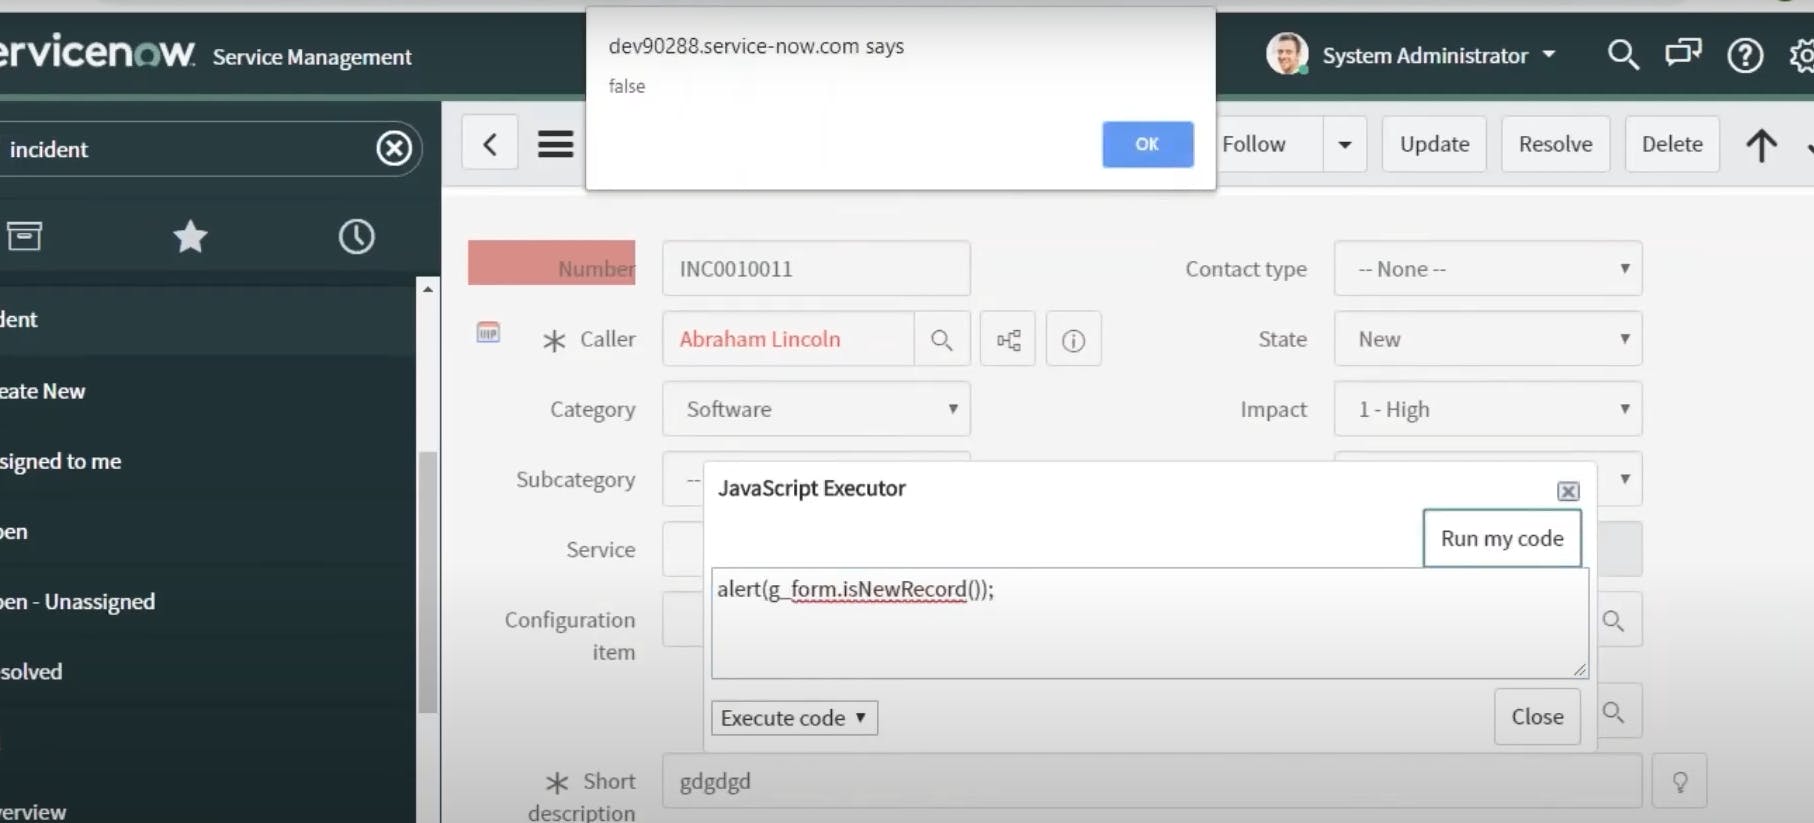
on new record
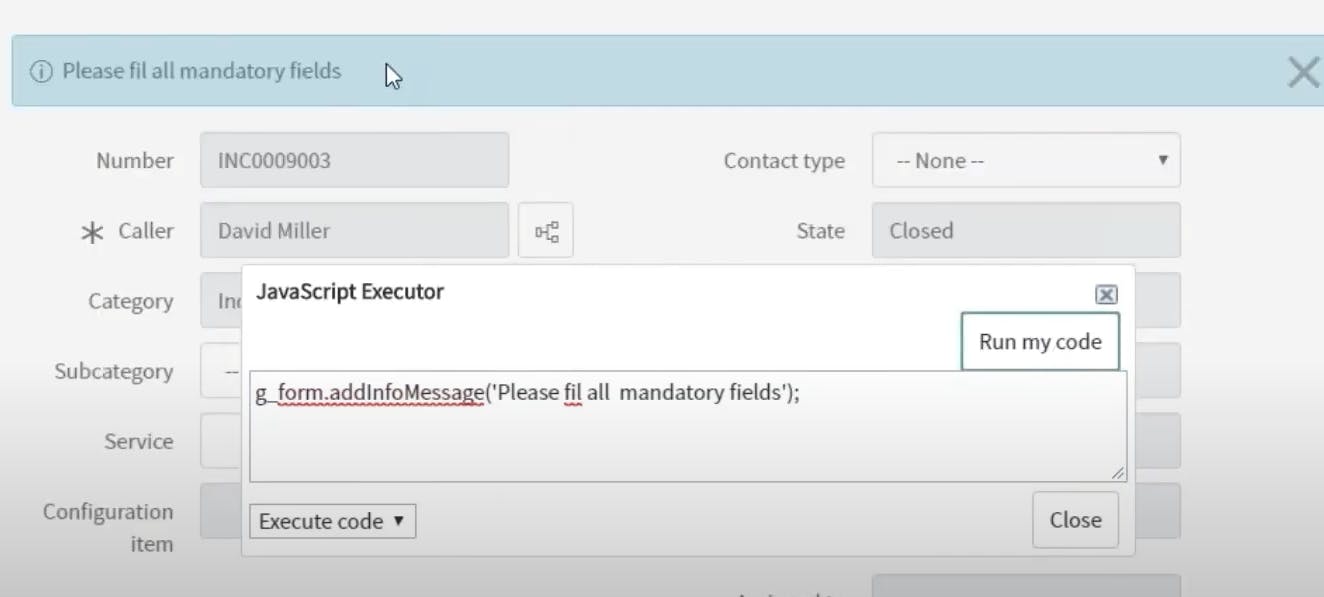
addInfoMessage() ,addErrorMessage()
GlideUser
In ServiceNow, GlideUser is a JavaScript API object that allows you to access and interact with user-related information and permissions within the ServiceNow platform. GlideUser provides a set of methods and properties that enable you to retrieve details about the current user, their roles, preferences, and more. It's a useful tool for customizing and controlling user experiences and processes in ServiceNow.
Here are some key aspects of GlideUser in ServiceNow:
Accessing GlideUser: You can access the current GlideUser object in server-side scripts, such as business rules, script includes, and server-side script actions, using the global
gsobject.var user = gs.getUser();User Information:
getID(): Retrieves the unique sys_id of the current user.getUserName(): Retrieves the username of the current user.getFirstName(): Retrieves the first name of the current user.getLastName(): Retrieves the last name of the current user.getFullName(): Retrieves the full name of the current user (first name + last name).getEmail(): Retrieves the email address of the current user.
Roles and Permissions:
getRoles(): Retrieves an array of role names associated with the current user.hasRole(roleName): Checks if the current user has a specific role.isMemberOf(groupName): Checks if the current user is a member of a specific group.getRolesInherited()andgetRolesInternal(): Retrieve inherited and internal roles.
Preferences:
getPreference(prefName): Retrieves the value of a user preference.setPreference(prefName, prefValue): Sets a user preference value.
Locale and Time Zone:
getClientLocale(): Retrieves the locale setting of the current user's browser.getPreferredTimeZone(): Retrieves the preferred time zone of the current user.
Interactive vs. Background User:
isInteractive(): Checks if the current user is an interactive user (logged in through the UI).isPublic(): Checks if the current user is a public user (used for background processes).
Impersonation:
getImpersonating(): Retrieves information about the user currently being impersonated (if applicable).getImpersonator(): Retrieves information about the user who is impersonating (if applicable).
GlideUser is a valuable tool for customizing the behavior of scripts and processes in ServiceNow based on user information, roles, and preferences. It allows you to create dynamic and personalized experiences for users while enforcing security and access control rules.

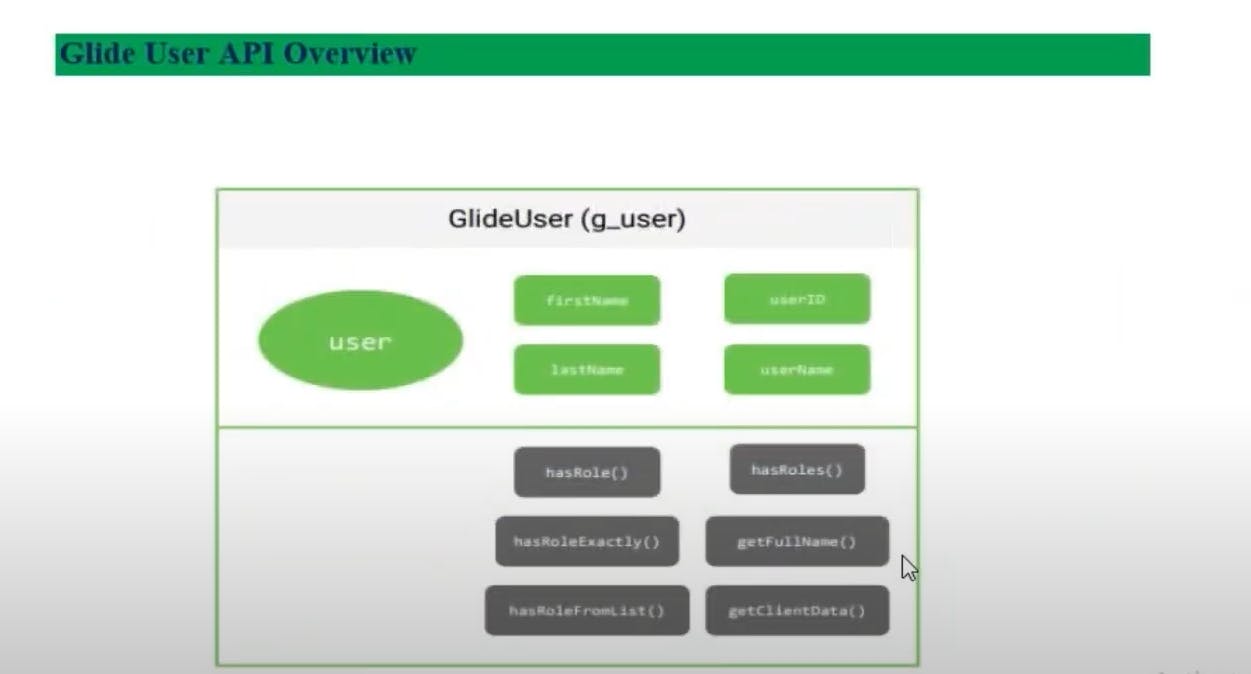
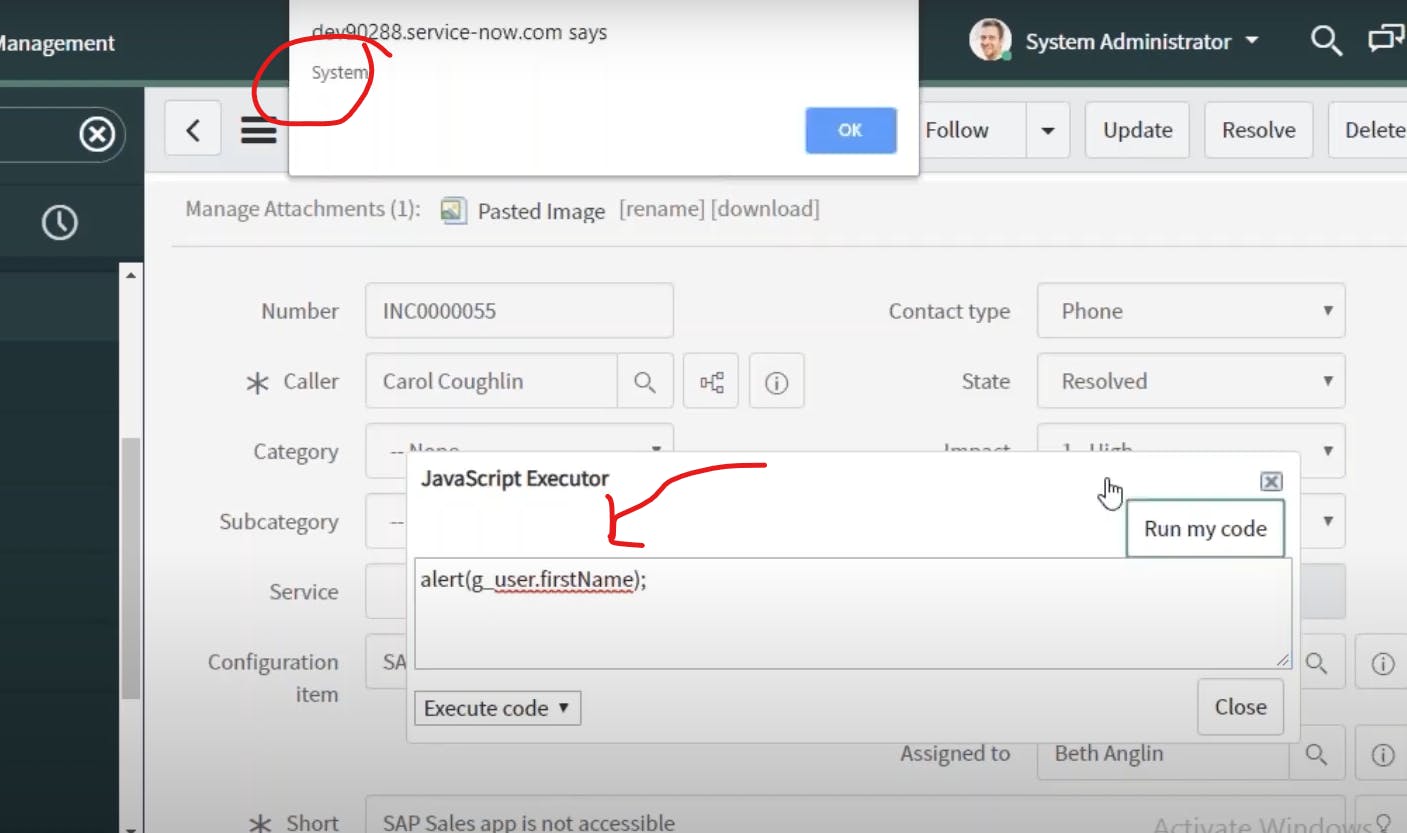
getFirstName()
In ServiceNow, the getFirstName() method of the GlideUser object is used to retrieve the first name of the current user. It allows you to access the first name of the user currently interacting with the ServiceNow platform. Here's how you can use it in a server-side script:
javascriptCopy codevar user = gs.getUser();
var firstName = user.getFirstName();

gs.info('First Name: ' + firstName); // Log the first name to the server logs.
In this code:
We use
gs.getUser()to obtain the current GlideUser object, representing the user interacting with the system.We then use the
getFirstName()method to retrieve the user's first name.The first name is stored in the
firstNamevariable.Finally, we use
gs.info()to log the first name to the server logs. You can use this value in your scripts for various purposes, such as personalizing messages or interactions with the user.
This method is helpful when you need to access and work with the first name of the current user in server-side scripts, business rules, or other server-side logic within the ServiceNow platform.
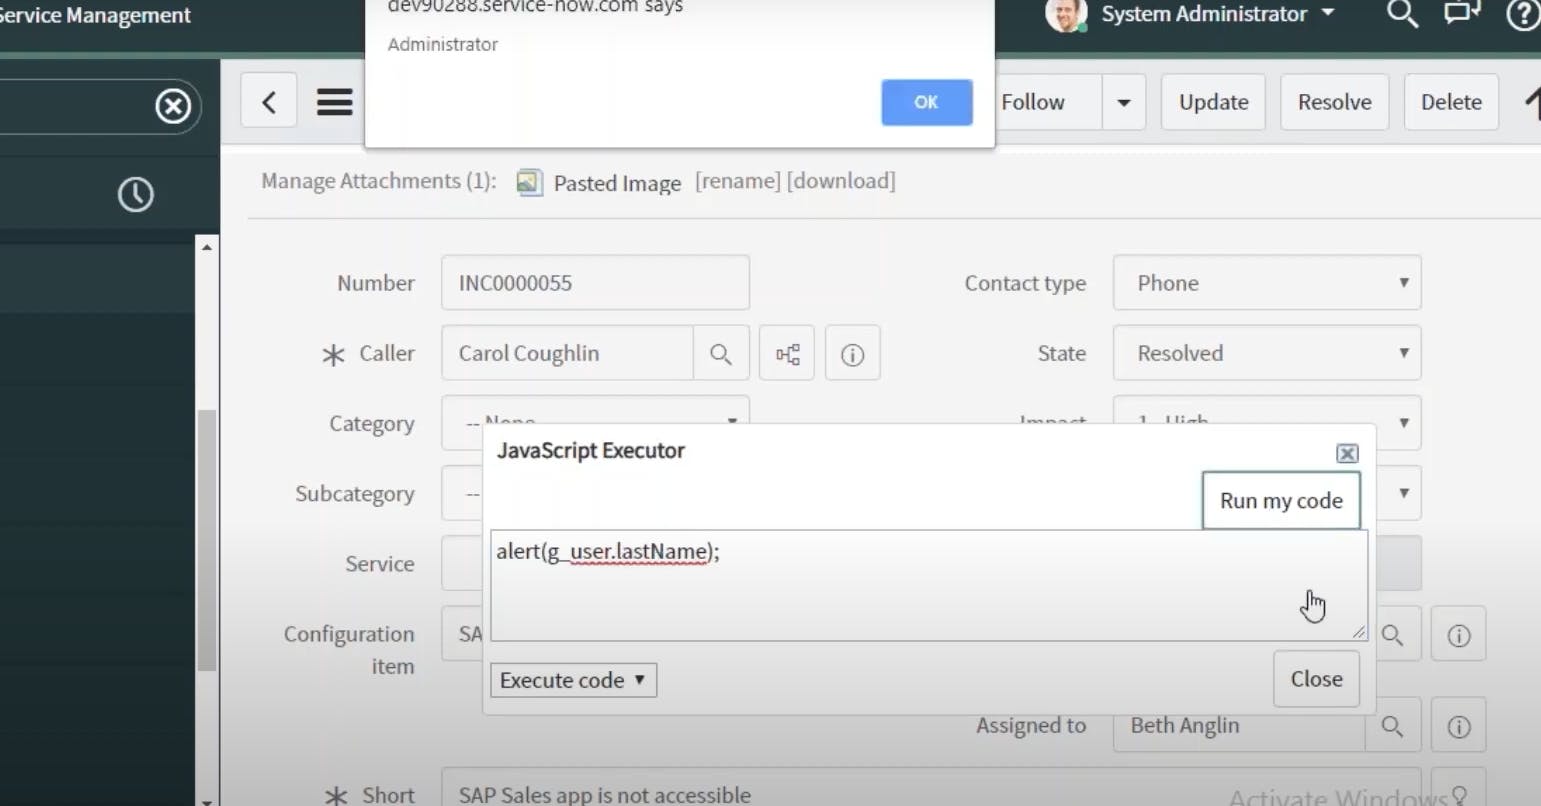
getLastName()
In ServiceNow, the getLastName() method of the GlideUser object is used to retrieve the last name of the current user. This method allows you to access the last name of the user currently interacting with the ServiceNow platform. Here's how you can use it in a server-side script:
javascriptCopy codevar user = gs.getUser(); // Get the current user.
var lastName = user.getLastName(); // Retrieve the last name of the user.

gs.info('Last Name: ' + lastName); // Log the last name to the server logs.
In this code:
We use
gs.getUser()to obtain the current GlideUser object, representing the user currently interacting with the system.We then use the
getLastName()method to retrieve the user's last name.The last name is stored in the
lastNamevariable.Finally, we use
gs.info()to log the last name to the server logs. You can use this value in your scripts for various purposes, such as personalizing messages or interactions with the user.
This method is helpful when you need to access and work with the last name of the current user in server-side scripts, business rules, or other server-side logic within the ServiceNow platform.
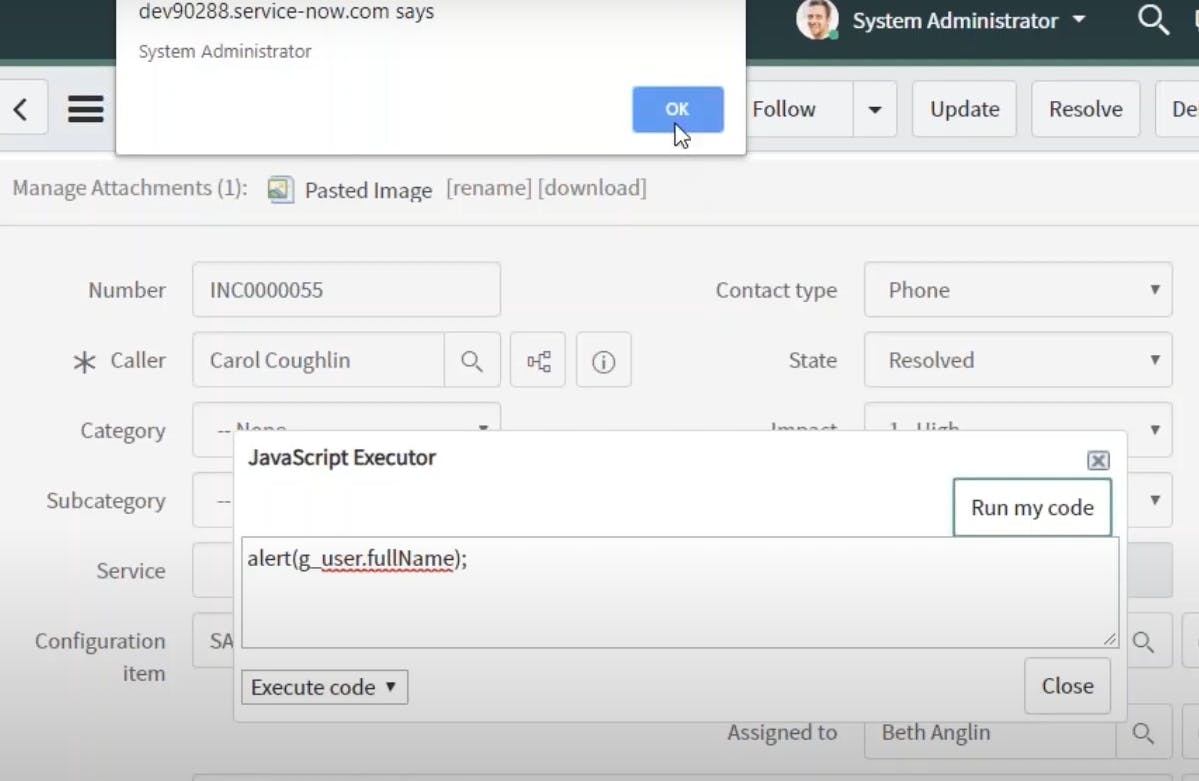
getFullName()
In ServiceNow, the getFullName() method of the GlideUser object is used to retrieve the full name of the current user. This method allows you to access the complete name (combination of first name and last name) of the user currently interacting with the ServiceNow platform. Here's how you can use it in a server-side script:
javascriptCopy codevar user = gs.getUser(); // Get the current user.
var fullName = user.getFullName(); // Retrieve the full name of the user.

gs.info('Full Name: ' + fullName); // Log the full name to the server logs.
In this code:
We use
gs.getUser()to obtain the current GlideUser object, representing the user currently interacting with the system.We then use the
getFullName()method to retrieve the user's full name, which is a combination of the first name and last name.The full name is stored in the
fullNamevariable.Finally, we use
gs.info()to log the full name to the server logs. You can use this value in your scripts for various purposes, such as personalizing messages or interactions with the user.
getID()
In ServiceNow, the getID() method of the GlideUser object is used to retrieve the unique sys_id of the current user. This method allows you to access the unique identifier associated with the user currently interacting with the ServiceNow platform. Here's how you can use it in a server-side script:
javascriptCopy codevar user = gs.getUser(); // Get the current user.
var userID = user.getID(); // Retrieve the sys_id of the user.

gs.info('User ID: ' + userID); // Log the user's sys_id to the server logs.
In this code:
We use
gs.getUser()to obtain the current GlideUser object, representing the user currently interacting with the system.We then use the
getID()method to retrieve the user's sys_id, which is a unique identifier for the user.The user's sys_id is stored in the
userIDvariable.Finally, we use
gs.info()to log the user's sys_id to the server logs. You can use this sys_id for various purposes, such as querying related records or tracking user-specific information.
This method is useful when you need to access and work with the unique identifier (sys_id) of the current user in server-side scripts, business rules, or other server-side logic within the ServiceNow platform.
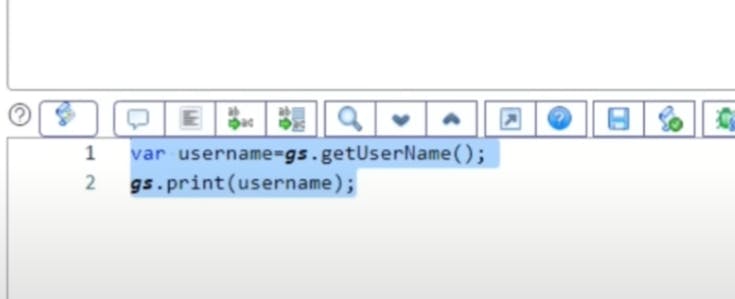
getUserName()
In ServiceNow, the getUserName() method of the GlideUser object is used to retrieve the username of the current user. This method allows you to access the username associated with the user currently interacting with the ServiceNow platform. Here's how you can use it in a server-side script:
javascriptCopy codevar user = gs.getUser(); // Get the current user.
var username = user.getUserName(); // Retrieve the username of the user.

gs.info('Username: ' + username); // Log the username to the server logs.
In this code:
We use
gs.getUser()to obtain the current GlideUser object, representing the user currently interacting with the system.We use the
getUserName()method to retrieve the username of the user.The username is stored in the
usernamevariable.Finally, we use
gs.info()to log the username to the server logs. You can use this value in your scripts for various purposes, such as tracking user actions or making user-specific decisions.
This method is helpful when you need to access and work with the username of the current user in server-side scripts, business rules, or other server-side logic within the ServiceNow platform.
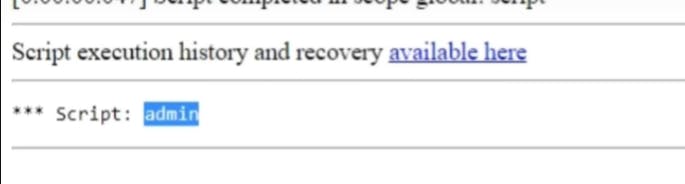
for example: admin
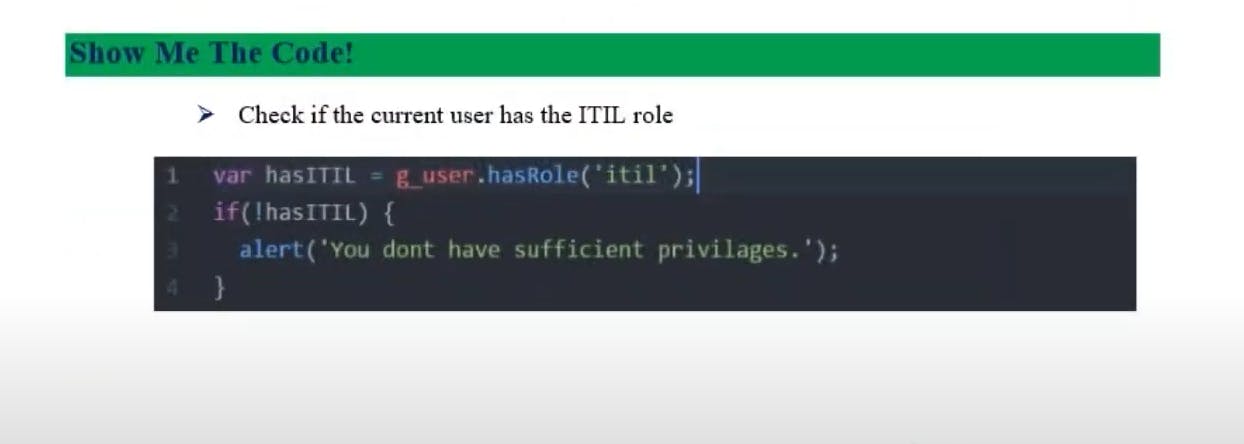
hasRole()
In ServiceNow, the hasRole(roleName) method of the GlideUser object is used to check if the current user has a specific role. This method allows you to determine whether the user currently interacting with the ServiceNow platform has been assigned a particular role. Here's how you can use it in a server-side script:
var user = gs.getUser(); // Get the current user.
var roleName = 'itil'; // Specify the role name you want to check.

if (user.hasRole(roleName)) {
    gs.info('The user has the ' + roleName + ' role.');
} else {
    gs.info('The user does not have the ' + roleName + ' role.');
}
In this code:
We use
gs.getUser()to obtain the current GlideUser object, representing the user currently interacting with the system.We specify the role name that we want to check (in this case, 'itil').
We use the
hasRole(roleName)method to check if the current user has the specified role.Depending on the result of the check, we log a message indicating whether the user has the role or not.
This method is useful when you need to conditionally execute code or apply specific logic based on the roles assigned to the current user in server-side scripts, business rules, or other server-side logic within the ServiceNow platform.
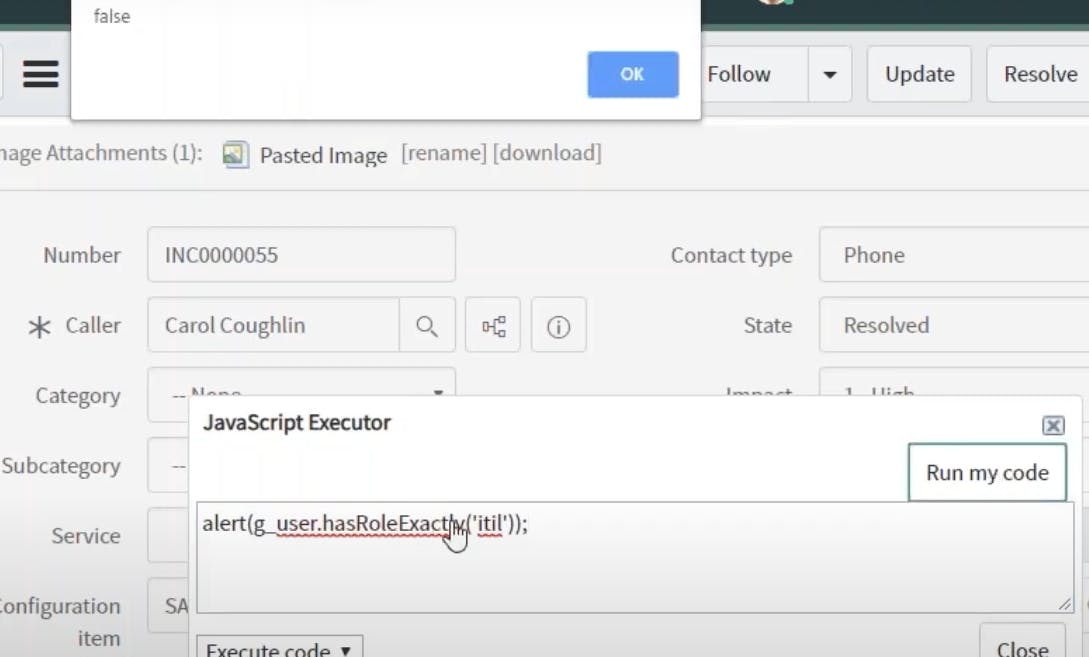
when we use itil

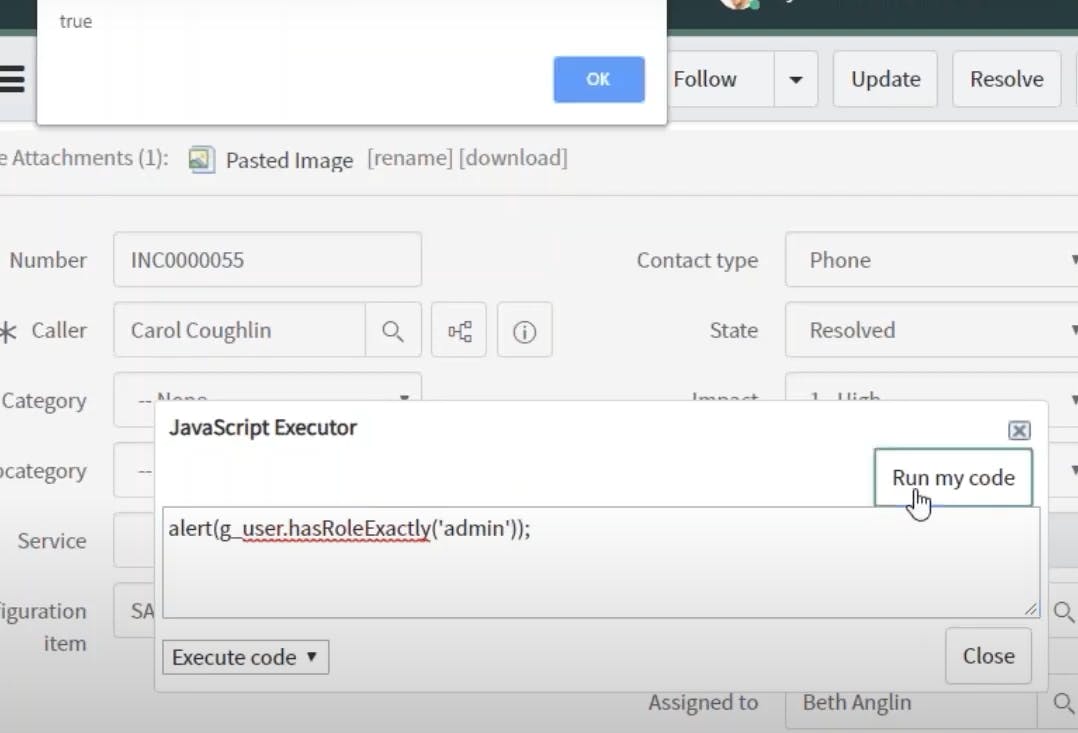
when we use admin
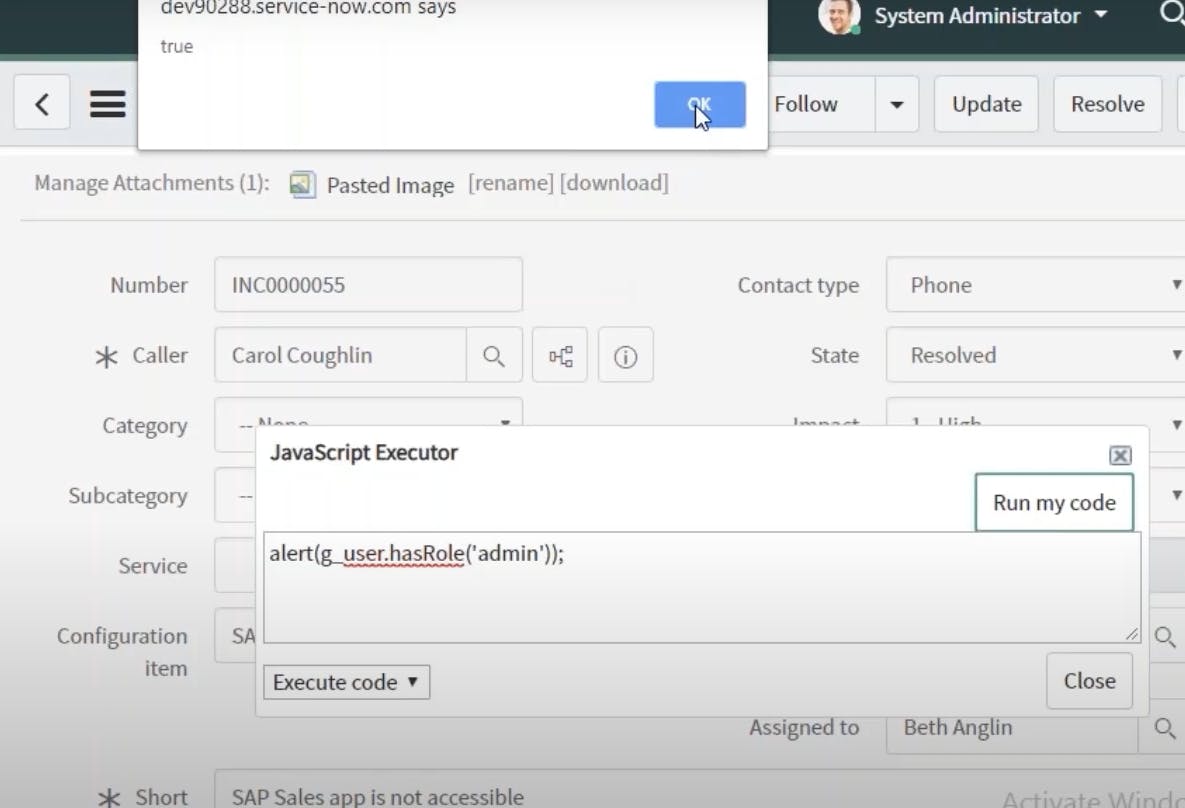
when we use hasroleexactly then it will only return true is user role is admin
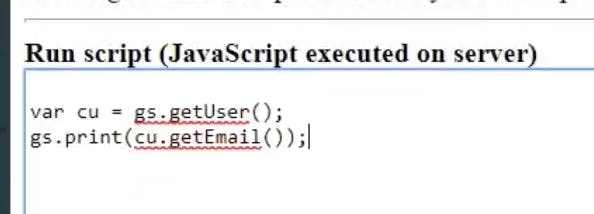
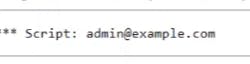
getEmail()
GlideAggregate
In ServiceNow, GlideAggregate is a JavaScript API used for performing aggregate operations on records in a ServiceNow table. It allows you to perform calculations such as counting, summing, averaging, and finding the minimum or maximum values of records that match certain conditions. GlideAggregate is particularly useful when you need to generate reports or gather statistical information from your data.
Here are some key features and methods associated with GlideAggregate:
Initialization: To use GlideAggregate, you first initialize it by creating a new GlideAggregate object for a specific table:
javascriptCopy codevar agg = new GlideAggregate('incident');Add Conditions: You can add conditions to filter the records you want to include in your aggregate operations using the
addQuerymethod. For example:javascriptCopy codeagg.addQuery('priority', '1'); // Include records with priority 1.Aggregate Functions: You can perform various aggregate functions on the matching records, such as:
addAggregate()to specify the aggregate function you want to use (e.g., COUNT, SUM, AVG, MIN, MAX).getAggregate()to retrieve the result of the aggregation.
    javascriptCopy codeagg.addAggregate('COUNT', 'number'); // Count the matching records.
    var totalCount = agg.getAggregate('COUNT');
Grouping: You can group records based on one or more fields using the
groupBymethod:javascriptCopy codeagg.groupBy('category'); // Group records by category.Filtering and Sorting: You can further filter and sort the aggregated results using methods like
addHaving,addOrderBy, andorder.Iterating Over Results: To iterate over the aggregated results, you can use the
nextmethod:javascriptCopy codewhile (agg.next()) { // Access and process each aggregated result. }
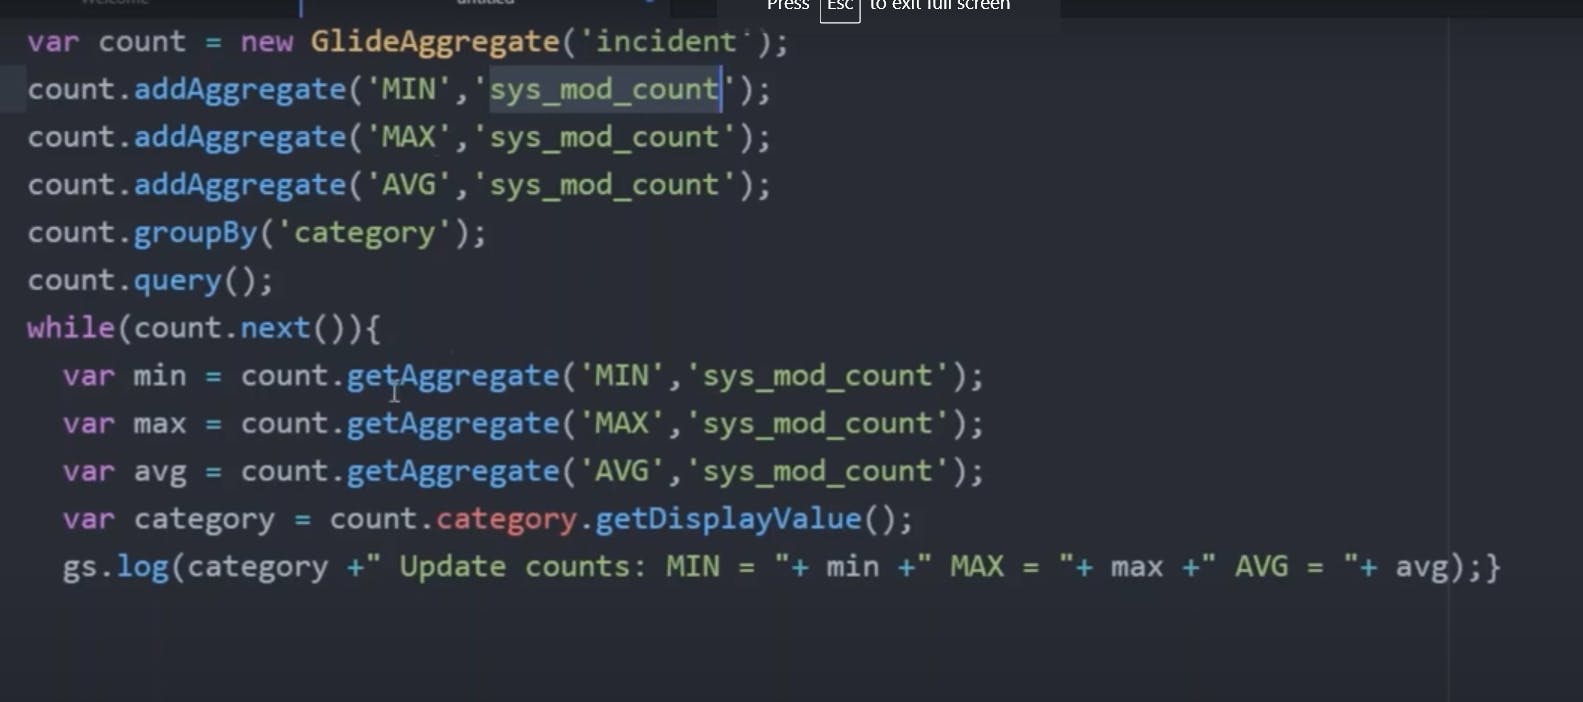
Here's a simplified example that demonstrates how to use GlideAggregate to count the number of high-priority incidents by category:
javascriptCopy codevar agg = new GlideAggregate('incident');
agg.addQuery('priority', '1'); // High priority incidents
agg.addAggregate('COUNT', 'category');
agg.groupBy('category');
agg.query();

while (agg.next()) {
    var category = agg.getValue('category');
    var count = agg.getAggregate('COUNT');
    gs.info('Category: ' + category + ', Count: ' + count);
}
This code initializes GlideAggregate for the 'incident' table, adds a query condition for high-priority incidents, aggregates the count of incidents by category, groups the results by category, and then iterates over the grouped results to display the count for each category.
GlideAggregate is a powerful tool for performing complex data analysis and reporting within the ServiceNow platform.
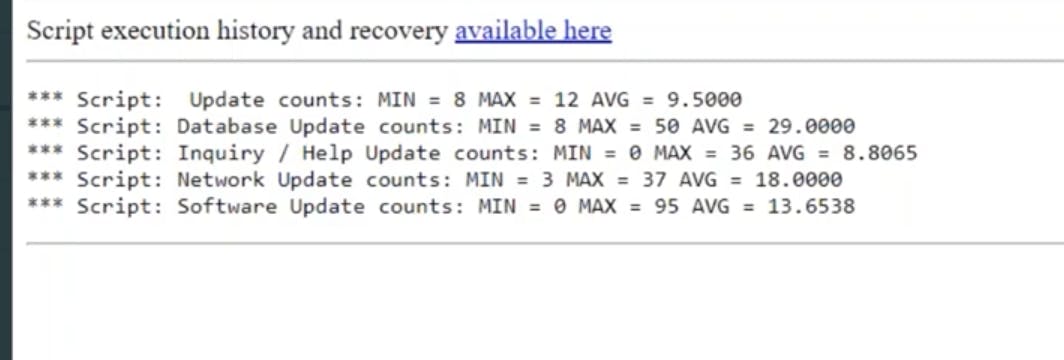
output:
Category: Hardware, Count: 5
Category: Software, Count: 8
Category: Network, Count: 3
sum aggregate
In ServiceNow, when you use GlideAggregate with the addAggregate method to perform a SUM aggregation, you are calculating the sum of numeric values in a field for records that match certain conditions. Here's how the SUM aggregation works with GlideAggregate:
Initialization: You start by initializing a GlideAggregate object for a specific table:
javascriptCopy codevar agg = new GlideAggregate('incident');In this example, we're using the 'incident' table.
Add Conditions: You can add conditions to filter the records you want to include in the aggregation using the
addQuerymethod. For instance, you might want to sum values for incidents with a specific priority:javascriptCopy codeagg.addQuery('priority', '1'); // Filter by incidents with priority 1.Aggregate Function: Next, you specify the SUM aggregate function using the
addAggregatemethod. You provide the aggregate function ('SUM' in this case) and the field you want to sum:javascriptCopy codeagg.addAggregate('SUM', 'numeric_field'); // Calculate the sum of the 'numeric_field'.Replace
'numeric_field'with the name of the numeric field you want to sum.Query and Retrieve: After defining your conditions and aggregation, you execute the query using
query(). Then, you retrieve the result of the aggregation usinggetAggregate():javascriptCopy codeagg.query(); // Execute the query. var totalSum = agg.getAggregate('SUM'); // Get the sum.The
totalSumvariable will contain the sum of the 'numeric_field' for the filtered records.
Here's an example code snippet that calculates the sum of a numeric field called 'amount' for high-priority incidents:
javascriptCopy codevar agg = new GlideAggregate('incident');
agg.addQuery('priority', '1'); // Filter by high-priority incidents.
agg.addAggregate('SUM', 'amount'); // Calculate the sum of the 'amount' field.
agg.query();

if (agg.next()) {
    var totalSum = agg.getAggregate('SUM');
    gs.info('Total Sum of Amount for High-Priority Incidents: ' + totalSum);
}
In this code, it calculates and logs the total sum of the 'amount' field for high-priority incidents in the 'incident' table. The result will depend on the actual data in your ServiceNow instance.
MAX aggregate
In ServiceNow, when you use GlideAggregate with the addAggregate method to perform a MAX aggregation, you are finding the maximum (largest) value in a numeric field for records that match certain conditions. Here's how the MAX aggregation works with GlideAggregate:
Initialization: You start by initializing a GlideAggregate object for a specific table:
javascriptCopy codevar agg = new GlideAggregate('incident');In this example, we're using the 'incident' table.
Add Conditions: You can add conditions to filter the records you want to include in the aggregation using the
addQuerymethod. For instance, you might want to find the maximum value in a numeric field for incidents with a specific priority:javascriptCopy codeagg.addQuery('priority', '1'); // Filter by incidents with priority 1.Aggregate Function: Next, you specify the MAX aggregate function using the
addAggregatemethod. You provide the aggregate function ('MAX' in this case) and the field you want to find the maximum value for:javascriptCopy codeagg.addAggregate('MAX', 'numeric_field'); // Find the maximum value in 'numeric_field'.Replace
'numeric_field'with the name of the numeric field you want to analyze.Query and Retrieve: After defining your conditions and aggregation, you execute the query using
query(). Then, you retrieve the result of the aggregation usinggetAggregate():javascriptCopy codeagg.query(); // Execute the query. var maxValue = agg.getAggregate('MAX'); // Get the maximum value.The
maxValuevariable will contain the maximum value found in the 'numeric_field' for the filtered records.
Here's an example code snippet that finds the maximum value in a numeric field called 'score' for high-priority incidents:
javascriptCopy codevar agg = new GlideAggregate('incident');
agg.addQuery('priority', '1'); // Filter by high-priority incidents.
agg.addAggregate('MAX', 'score'); // Find the maximum score.
agg.query();

if (agg.next()) {
    var maxScore = agg.getAggregate('MAX');
    gs.info('Maximum Score for High-Priority Incidents: ' + maxScore);
}
In this code, it calculates and logs the maximum score for high-priority incidents in the 'incident' table. The result will depend on the actual data in your ServiceNow instance.


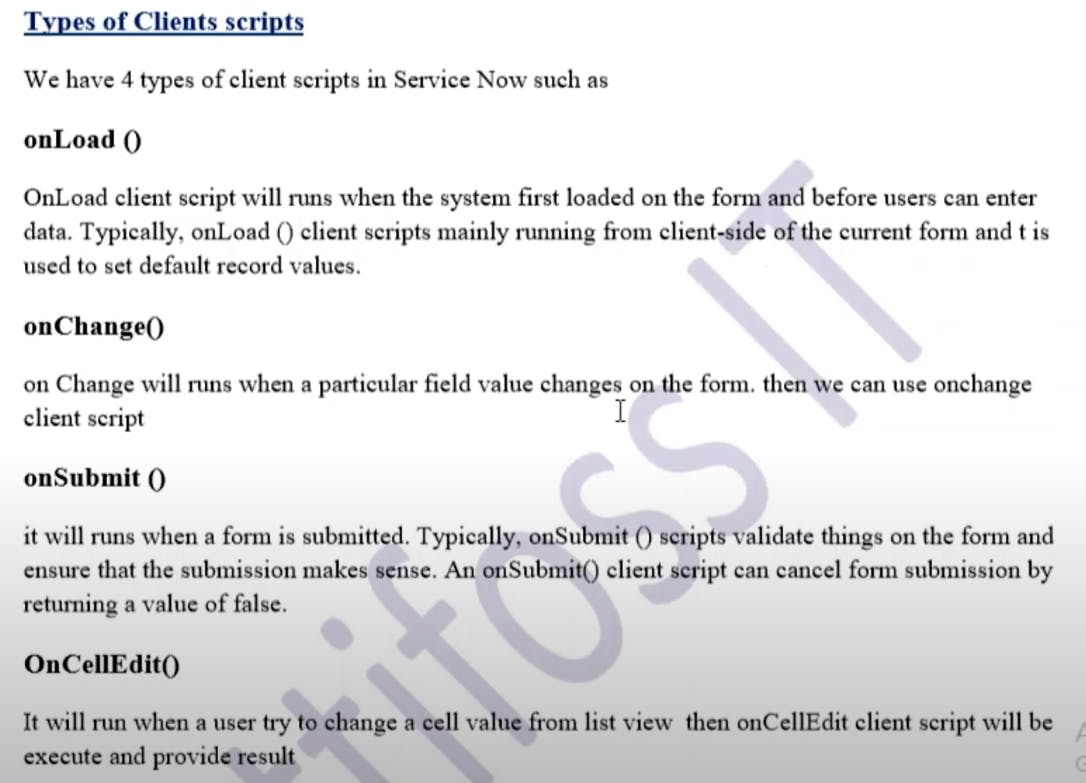
ClientScript